Peach Galette

This post may contain affiliate links. Please read our disclosure policy.
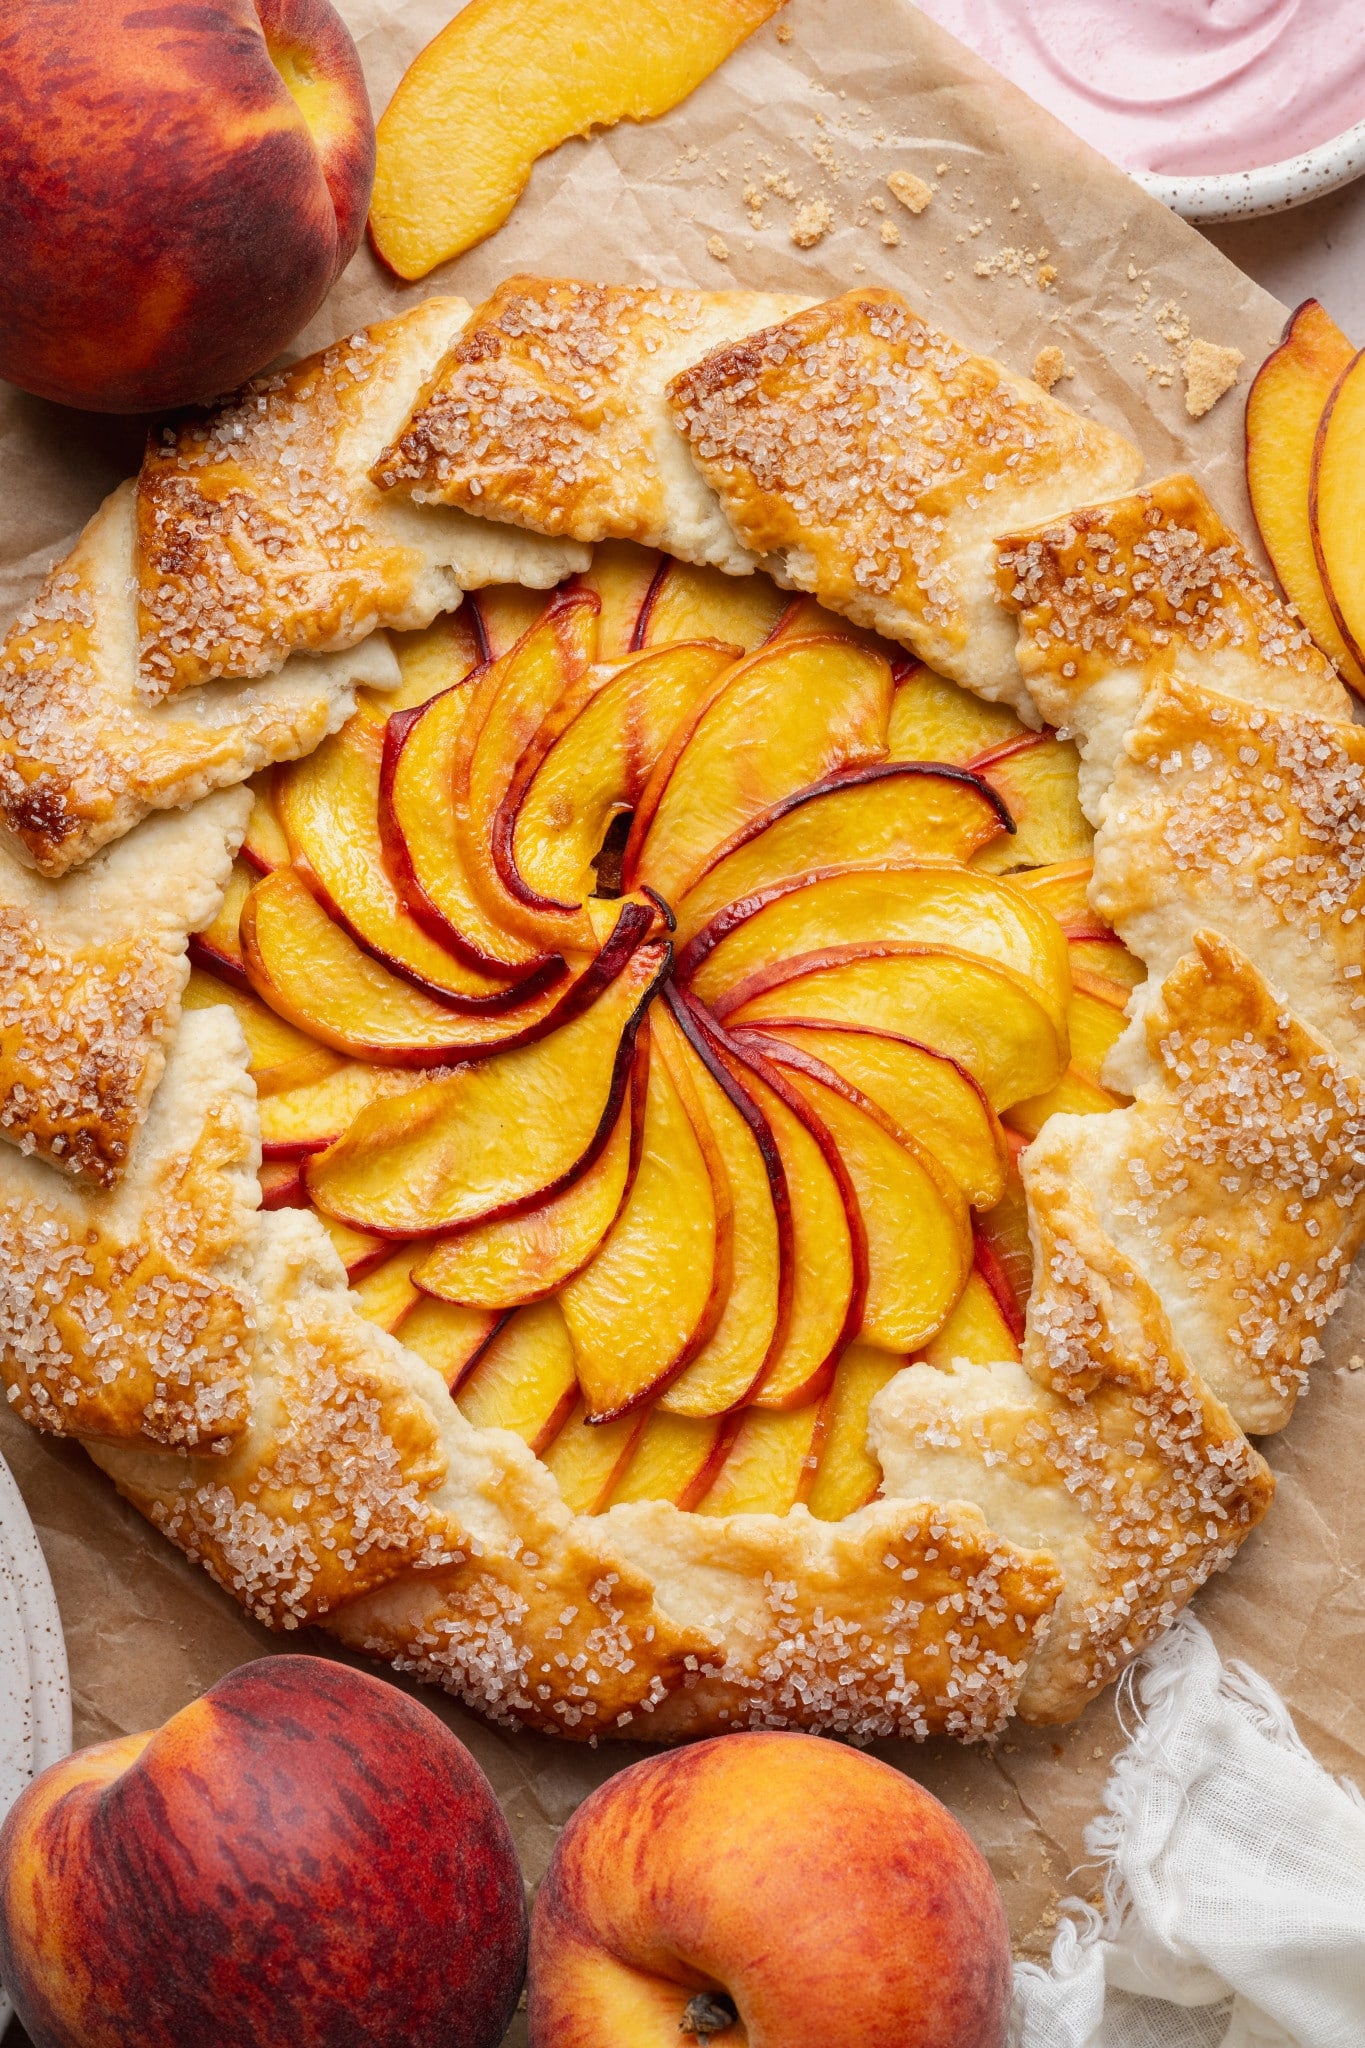
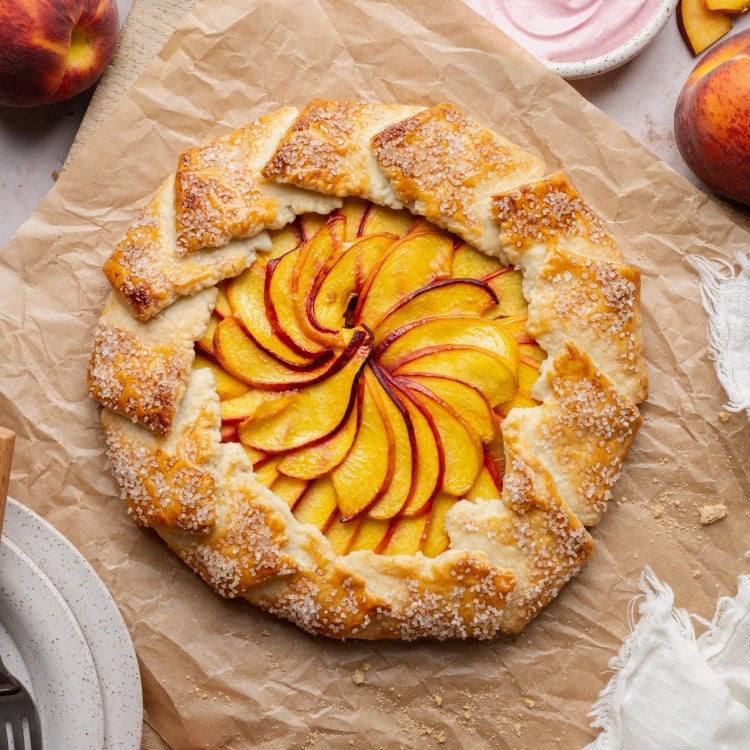
Nothing says summer quite like a dessert made with sweet, juicy peaches, and this Peach Galette is one of my favorite ways to enjoy them. Fresh peaches are wrapped in a flaky, buttery homemade crust that’s rustic, beautiful, and so much easier to make than a traditional pie.
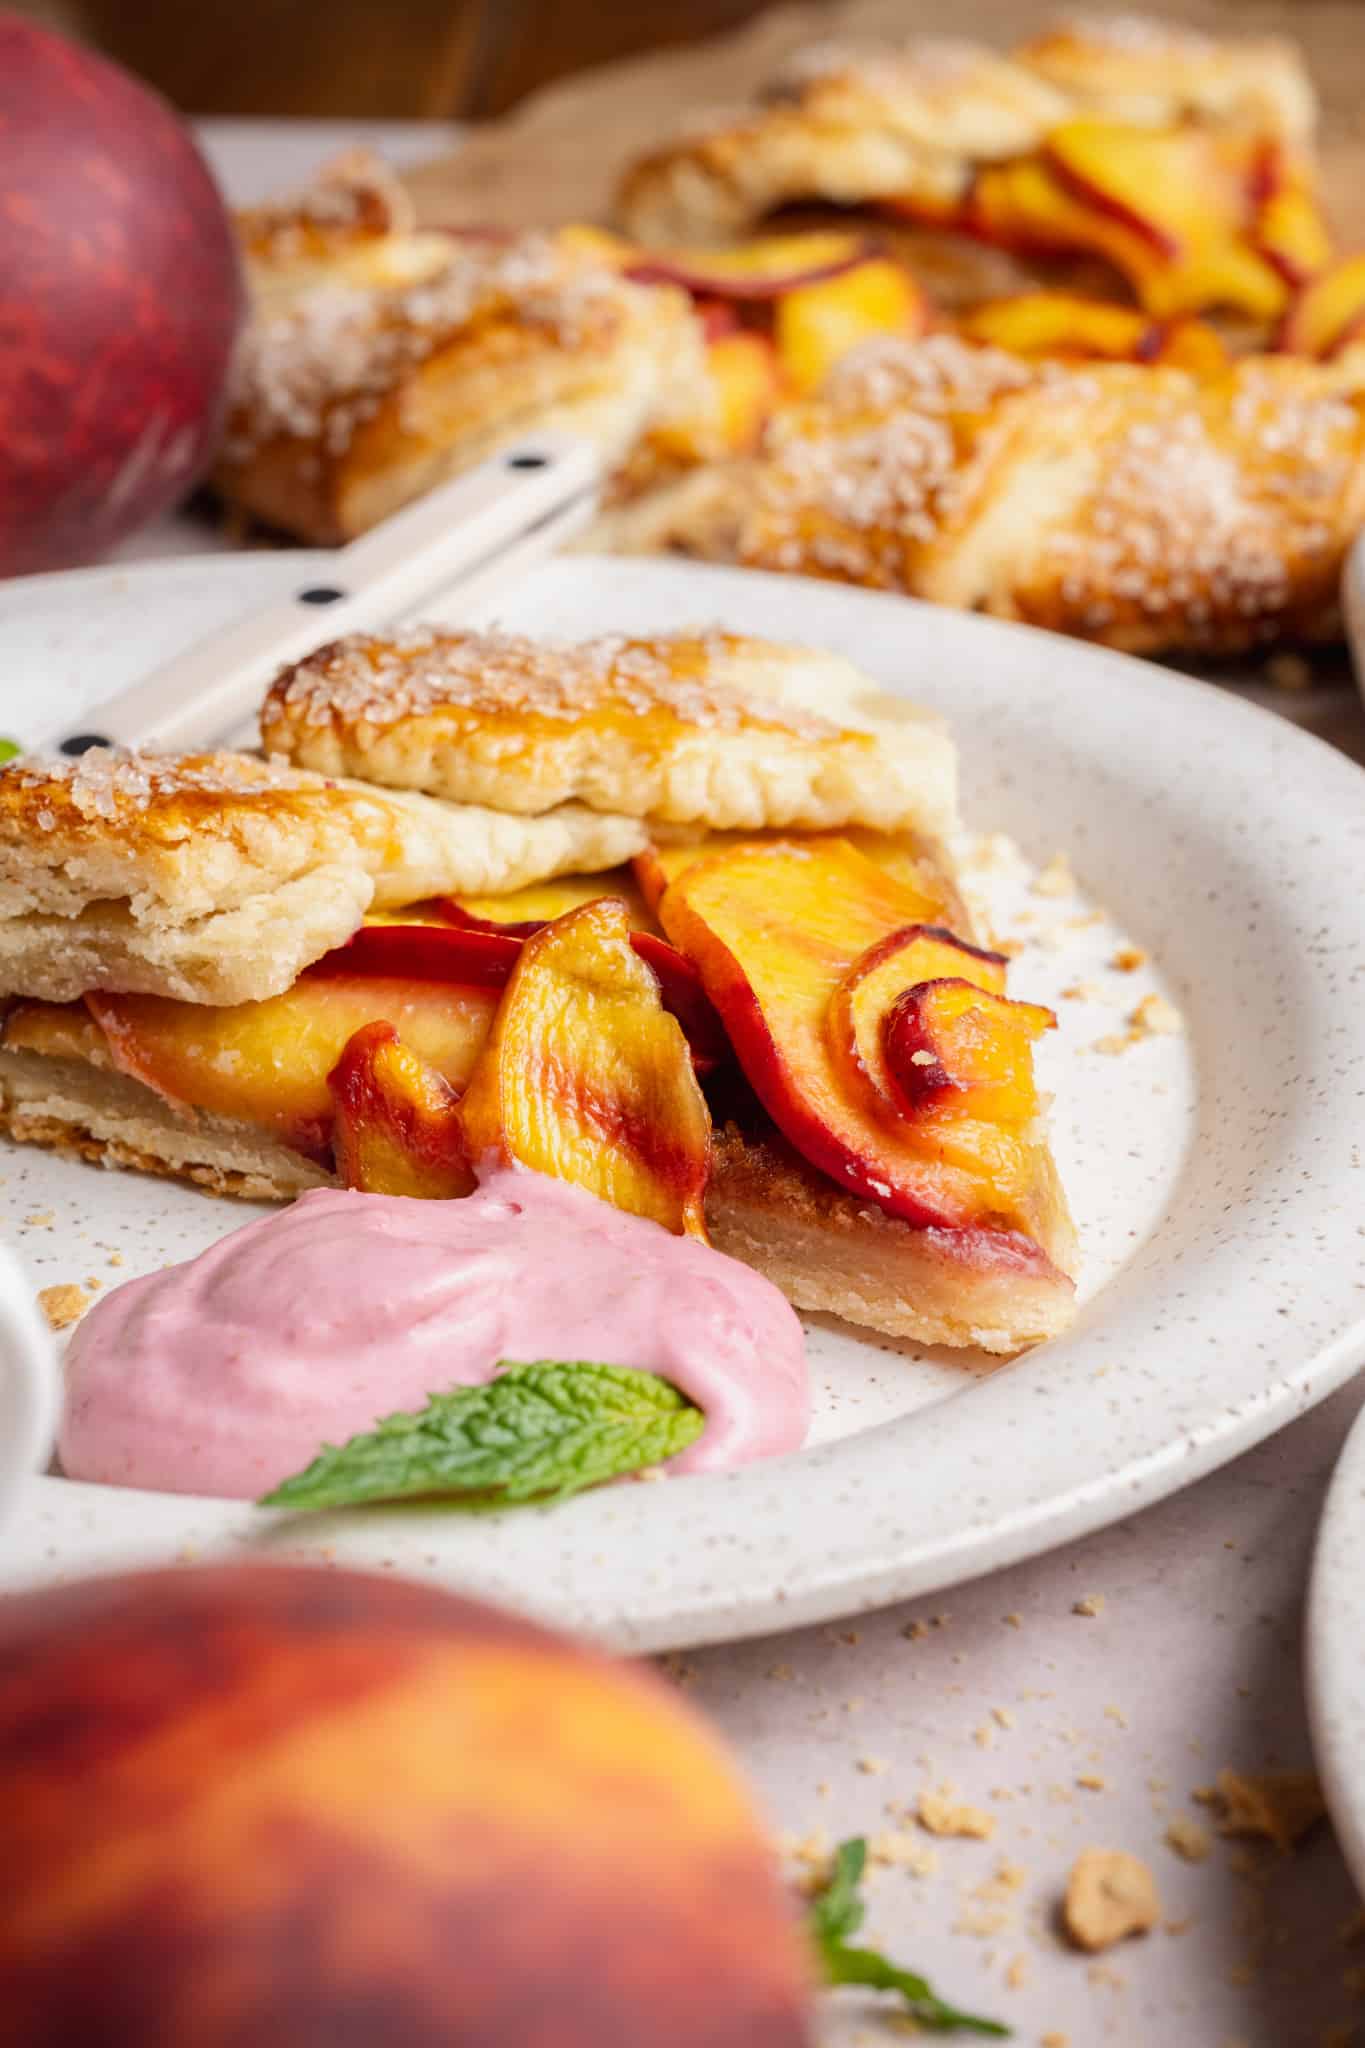
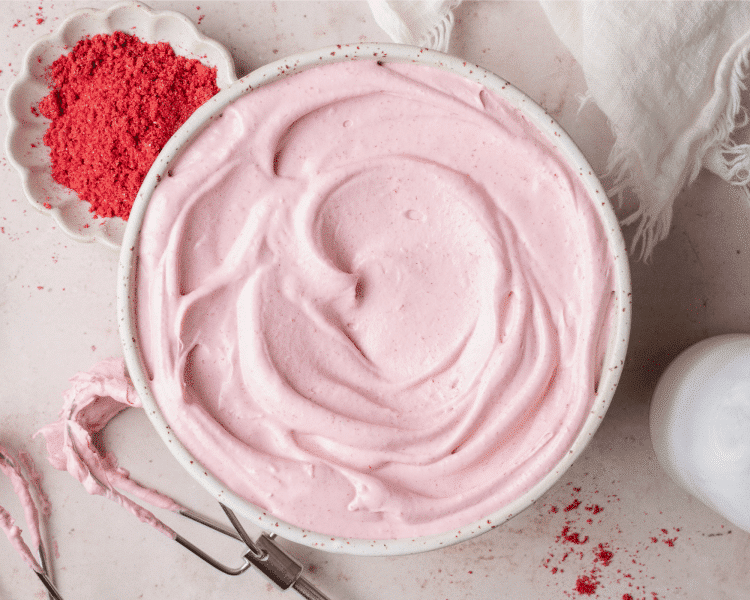
The best part? It’s finished with a light and fluffy raspberry whipped cream made with freeze-dried raspberries, adding the perfect pop of fruity flavor and color. Of course, a scoop of vanilla ice cream is never a bad idea either!
This galette looks like something you’d pick up from a bakery, but it’s surprisingly simple to make. With its free-form shape, there’s no pie plate, intricate crimping, or perfect edges required, just all the delicious flavors of peach pie in an easy, approachable dessert that’s perfect for summer gatherings.
For more easy summer dessert recipes, try my Mixed Berry Galette, Mixed Berry Cobbler, Chocolate Chip Cookie Ice Box Cake, White Chocolate Mousse, or Zucchini Cake with Brown Butter Frosting.
Why You’ll Love This Recipe
- Simple, foolproof crust: The buttery homemade crust comes together quickly in the food processor, making it much easier than a traditional pie crust.
- No pie pan required: This rustic dessert bakes right on a baking sheet, so there’s no need to fuss with shaping or crimping a pie.
- Faster than making pie: You’ll have a beautiful homemade dessert ready in under 2 hours, and it only needs to cool for about 10–15 minutes before serving.
- 🍑The perfect way to use fresh peaches: Sweet, juicy summer peaches shine in this recipe, but it’s just as delicious with nectarines, plums, apricots, or your favorite berries.
- Impressive with minimal effort: The free-form rustic shape looks bakery-worthy, yet it’s one of the easiest fruit desserts you can make.

 Table Talk with Tawnie

If you’re looking for another recipe to make with peaches this summer, add my peach galette to your baking list. I love that it comes together easily since you don’t even need to peel the peaches (but if you want to check out this post on my favorite way to peel them), and the raspberry whipped cream really makes this recipe stand out. Something about the raspberry and peach combo is just so heavenly. Total crowd pleaser, and also I’m guilty of enjoying it for breakfast too!
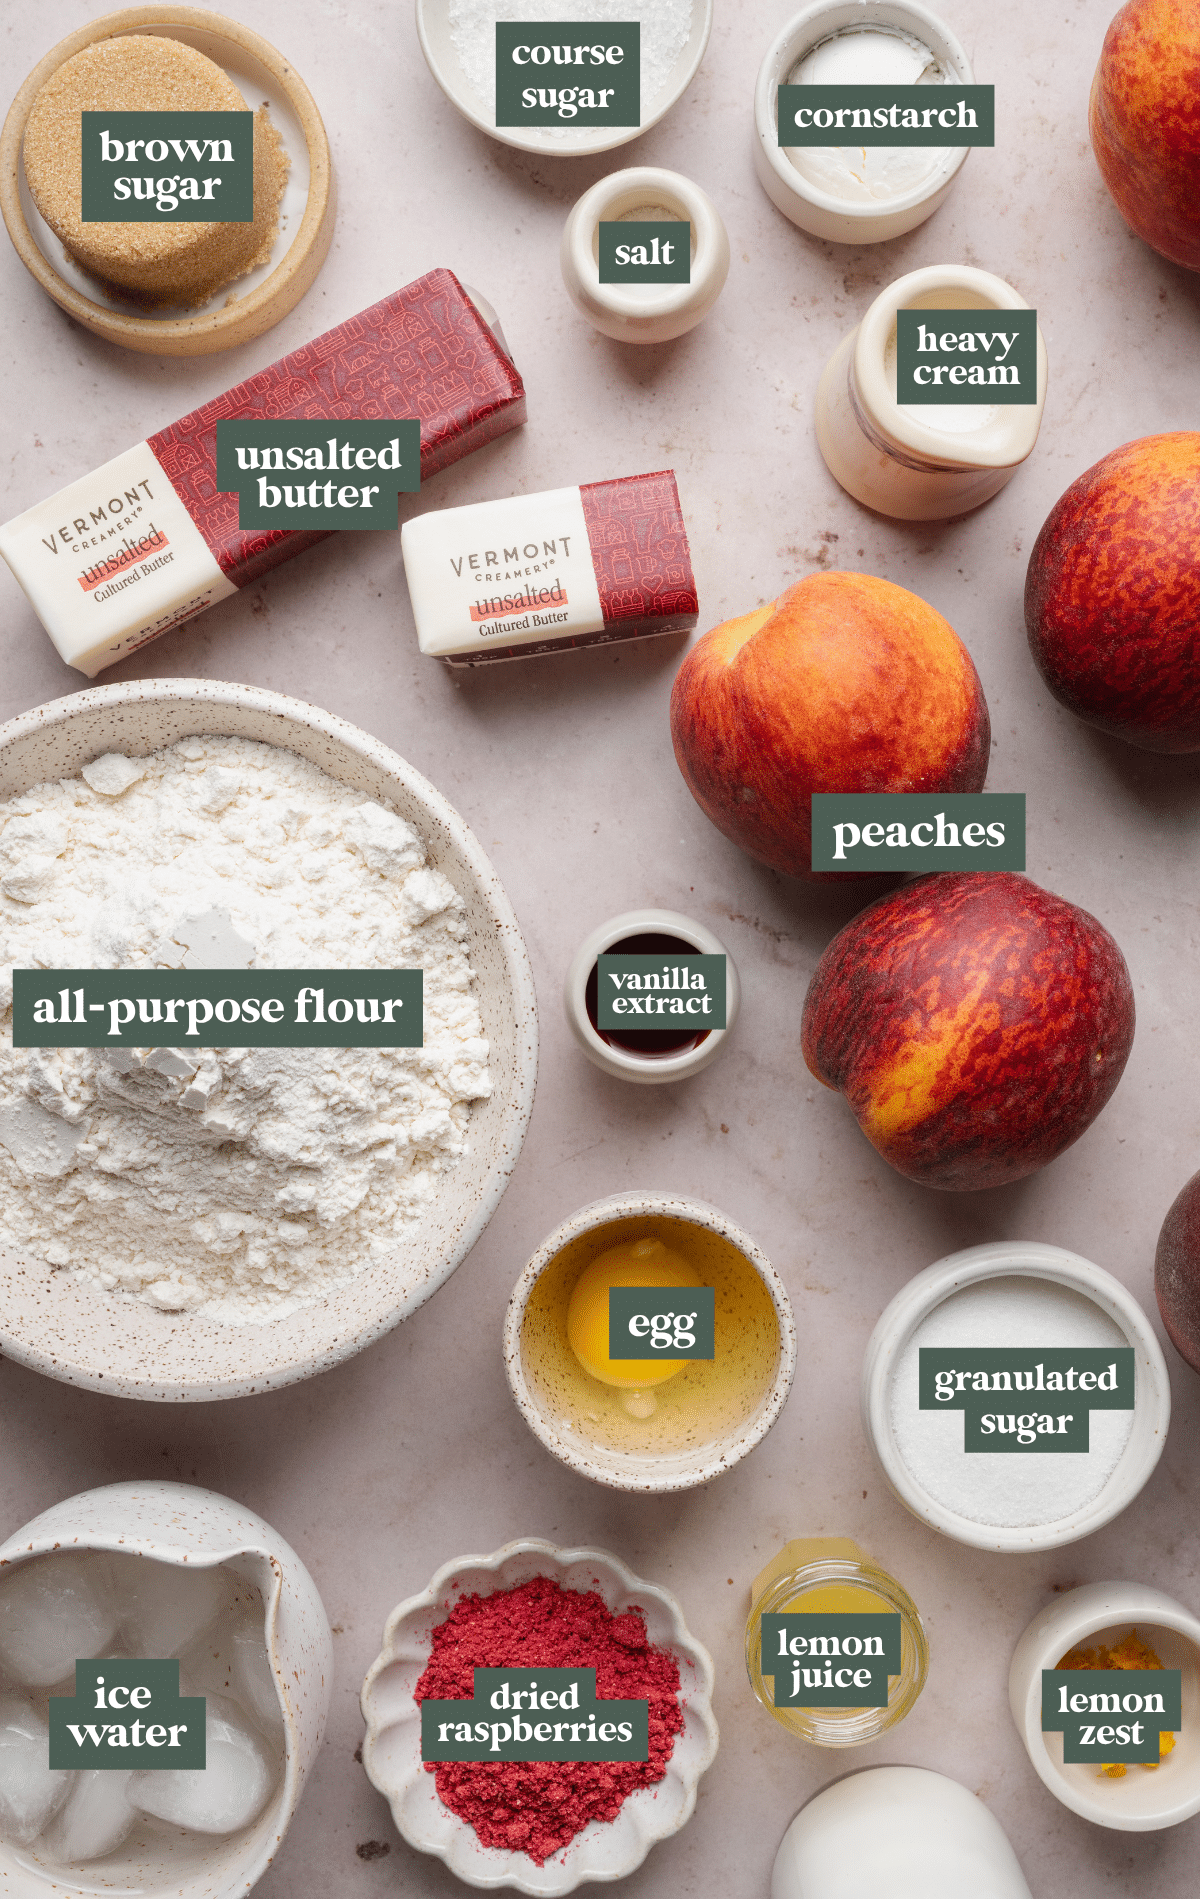
- All-purpose flour: The base of the galette dough. Be sure to spoon and level for the most accurate measurement. As always, too much flour can make the crust tough instead of tender and flaky.
- Cold butter: Cold butter is key here! It creates those flaky layers in the crust as it melts in the oven. I like to cube it and keep it chilled right up until using.
- Lemon zest & juice: A tangy zing from the zest adds a citrusy flavor, plus it helps temper the sweetness of the peach filling.
- Sugar: Get the best of flavors when you use a combination of both brown and granulated sugars.
- Fresh peaches: More than anything, we want the galette to taste like ripe summer peaches! Be sure to find the very best ones, maybe at your local farmers’ market, and be sure to use them when they’re nice and ripe.
- Graham crackers (optional): My little trick for avoiding a soggy bottom! Adding a layer of crumbs under the filling can help absorb the excess juices and keep the crust crisp. You can use crushed graham crackers, Biscoff cookies, or Nilla wafers!
- Freeze-dried raspberries: These add concentrated raspberry flavor and a naturally vibrant pink color to the whipped cream without adding extra moisture. Feel free to substitute freeze-dried strawberries for a different fruity twist.
Step by Step Directions
(For the full recipe, scroll down to the recipe card below)
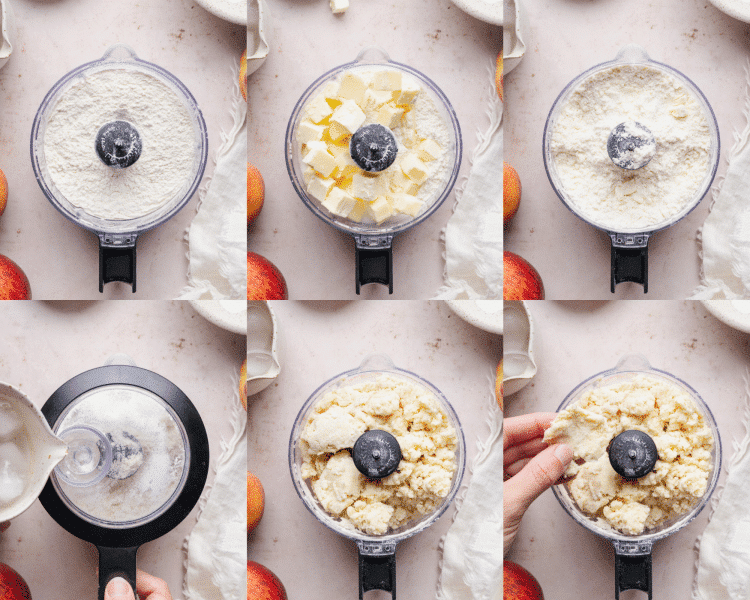
Make the dough
Pulse flour, sugar, and salt in a food processor. Add cold butter and pulse until crumbly, then drizzle in ice water just until the dough starts to come together.
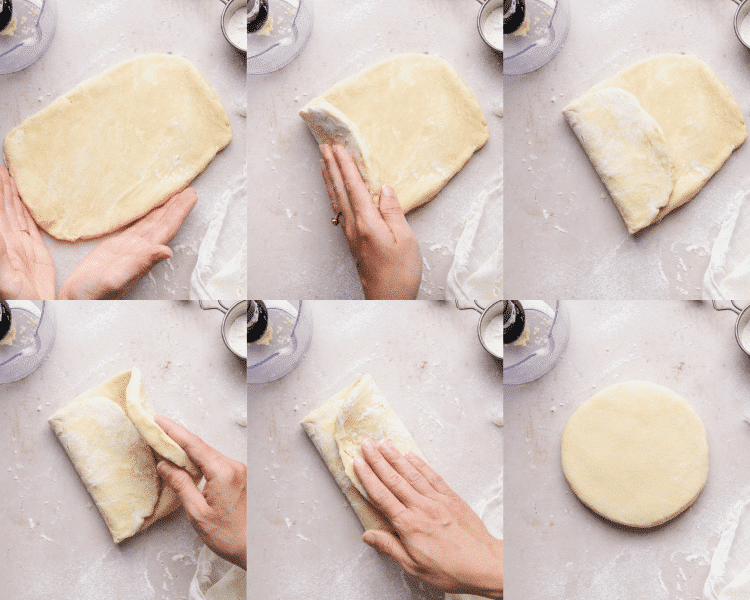
Fold and chill the dough
Turn dough out onto a floured surface, press together, then fold it over itself a few times to create layers. Shape into a disk, wrap tightly, and chill.
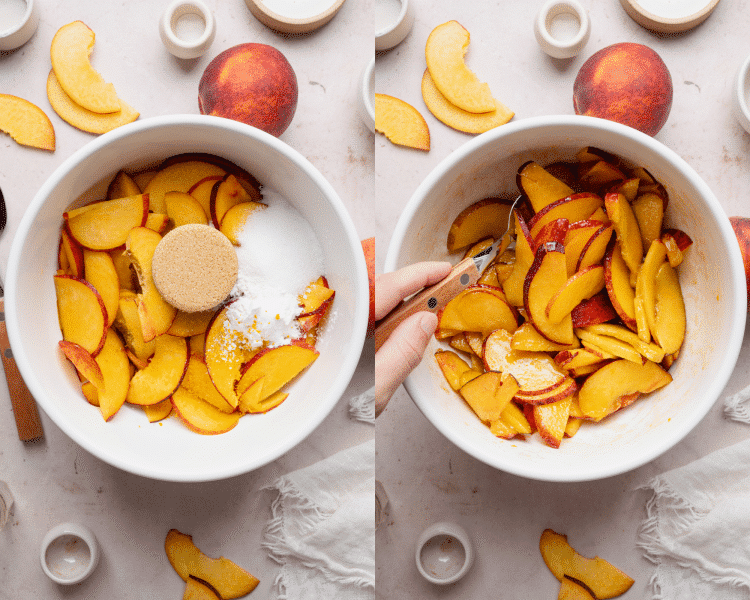
Make the peach filling
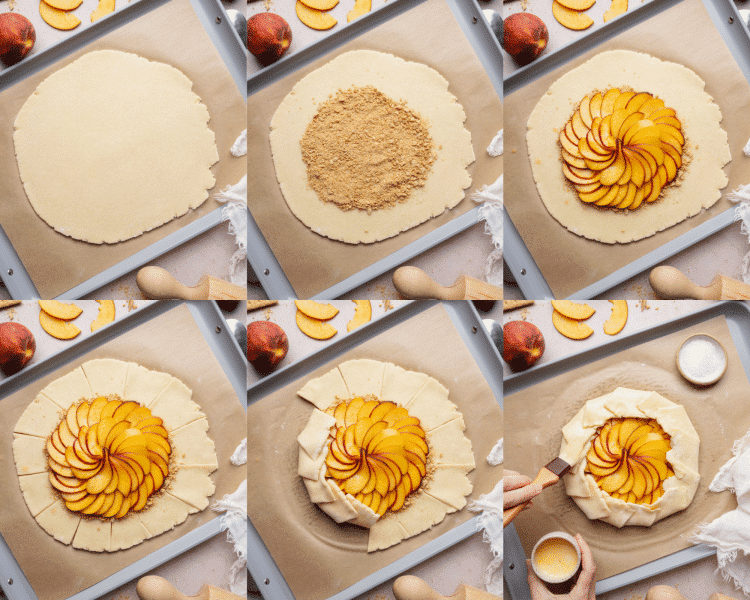
Assemble
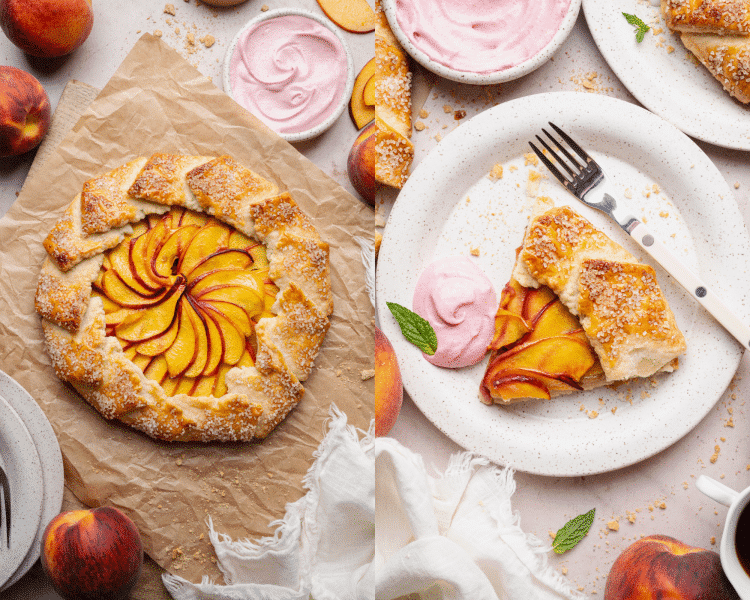
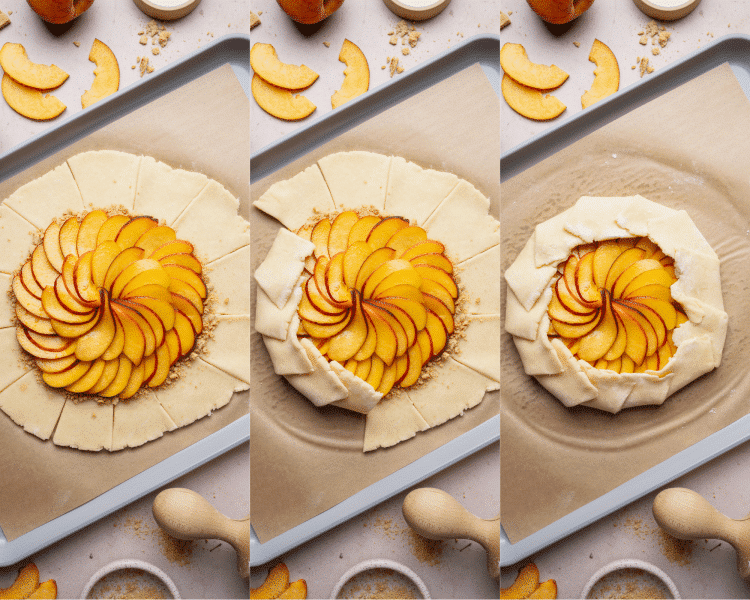
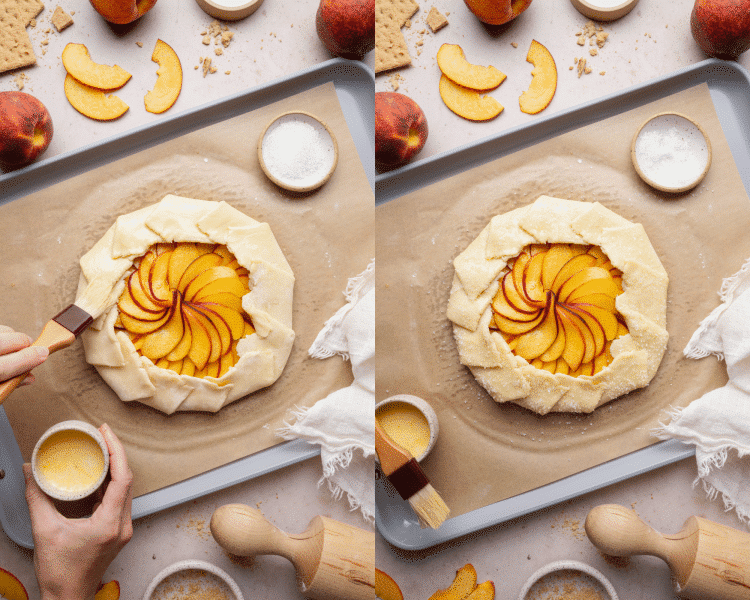
Roll dough into a large circle. Sprinkle graham cracker crumbs in the center (if using), then spoon the peach filling on top, leaving a border. Fold the edges of the dough over the filling, pleating as you go. Brush with egg wash, sprinkle with coarse sugar, and bake until golden and bubbly.
Bake and enjoy!
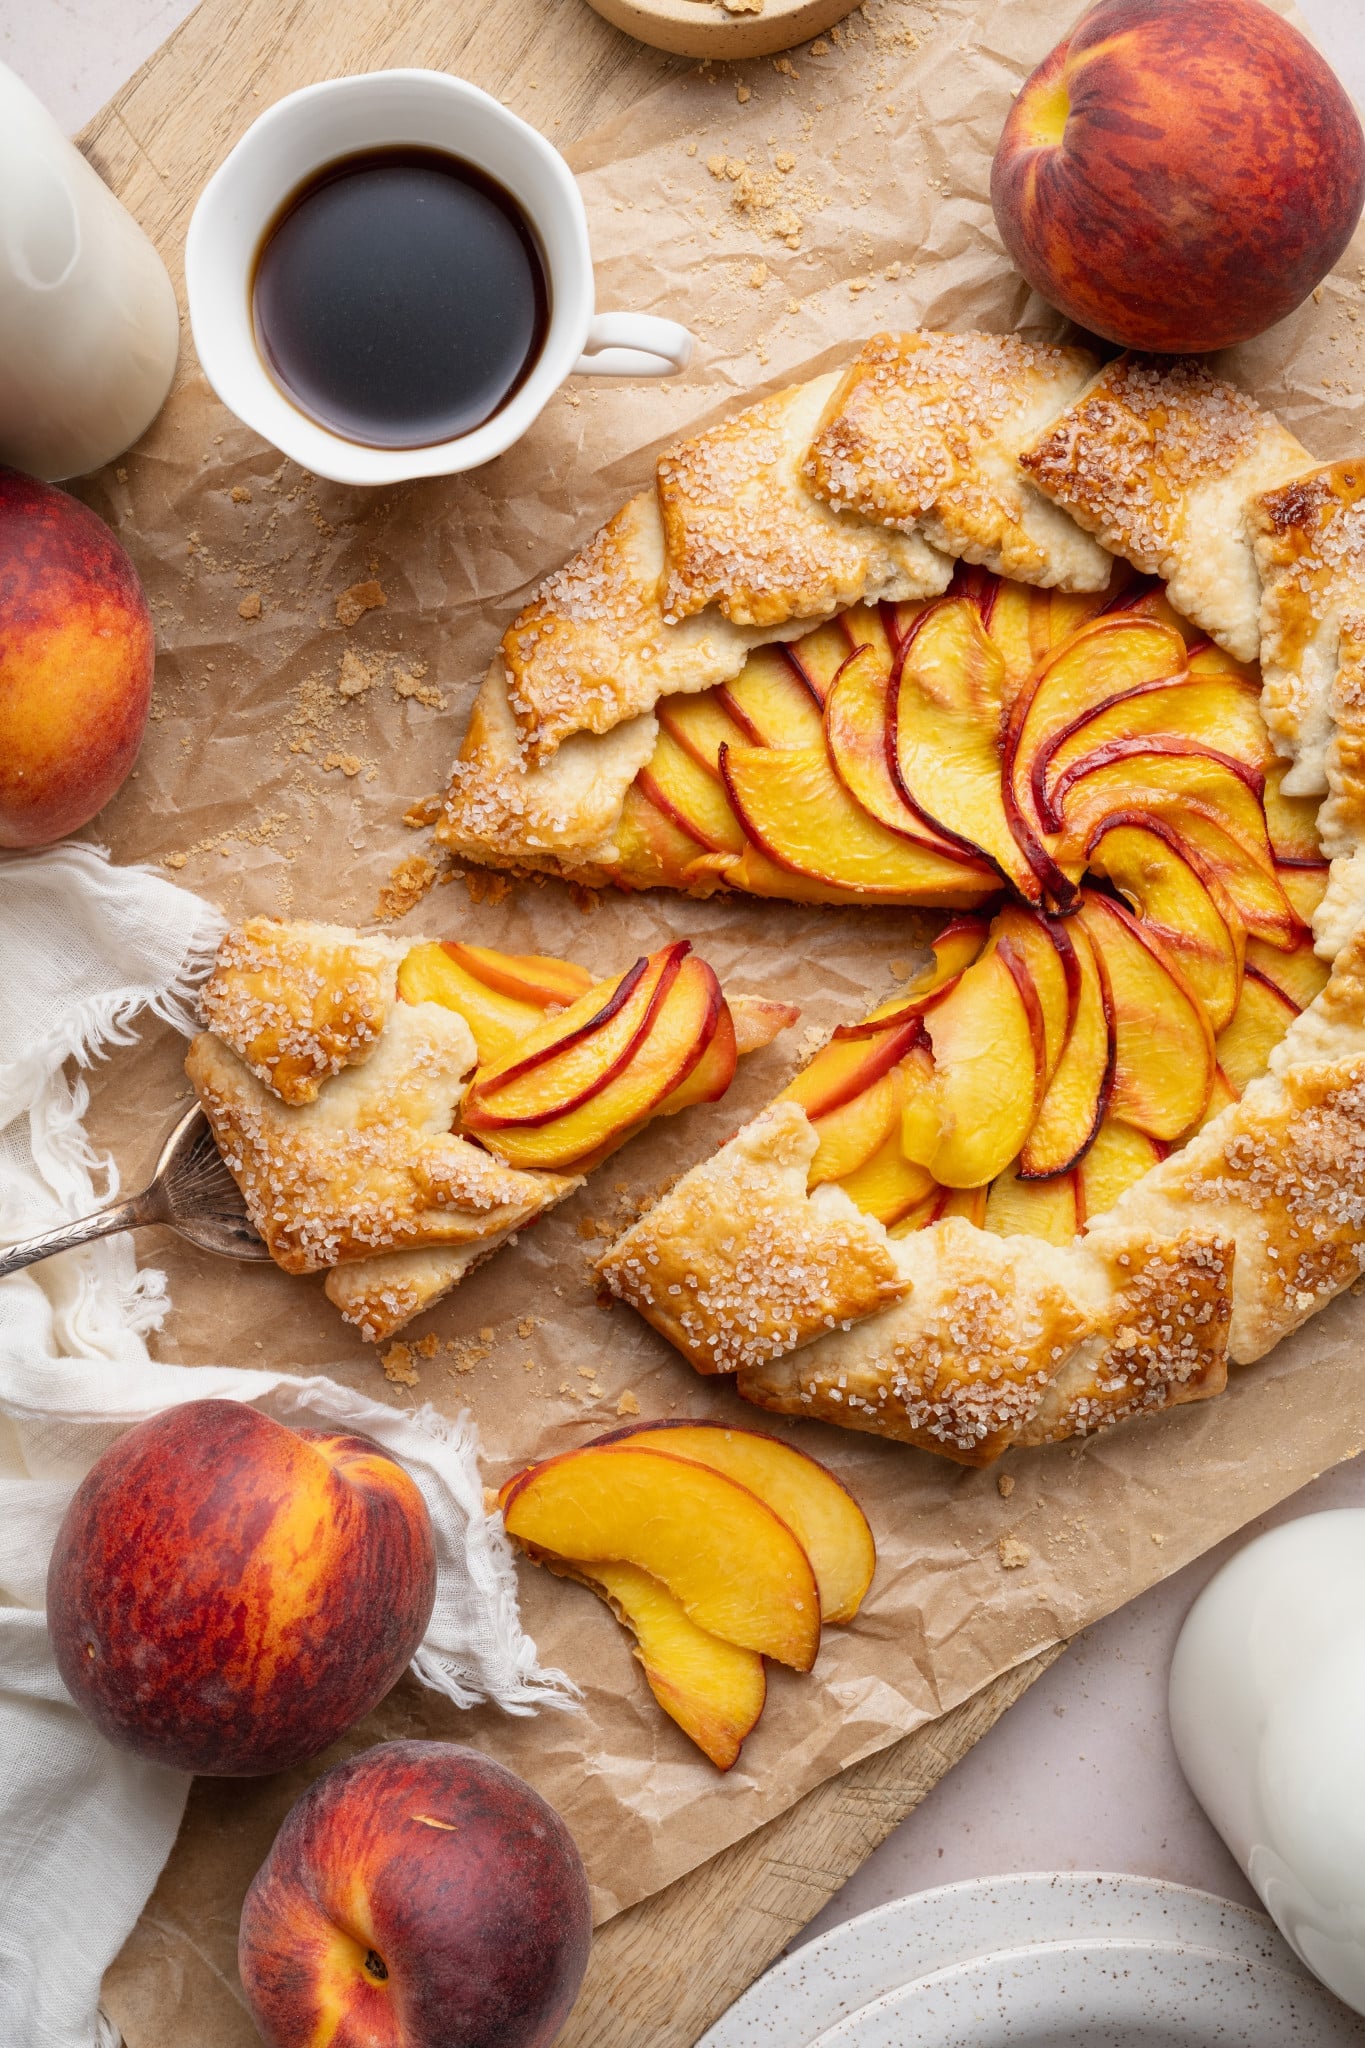
While the galette bakes, make the raspberry whipped cream. Let the peach galette cool, then slice and enjoy with the raspberry whipped cream or vanilla ice cream on top!
Expert Tips
- Keep things cold! From the dough and butter and to the kitchen counters and the entire galette itself, cold is key. I always recommend to chill the galette before you bake it. This keeps the dough cold after you’ve worked with it so it holds it’s shape and bakes up crisp and flakey.
- Use ripe peaches: The sweetness starts with perfectly ripened fruit. If the peach is too firm, it is not ripe yet. And if it’s too mushy, we don’t want that either! When you gently squeeze a peach, there should be some slight give. Don’t squeeze too hard, as you can easily bruise the peach.
- Make use of the leftover liquid from the peaches: If you don’t want this liquid gold to go to waste, you can simmer it on the stove in a small saucepan until it thickens and pour it as a syrup over ice cream. You don’t want to add all these juices into the galette because it will ooze out the sides and make a soggy crust.
- Use a food processor to make the crust: It comes together simply with flour, sugar, butter, salt, and a little ice-cold water, and so much better than a store-bought crust! If you don’t have a food processor, cut the butter into the dry ingredients with a pastry cutter. Stream in the cold water just until you get a shaggy dough. Then turn the dough out onto a clean, lightly floured work surface and gently knead the dough to bring it together into a disk.
Variations / Substitutions
- Use different fruits: Swap the peaches for nectarines or your favorite stone fruit (plums and apricots are yummy options). Mixed berries also work well, too! Don’t miss out on my Apple Galette or my Grape Galette.
- Use less sugar: If your peaches are really sweet and ripe, you can totally get away with using less sugar in the filling than my recipe calls for. It’s easy to adapt and customize based on your preferences.
- Gluten-free option: Use a 1:1 gluten-free flour blend for the crust.
- Mini peach galettes: Divide the dough into smaller portions and make individual servings. Keep a close eye on the bake time so they don’t get too toasty!
How To Avoid A Soggy Crust!
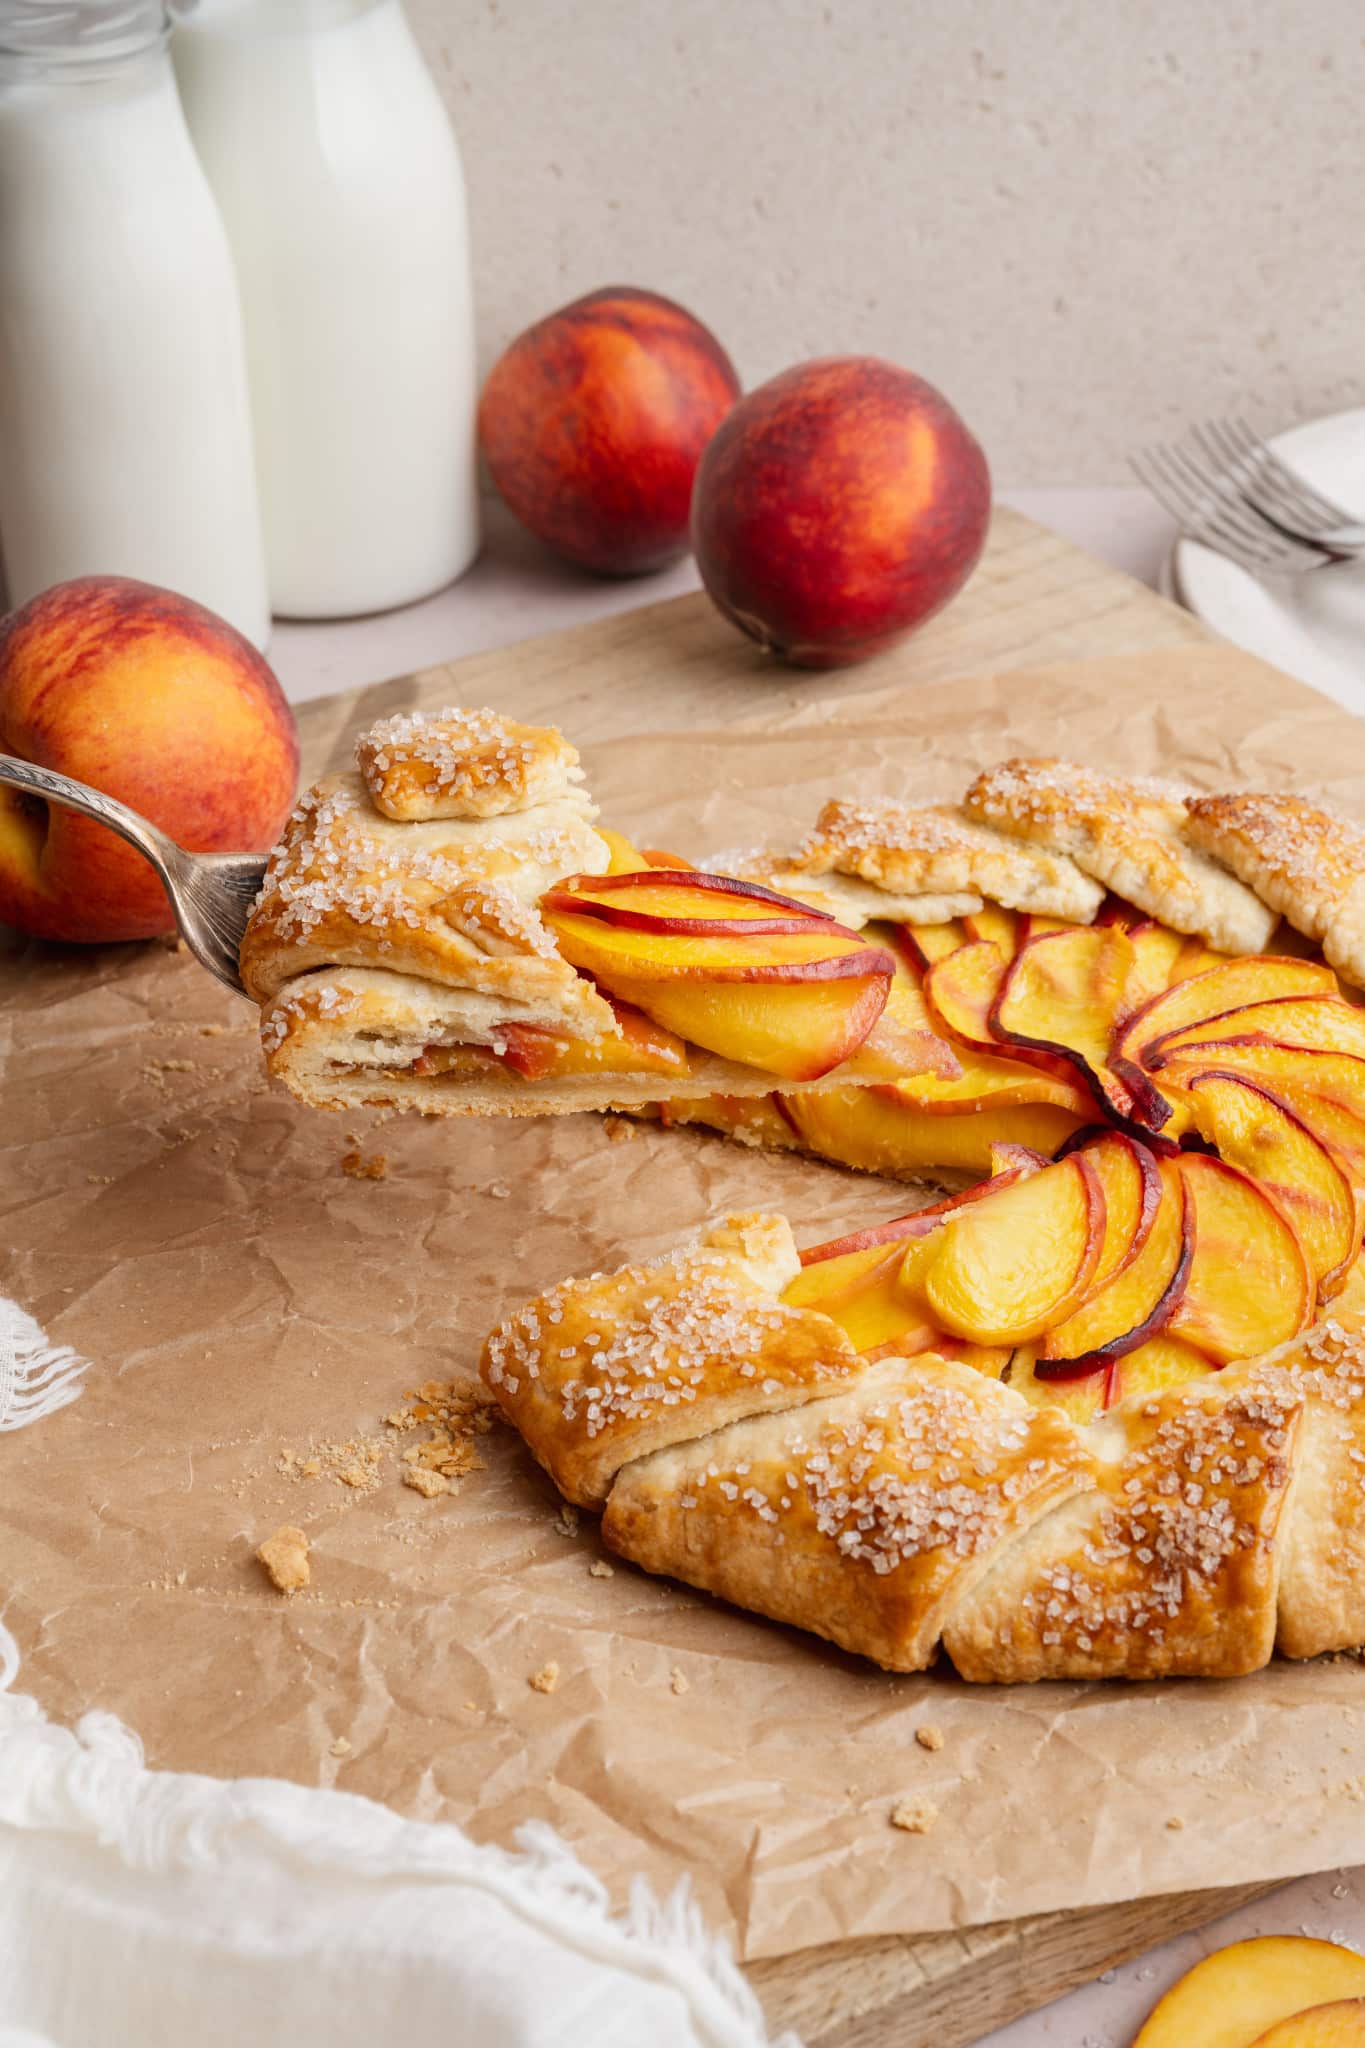
One of my favorite tricks I recently found was adding 3-4 tablespoons of crushed cookies (graham crackers, Biscoff, Nilla wafers, etc.) to the bottom of the galette before adding your fruit filling to help soak up excess fruit juices. This helps prevent a soggy bottom and keeps everything nice and crisp!
Storage / Freezing
- Store at room temp: Keep loosely covered at room temperature for up to 1 day.
- Refrigerate: Store in the fridge for up to 3–4 days. Reheat before serving for best texture.
- Reheat tips: Warm in a 350°F oven for 10–15 minutes to crisp up the crust again.
- Avoid microwaving: It can make the crust soft instead of flaky.
- Freezing: Once cooled completely, freeze the galette on a sheet pan or plate until solid. Then, wrap in plastic wrap and store in an airtight container for up to 2 months. When ready to serve and enjoy, thaw at room temperature and reheat in the oven at 325°F until warm, about 10 minutes.
- Make ahead: Instead of freezing the fully assembled galette, you can also consider making the dough in advance, wrapping it tightly, and freezing for up to 2–3 months. Then thaw in the fridge overnight before using and following the rest of the directions as written.
FAQs
A galette is essentially a free-form pie. I love the open-faced presentation and the ratio of crust to filling when it comes to galettes. They have a gorgeous rustic look to them and are easier to make than an entire pie!
I don’t spend any extra time peeling the peaches. But you can remove the skin if you prefer. It comes down to a texture preference! If you want to peel the peaches, here’s my favorite method!
Make sure the crust is cold, and use a slotted spoon when transferring the peaches to the crust so the excess juices are left behind.
I recommend fresh peaches for the ultimate flavor experience. But if you want to use frozen, be sure to thaw them, discard and juices, from them/blot them dry before mixing with the other filling ingredients.
A rimmed half-sheet baking pan, which is 18″x13″.
shop this post
 Buy Now →
  Buy Now →
 More Peach Recipes You’ll Love


Before You Begin! If you make this, please leave a review and rating letting us know how you liked this recipe! This helps our business thrive & continue providing free recipes.
Peach Galette
Ingredients
For the dough
- 1½ cups all-purpose flour
- 1 Tbsp. granulated sugar
- 3/4 tsp. salt
- 12 Tbsp. unsalted butter (cold )
- 4-5 Tbsp. ice cold water
For the peaches
- 4 yellow peaches (ripe, sliced 1/2" thick)
- 1/4 cup brown sugar*
- 1/4 cup granulated sugar*
- 1 Tbsp. cornstarch
- 1 tsp. kosher salt
- 1 Tbsp. lemon zest (or just the zest from 1 lemon)
- 1 tsp. lemon juice
- 1 tsp. vanilla extract
- 1 Tbsp. heavy cream
- 1 large egg
- Coarse sugar (turbinado or demerara)
- Vanilla ice cream (for serving )
For the raspberry whipped cream
- 1 cup freeze dried raspberries
- 1/4 cup granulated sugar
- 1¾ cup heavy cream

Last step! If you make this, please leave a review and rating letting us know how you liked this recipe! This helps our business thrive & continue providing free recipes.
Instructions
- Prep: Line a rimmed baking sheet with parchment paper. Set aside.
- Make the crust: In a food processor with the blade attachment, pulse together the flour, sugar, and salt a few times until combined. Add in the cold, cubed butter and pulse again until butter pieces are the size of peas, ~7-8 times. Slowly stream in the cold water, just enough for the dough to come together into a shaggy dough.1½ cups all-purpose flour, 1 Tbsp. granulated sugar, 3/4 tsp. salt, 12 Tbsp. unsalted butter, 4-5 Tbsp. ice cold water

- Fold and chill: Transfer the dough onto a lightly floured clean surface and gently knead the dough until it comes together into a disk. You don't want to overwork the dough here; just work it enough until it comes together. Wrap in plastic wrap and refrigerate for at least 1 hour or up to 3 days. Start Timer
- Make peach filling: Add the sliced peaches to a mixing bowl. You should have ~18-20 ounces once sliced and the pits removed. Add the sugars, cornstarch, salt, lemon zest, lemon juice, and vanilla extract. Gently stir to combine. Set aside or refrigerate while you prepare the crust.4 yellow peaches, 1/4 cup brown sugar*, 1/4 cup granulated sugar*, 1 Tbsp. cornstarch, 1 tsp. kosher salt, 1 Tbsp. lemon zest , 1 tsp. lemon juice, 1 tsp. vanilla extract
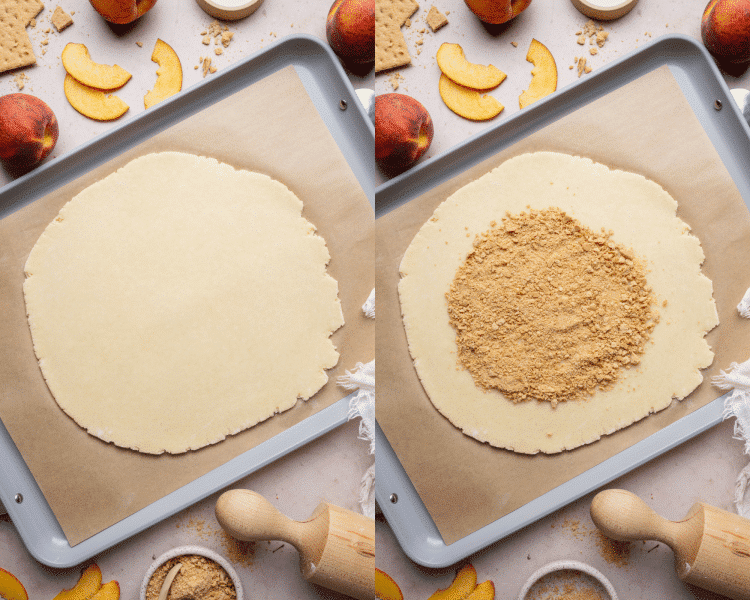
- Roll out dough: Roll out the dough on a lightly floured surface into a 12 inch circle, keeping in mind it doesn't have to be perfect! Galettes are rustic. You can trim the edges of the dough to make clean lines if you prefer. Transfer the dough to the prepared baking sheet. (You can also roll out the dough directly on a lightly floured piece of parchment and then lift the dough and parchment directly to the sheet pan for an easy transfer). Optional: Sprinkle a layer of crushed graham crackers in an even layer on the center of the dough, where you’ll be placing the peaches (this helps absorb excess juices).
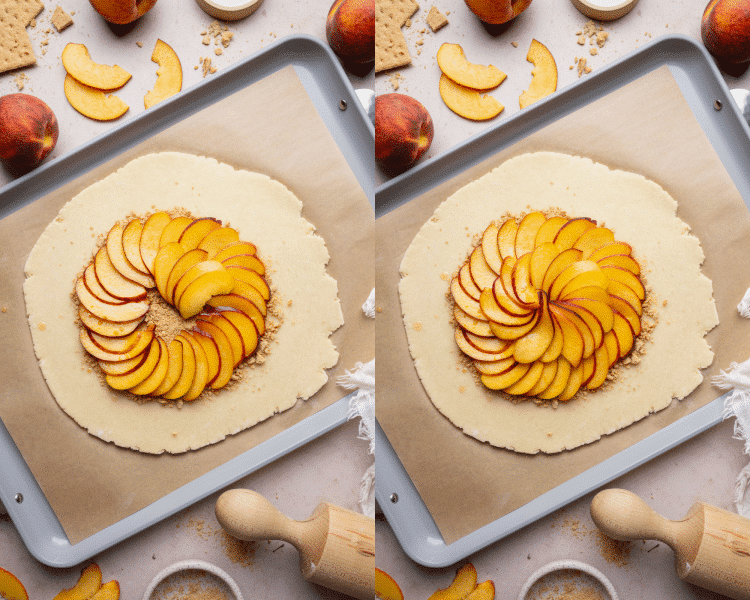
- Add the filling: Arrange the peaches in the center of the dough in a circular pattern, leaving behind the juices. Slightly overlap the peaches like fallen dominoes. Leave about a 2-inch border around the dough. Be sure not to overcrowd the dough with too many peach slices; ~18 ounces should be plenty.
- Fold border: Cut slits along the border of the dough, spacing them about 2-3 inches apart. Fold each segment of the dough over the peaches, gently pinching the overlapping dough to secure, and repeat until all the dough is folded over the peaches. Refrigerate the galette for 15-30 minutes (make sure your fridge has enough space for the baking sheet). Start Timer
- Finish and bake: While the galette chills, preheat the oven to 400°F. Whisk together the heavy cream and egg to make the egg wash. Brush egg wash all over the chilled dough in a thin, even layer. Sprinkle the dough with coarse sugar. Bake until the dough has a golden sheen and the peaches are juicy and bubbly, about 30-35 minutes. Start Timer
- Make whipped cream: While the galette bakes, you can make the raspberry whipped cream. In a food processor with the blade attachment, blitz the freeze-dried raspberries and sugar together until it becomes a powdery consistency. Then add in the cold heavy cream and process again until thickened, about 20-45 seconds depending on the power of your food processor. Keep a close eye on it. It will be super thick like Greek yogurt!1 cup freeze dried raspberries, 1/4 cup granulated sugar, 1¾ cup heavy cream
- Serve: Let the peach galette cool for 10-15 minutes Start Timer before slicing and enjoy with the raspberry whipped cream or vanilla ice cream on top.Vanilla ice cream
Notes
- Storage: You can store it at room temperature in an airtight container for 1 day, but then after that I recommend storing it in the fridge for up to 3 days.
- To freeze: Freeze the cooled galette on a sheet pan or plate until solid. Then, wrap in plastic wrap and store in an airtight container for up to 2 months. When ready to serve and enjoy, thaw at room temperature and reheat in the oven at 325°F until warm, about 10 minutes.
- *Sugar: If your peaches are really sweet and ripe, you can totally get away with using less sugar in the filling than my recipe calls for. It’s easy to adapt and customize based on your preferences.
- Raspberry whipped cream inspired by Serious Eats.
- This recipe was updated with new photos in July 2026 (new photos, same recipe)😊
Nutrition Information
Nutritional information is provided as a courtesy and is automatically calculated. It should only be construed as an estimate rather than a guarantee. Ingredients can vary and Kroll’s Korner can’t make any guarantees to the accuracy of this information.
📸 Photography by Creating Kaitlin


I recently made a Grape Galette from your recipe and it surprised everyone. They all loved it! My question concerns the crust. The part folded over was wonderfully flaky and tender. However the bottom was wet and soggy. Any suggestions?
Prettty! thank you for making! You can sprinkle a layer of crushed graham cracker crumbs in an even layer on the center of the dough, where you’ll be placing the grapes, like I do in this peach galette recipe. (this helps absorb excess juices).
This was so good!! My whole family loved it! So fun and easy to make! I think I definitely will be making an apple one in the fall!
I’ve never made a galette before but this recipe was so simple and straightforward it came out great. I will be making it again for sure! I’m thinking about apples next time!
Yay! It’s beautiful Rachel! thank you!
Delicious and easy recipe!
Love the cinnamon addition! thank you!
I was intimidated because of the crust, however this recipe was incredibly easy to follow and turned out so yummy!!! Thanks for another great recipe!
Looks great Ashley!! thank you sooo much! 🙂
Yum yum YUM! Super easy and fun to make. The food processor definitely makes it easy. I didn’t even add the ice cream or raspberry cream because I was hanging on to every spoonful. So delicious! I will definitely be making this again.
So glad you enjoyed it! thanks so much 🙂
I’ve been making galettes for years, SO much easier than whole pies! This recipe is easy and delicious! I followed it exactly using fresh, unpeeled peaches and it came out of the oven perfectly gorgeous and yummy. I loved that the peaches didn’t need to be peeled! We loved it!!
it’s beautiful!! yayyy thank you 🙂
I love how the use of the food processor really simplified the process of making the dough, I’ve heard of that technique for years but was always hesitant that it would make my crust tough. To my surprise I had the most tender, melt in your mouth pie! The combination of sweet peaches with the slightly tart raspberry whip was also absolutely delicious!
im so glad you enjoyed it!! thank you soo much 🙂
This was so easy to make (the videos made it easy), it’s delicious, and it was another creation my 2 year old son loved helping with.
I am so glad the videos helped 🙂 loved that your toddler joined in!! thank you 🙂 looks great!!
This recipe was so easy to follow and just look how beautiful mine turned out. My son asked me to make another one already! My new favorite way to enjoy fresh peaches
It’s gorgeous! And im so glad your son enjoyed it too, always a win! 🙂 thank you!