Chocolate Ice Cream (Ninja Creami)
This post may contain affiliate links. Please read our disclosure policy.
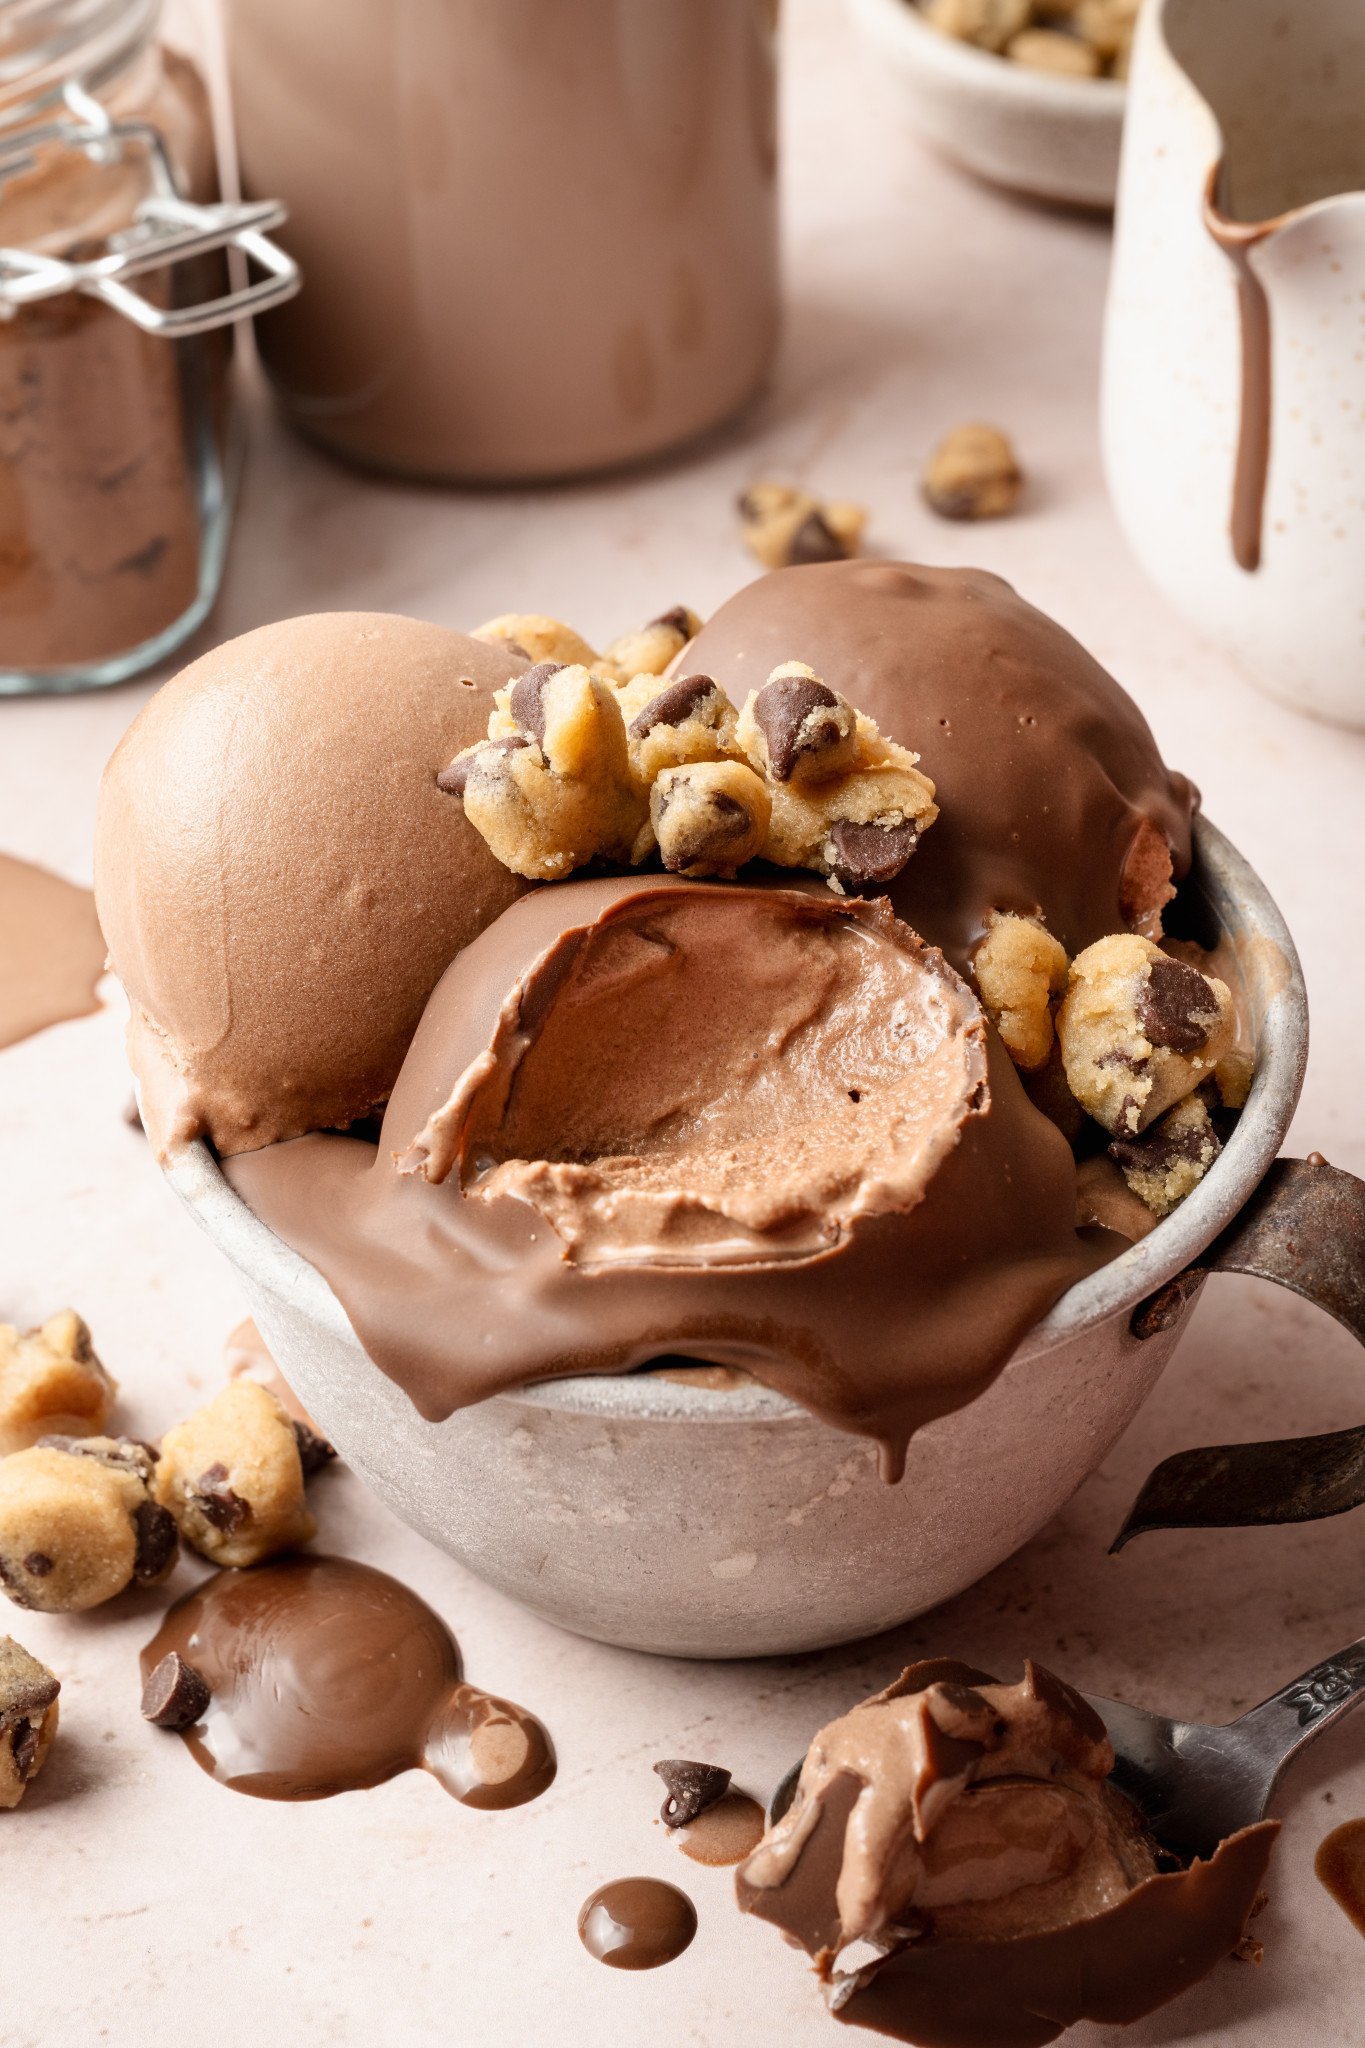
Don’t get me wrong—I love dreaming up fun, over-the-top ice cream flavors loaded with mix-ins and toppings for my Creami series. But sometimes, nothing beats a simple, classic bowl of rich chocolate ice cream.
This recipe is thick, ultra-creamy, and hits that deep chocolatey note just right. It’s perfect on its own, but also makes the ultimate base for all your favorite add-ins—think crumbled brownies, mini chocolate chips, cookie dough, chocolate syrup, or a drizzle of magic shell. When it comes to customizing, the possibilities are endless!
I wanted this ice cream to be a true, classic chocolate ice cream. But if you’re looking for a little healthier option, try my Strawberry Frozen Yogurt, Vanilla Protein Ice Cream or Peanut Butter Cup Protein Ice Cream!
And if you haven’t jumped on the Ninja Creami train yet, I highly recommend making my No Churn Dark Chocolate Oreo Ice Cream.
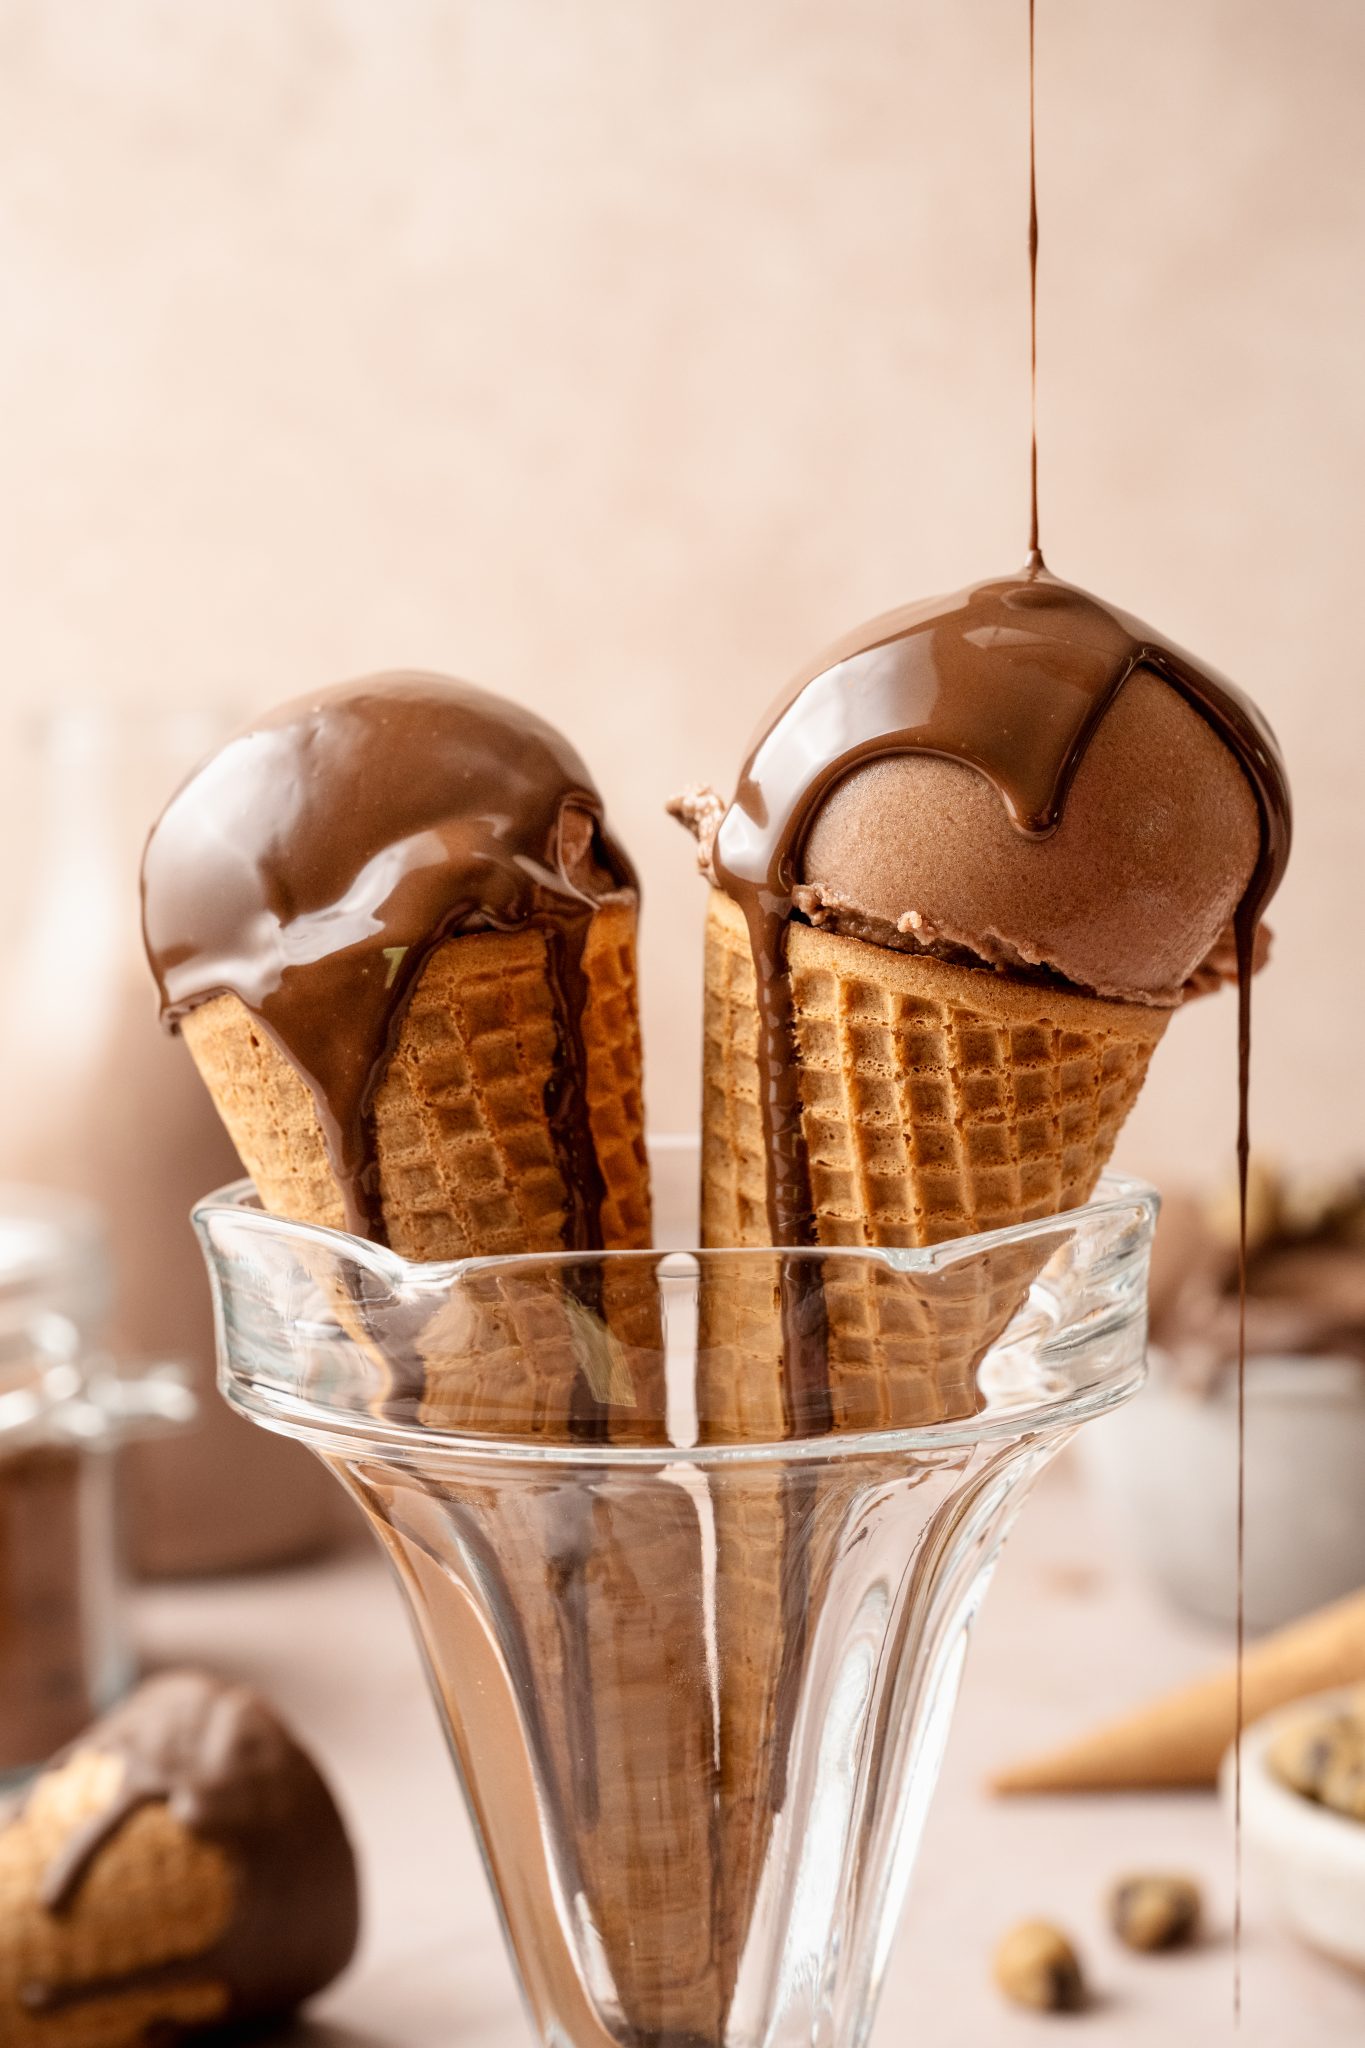

 Table Talk with Tawnie

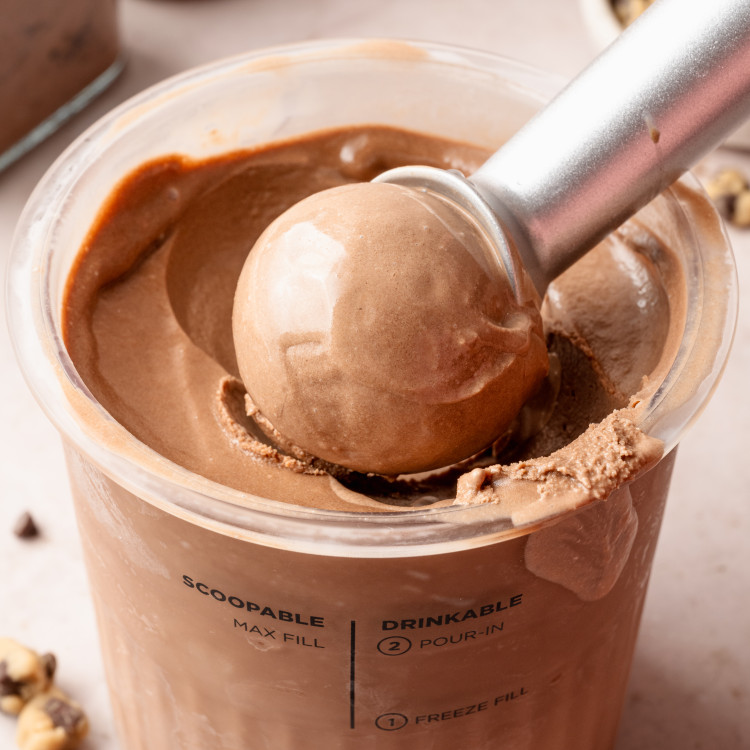
Chocolate ice cream has always been a go-to treat for me. So when I started my Creami series, I knew I had to nail a classic chocolate recipe. I wanted to create an ice cream with a rich, nostalgic flavor that’s smooth, scoopable and perfect for adding any mix-ins or toppings. So after a few test runs, I finally landed on this version that checked off every box. It’s thick, creamy, chocolatey and unbelievably delicious!
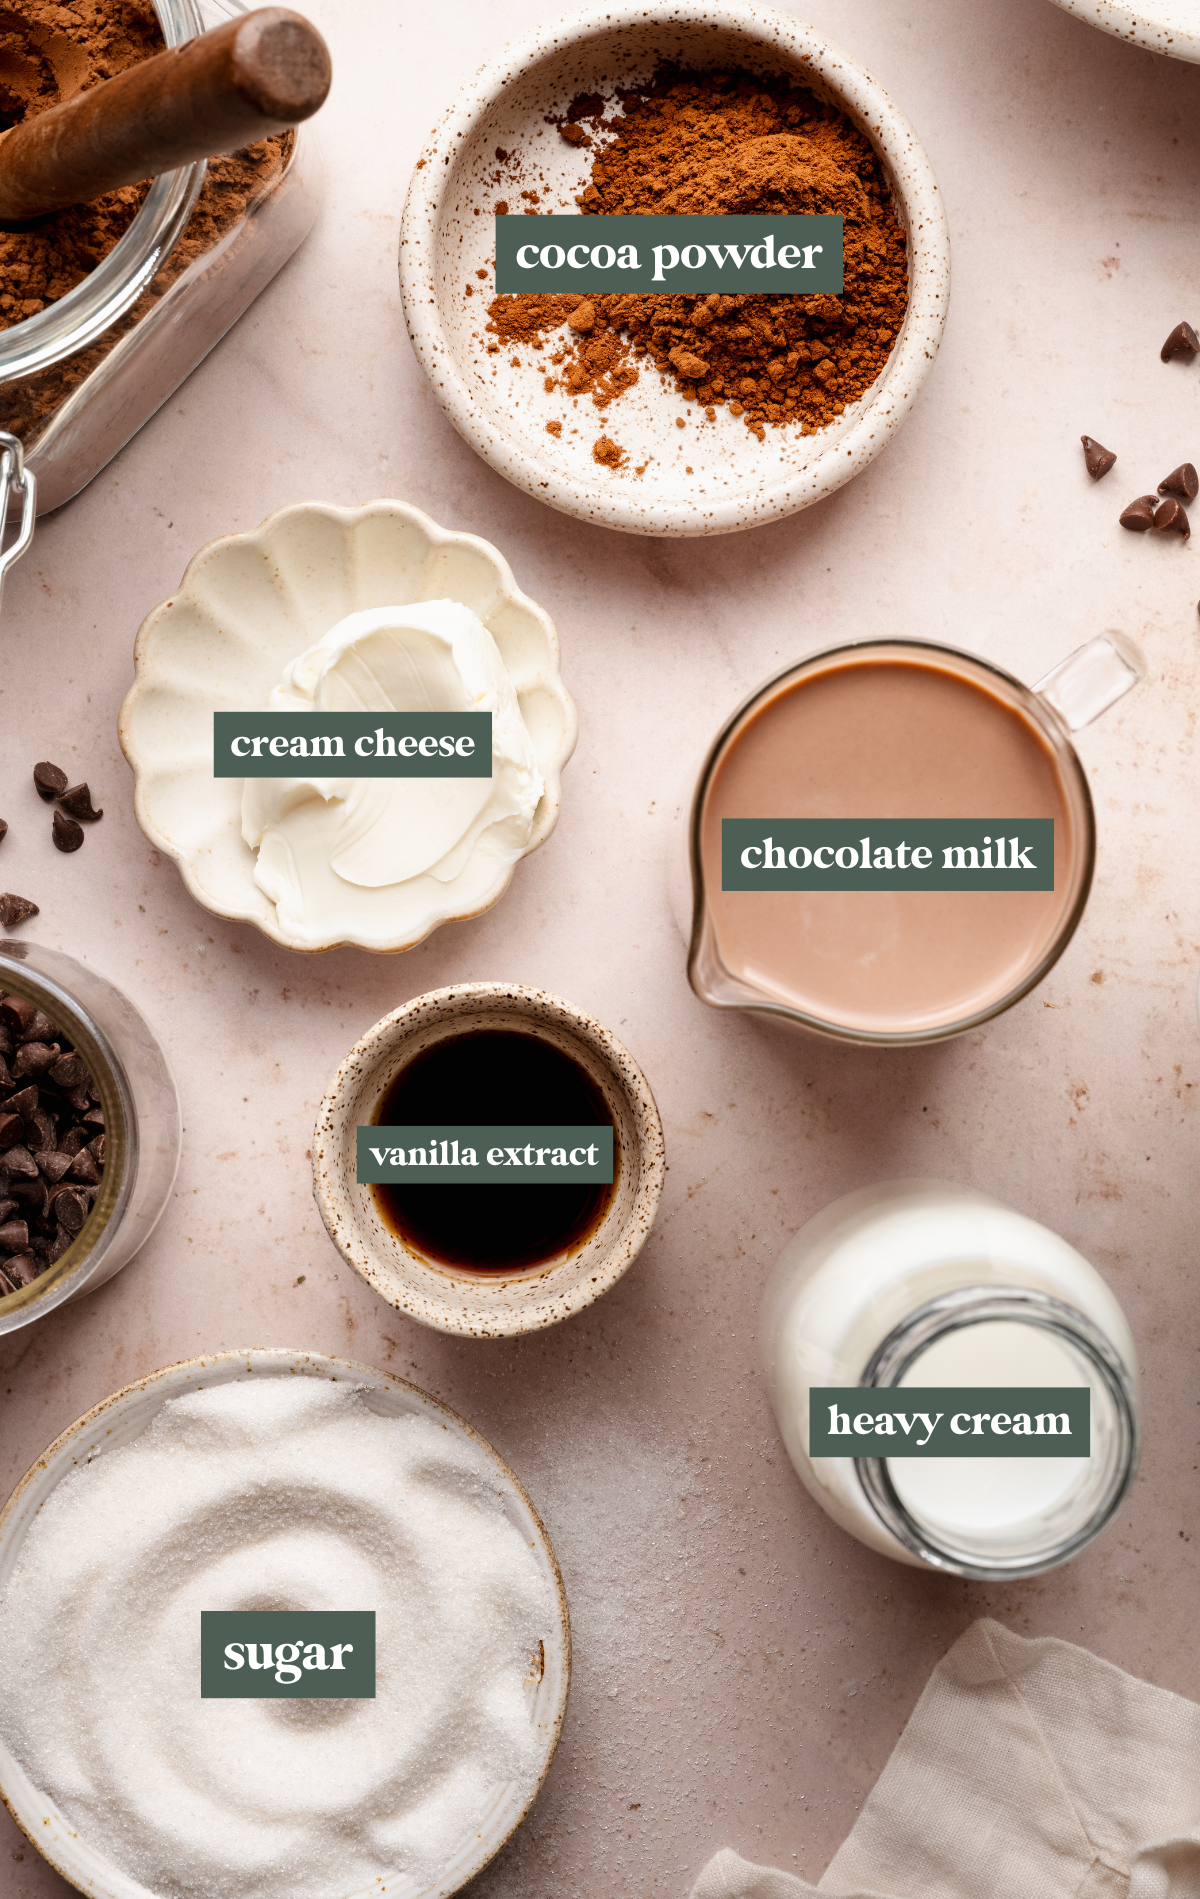
- Cream cheese: I recommend using full-fat cream cheese for the thickest consistency.
- Granulated sugar: You can adjust the amount of sugar based on your sweetness preference.
- Cocoa powder: Use your favorite cacao powder for the perfect chocolatey touch. For a more intense chocolate flavor, use a Dutch-processed cocoa powder.
- Heavy cream: The heavy cream helps give this ice cream a creamy, rich consistency.
- Chocolate milk: For the most chocolately flavor, I love to use chocolate milk! However, you can sub for whole milk or your milk of choice if preferred.
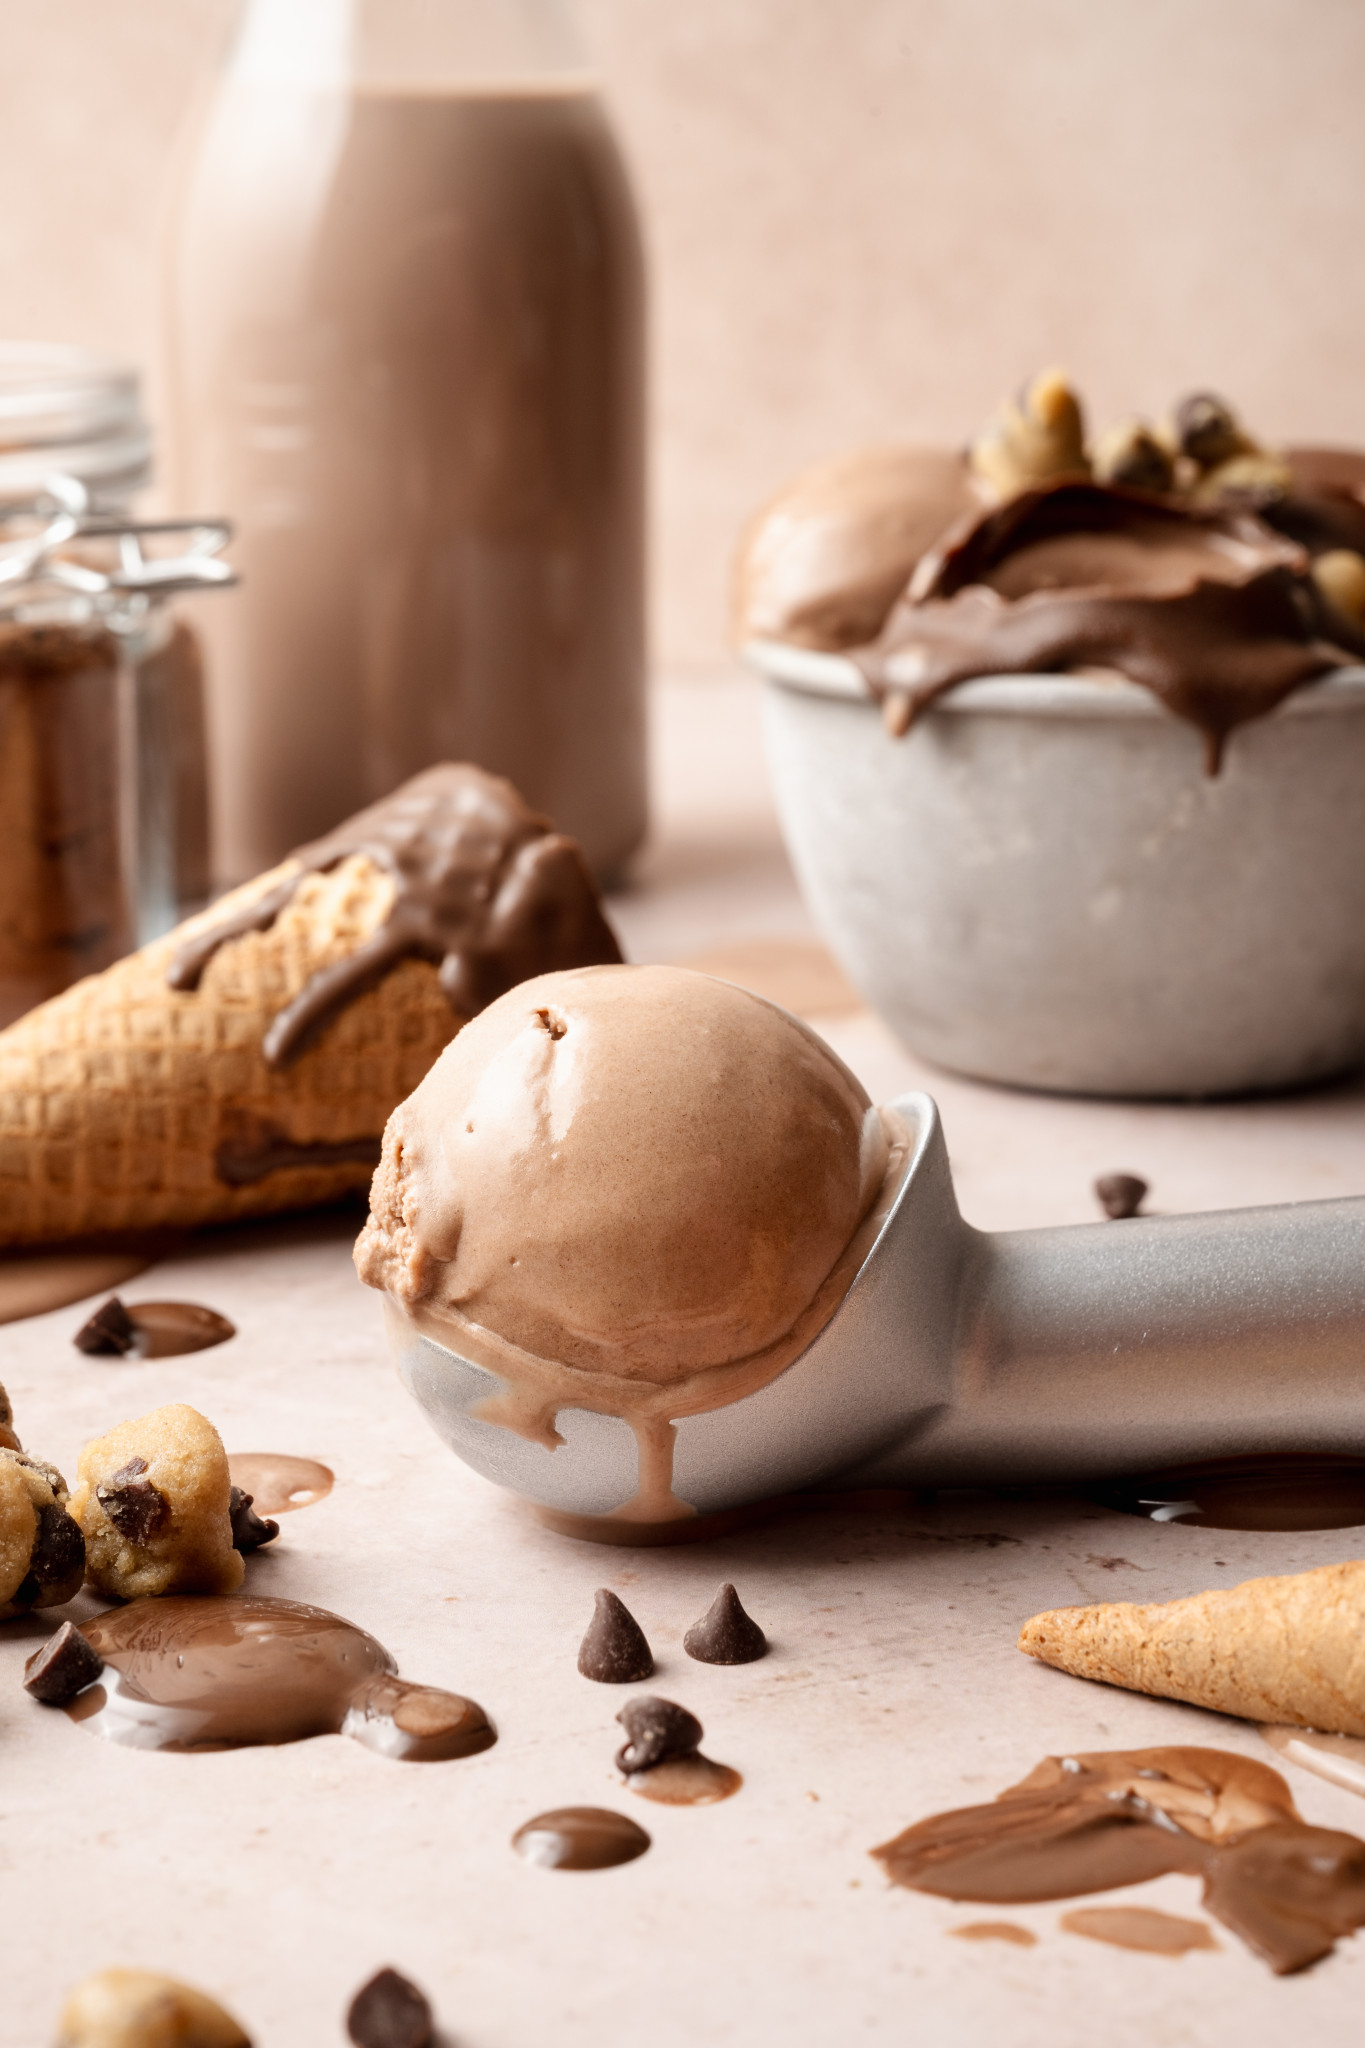
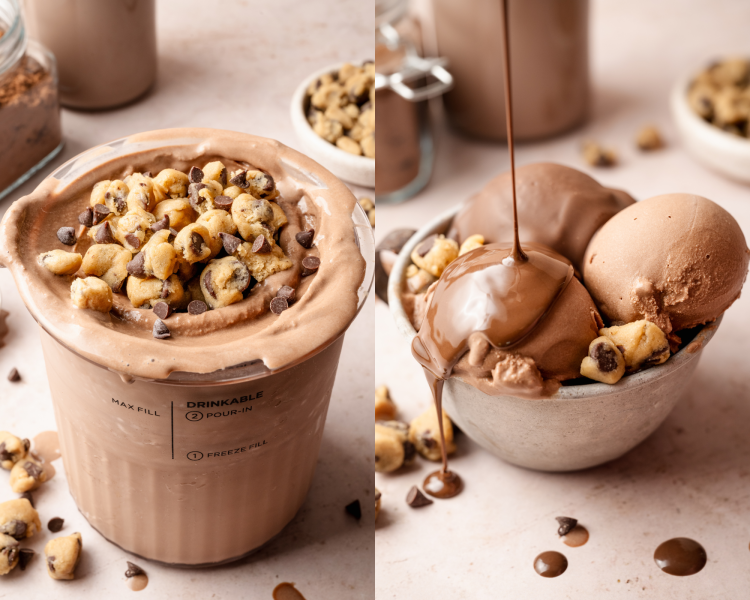
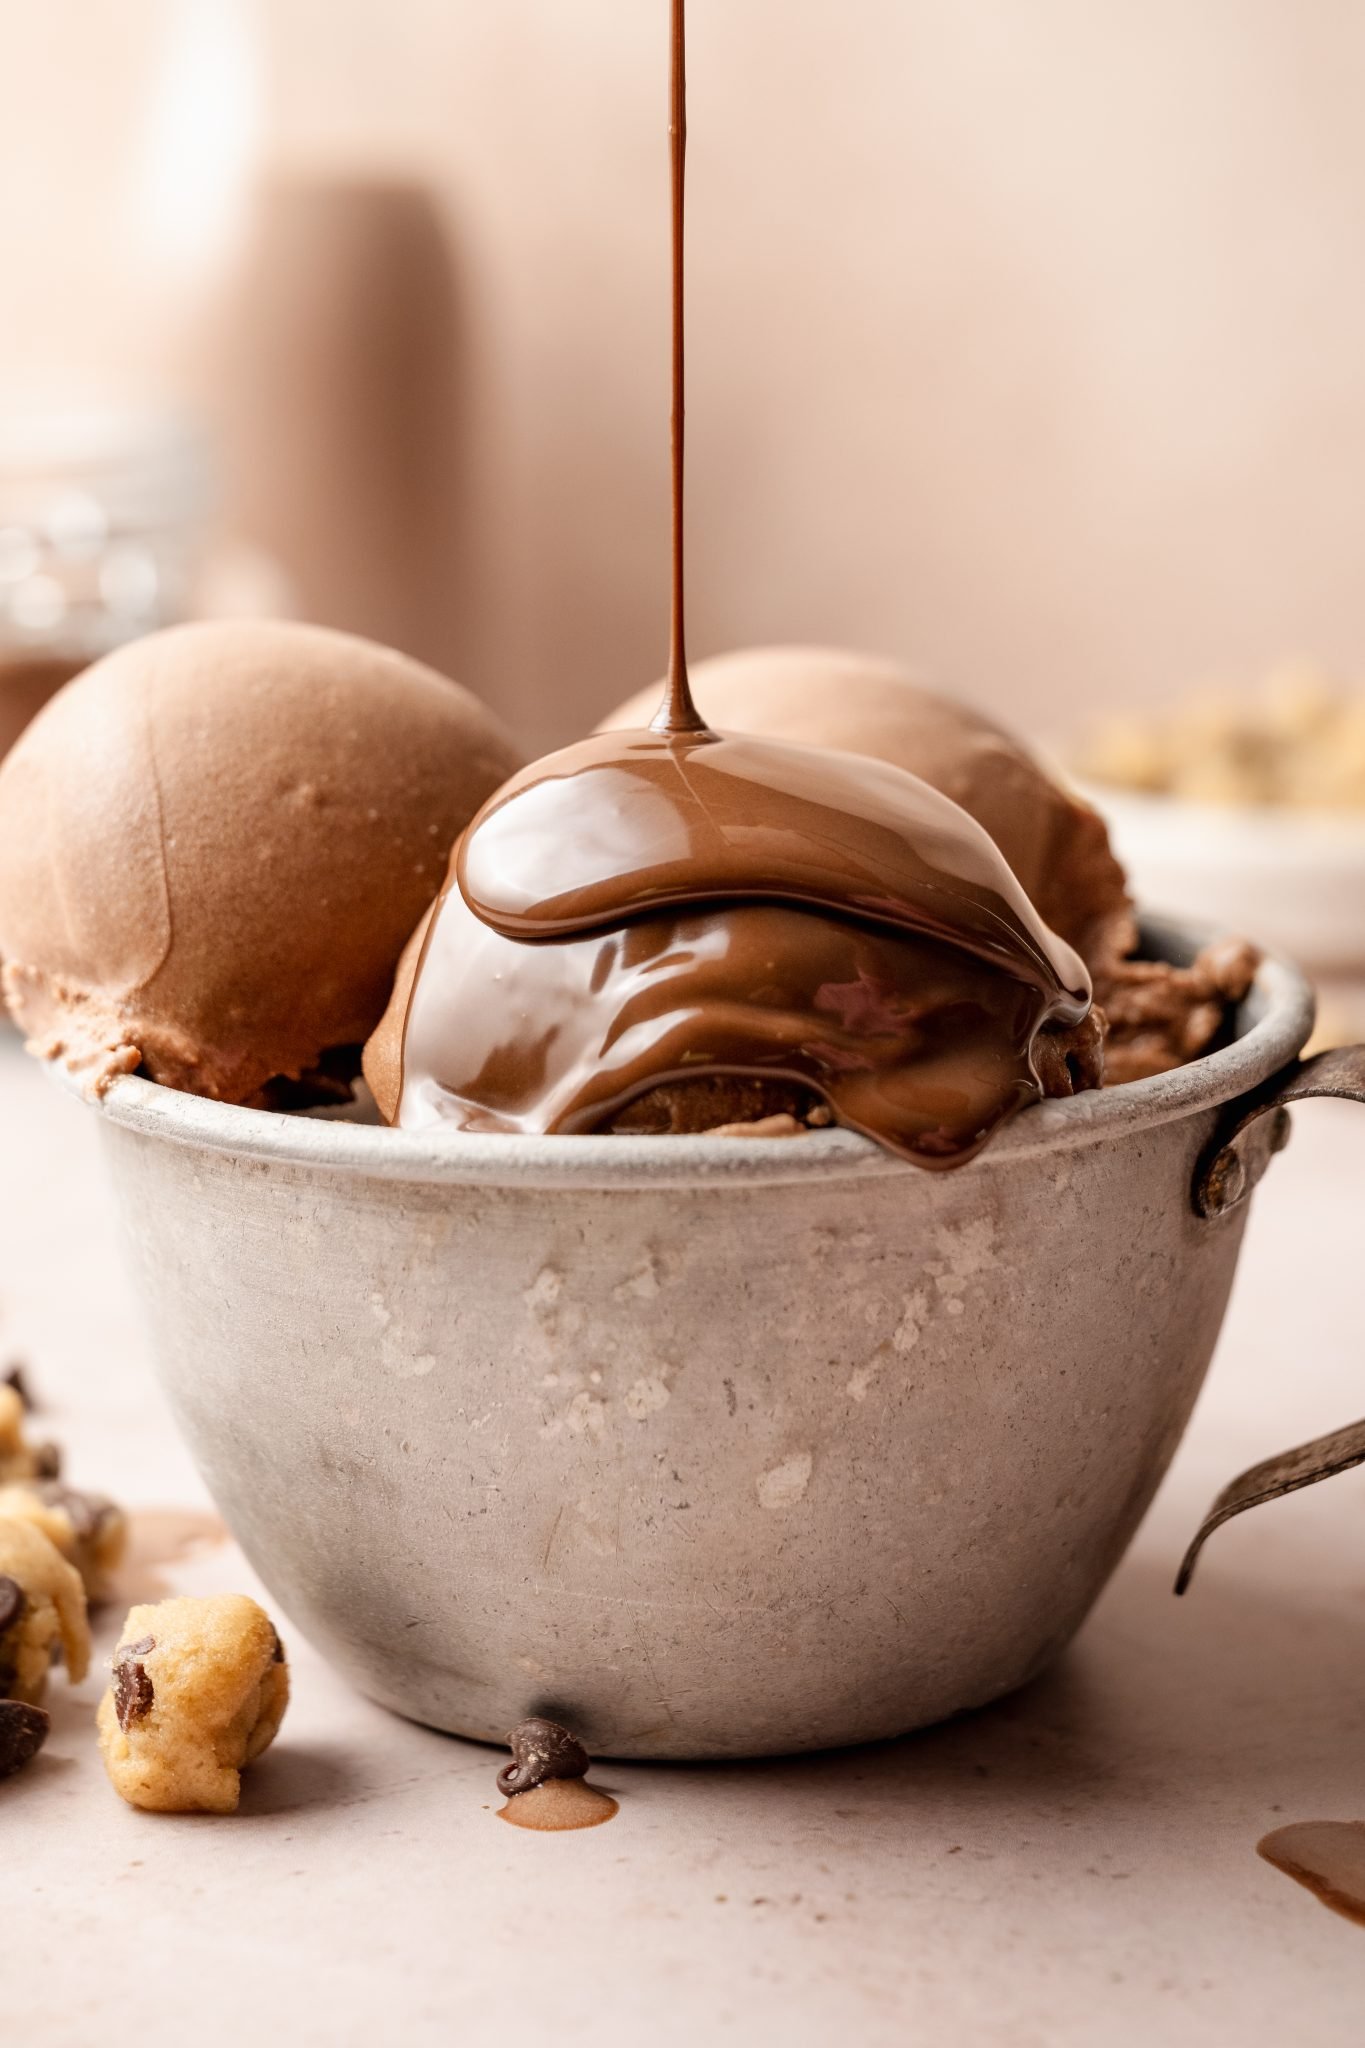
- Mix-ins or toppings: Crumbled brownie, mini chocolate chips, cookie dough, chocolate syrup, magic shell, etc.
Step by Step Directions
(For the full recipe, scroll down to the recipe card below)
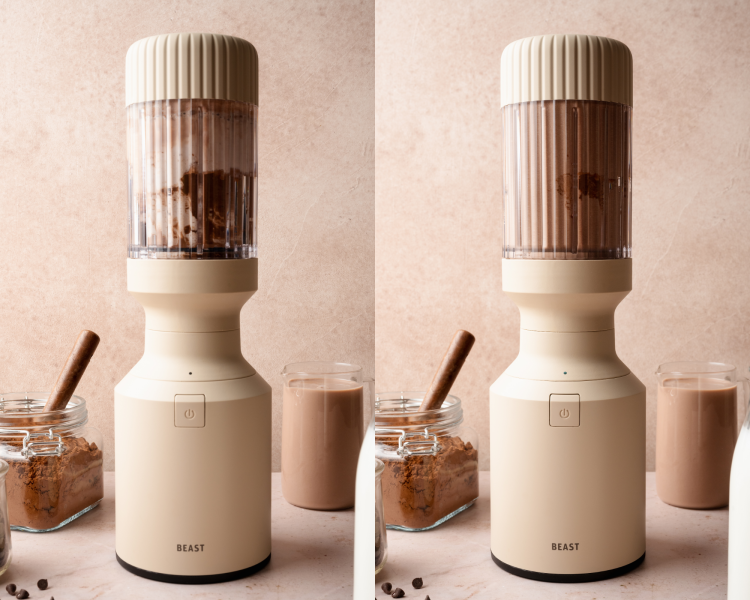
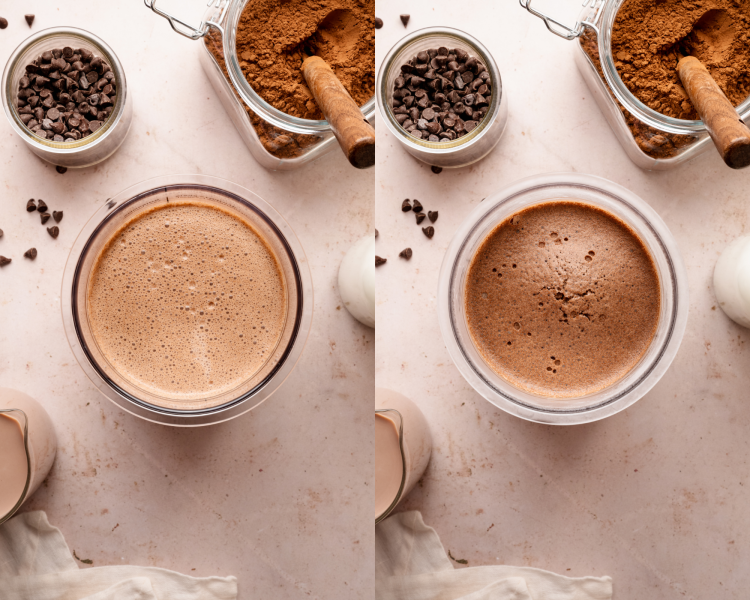
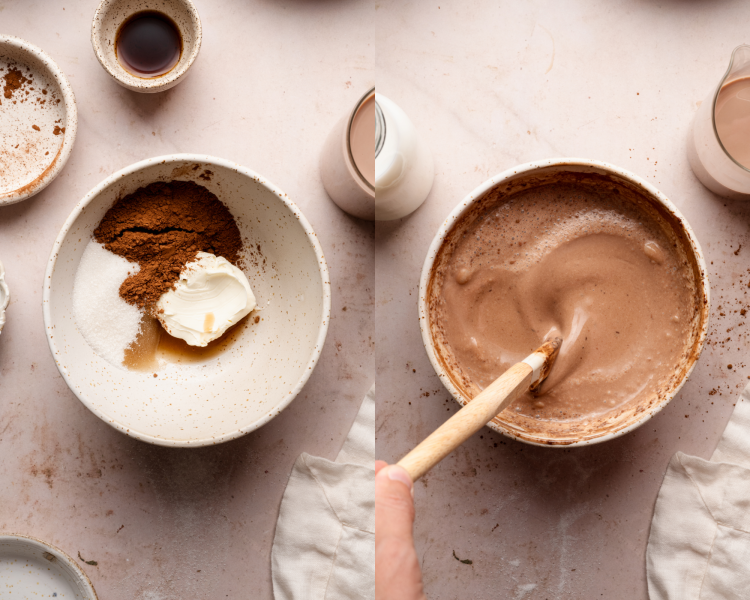
Combine Ingredients
Add all the ingredients to a blender and blend until smooth.
Freeze
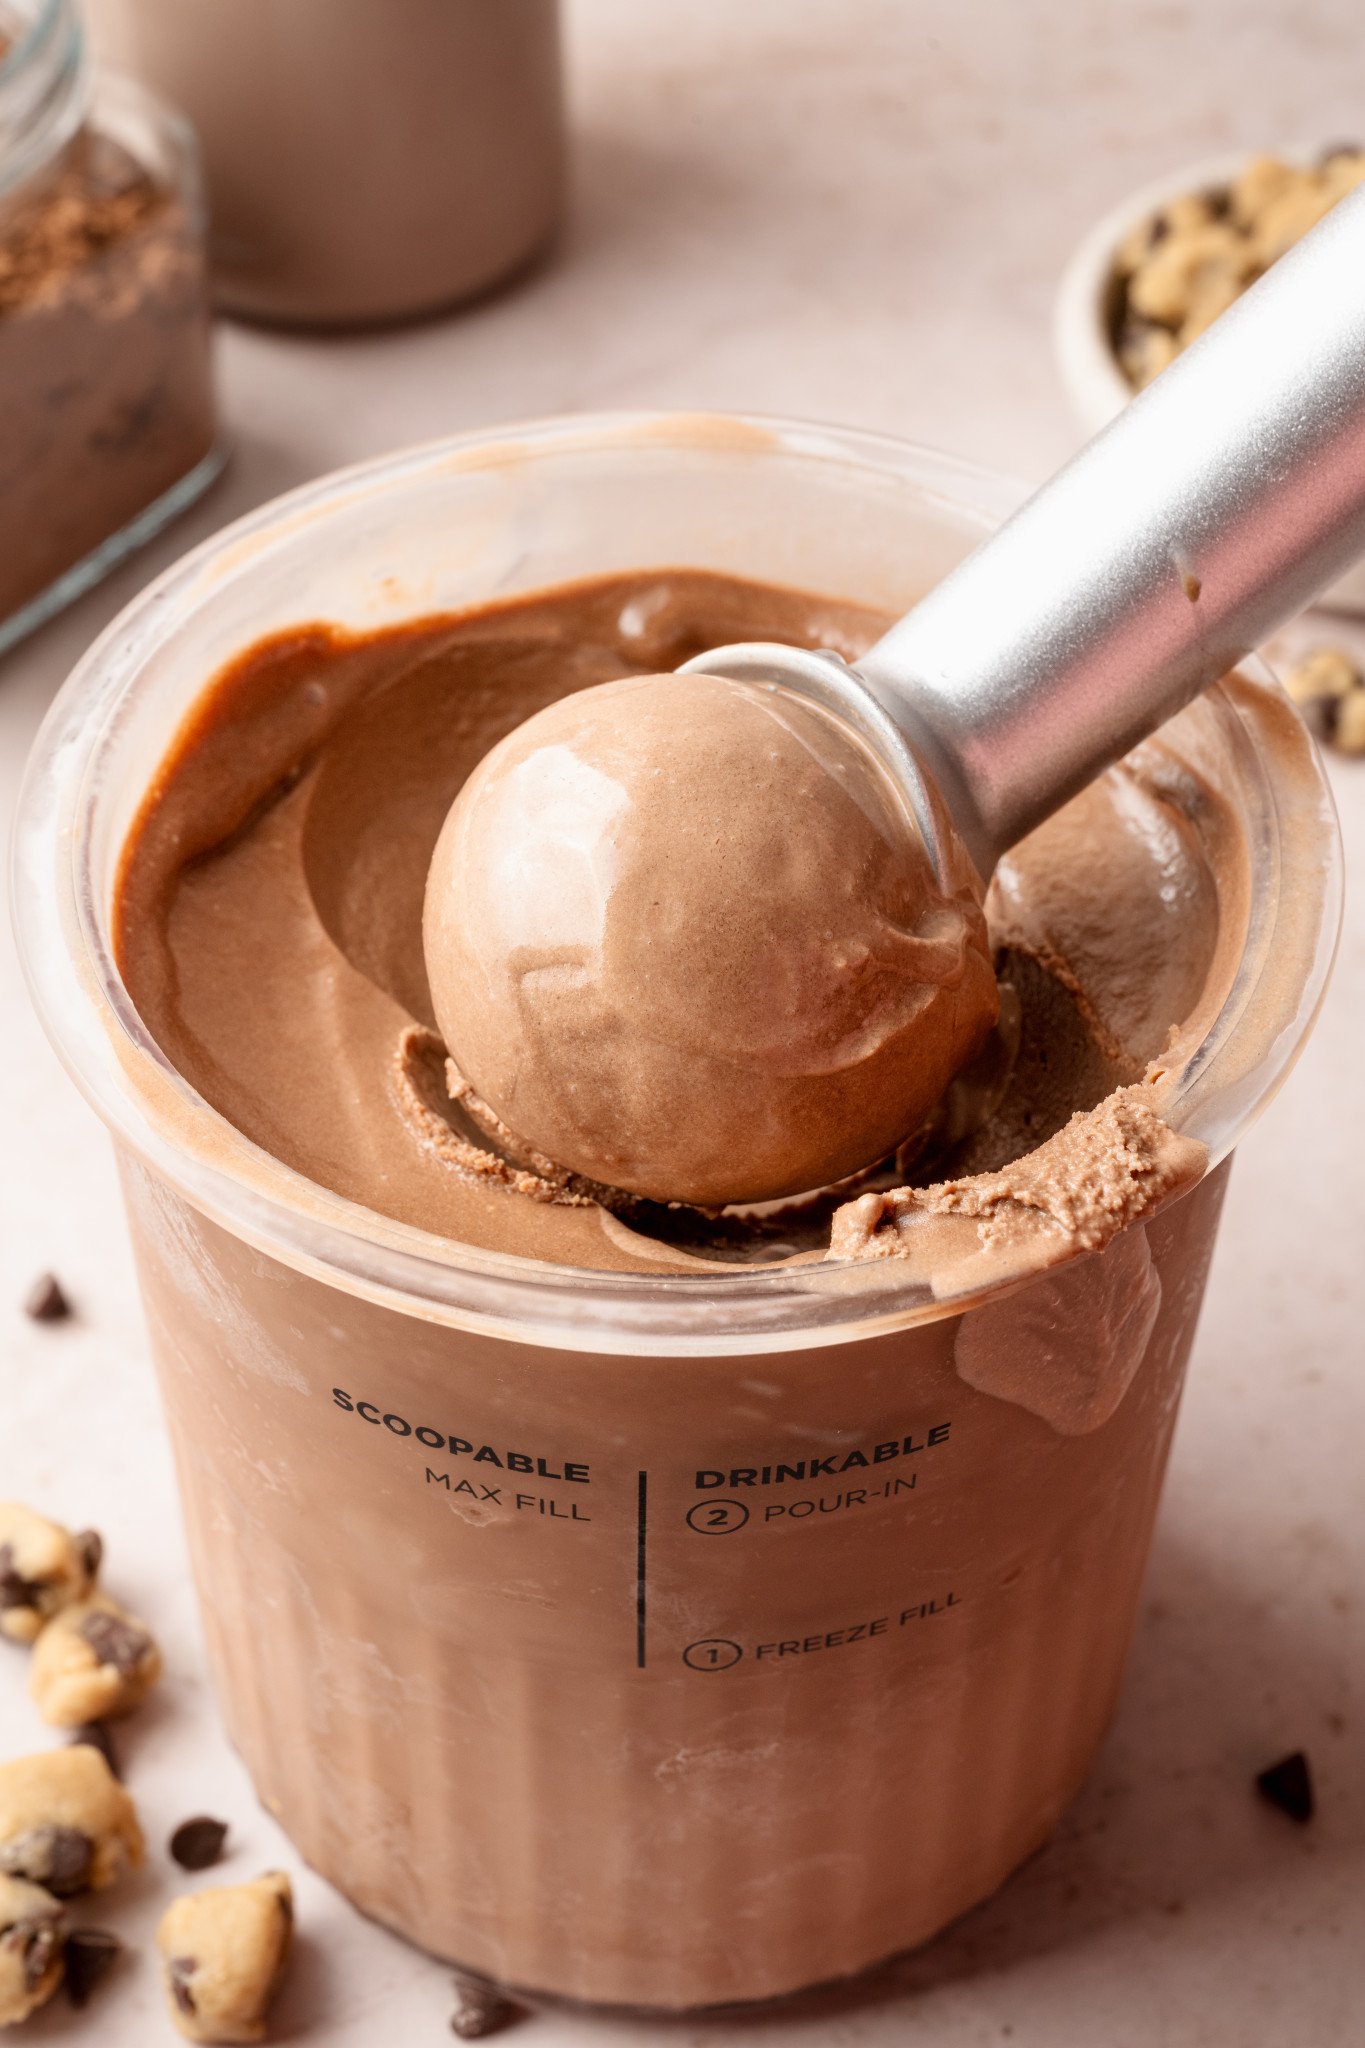
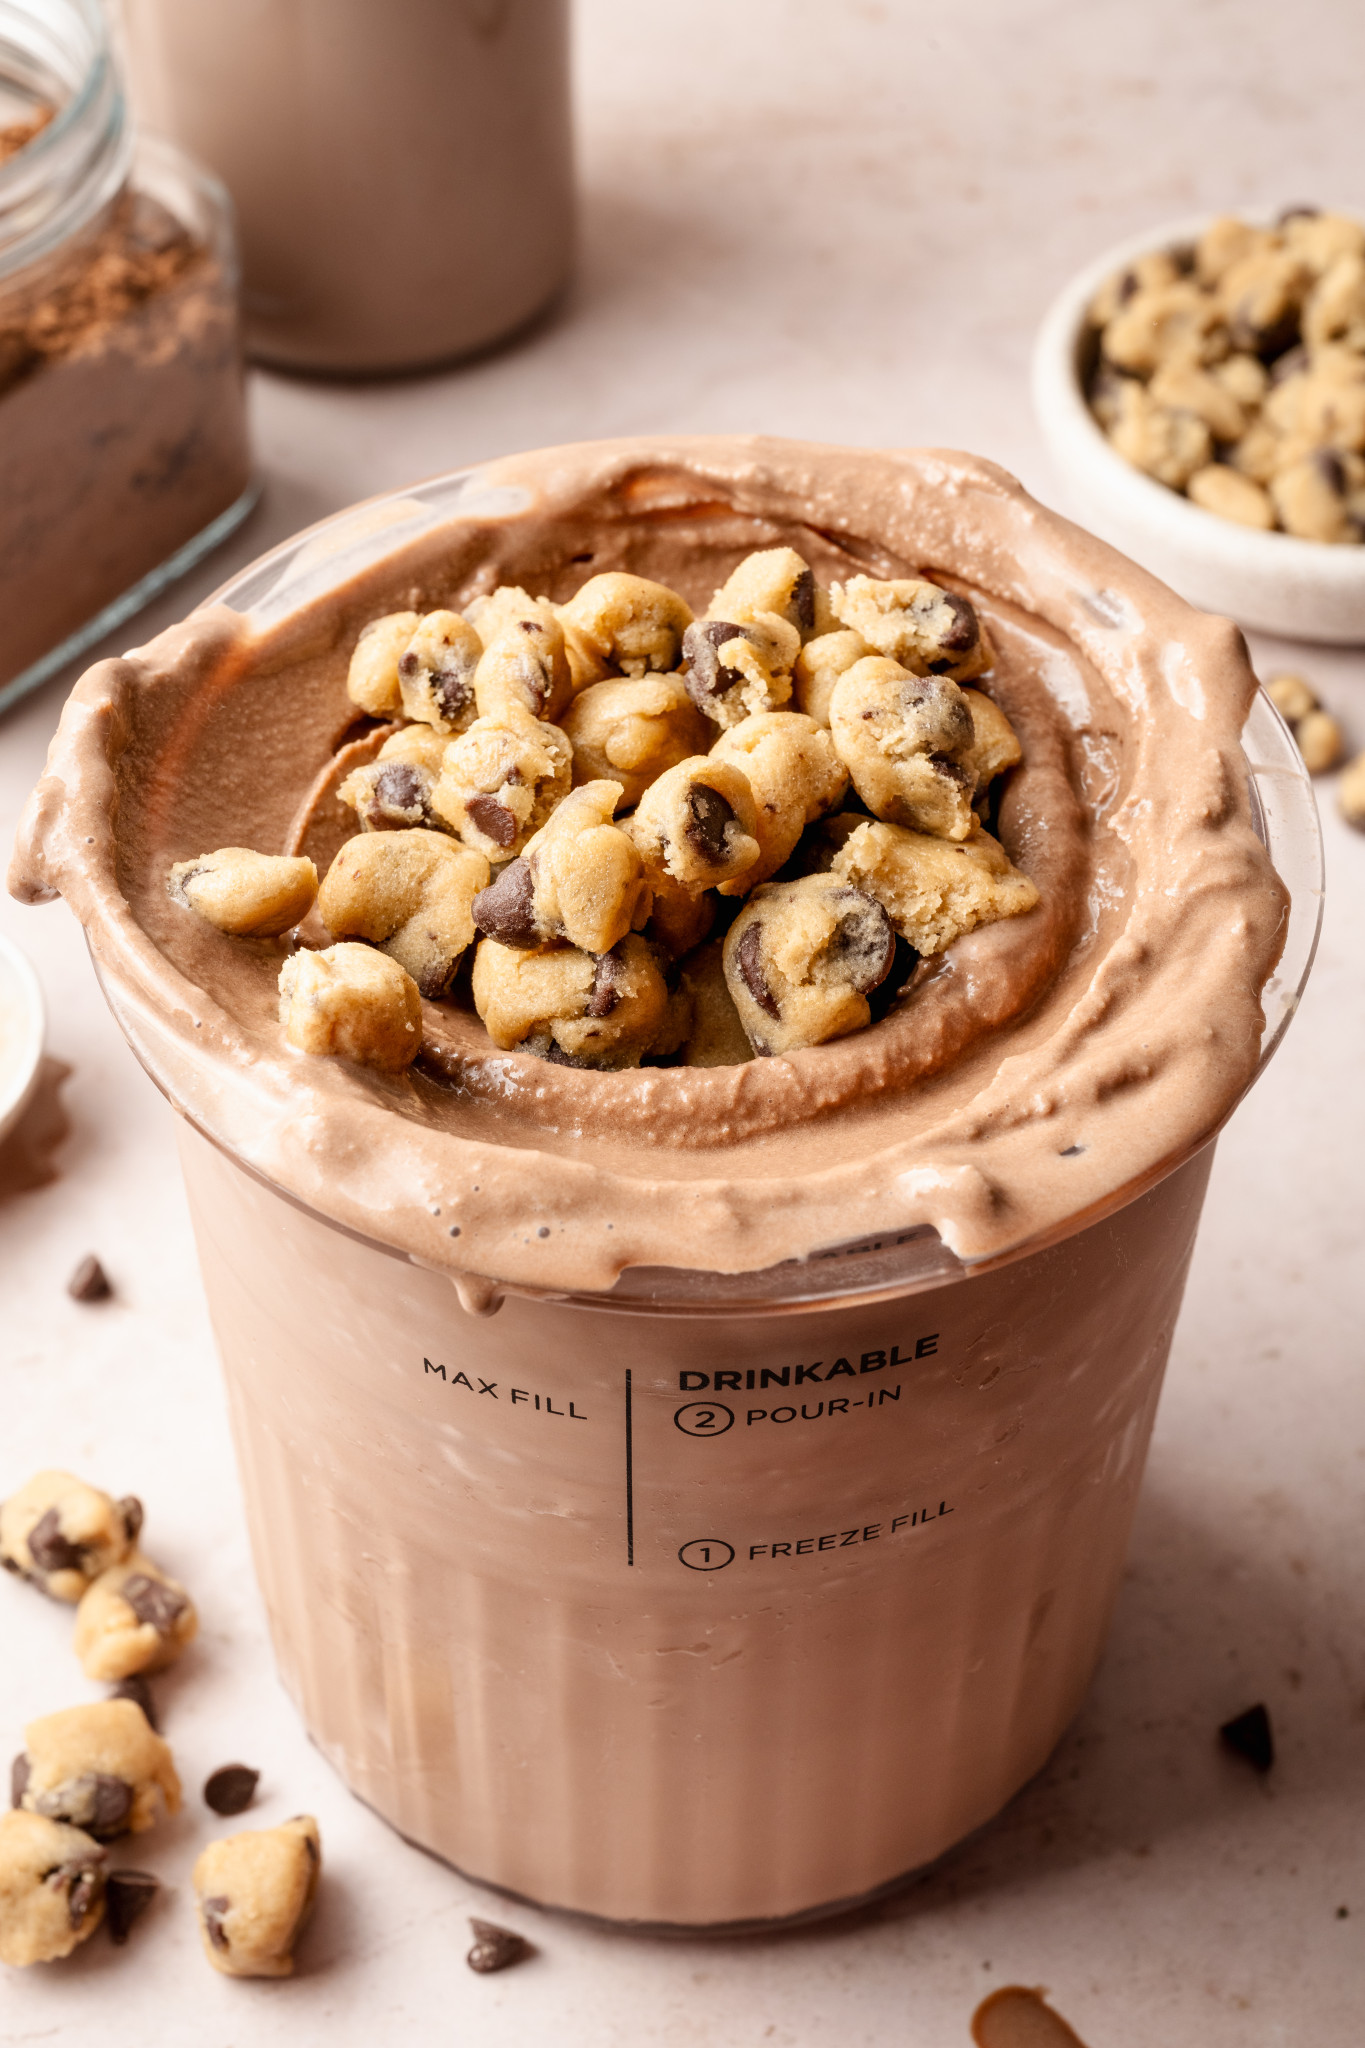
Pour mixture into an empty CREAMi™ Pint and freeze for 24 hours. Tip: freezing with the lid on creates a hump at the top of the ice cream, which can damage the blade, so be sure to leave it off.
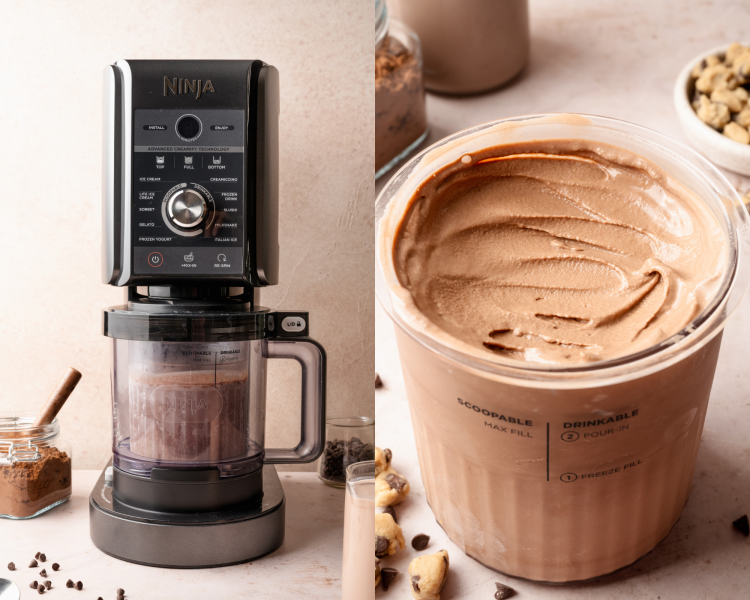
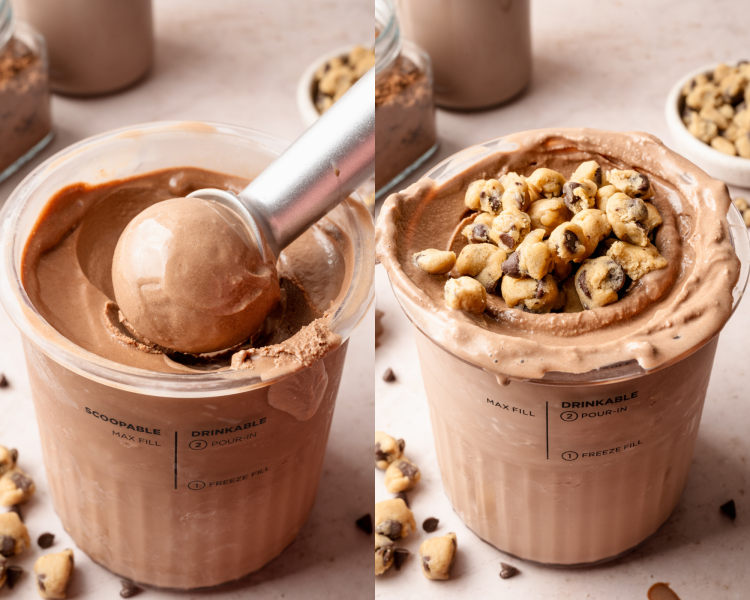
Assemble & spin
Assemble the frozen pint container in the base and run the Lite Ice Cream cycle. Add mix-ins and run Mix-In cycle if desired!
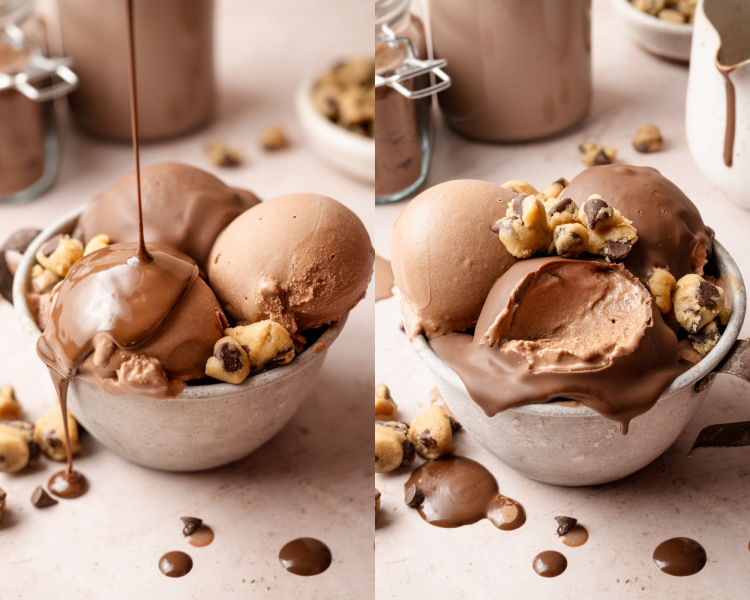
ENJOY!
Add more mix-ins on top and ENJOY!!
Expert Tips
- Prep in advance: Make sure to allow your pint at least 24 hours to freeze before spinning.
- Don’t overblend: If using the blender method, you only need to blend for 20-30 seconds. If you blend too long, your mixture will become foamy and won’t fit in the pint container.
- Respins: This recipe shouldn’t need an additional spin but if your ice cream isn’t smooth and creamy after the first spin, you can run a respin cycle until you get your desired consistency.
- Freeze with no lid: It’s important to freeze the pint on a level surface and without the lid. If you freeze it with the lid on, it can form a hump on the top which can damage the blade when you put it in the machine to spin.
- Don’t overfill the container: Make sure not to overfill the pint container. The ice cream will expand in volume as it spins so don’t worry if it looks like the pint isn’t initially full.
Storage / Freezing
If you don’t finish the pint, use a spoon to smooth and level out the top of the remaining ice cream and place it back in the freezer with the lid. When ready to eat again, let the ice cream slightly defrost and respin the frozen pint until you reach your desired consistency.
FAQs
Why do I have to dig a hole in the Creami before adding the mix-ins?
Digging a hole in the Creami before adding your mix-ins allows you to place the mix-ins exactly where the blade will spin during the Mix-In cycle. If you sprinkle them on top or around the edges, they won’t get incorporated as well and will just stay close to the top.
Why does my Ninja Creami have a “hump” on top after I freeze it?
Freezing your base with the lid on can create a “hump” on the top. To avoid the hump, place your Creami containers in the freezer on a flat surface without the lid until frozen. You want to make sure to freeze your pints with a smooth top for the best results while spinning and also to avoid any potential damage to the blades. If you’re making multiple pints at once, you can place the lids on the containers after they are frozen for easier storage.
What type of cocoa powder should I use for this ice cream recipe?
You can use your favorite type of cocoa powder for this recipe. Natural unsweetened cocoa powder (like Hershey’s) will have a lighter chocolate flavor. For a richer, deeper chocolate flavor use a Dutch-processed cocoa powder.
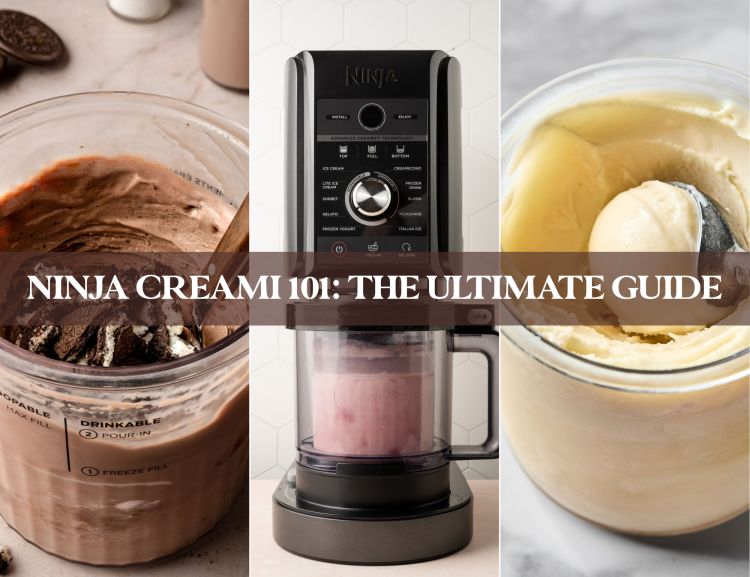
Ninja Creami 101: The Ultimate Guide
If you still have questions, I created a whole guide so you can easily find tips, tricks, and solutions to any of your Ninja Creami questions!
shop this post
 Buy Now →
  Buy Now →
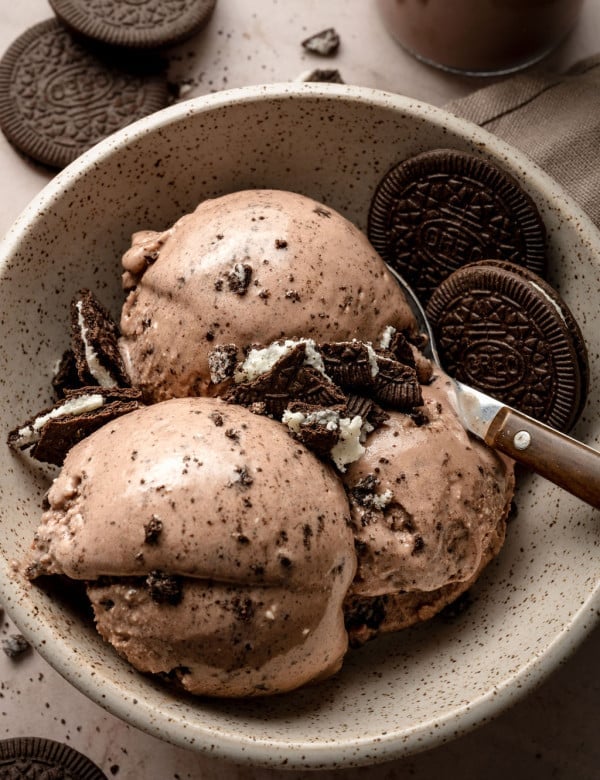
Before You Begin! If you make this, please leave a review and rating letting us know how you liked this recipe! This helps our business thrive & continue providing free recipes.
Chocolate Ice Cream (Ninja Creami)
Ingredients
- 2 Tbsp. (1 oz.) full-fat cream cheese (softened)
- ⅓ – ½ cup sugar (use more or less depending on how sweet you want your ice cream)
- 2-3 Tbsp. cocoa powder (I like 3 for really chocolatey!)
- 1 tsp. vanilla extract
- 3/4 cup heavy cream
- 1 cup chocolate milk (or whole milk/milk of choice)
- Mix-ins or toppings: brownie, mini chocolate chips, cookie dough, chocolate syrup, magic shell, etc.
Last step! If you make this, please leave a review and rating letting us know how you liked this recipe! This helps our business thrive & continue providing free recipes.
Instructions
- Microwave cream cheese: If not softened to room temperature, microwave the cream cheese for just 10 seconds.2 Tbsp. (1 oz.) full-fat cream cheese
- Blend: Add the cream cheese and remaining ingredients to a blender, and blend until smooth. It won’t take longer than 20-30 seconds. If you blend too long, it gets airy and foamy and won’t fit into the Creami pint.⅓ – ½ cup sugar, 1 tsp. vanilla extract, 3/4 cup heavy cream, 1 cup chocolate milk, 2-3 Tbsp. cocoa powder

- Alternate method if you don’t have a blender: To the softened cream cheese, add the sugar, cocoa, and vanilla. Whisk or use a rubber spatula to combine it. Gradually and slowly whisk in the cream and milk until the sugar is dissolved. You’ll need to whisk well!
- Both methods – Freeze: Pour mixture into an empty CREAMi™ Pint. Freeze the pint on a level surface in the freezer, with the lid off, for 24 hours. (freezing with the lid on creates a hump at the top of the ice cream, which can damage the blade, so be sure to leave it off).
- Assemble: Remove the pint from the freezer, place it in the outer bowl, and lock the lid on top. Place the bowl assembly on the motor base, twist the handle right to raise the platform, and lock it in place.
- Spin it! Select Ice Cream. It shouldn’t need another respin but if it does, re-spin 1x. Enjoy as is or follow the next step for mix-ins.
- Mix-ins: Use a spoon to create a small hole in the center, about 1½ inches wide. Place your favorite mix-ins in the center. Run the Mix-in program one time.Mix-ins or toppings: brownie, mini chocolate chips, cookie dough, chocolate syrup, magic shell, etc.
- Enjoy: Remove the pint and enjoy right away with any more mix-ins on top!
Notes
- Prep in advance: Make sure to allow your pint at least 24 hours to freeze before spinning.
- Respins: This recipe shouldn’t need an additional spin but if your ice cream isn’t smooth and creamy after the first spin, you can run a respin cycle until you get your desired consistency.
- Freeze with no lid: It’s important to freeze the pint on a level surface and without the lid. If you freeze it with the lid on, it can form a hump on the top which can damage the blade when you put it in the machine to spin.
- Don’t overfill the container: Make sure not to overfill the pint container. The ice cream will expand in volume as it spins so don’t worry if it looks like the pint isn’t initially full.
Nutrition Information
Nutritional information is provided as a courtesy and is automatically calculated. It should only be construed as an estimate rather than a guarantee. Ingredients can vary and Kroll’s Korner can’t make any guarantees to the accuracy of this information.
📸 Photography by Creating Kaitlin

This is my favorite recipe for chocolate ice cream! The flavor and consistency is better than all the others I’ve tried! I used Fairlife chocolate protein shake for the chocolate milk, adding 30g of protein! It’s truly the best ice cream I’ve ever had!
aw thank you sooo so much!! 🙂
I love this recipe! It’s amazing! Thank you!
So happy to hear this, Alicia!! 🫶🏻
Great recipe, I change the choc Milk to a protein shake and the heavy cream to coconut cream. Any ideas for them turning out powdered? Every recipe I make after the first spin it’s like a powder, I usually add some mole and respin, but curious if you’ve had this issue ever?
Thank you so much! I have a whole post dedicated to common questions: https://krollskorner.com/techniques/ninja-creami-guide/ but There are several reasons your Creami might have turned out icy:
1. Using too much liquid: Using just almond milk, water, or low-fat milk without anything to add body (like pudding mix, protein powder, or a creamy add-in) often leads to iciness. To fix, add a bit of sugar-free pudding mix, a dash of xanthan gum, or a tablespoon of Greek yogurt or cottage cheese to thicken it up.
2. Base didn’t freeze correctly: If your freezer is too cold or your pint isn’t level while freezing, you might get uneven ice formation. Always freeze your pint with the lid off on a flat surface for 24 hours.
3. Not enough sugar or sweetener: Sugar helps reduce iciness by lowering the freezing point. If your base is very low in sugar or uses low-calorie sweeteners (like stevia or monk fruit drops), you will most likely get a harder texture. Try using sweeteners with more volume (like allulose, erythritol, or sugar-free syrups) or adding a splash of milk when re-spining for extra softness.
4. Re-Spin: Some bases, especially lower calorie or higher protein recipes, are meant to be re-spun. If your pint is crumbly or icy after the first spin, don’t worry! Use the Re-Spin button once (or even twice) to get your desired creamy texture.
If your Creami is super dry and crumbly it’s probably because it just needs to soften a bit before spinning again. A few ways to avoid this is to run it under hot water for a few seconds before spinning or let it sit on the counter for 10-15 minutes before spinning. You can also add a tablespoon of milk after the initial spin before you Re-spin the help get a creamy consistency. Also, don’t be afraid to Re-spin 2-3 times if your base needs a little help!