Brown Butter Banana Bread
This post may contain affiliate links. Please read our disclosure policy.

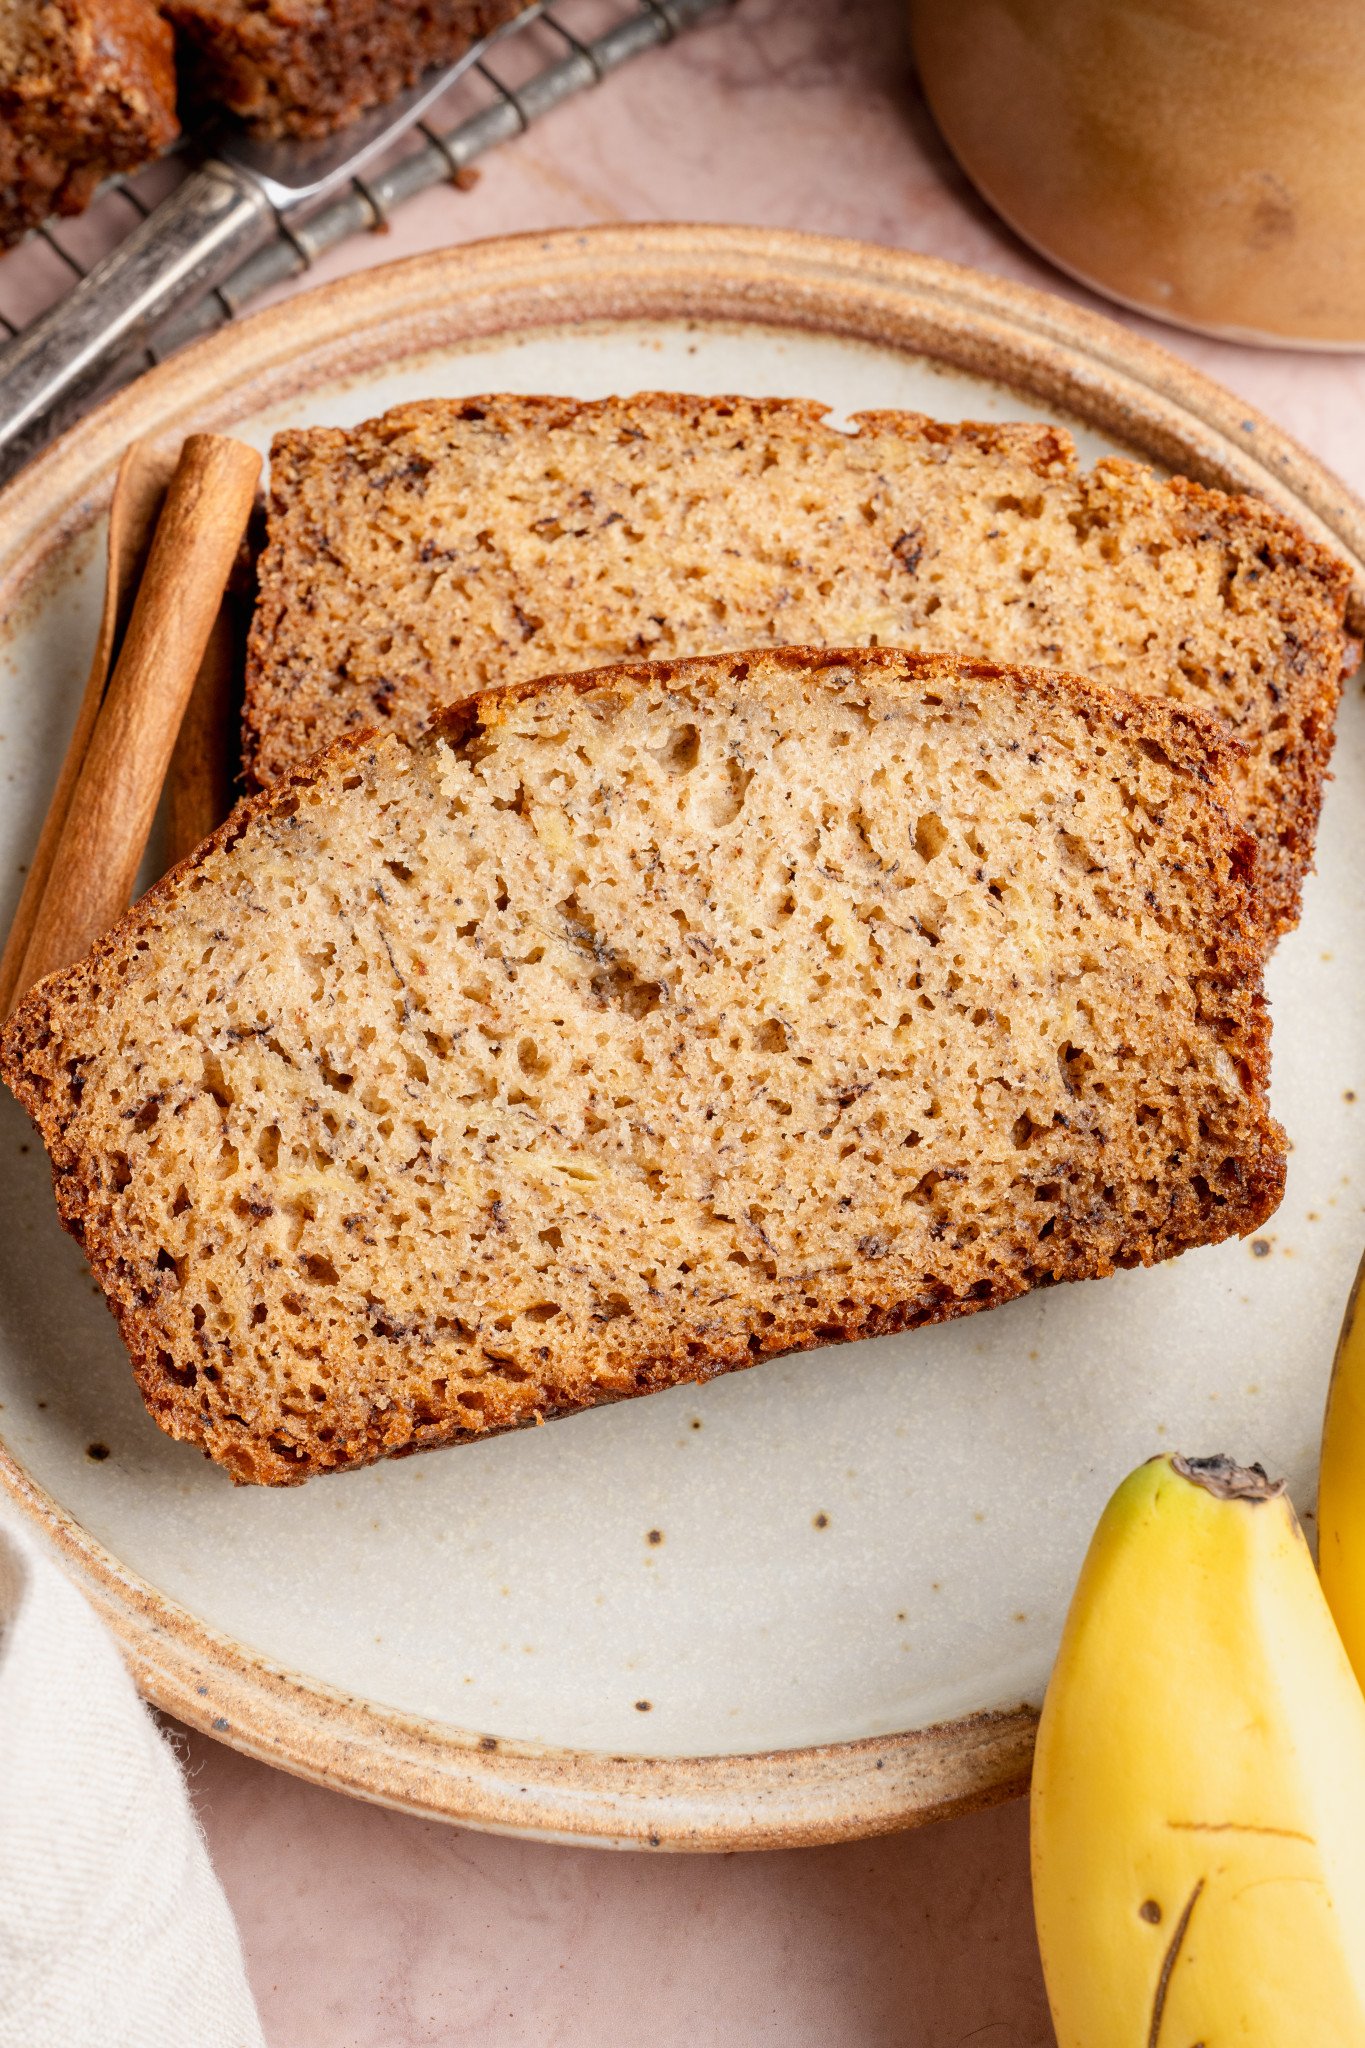
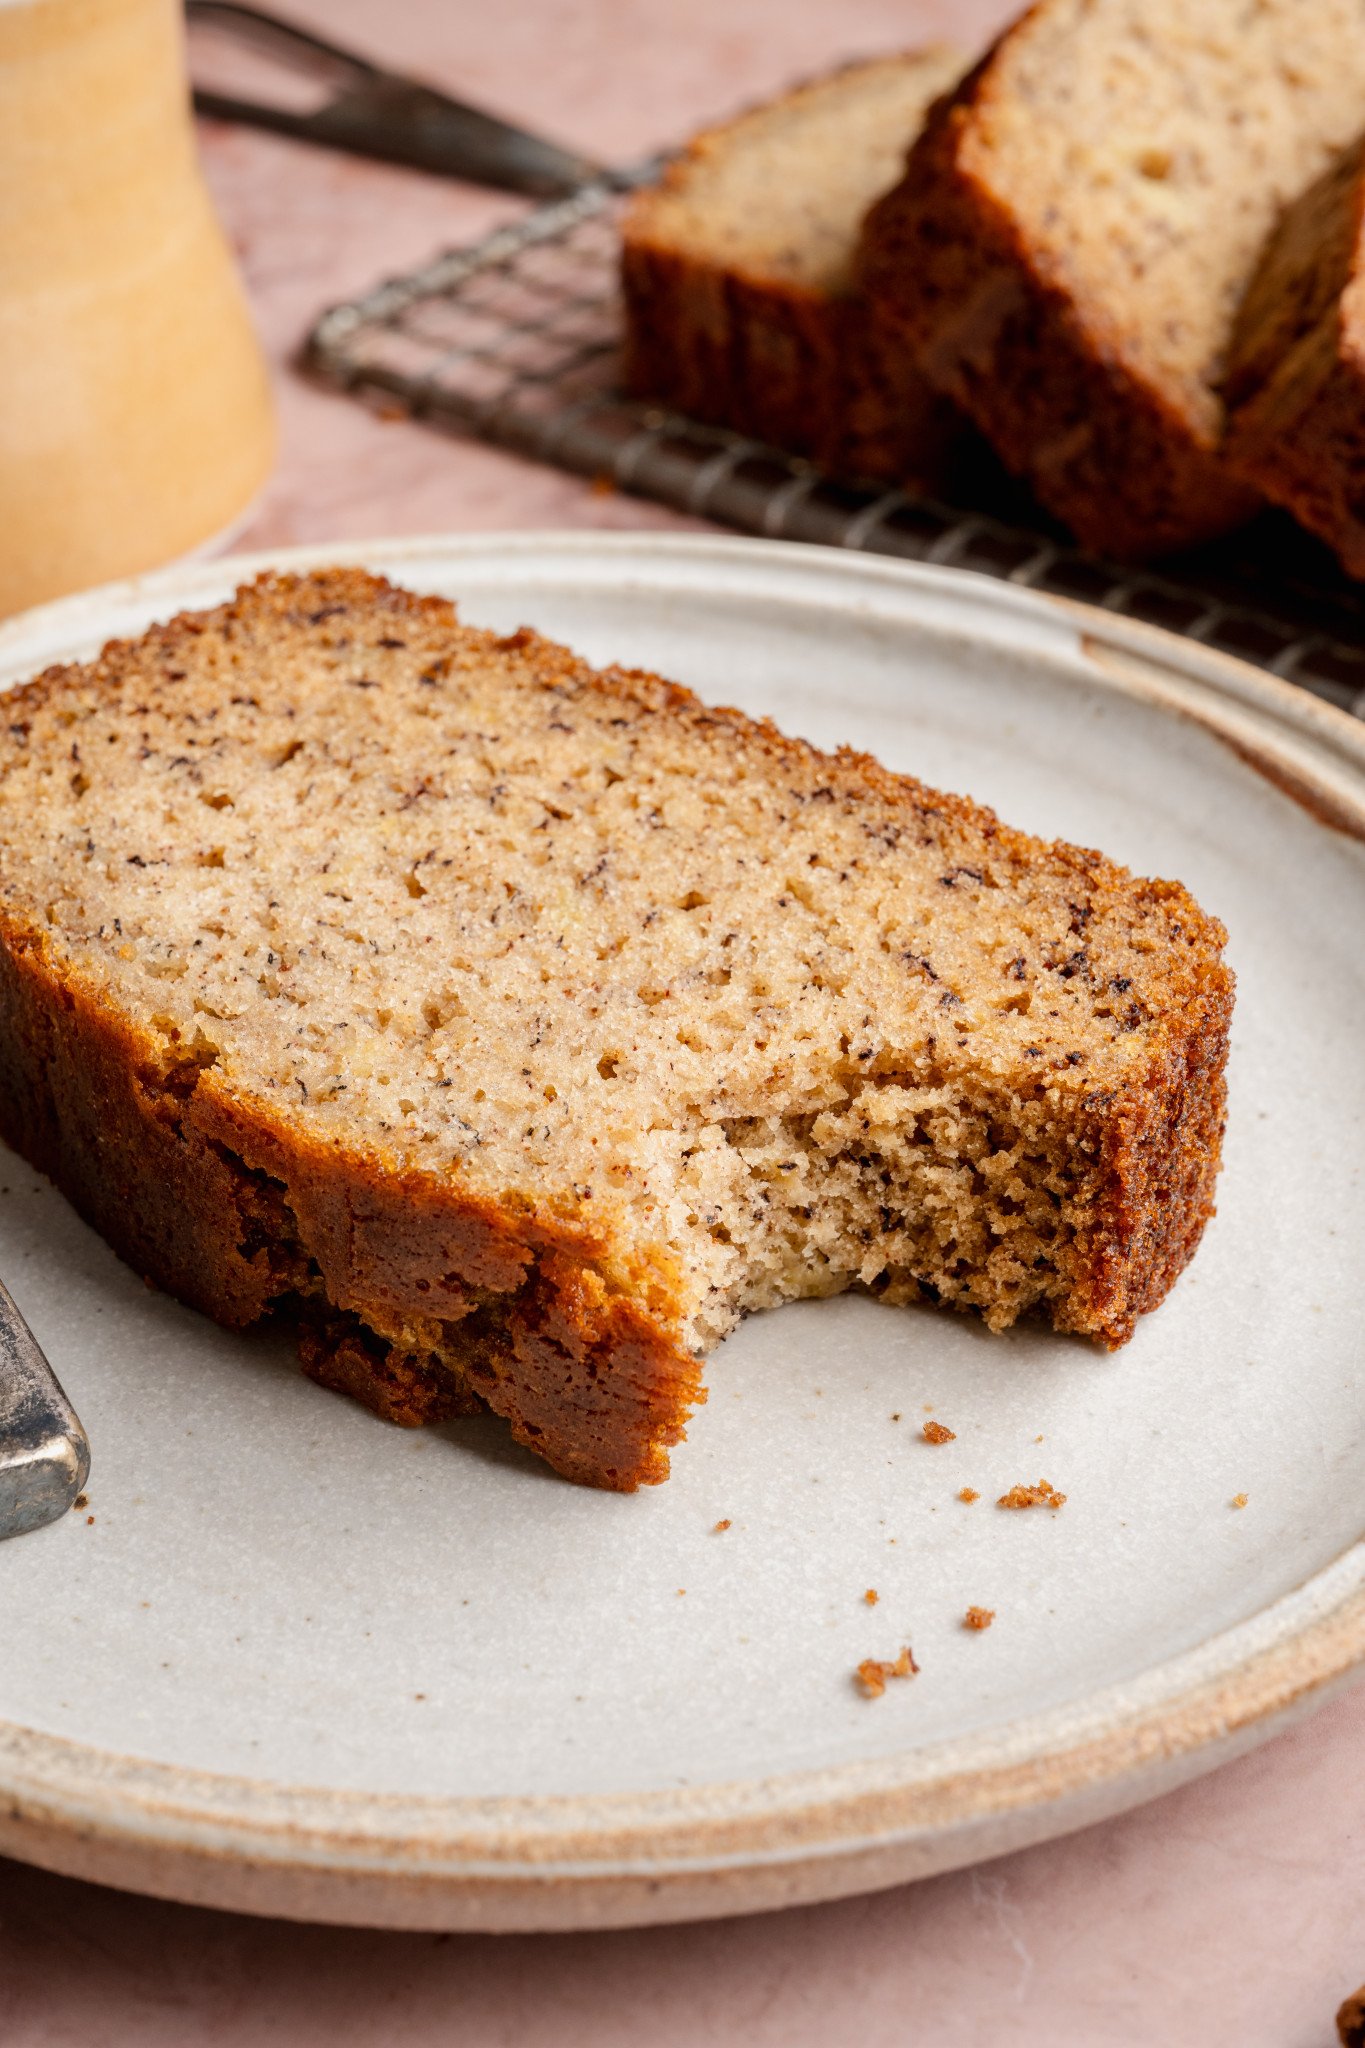
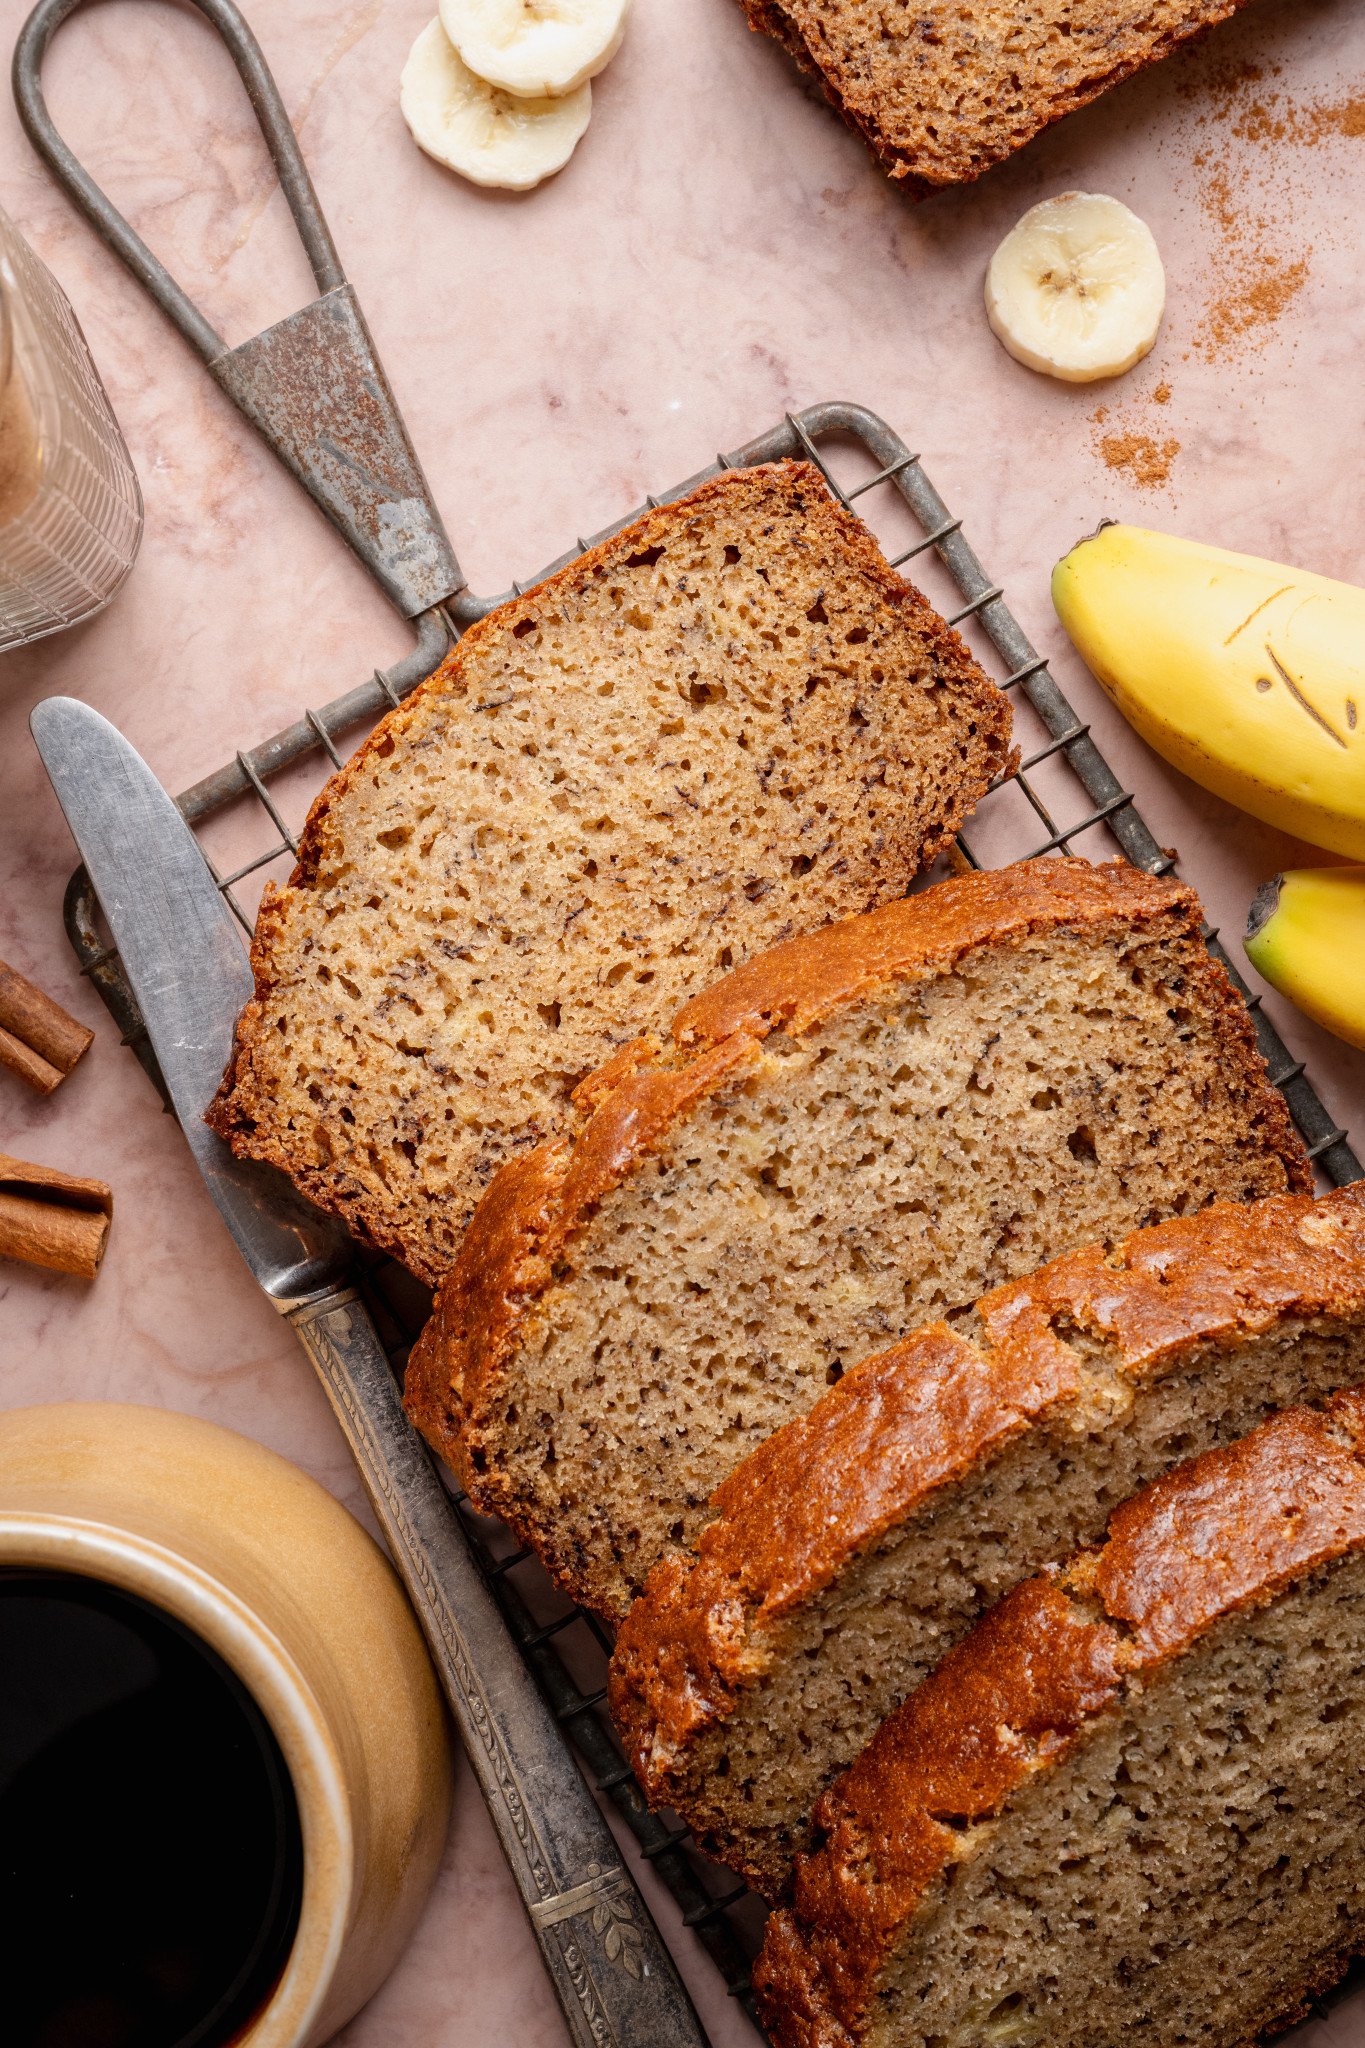
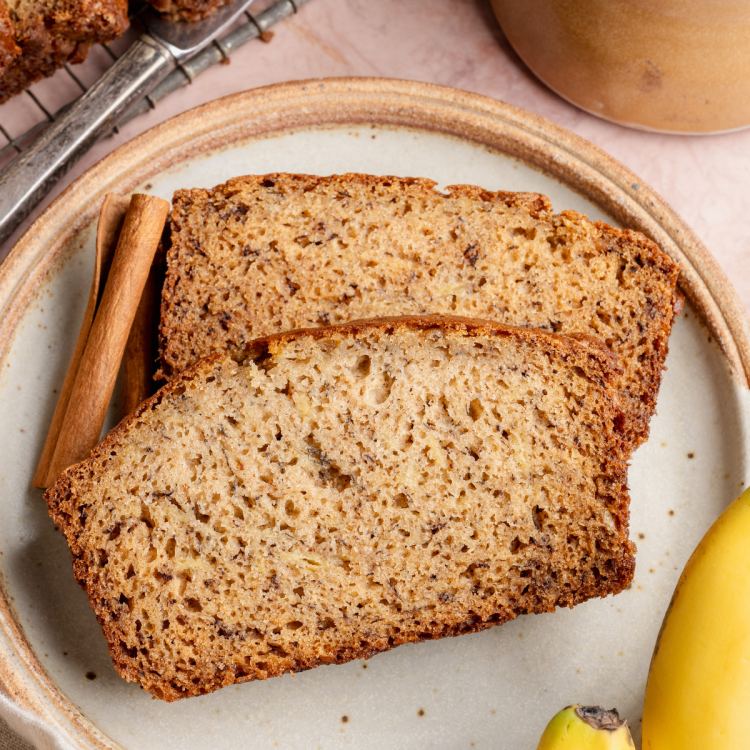
This Brown Butter Banana Bread elevates my classic banana bread recipe in the best way. Browning the butter adds a rich, nutty flavor that pairs perfectly with the natural sweetness of the ripe bananas. Whether you enjoy a warm slice with your morning coffee or pack one for an easy afternoon snack, this banana bread is guaranteed to be a bright spot on any day. 🍌🧈
If you know me, you know banana bread is one of my all-time favorite baking recipes. It’s simple to make, always turns out delicious, and somehow manages to instantly boost my mood every time.
And if browning butter intimidates you, don’t worry! It’s super easy, and I walk you through it with step-by-step instructions in this post. Then, once you get the hang of it, you can also make my Chocolate Dipped Brown Butter Cookies, Zucchini Cake with Brown Butter Frosting, Brown Butter Caramel Snickerdoodles, Brown Butter Chocolate Chunk Blondies, or my Brown Butter Snickerdoodle Cookie Skillet!
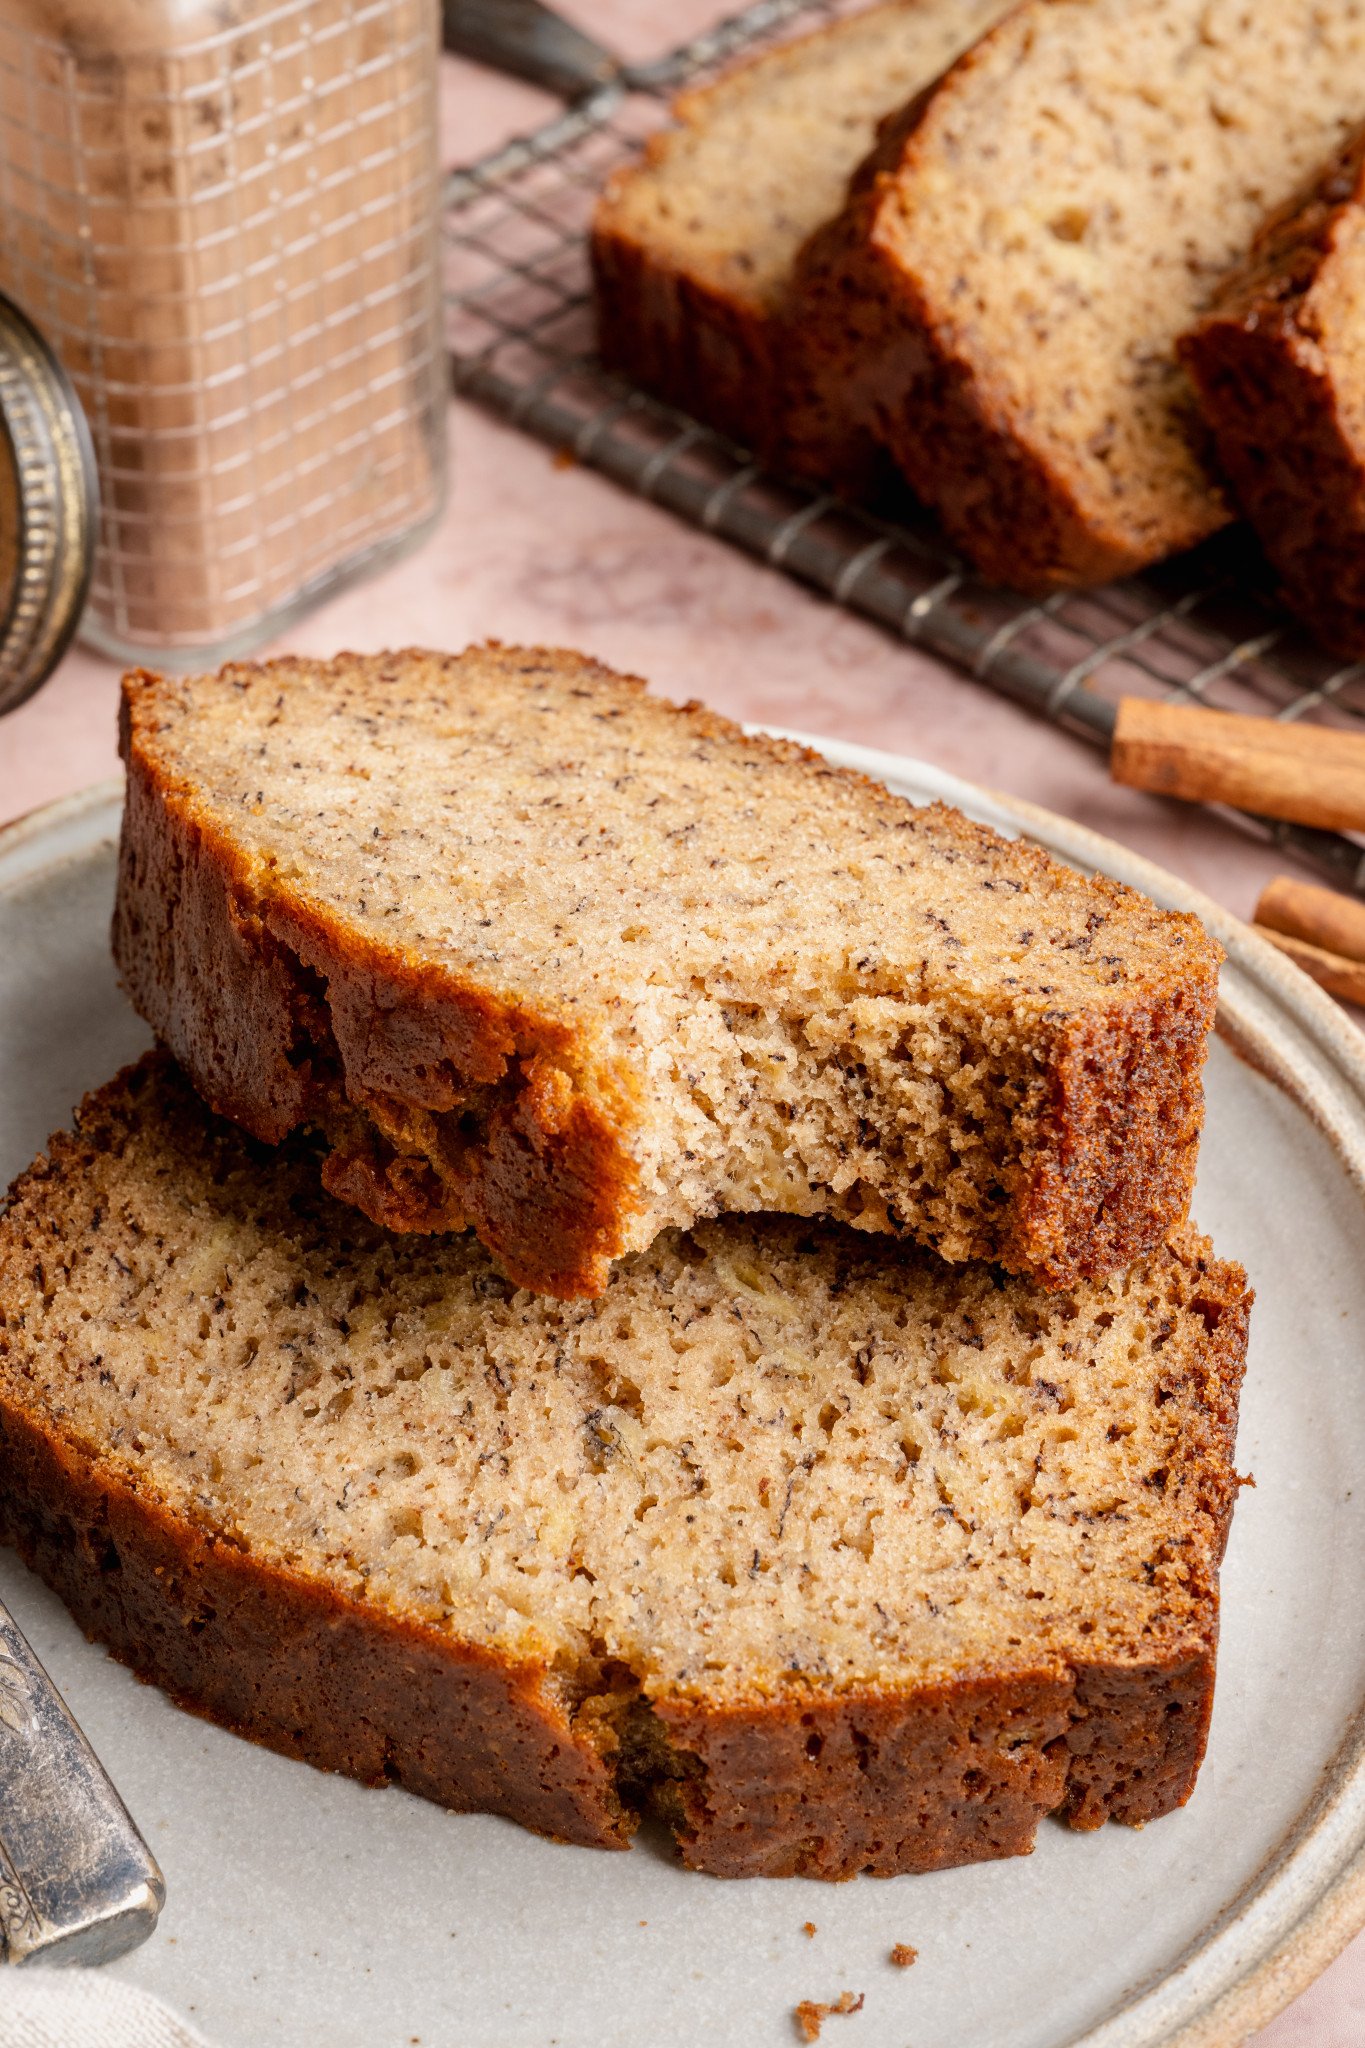

 Table Talk with Tawnie

So here’s a serious question for you: how do you enjoy your banana bread? Do you enjoy it with coffee for breakfast, as an afternoon snack, or with a scoop of vanilla ice cream for dessert? The funny thing is, no matter how it’s supposed to be eaten, I inevitably find myself always slicing off “just a tiny piece” throughout the entire day, until suddenly half the loaf is gone. For me, there’s just something about warm banana bread that makes it impossible to resist, and this brown butter banana recipe is definitely no exception!🍌💛
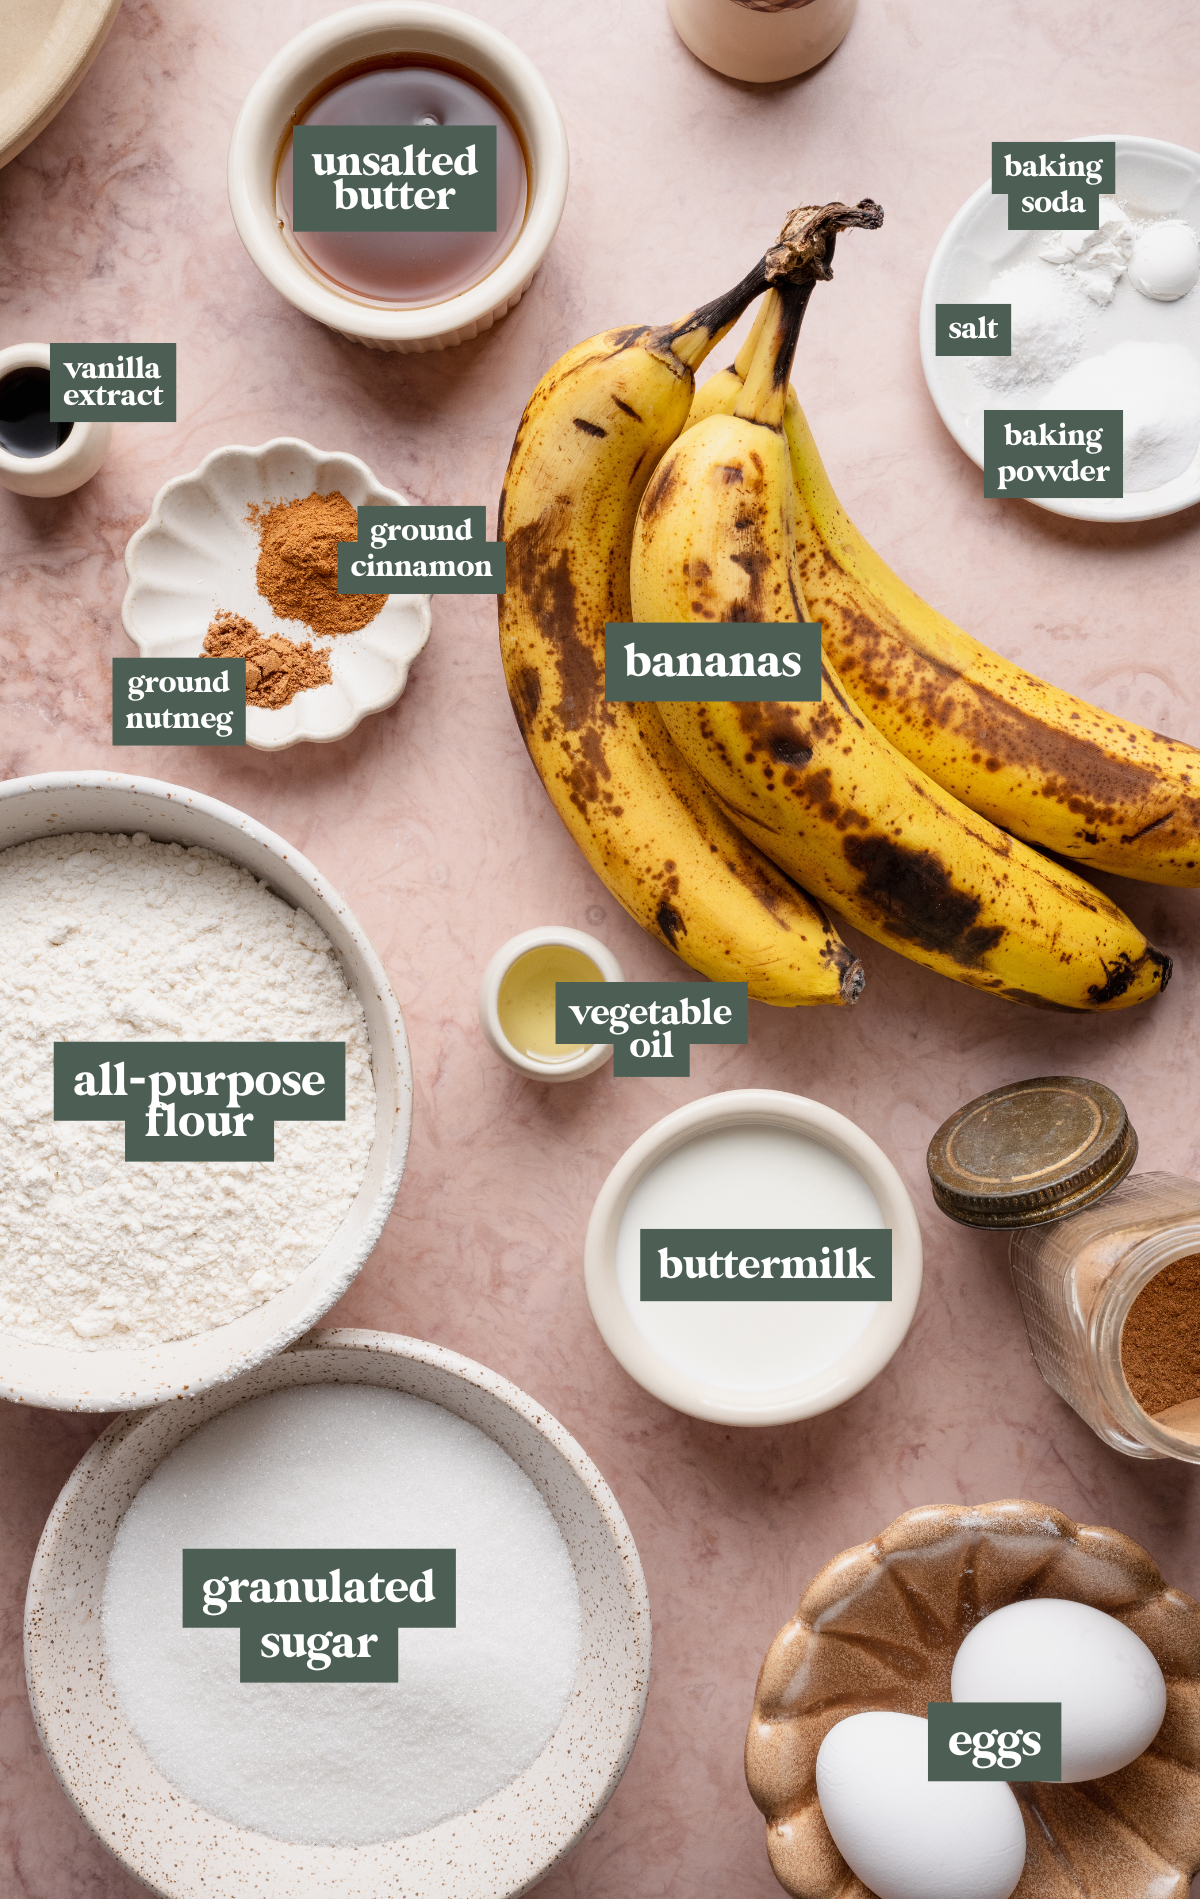
- Butter: Make sure to use unsalted butter and visit this post on how to brown butter for an easy tutorial.
- All-purpose flour: All-purpose flour is the only flour I’ve tested this banana bread recipe with. As always, it’s very important to make sure you’re using the spoon and level method to measure your flour when baking (you can also use a kitchen scale to weigh your ingredients). Too much flour can result in drier, denser bread, which you definitely don’t want with this!
- Bananas: Your bananas should have lots of brown spots or streaks on them. You want to use ripe or over-ripe bananas so they will mash into a puree, which allows them to distribute more evenly throughout the batter. Also, the riper the bananas, the sweeter and richer the banana taste, which will enhance the overall flavor of the bread.
- Eggs: Be sure to use a room-temperature eggs so they mix evenly and create a fluffier bread.
- Buttermilk: Buttermilk adds a subtle tang that helps to balance the sweetness of the bananas and brown butter while helping create a tender, moist crumb. Its acidity also reacts with the leavening agents to give the bread a soft, fluffy texture! Make sure your buttermilk is room temperature.
Step-by-Step Directions
(For the full recipe, scroll down to the recipe card below)
Mix wet ingredients
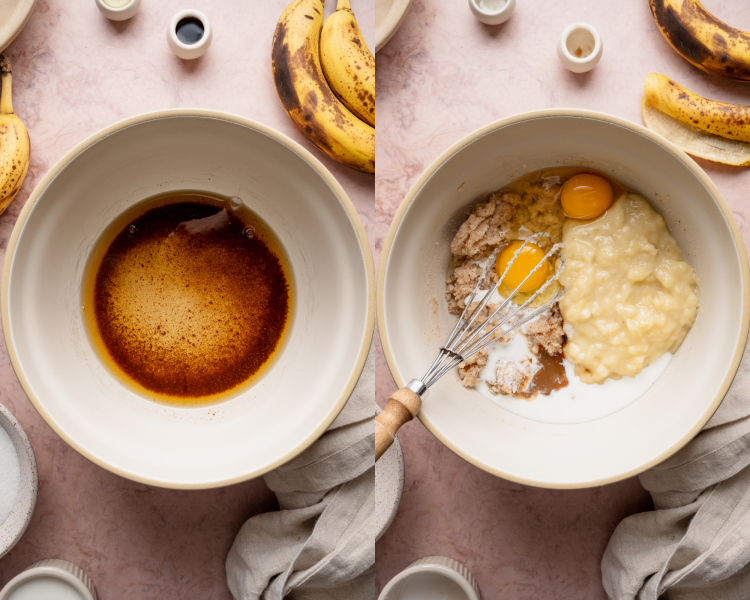
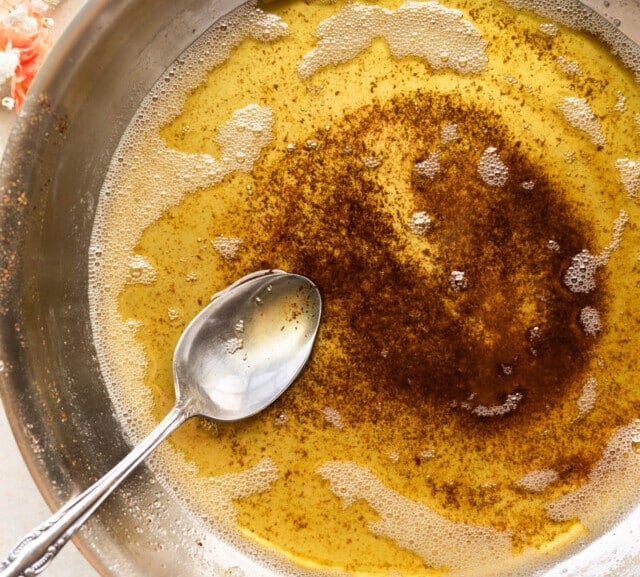
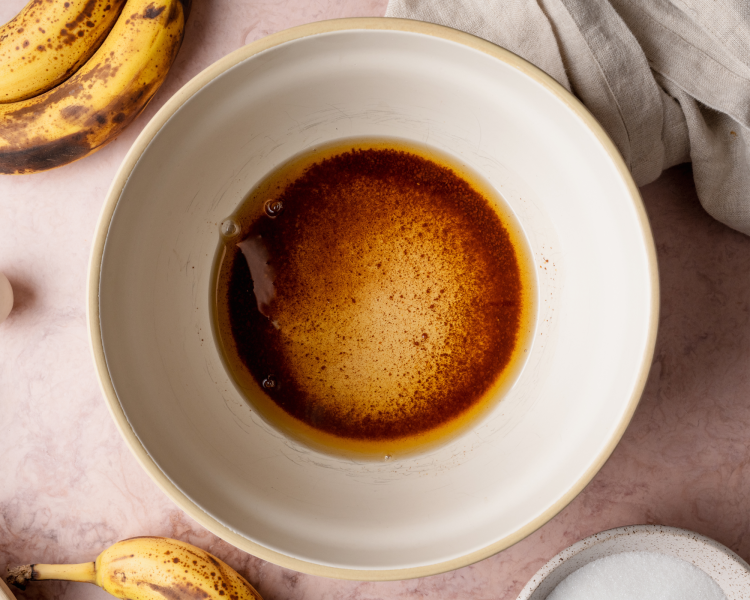
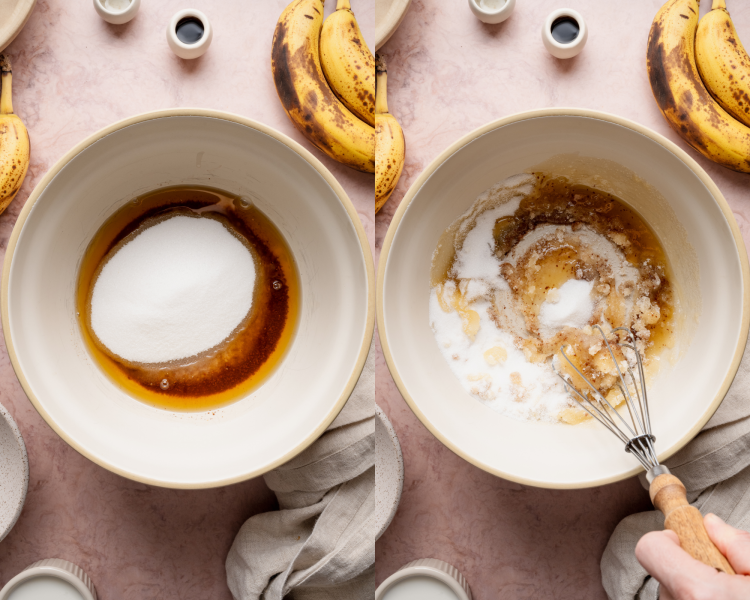
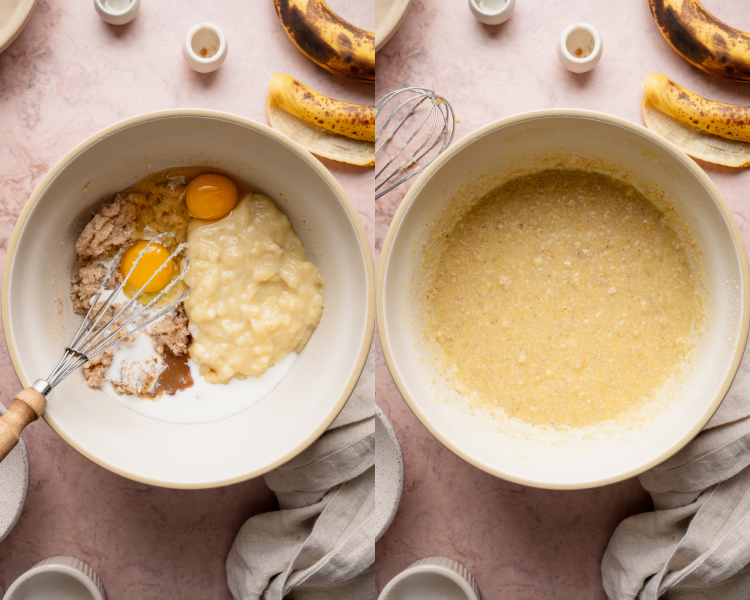
Start by browning the butter🧈 (see this post on how to brown butter). Once butter has slightly cooled, whisk it together with the sugar and oil. Then add the rest of the wet ingredients and mix to combine.

Whisk dry ingredients
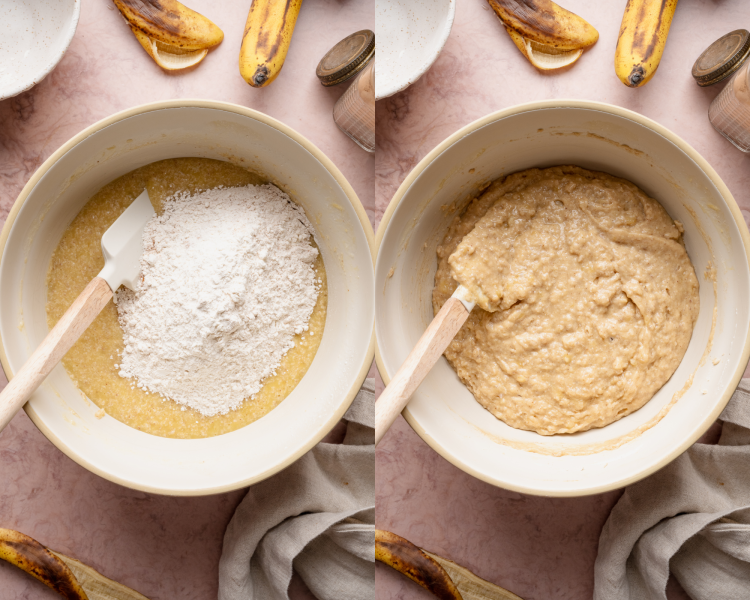
In a separate bowl, whisk together the dry ingredients.
Combine wet and dry
Gently combine the wet and dry ingredients. Do not over-mix. Then let the batter rest for 5-10 minutes.
Bake
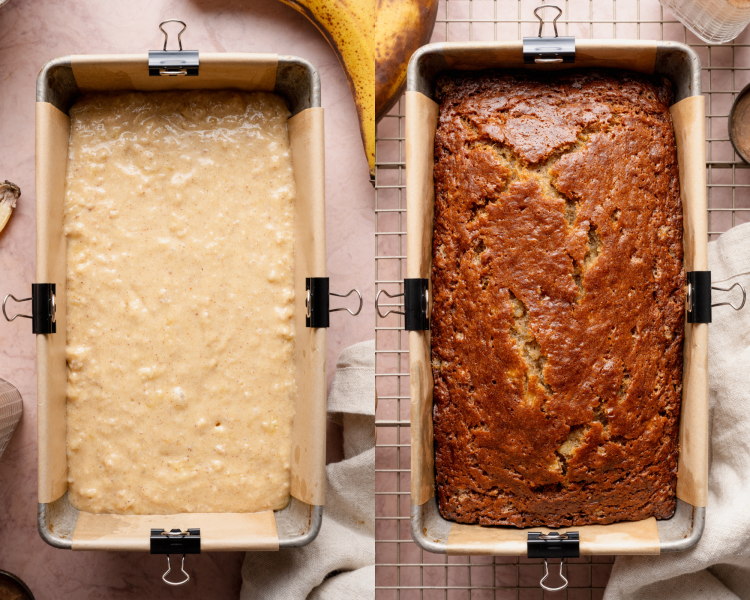
Pour the batter into the prepared pan and bake for ~60 minutes. Tip: Cover the top with foil about halfway through to prevent over-browning.
Let cool & enjoy!
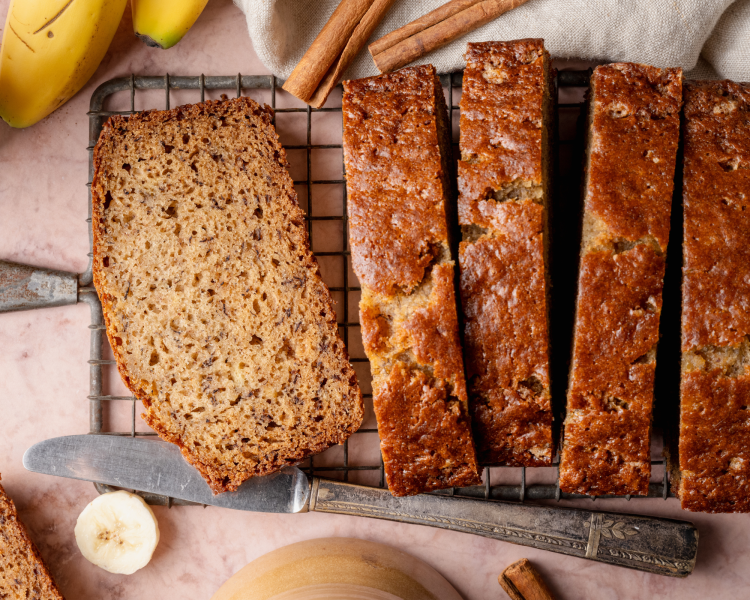
Let the bread cool in the pan for 10 minutes, then transfer to a wire rack and let cool completely before slicing. YUM!😋
Expert Tips
- Allow the brown butter to cool: Allow the brown butter to cool slightly before whisking it into the rest of the wet ingredients.
- Mash bananas thoroughly: Mash the bananas well to ensure a smooth and consistent banana flavor throughout the bread. A few small lumps are okay. I usually like to use my hand mixer to get them perfectly mashed.
- Don’t add too much banana: I always measure out 1¼ cup mashed banana for my recipe, which is usually 4 small or 3 medium bananas (or 300 grams if you have a food scale). Using too much mashed banana can lead to texture issues and the bread may not cook or rise properly.
- Room temperature ingredients: Make sure your buttermilk and eggs are room temperature to ensure even mixing.
- Don’t over-mix: Mix the wet and dry ingredients until just combined. Overmixing can lead to a tough and dense texture.
- Ripening bananas quickly: If you don’t have ripe bananas on hand, you can ripen them quickly by placing them in a paper bag for a day or two. The ethylene gas they produce will speed up the ripening process.
- Resting Time: Allow your banana bread to rest for a few hours or even overnight before slicing. This resting time allows the flavors to meld and results in a moister and more flavorful loaf.
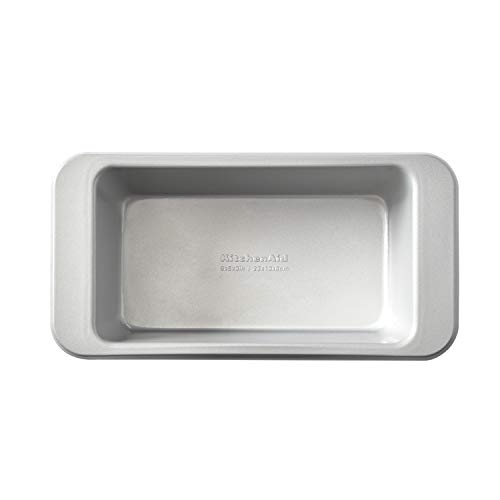
- Loaf pan: Light-colored pans reflect more heat and can yield a lighter crust, compared to dark pans. I have not tested this recipe in a glass or ceramic loaf pan, those pans will require an adjustment to the baking times.
Variations / Substitutions
- Add mini chocolate chips: Use the mini chocolate chips so they don’t sink to the bottom of the bread. If you only have regular chocolate chips, toss them in a little flour before folding into the batter. 1/2 cup to 3/4 cup is plenty.
- Nutty Banana Bread: Incorporate chopped nuts such as walnuts, pecans, or almonds for a crunchy and nutty flavor. Toasting the nuts beforehand can enhance their flavor.
- Gluten-free: Use 1:1 gluten-free flour in place of the all-purpose flour to make this banana bread gluten-free.
- Muffins: If you want to turn this recipe into muffins, pour batter into a greased muffin tin and bake at 425°F for 5 minutes. Then, without opening the oven, lower the temperature to 350°F and bake for an additional 12-15 minutes.
How To Brown Butter
Learn how to brown butter with my easy step-by-step guide. It’s not hard, you can do it! This one ingredient transforms your baked goods or savory dishes into something magical. This nutty, amber brown, toasty liquid gold will be a staple in your kitchen if it’s not already!
Storage / Freezing
- Room temperature: Will keep for 2-3 days at room temperature. Wrap the banana bread in plastic wrap, then place it in an airtight container, such as a plastic storage container with a tight-fitting lid or a resealable plastic bag. If you’re stacking multiple slices or pieces, separate them with sheets of parchment paper or wax paper to prevent sticking.
- Refrigerator: Wrap and store in the fridge for up to 1 week.
- Freezer: Wrap the banana bread in plastic wrap or foil and then place it in an airtight freezer-safe container or a heavy-duty freezer bag for up to 2-3 months. Be sure to label and date to keep track of how long it has been frozen. When ready to enjoy, remove it from the freezer and let it thaw at room temperature for a few hours or overnight. Or, microwave a slice!
shop this post
 Buy Now →
  Buy Now →
 More Banana Bread Recipes You’ll Love

Before You Begin! If you make this, please leave a review and rating letting us know how you liked this recipe! This helps our business thrive & continue providing free recipes.
Brown Butter Banana Bread
Ingredients
- 1/2 cup unsalted butter (browned and slightly cooled)
- 1 cup granulated sugar
- 1 Tbsp. vegetable oil
- 2 large eggs (room temperature)
- 1¼ cups mashed overripe bananas (about 3 medium bananas)
- 1/3 cup buttermilk (room temperature)
- 2 tsp. vanilla extract
- 2 cups all-purpose flour (spooned and leveled)
- 1 tsp. baking soda
- 1/2 tsp. baking powder
- 1 tsp. kosher salt (or 1/2 tsp fine sea salt)
- 1/2 tsp. ground cinnamon
- 1/4 tsp. ground nutmeg
Last step! If you make this, please leave a review and rating letting us know how you liked this recipe! This helps our business thrive & continue providing free recipes.
Instructions
- Preheat the oven: Preheat the oven to 350°F. Line a light colored aluminum 9×5-inch loaf pan with parchment paper or grease well.
- Brown the butter: For a detailed tutorial, see this post on how to brown butter. Pour the butter in a large mixing bowl and allow the butter to cool slightly, ~10-15 minutes. Start Timer1/2 cup unsalted butter

- Mix the butter and sugar: Whisk together the browned butter, granulated sugar, and oil until well combined, about 30 seconds.1 cup granulated sugar, 1 Tbsp. vegetable oil
- Add the remaining wet ingredients: Then whisk in the eggs, mashed bananas, buttermilk, and vanilla until smooth.
- Combine dry ingredients: In a separate bowl, whisk together the flour, baking soda, baking powder, salt, cinnamon, and nutmeg.2 cups all-purpose flour, 1 tsp. baking soda, 1/2 tsp. baking powder, 1 tsp. kosher salt, 1/2 tsp. ground cinnamon, 1/4 tsp. ground nutmeg
- Finish the batter: Add the dry ingredients to the wet ingredients and gently fold until just combined. Do not over-mix. Let this rest for 5-10 minutes to hydrate the flour, fold again 2 times after it rests. Start Timer
- Bake: Pour the batter into the prepared loaf pan. Bake for ~60 minutes, covering the top with foil about halfway through to prevent over-browning. The banana bread is done when a toothpick inserted into the center comes out clean with a few moist crumbs. Start Timer
- Cool: Let the bread cool in the pan for 10 minutes, then transfer to a wire rack to cool completely before slicing. YUM! This bread stays really moist and tender even on days 2-3! Start Timer
Notes
- Allow the brown butter to cool: Allow the brown butter to cool slightly before whisking it into the rest of the wet ingredients.
- Mash bananas thoroughly: Mash the bananas well to ensure a smooth and consistent banana flavor throughout the bread. A few small lumps are okay. I usually like to use my hand mixer to get them perfectly mashed.
- Ripening bananas quickly: If you don’t have ripe bananas on hand, you can ripen them quickly by placing them in a paper bag for a day or two. The ethylene gas they produce will speed up the ripening process.
- Room temperature: Will keep for 2-3 days at room temperature. Wrap in plastic wrap and place the wrapped banana bread in an airtight container, such as a plastic storage container with a tight-fitting lid or a resealable plastic bag. If you’re stacking multiple slices or pieces, separate them with sheets of parchment paper or wax paper to prevent sticking.
- Refrigerator: Wrap and store in the fridge for up to 1 week.
- Freezer: Wrap the banana bread in plastic wrap or foil and then place it in an airtight freezer-safe container or a heavy-duty freezer bag for up to 2-3 months. Be sure to label and date to keep track of how long it has been frozen. When ready to enjoy, remove it from the freezer and let it thaw at room temperature for a few hours or overnight. Or, microwave a slice!
Nutrition Information
Nutritional information is provided as a courtesy and is automatically calculated. It should only be construed as an estimate rather than a guarantee. Ingredients can vary and Kroll’s Korner can’t make any guarantees to the accuracy of this information.
📸 Photography by Creating Kaitlin

I thought I didn’t like banana bread until I tried this recipe. The browned butter makes such a huge difference! It is the best banana bread I have ever had. Simply the best. No notes!
OMG what a kind review, thank you!! Sooo happy you found this recipe!
I was out of nutmeg so I substituted cinnamon…delicious! Also, I love your recipes!!
Yummm! Sounds great Kim, thank you!!
Seriously amazing! This is the only way I’ll make banana bread going forward!
The only change I made was adding chopped walnuts, because, well WALNUTS!
Thank you sooo so much Donna! Really glad you enjoyed it. Love the walnut addition! 🙂
Hello. I love making your banana bread with brown butter.
Is it just me or when I convert to metric the amount of banana is in grams but butter, flour and sugar are in ml which my scale really over calculated for some reason, the first time I made this recipe.
So sorry! That is now fixed!
Delicious banana bread!😋Thanks for tips throughout recipe. I’ve done brown butter before & love it. Enjoy your instagram site & recipes!
Looks amazing! Thank you so much Marcy 🙂 I appreciate you!
One of the best banana breads I’ve ever had. The recipe was the first one I came across that actually told you how much banana… not just 2/3. I think I was putting too much banana in before. This is all that’s left after 2 days!
Yayyy! So glad you enjoyed it 🙂 thank you!
If we make a Brown Butter Banana Bread with the addition of toasted nuts of preference, would we add 1 Cup? Do we need to add additional baking time? If the bananas equal more than 1 Cup, then what additions need to be made? More flour? Additional baking time?
Hello. You can add nuts without any other changes to the recipe. I would recommend making the recipe with the amount of banana I have suggested for best results. I hope you love it!