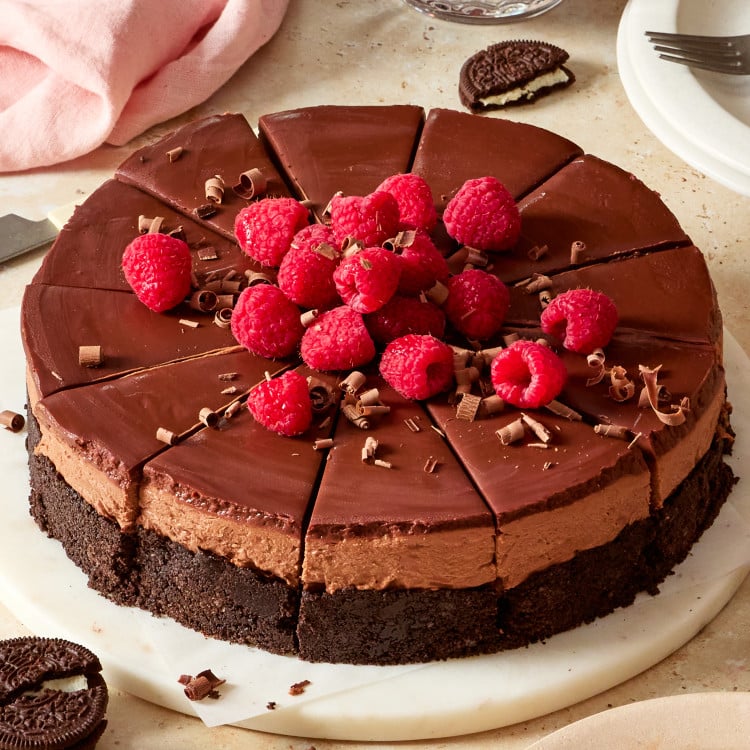
No-Bake Chocolate Cheesecake
This post may contain affiliate links. Please read our disclosure policy.
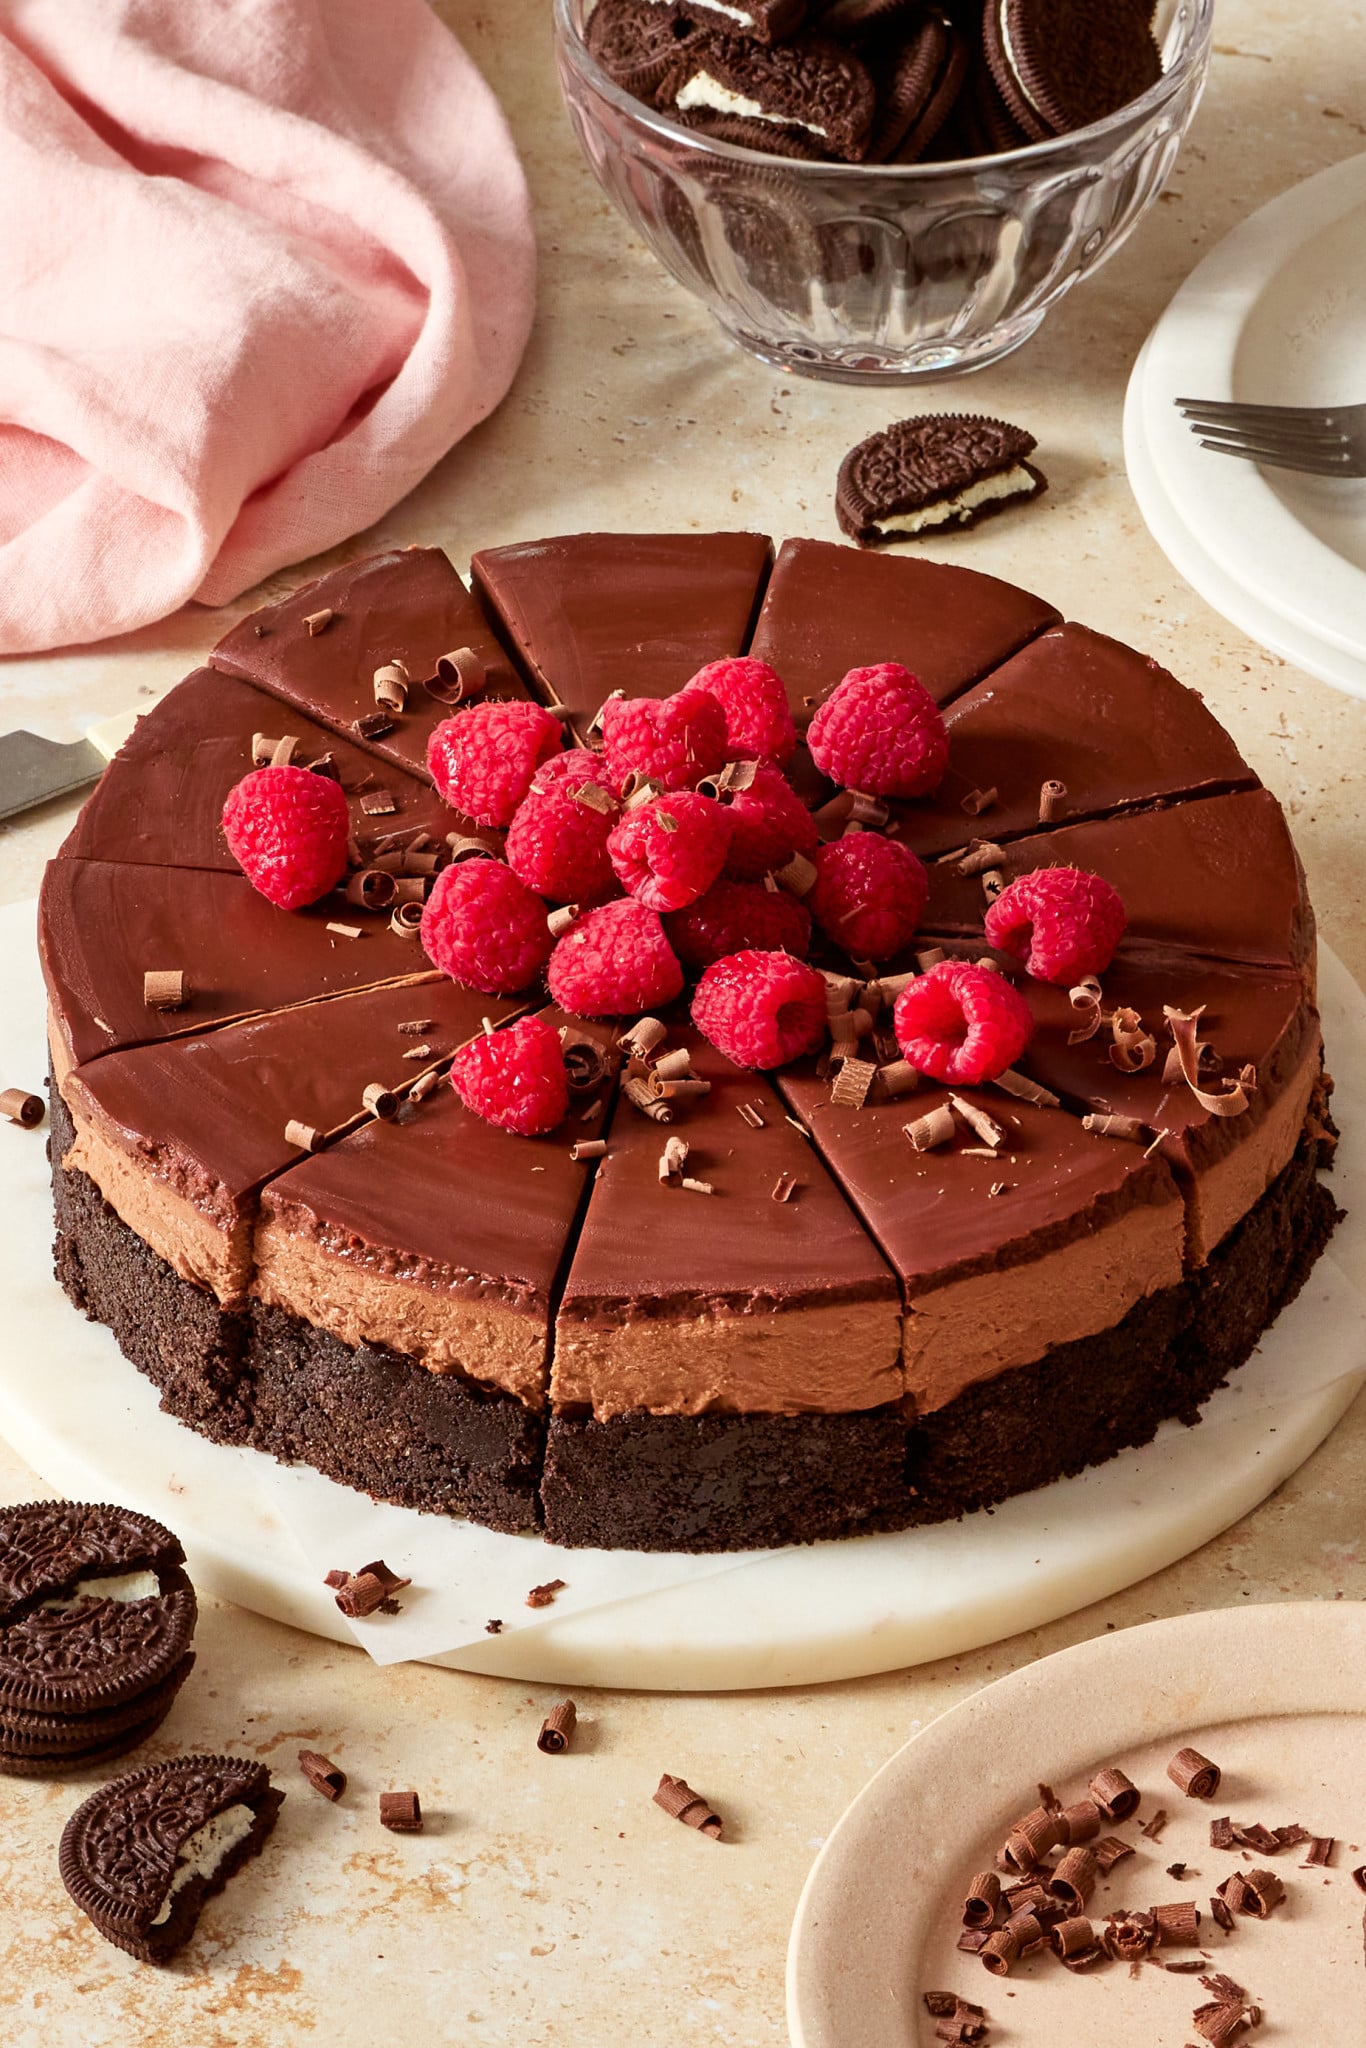
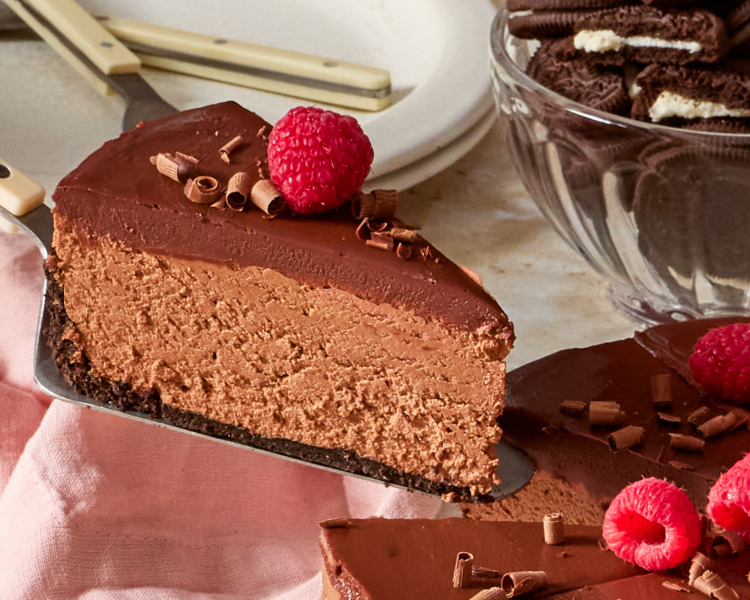
Rich, creamy, and loaded with chocolate flavor, this No-Bake Chocolate Cheesecake looks impressive but is surprisingly simple to make. It features a silky, velvety chocolate filling layered over a buttery Oreo cookie crust that gives you all the indulgence of a classic cheesecake, but with no oven required!
And if you’re looking over this recipe, don’t let the longer instructions intimidate you. I’ll guide you through each step so it’s completely doable, even if you’ve never made cheesecake before. The key is just allowing enough chill time. It’s actually why this is the perfect make-ahead dessert for holidays, gatherings, or anytime you need a stress-free sweet treat that still wows.
And if you love all things cheesecake, be sure to also try my Mini Cheesecake Bites, Basque Cheesecake Bars, Carrot Cake Cheesecake Bars, Peanut Butter Oreo Cheesecake Bites, No Bake Mini Biscoff Cheesecakes, No Bake Berry Cheesecake Bars, Strawberry Cheesecake Ice Cream, Caramel Apple Cheesecake Dip, Cheesecake Biscoff Cookies, or Cheesecake Banana Bread.
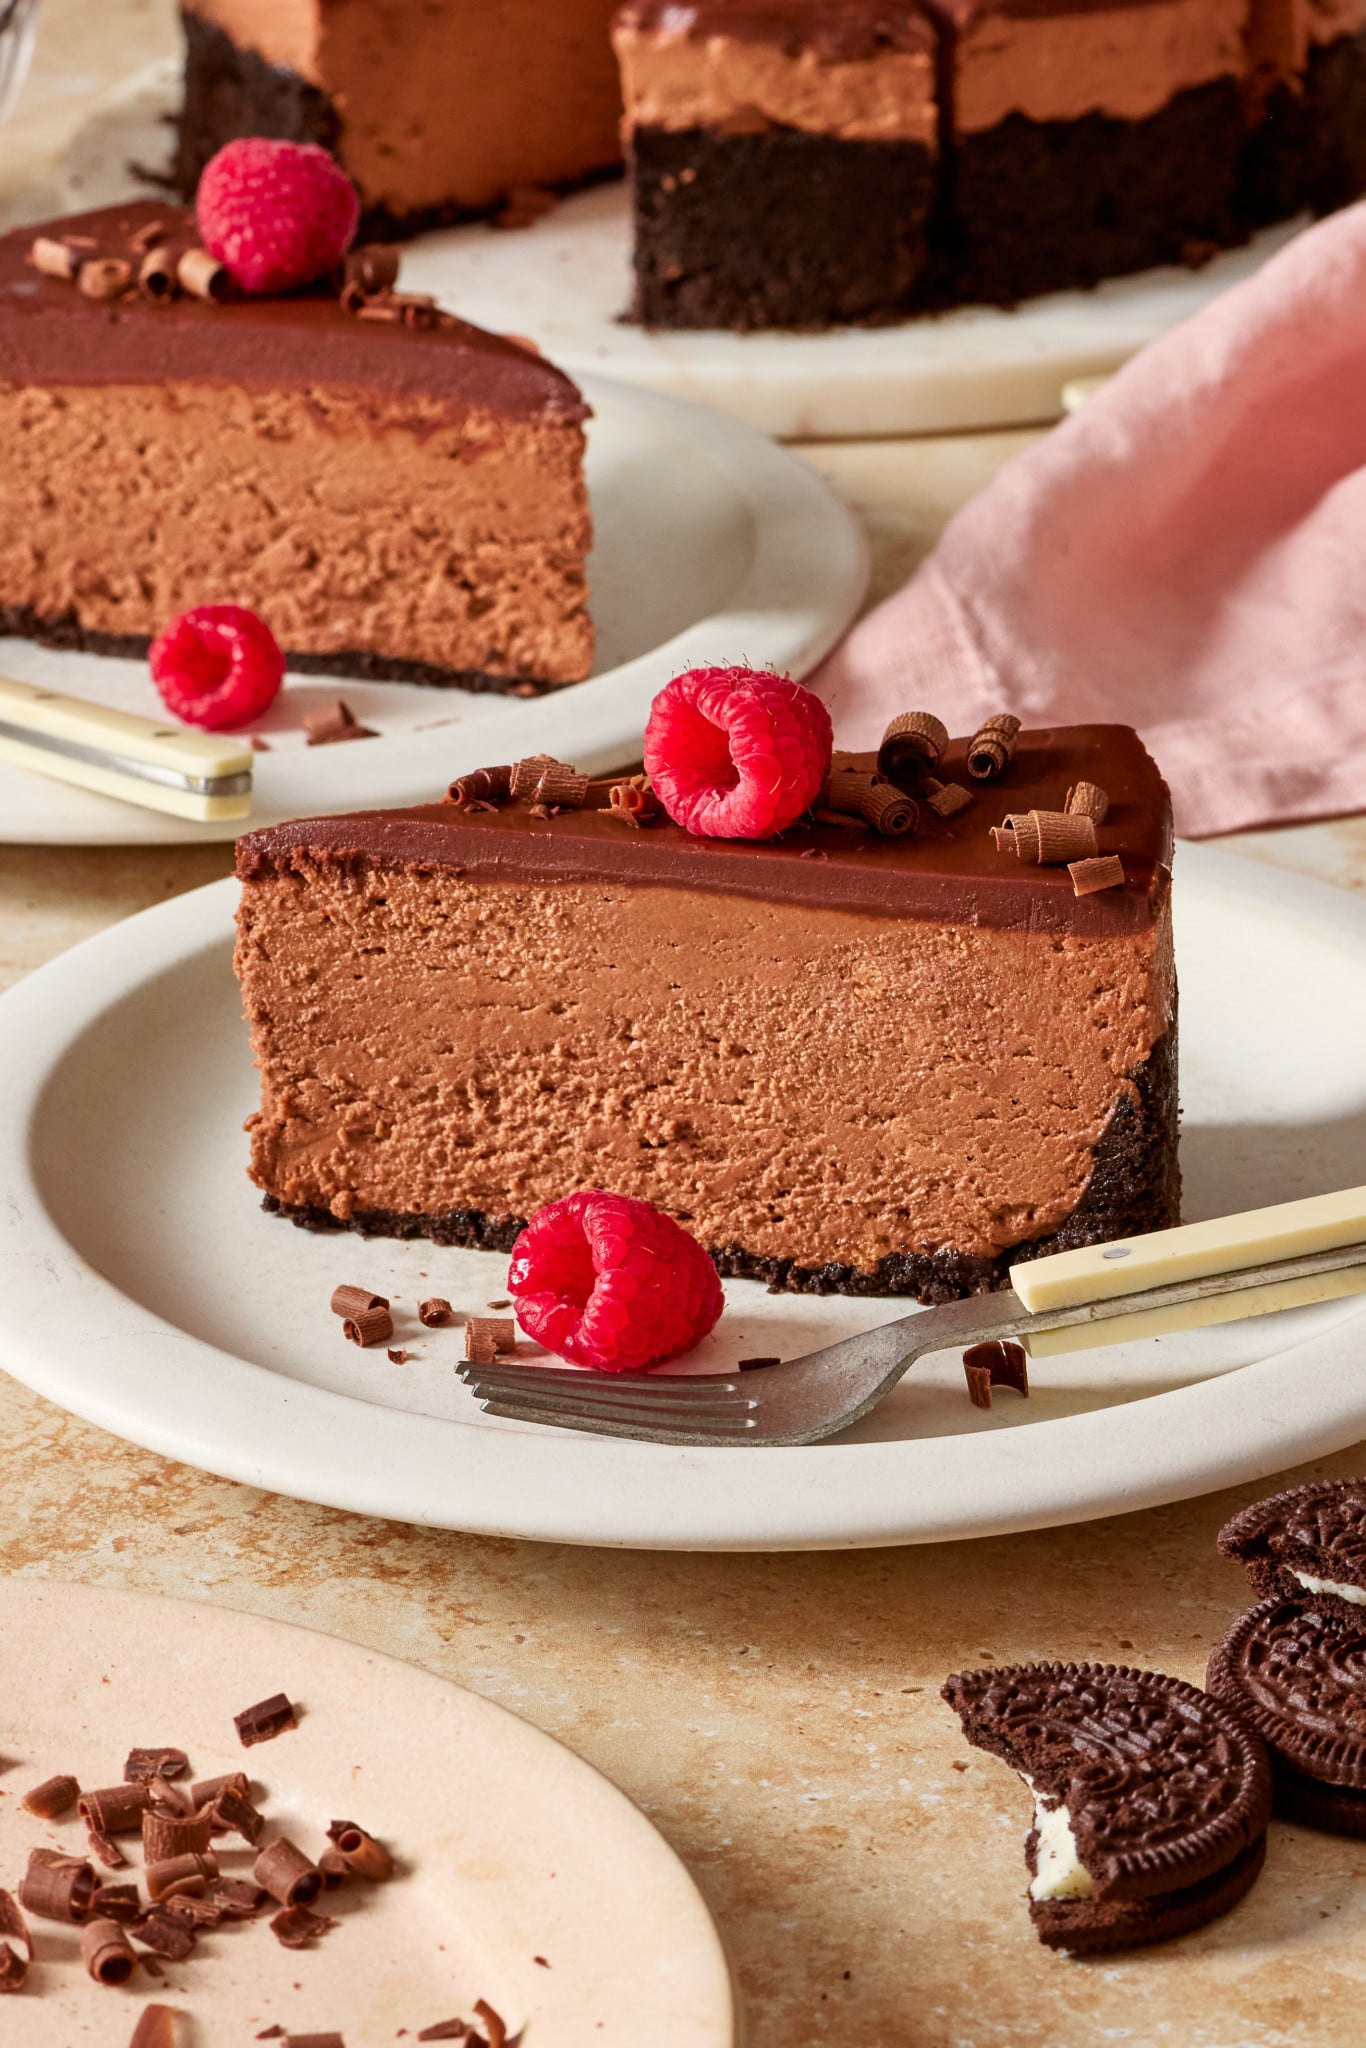

 Table Talk with Tawnie

As much as I love baking, sometimes turning on the oven just doesn’t sound like a good idea when it’s hot outside! I’ve been making this cheesecake for all of my chocolate-obsessed friends and family members, and EVERYONE is asking for the recipe! It’s one of those easy to bring together desserts (plus you have to make it ahead so it’s already done for you by the time you need to serve it) but feels really decadent and like you tried really hard! So if you love chocolate, and easy impressive recipes, steal my recipe for your next get together – you won’t be disappointed!
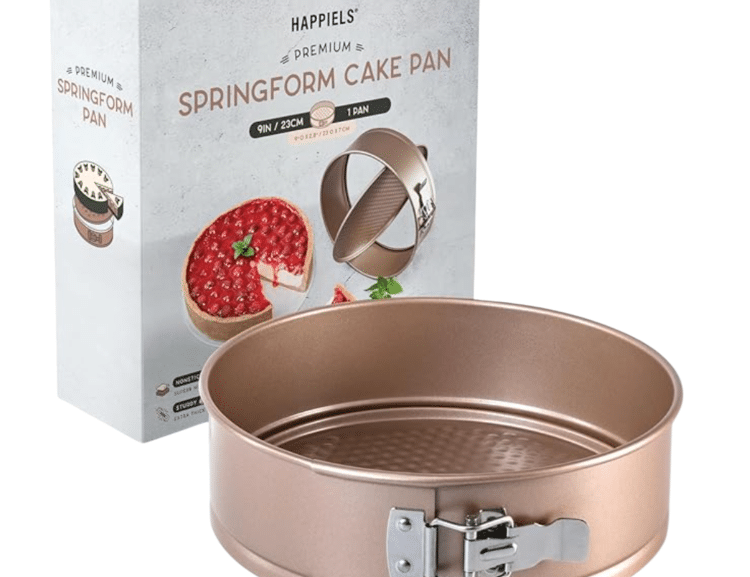
9-Inch Springform Pan
Loving this new 9-inch springfoam pan! It’s non-stick, non-toxic, and leak-proof! ⭐️⭐️⭐️⭐️⭐️
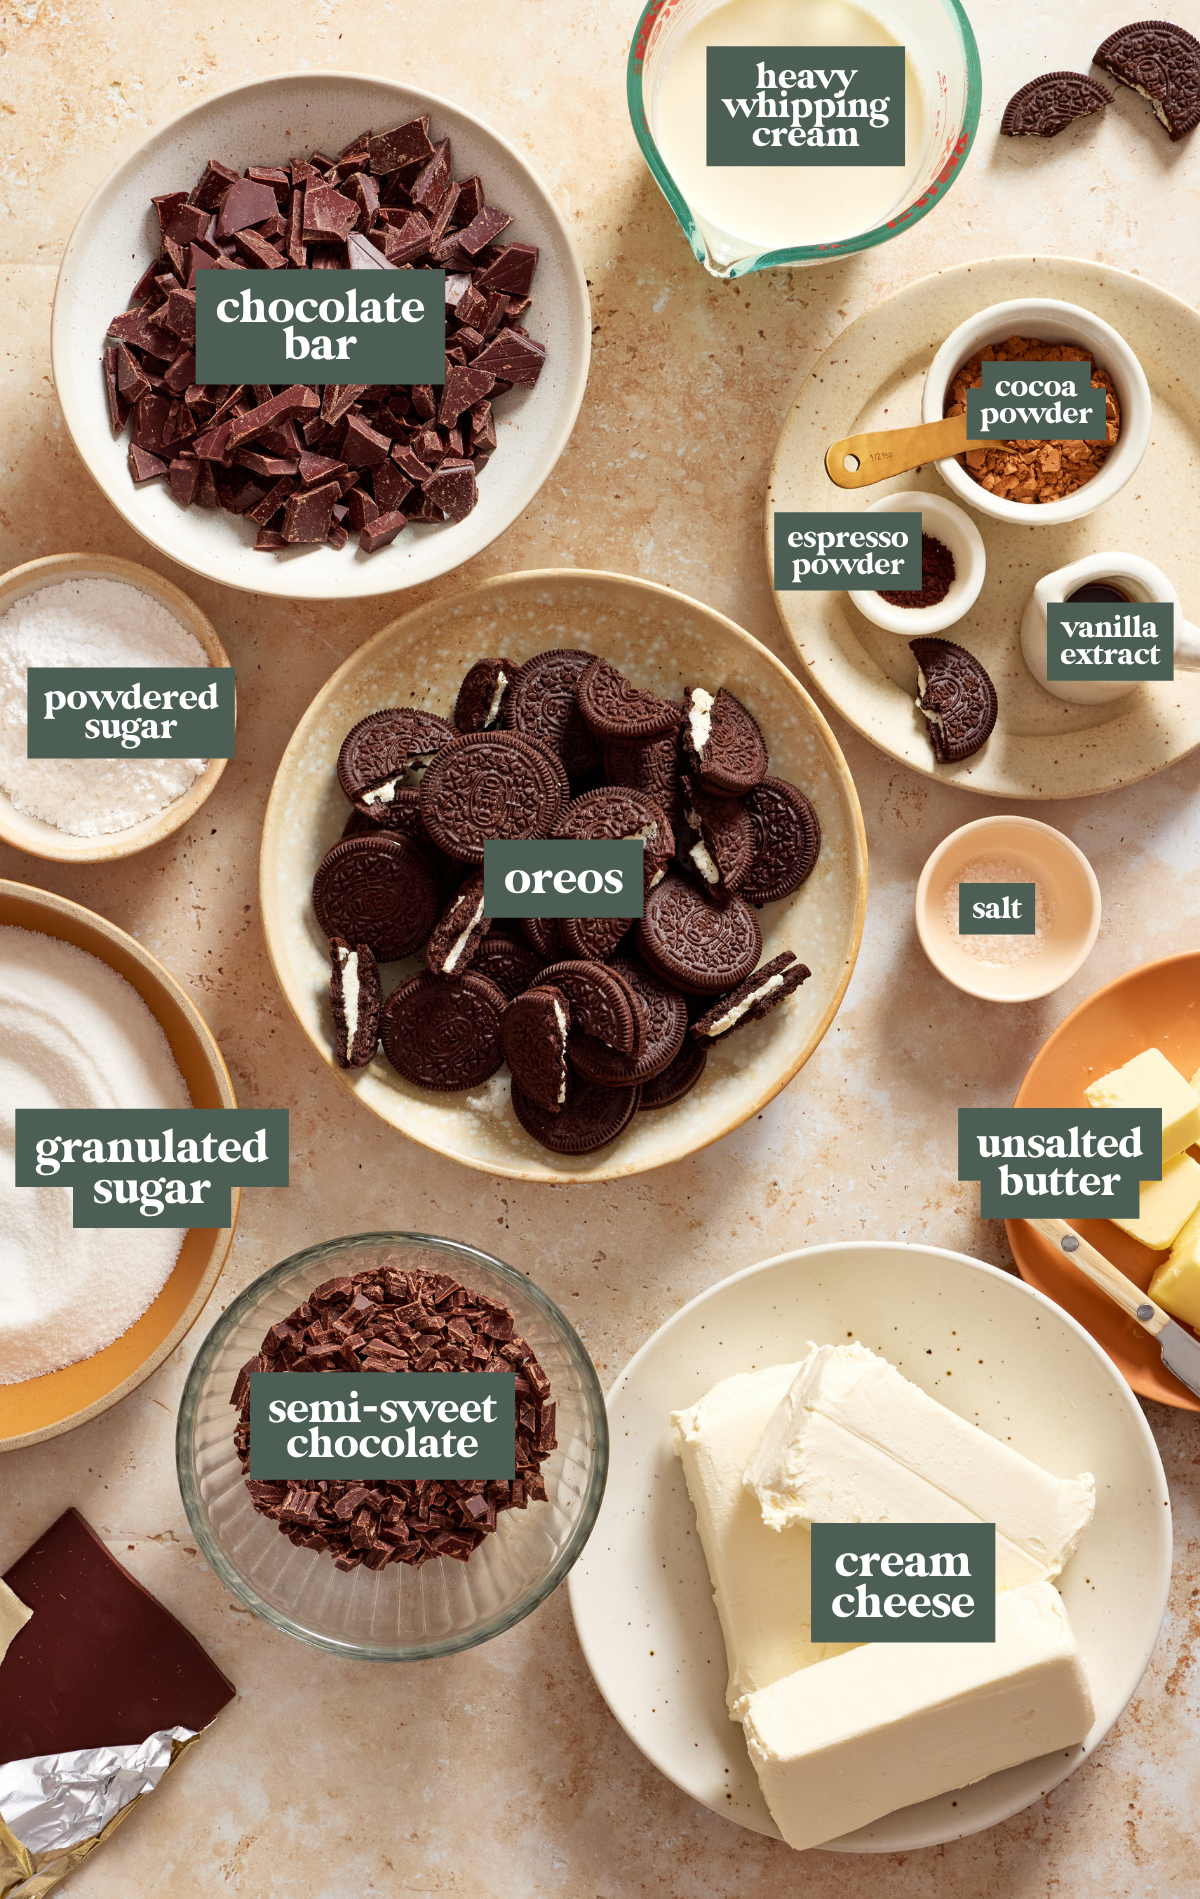
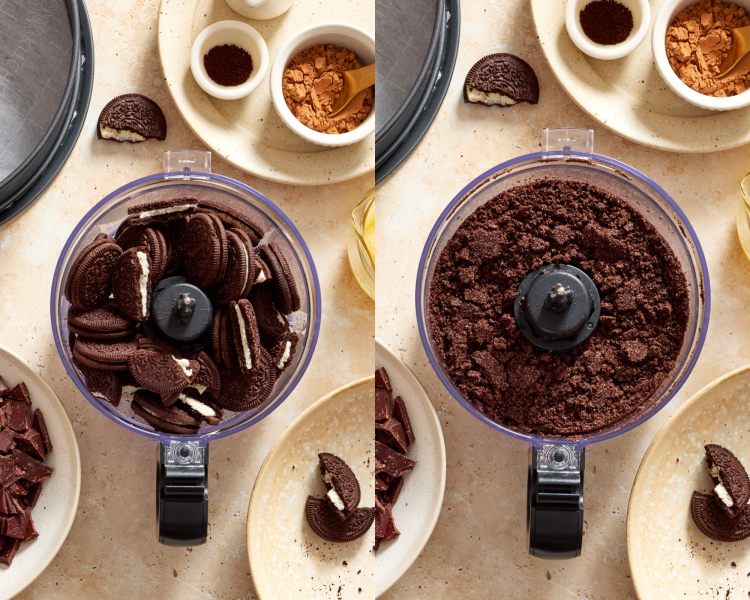
- Oreos: You’ll need about 25 Oreo cookies for the crust! I like to use my food processor to get a very fine crumb, but you can also just place them in a large Ziplock bag and smash with a rolling pin or meat mallet if you don’t have a food processor.
- Chocolate: For the cheesecake, I love to use a combination of dark and semi-sweet chocolate (you can also just use all semi-sweet). Just make sure to use a bar! I usually use Ghirardelli. For the ganache, I use all semi-sweet!
- Full-fat cream cheese: Use full-fat cream cheese for the creamiest texture and best structure. Low-fat versions can make the filling too soft.
- Cocoa powder: Use regular unsweetened cocoa powder for this cheesecake. With the melted chocolate and espresso powder mixed into the cheesecake mixture, I feel like this cheesecake is plenty chocolately enough; however, you can always try the dark cocoa powder if you want an even deeper chocolate flavor.
- Espresso powder: The espresso powder helps to enhance and intensify the chocolate flavor of this cheesecake (don’t worry, it doesn’t make it taste like coffee). The King Arthur espresso powder is my favorite!
Step by Step Directions
(For the full recipe, scroll down to the recipe card below)
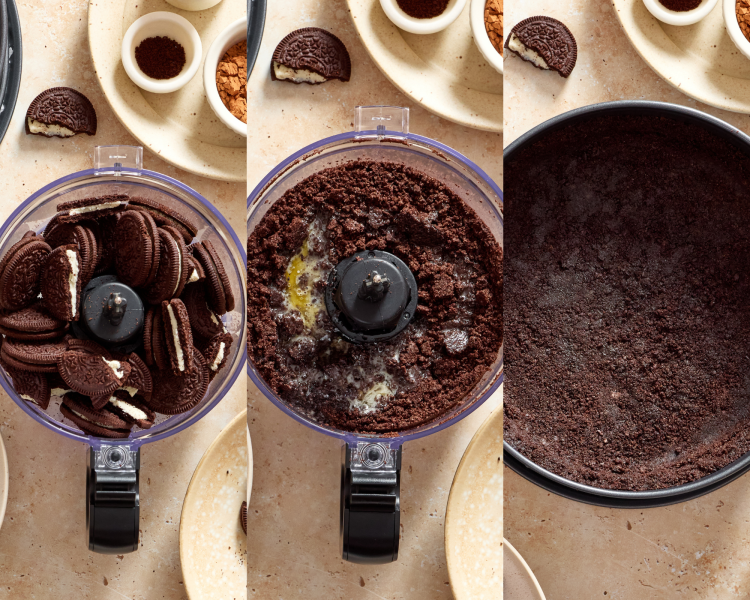
Make the Oreo crust
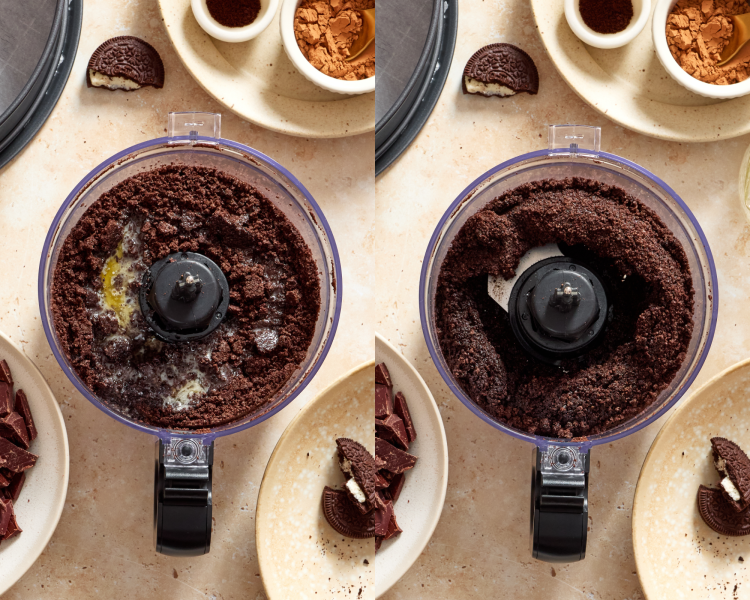
Start by adding the Oreos to the food processor and pulse into crumbs. Then add the butter and continue to mix until a “wet sand” forms. Press into the spring form pan and freeze for ~20-30 minutes
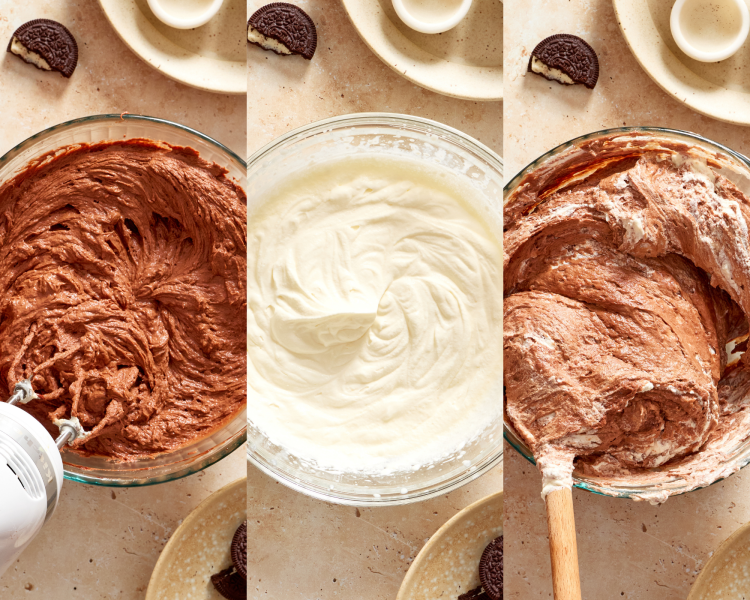
Make the filling
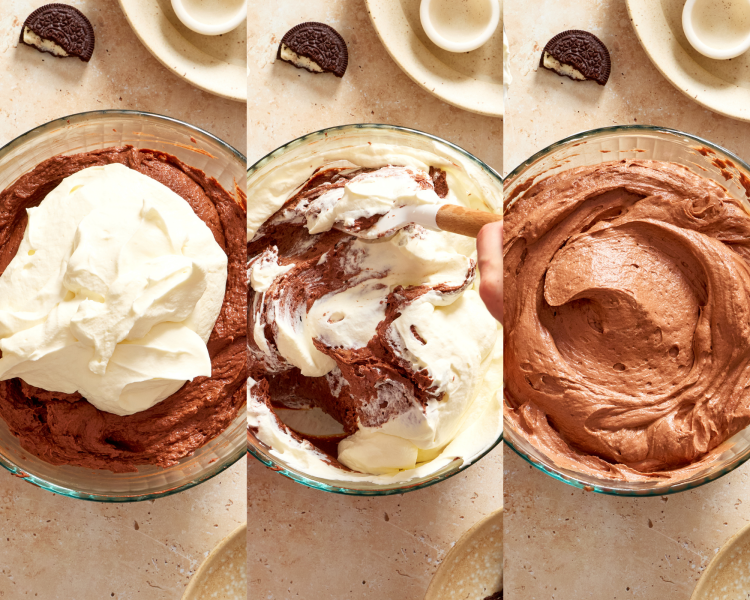
Melt the chocolate and let it cool slightly. Then combine the filling ingredients and make the whipped cream. Gently fold the whipped cream into the chocolate mixture until fully combined and light (Make sure to be gentle in this step; no aggressive mixing‼️).
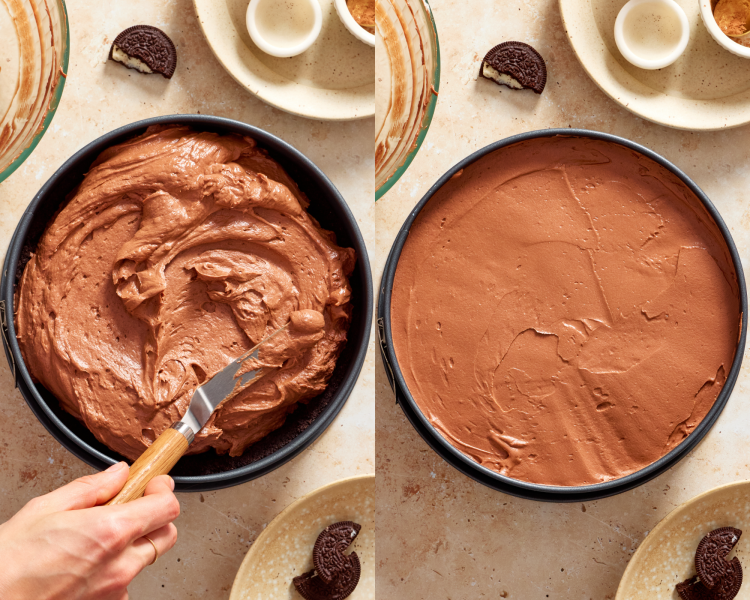
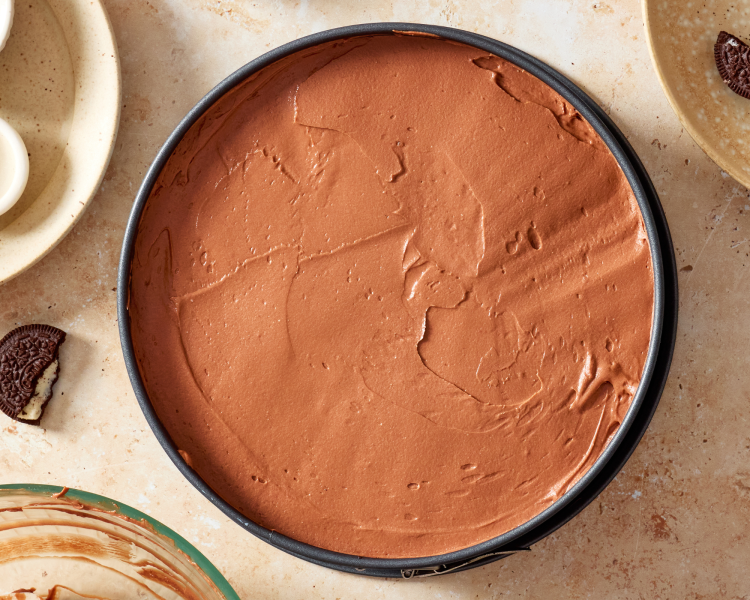
Assemble & chill
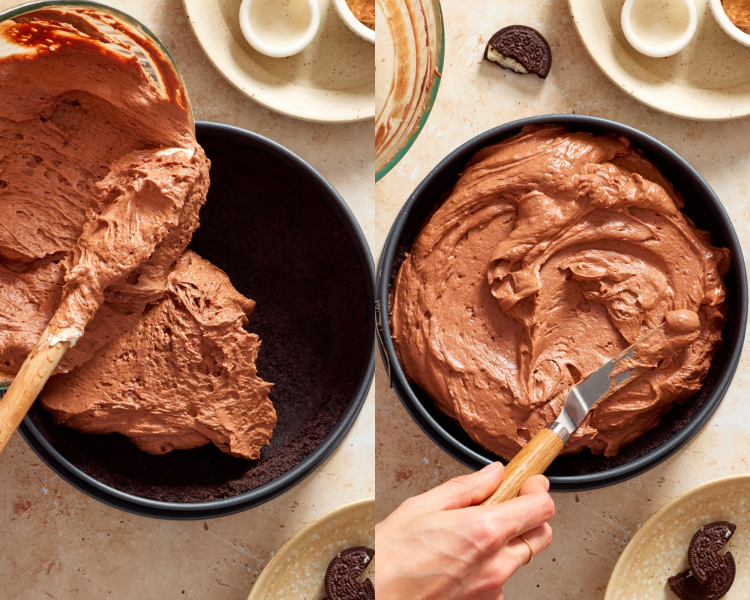
Spread filling evenly into the chilled crust and refrigerate until fully set!
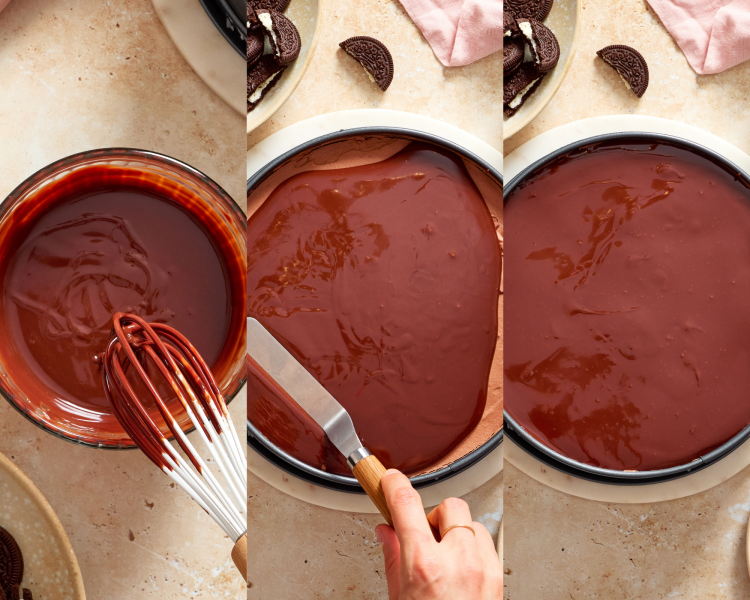
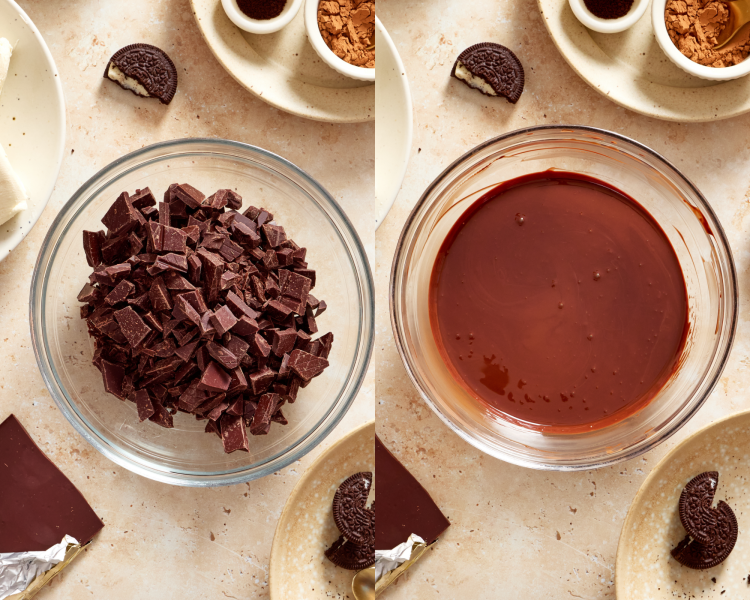
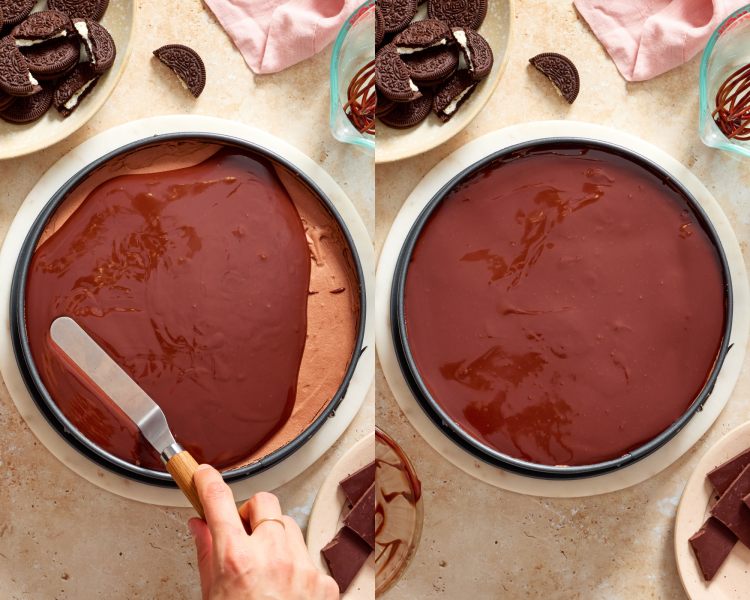
Make the ganache
Make the ganache and pour it over the chilled cheesecake. Spread evenly, then chill for 1-2 hours until everything is set!
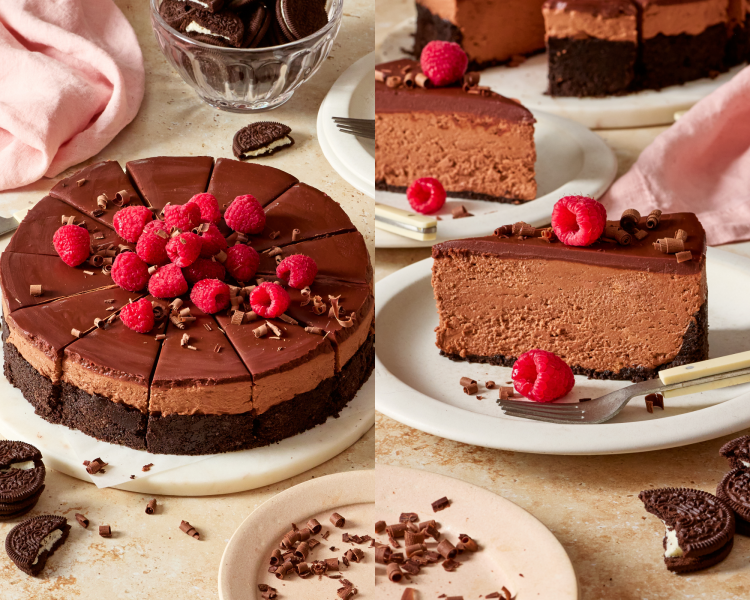
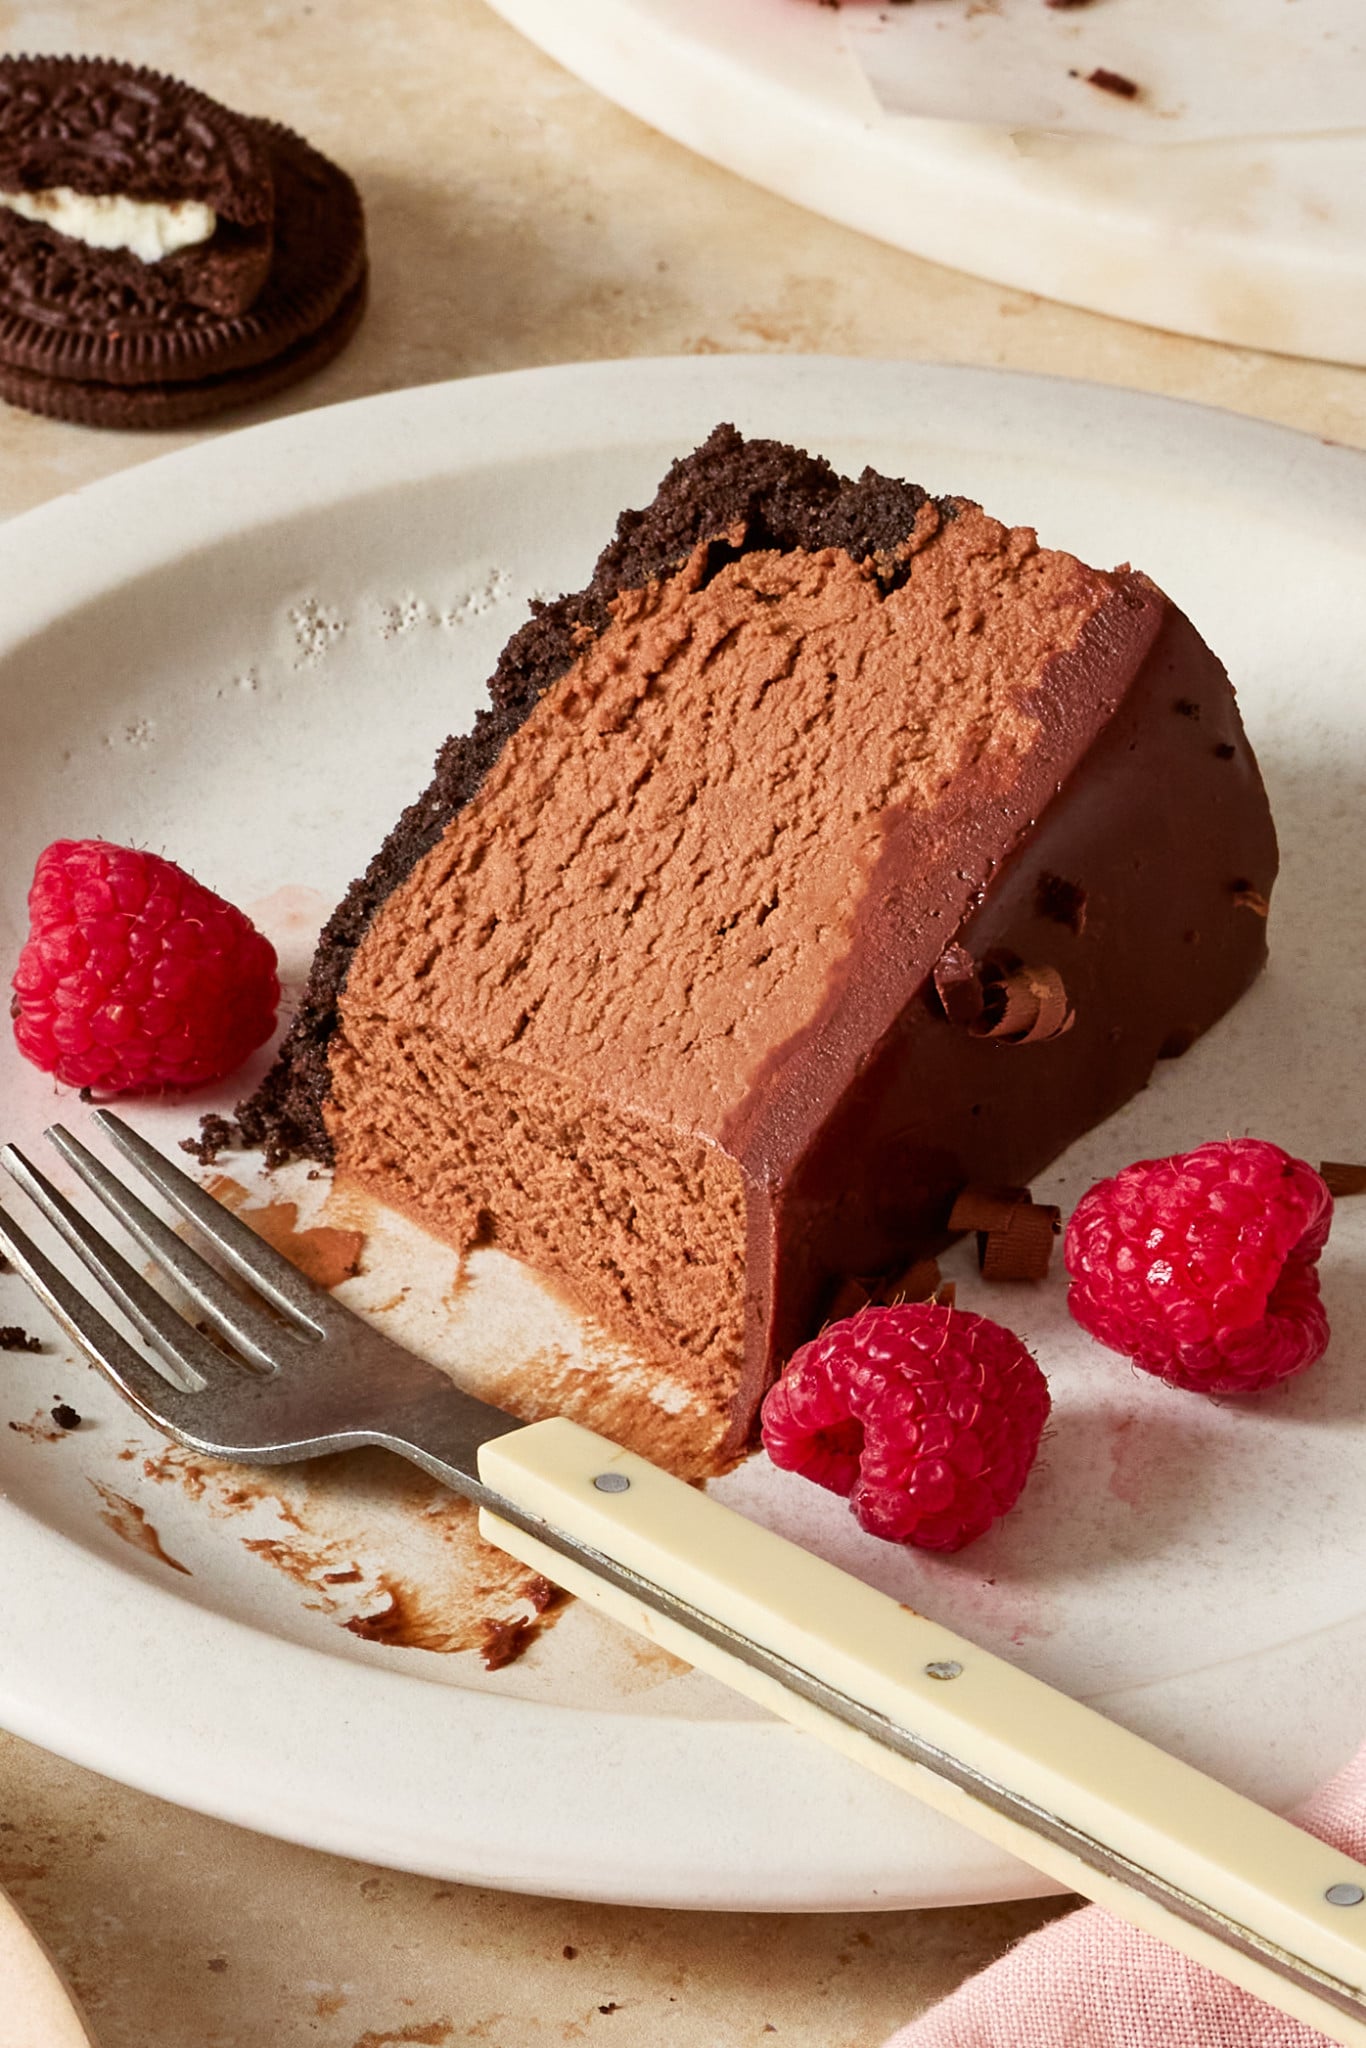
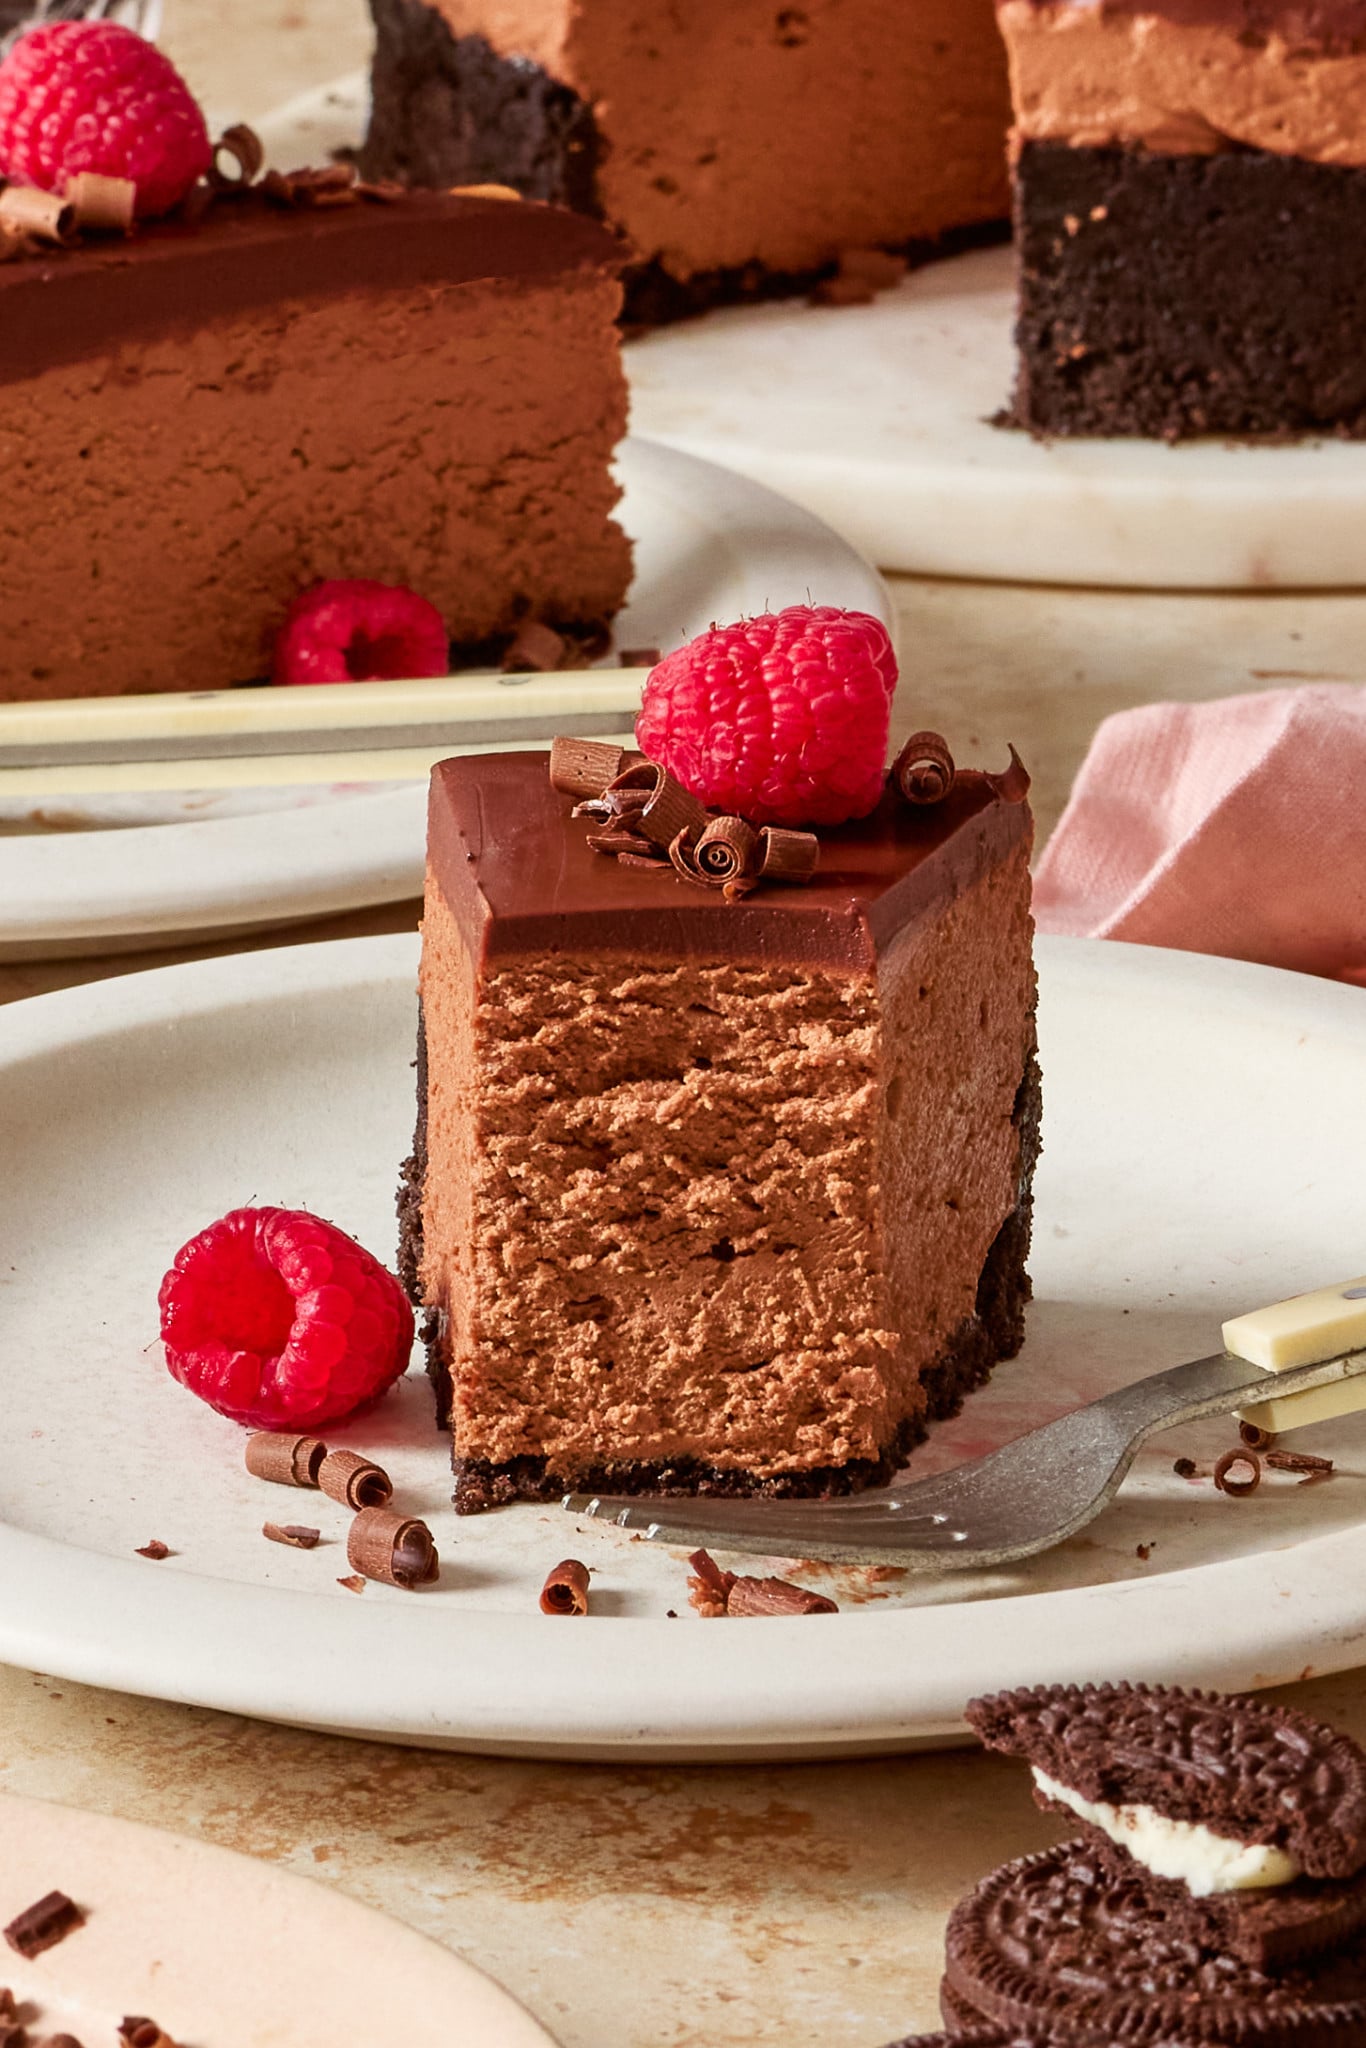
Slice & serve!
Top with fresh raspberries, chocolate shavings, or more whipped cream! Serve and enjoy!!
Expert Tips
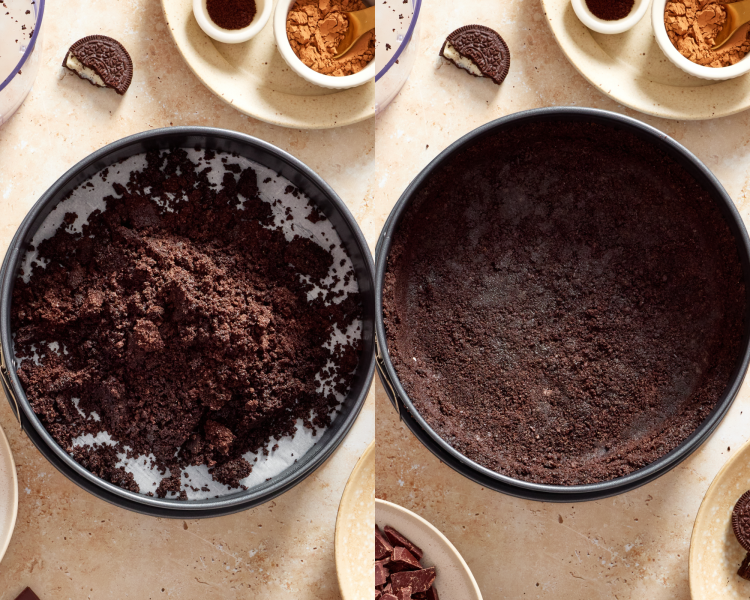
- Firmly press the crust: Press the crust firmly into the pan and chill it before adding the filling so it holds together when sliced. I like to take a piece of parchment paper and the back of a measuring cup and firmly press the crust into the pan.
- Soften cream cheese: Let the cream cheese soften fully before mixing to avoid lumps and create a silky-smooth filling. If you need to soften the cream cheese quickly, you can slice it into small cubes and spread them out on a plate (more surface area helps it soften much faster) or place the sealed, wrapped cream cheese in a bowl of warm (not hot) water for 10–15 minutes to gently bring it to room temp.
- Don’t burn the chocolate: Melt the chocolate gently (microwave in short intervals or use a double boiler) and let it cool slightly before adding so it doesn’t seize or melt the filling.
- Don’t over- or under-whip the cream: Whip the cream to medium peaks and fold it in gently to keep the cheesecake light and airy. The peaks should stand up with just a slight curl at the tip. Overly stiff peaks can make the cheesecake too dense, so the medium stiff peaks still give the cheesecake a mousse-like but sliceable texture.
- Prep in advance: This cheesecake is honestly ideal and better when made with plenty of time in advance. It requires chilling a couple of times throughout the process, so just make sure to account for the proper time when making (this isn’t one you can throw together 30 minutes before guests arrive😂). I like to make the Oreo crust and filling on one day, let it sit overnight, then make and add the ganache the morning before I’m planning on serving. That way, it has plenty of time to sit in the fridge throughout the afternoon!
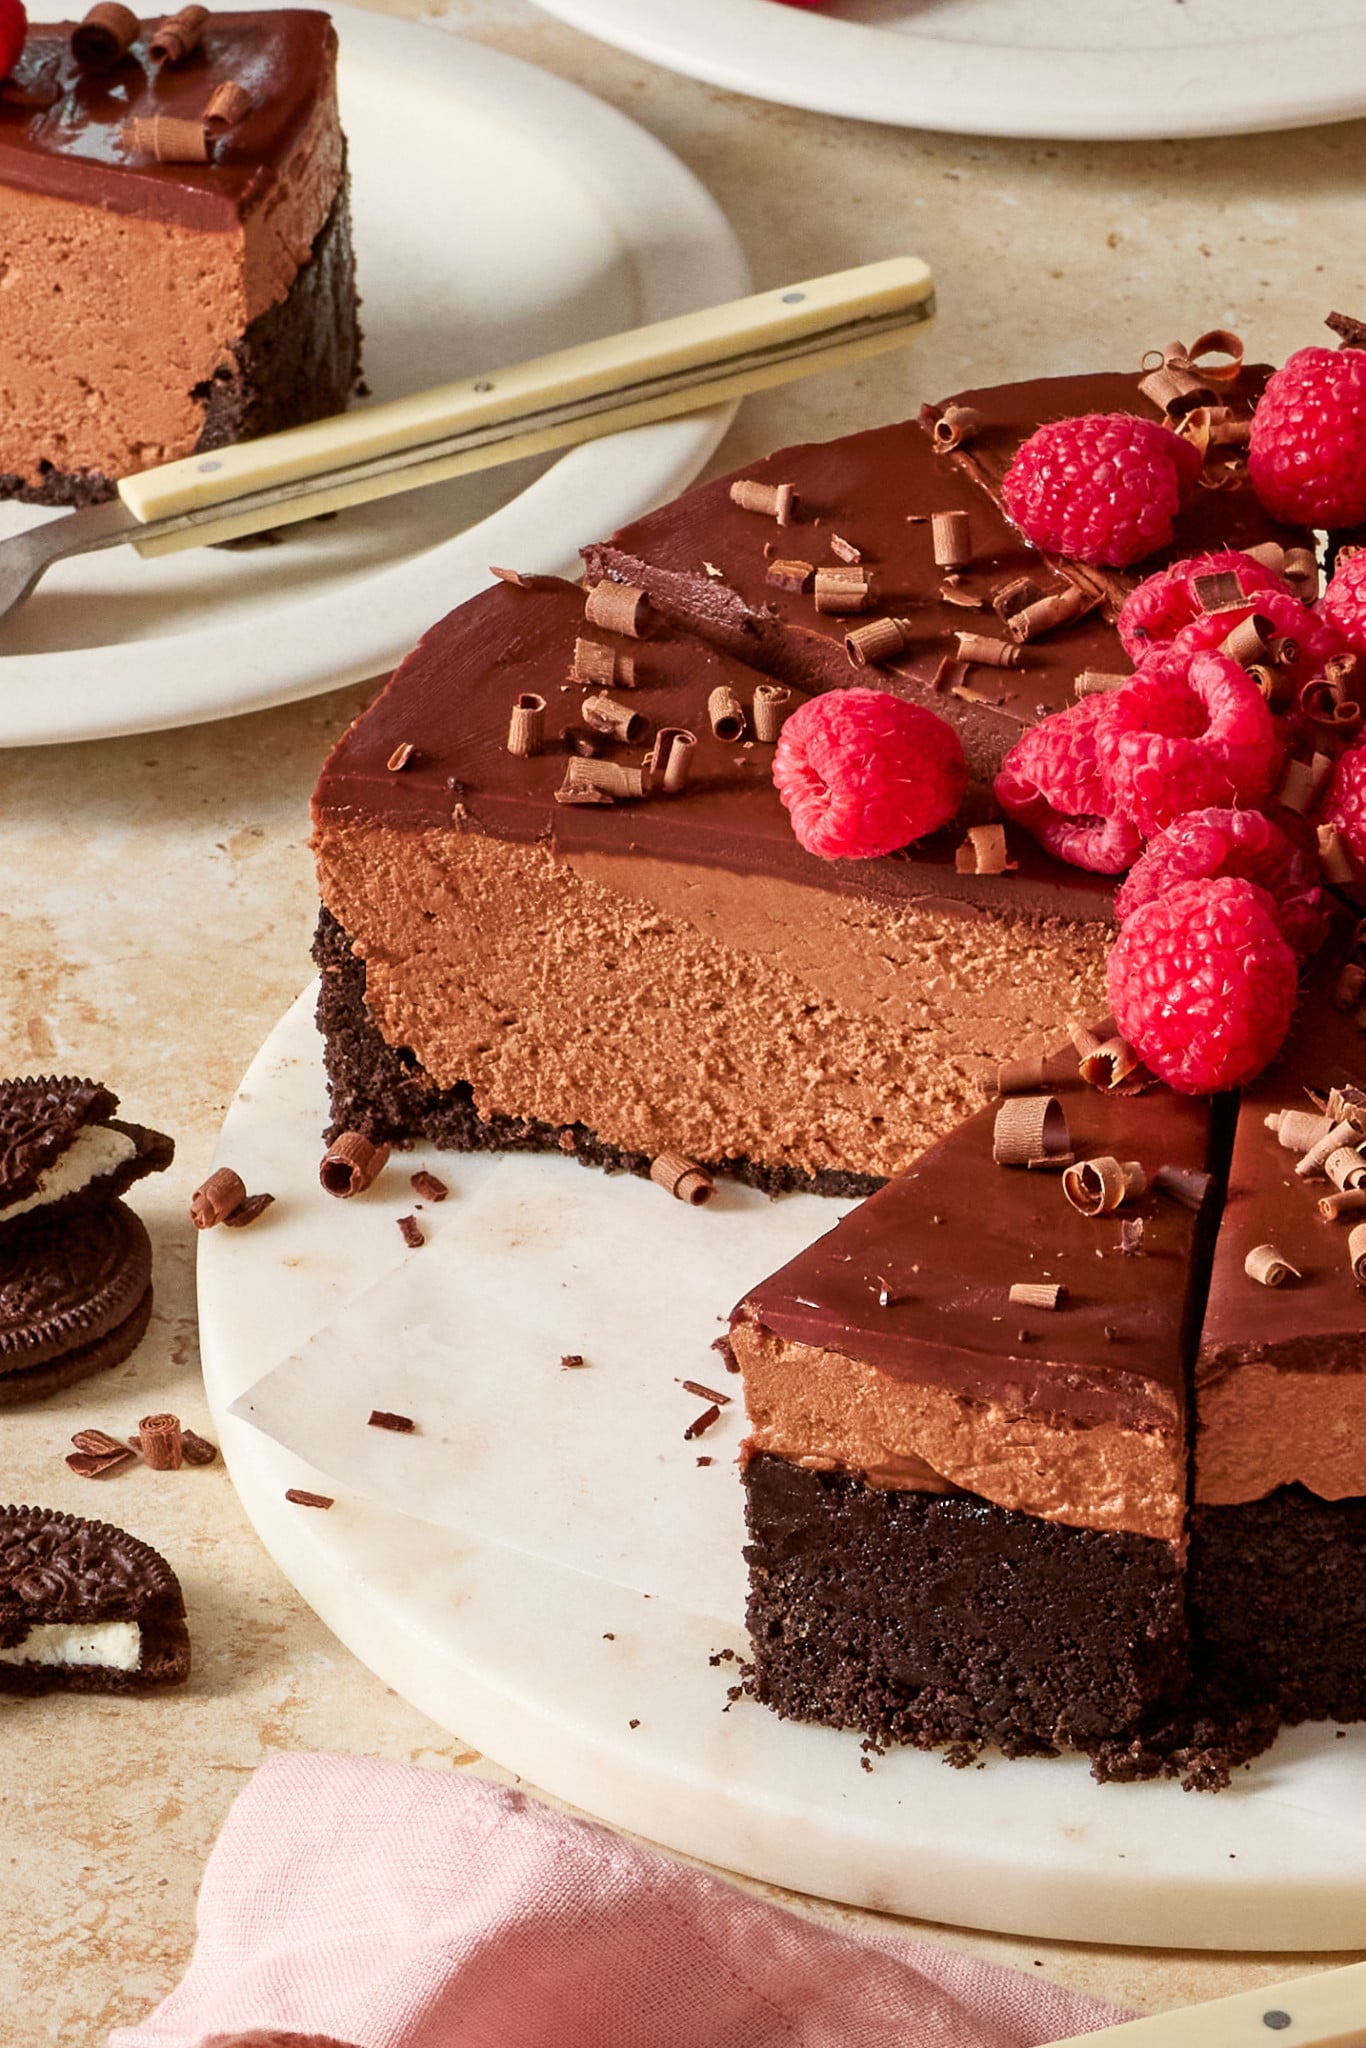
- Clean slices: To get the cleanest slices, dip a sharp knife in hot water, dry with a towel, and then slice, cleaning the knife in between each slice so you get clean cuts.
- No springform pan: A springform pan is ideal for easy removal, but you can also use a pie dish or square pan and line it with parchment for easier slicing.
Storage / Freezing
- Store the cheesecake covered in the refrigerator for up to 4–5 days. Keep chilled until ready to serve, as the no-bake filling softens at room temperature.
- For longer storage, freeze tightly wrapped for up to 2 months. Thaw overnight in the fridge before serving.
shop this post
 Buy Now →
  Buy Now →
  Buy Now →


Before You Begin! If you make this, please leave a review and rating letting us know how you liked this recipe! This helps our business thrive & continue providing free recipes.
No-Bake Chocolate Cheesecake
Ingredients
For the Oreo Crust
- 25 Oreo cookies
- 5-5½ Tbsp. unsalted butter (melted)
For the Chocolate Cheesecake Filling
- 12 oz chocolate bar (dark + semi-sweet blend or all semi-sweet, chopped (I usually use Ghirardelli))
- 24 oz full-fat cream cheese (softened to room temperature)
- 3/4 cup granulated sugar
- 2 Tbsp. unsweetened cocoa powder
- 1/2 tsp. espresso powder
- 1 tsp. vanilla extract
- Pinch of salt
- 1/2 cup powdered sugar
- 1⅓ cups heavy whipping cream (cold)
For the Ganache Topping
- 6 oz semi-sweet chocolate (finely chopped)
- 3/4 cup heavy cream (6 oz.)
- 1 Tbsp. unsalted butter (room temperature)
Last step! If you make this, please leave a review and rating letting us know how you liked this recipe! This helps our business thrive & continue providing free recipes.
Instructions
- Prep the pan: Spray the bottom of a 9-inch spring form pan with baking spray and then line with parchment. Set aside.
Make the Oreo Crust
- Pulse Oreos: Add Oreos to a food processor and pulse into fine crumbs.25 Oreo cookies

- Add butter: With the processor running, slowly stream in the melted butter until the mixture resembles wet sand.5-5½ Tbsp. unsalted butter
- Form into pan: Press firmly into the bottom and slightly up the sides of the 9-inch springform pan.
- Freeze: Freeze for ~20-30 minutes while you prepare the filling. Start Timer
Make the Filling
- Melt chocolate: Melt chocolate in a microwave-safe bowl in 20-30 second increments, stirring between each, until smooth.12 oz chocolate bar
- Let cool: Set aside to cool until just slightly warm (not hot). It should still be pourable.
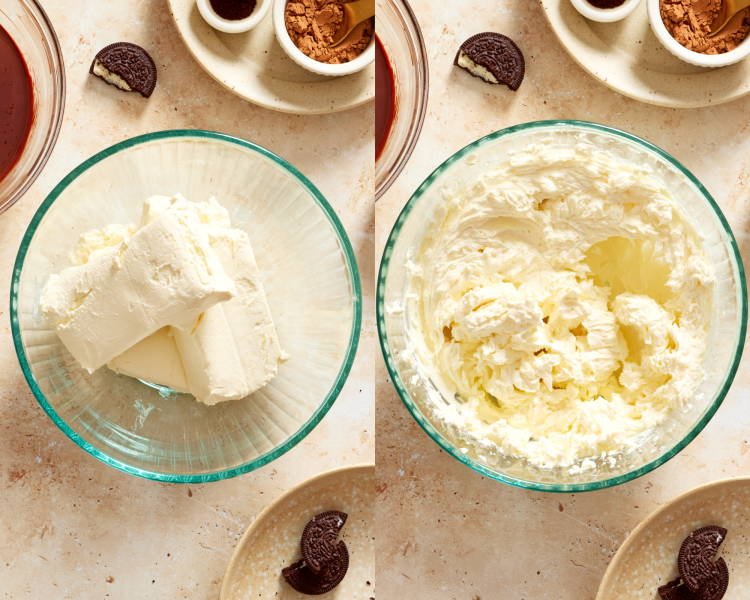
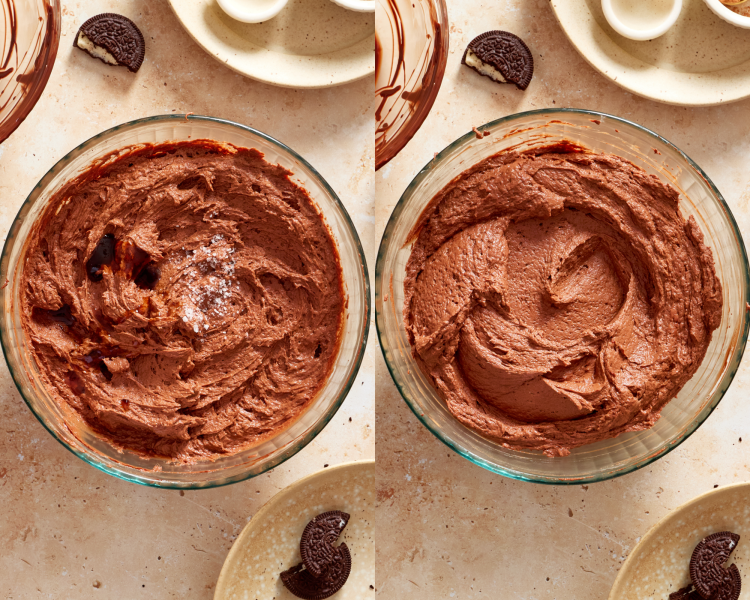
- Beat cream cheese: In a large bowl, beat cream cheese until smooth and creamy.24 oz full-fat cream cheese
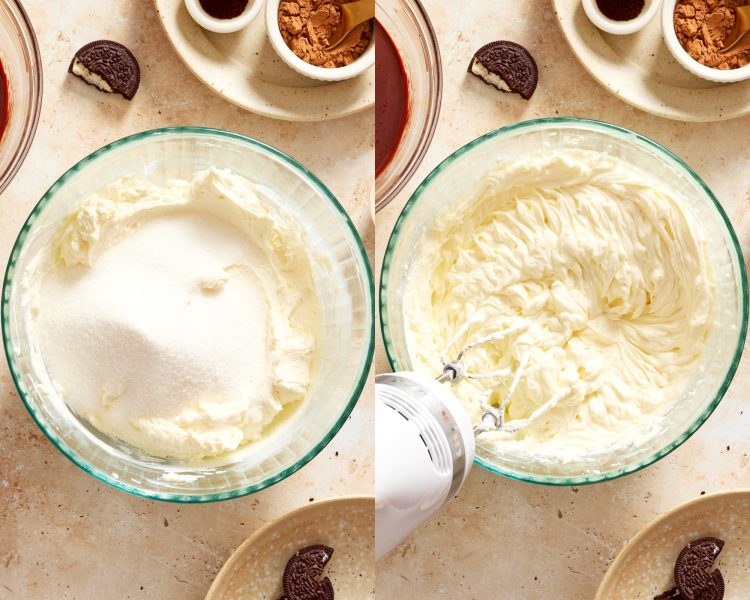
- Add sugar: Then add the granulated sugar and mix again.3/4 cup granulated sugar
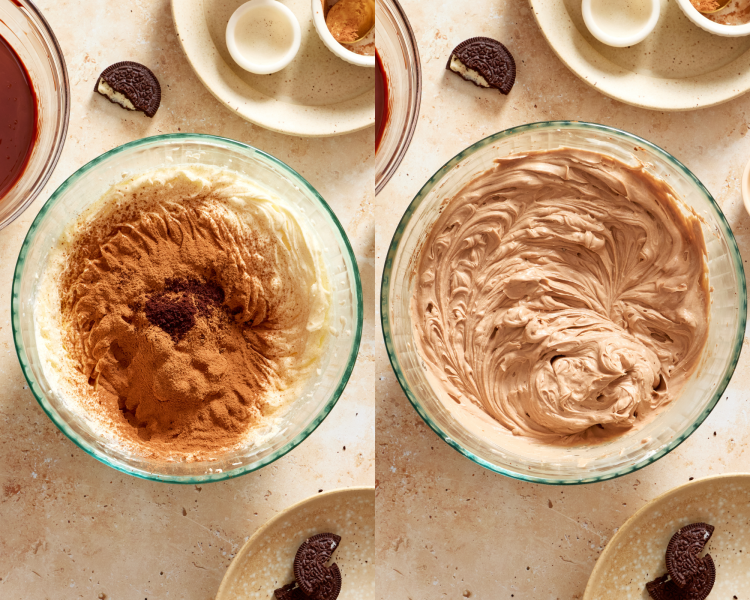
- Add dry ingredients: Add cocoa powder and espresso powder and mix until combined. Be sure to sift cocoa powder if it’s clumpy.2 Tbsp. unsweetened cocoa powder, 1/2 tsp. espresso powder
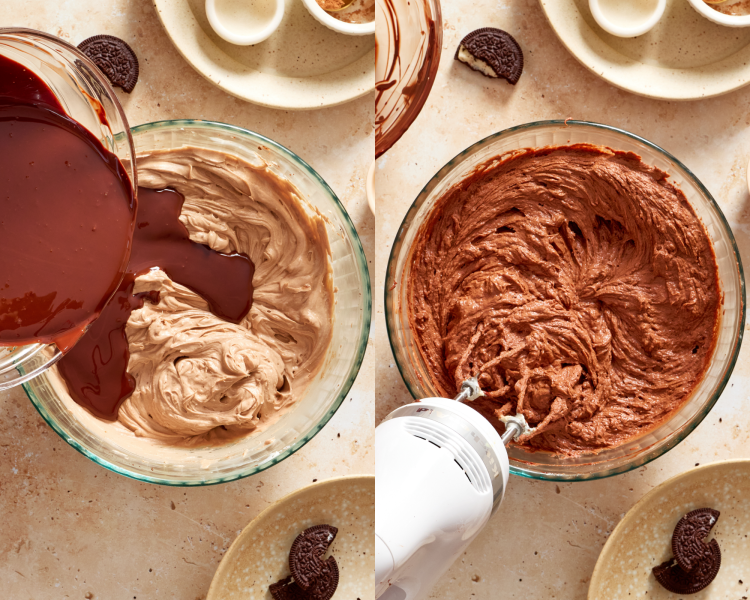
- Combine with melted chocolate: Slowly drizzle in the slightly cooled melted chocolate, mixing until smooth.
- Add remaining filling ingredients: Mix in vanilla and salt.1 tsp. vanilla extract, Pinch of salt
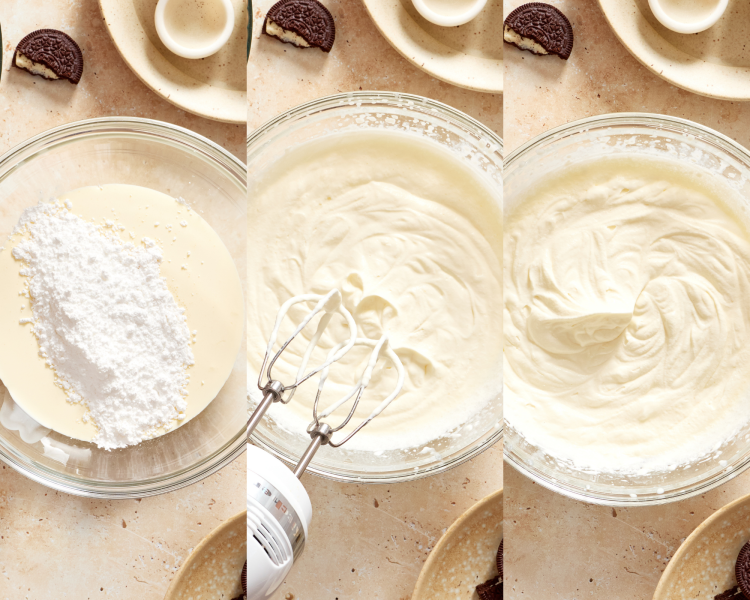
Make the Whipped Cream
- Beat heavy cream: In a separate bowl, beat cold heavy cream and powdered sugar until medium stiff peaks form. The peaks should stand up with just a slight curl at the tip. (Overly stiff peaks can make the cheesecake too dense, so the medium stiff peaks still give the cheesecake a mousse-like but sliceable texture)1⅓ cups heavy whipping cream, 1/2 cup powdered sugar
- Fold: Gently fold the whipped cream into the chocolate mixture until fully combined and light. Be gentle in this step, no aggressive mixing.
- Assemble: Spread filling evenly into the chilled crust.
- Let chill: Refrigerate for at least 4-6 hours, or preferably overnight, until fully set. Start Timer
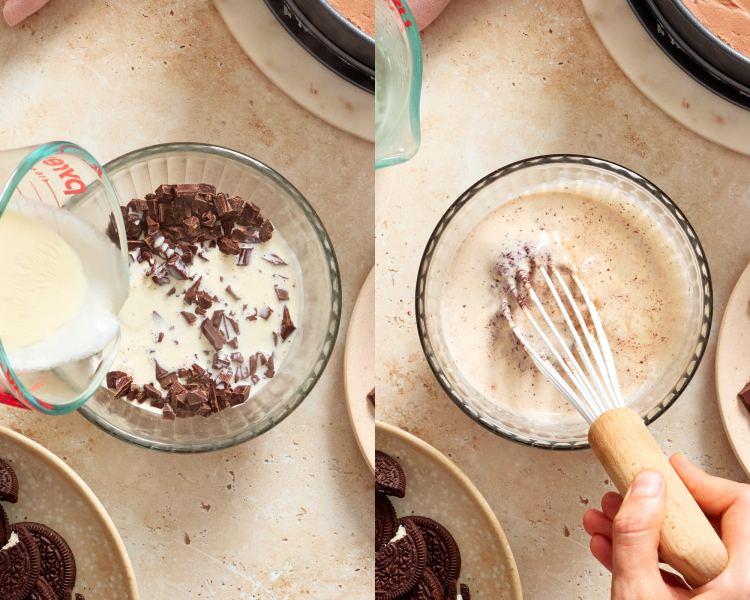
Make the Ganache
- Heat cream: Heat heavy cream until just steaming (not boiling, it’s important not to overheat). Then pour over chopped chocolate and let sit for 1-2 minutes, then stir until smooth. Start Timer3/4 cup heavy cream
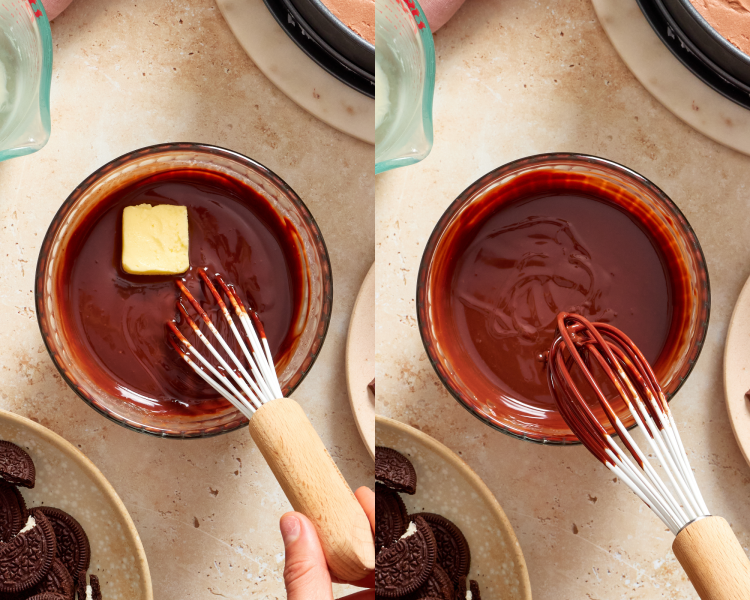
- Mix-in butter: Stir in butter until glossy. Let cool slightly,1 Tbsp. unsalted butter
- Add to cheesecake: Pour over the chilled cheesecake and spread evenly. Refrigerate for 1-2 hours until set. Start Timer
- Slice and serve: Dip a sharp knife in hot water, dry with a towel, and then slice. Cleaning knife between slices to get clean cuts. Serve as is or with berries. ENJOY!!
Equipment
Notes
- Soften cream cheese: Let the cream cheese soften fully before mixing to avoid lumps and create a silky-smooth filling. If you need to soften the cream cheese quickly, you can slice it into small cubes and spread them out on a plate (more surface area helps it soften much faster) or place the sealed, wrapped cream cheese in a bowl of warm (not hot) water for 10–15 minutes to gently bring it to room temp.
- Prep in advance: This cheesecake is honestly ideal and better when made with plenty of time in advance. It requires chilling a couple of times throughout the process, so just make sure to account for the proper time when making (this isn’t one you can throw together 30 minutes before guests arrive😂). I like to make the Oreo crust and filling on one day, let it sit overnight, then make and add the ganache the morning before I’m planning on serving. That way it has plenty of time to set in the fridge throughout the afternoon!
- Store: Store the cheesecake covered in the refrigerator for up to 4–5 days. Keep chilled until ready to serve, as the no-bake filling softens at room temperature.
- Freeze: For longer storage, freeze tightly wrapped for up to 2 months. Thaw overnight in the fridge before serving.
Nutrition Information
Nutritional information is provided as a courtesy and is automatically calculated. It should only be construed as an estimate rather than a guarantee. Ingredients can vary and Kroll’s Korner can’t make any guarantees to the accuracy of this information.
📸 Photography by Angelica Oles
