Green Chicken Enchiladas
This post may contain affiliate links. Please read our disclosure policy.
It’s true what they say, sometimes simple is just best! These easy weeknight enchiladas are honestly so easy that I never even thought to write them up as a recipe. But after sharing several times on Instagram, and so many people asking for the recipe, I figured, why not!
These Green Chicken Enchiladas are so simple to make but are one of our favorite meals! They are made with a few shortcuts like shredded rotisserie chicken and store-bought enchilada sauce, but they seriously taste homemade!
The key is adding plenty of seasoning to the chicken and topping these enchiladas with fresh, shredded melty cheese. I also love to throw in a little sour cream to the chicken mixture to make it really creamy and delicious (but that’s totally optional).
These enchiladas are great enjoyed on their own, or serve them with a side of my Cilantro Lime Rice or beans.
And if you’re looking for more enchilada-inspired recipes, try my Chicken Enchilada Casserole, Breakfast Enchiladas, Green Chicken Enchilada Soup, or Ground Turkey Black Bean Enchiladas.
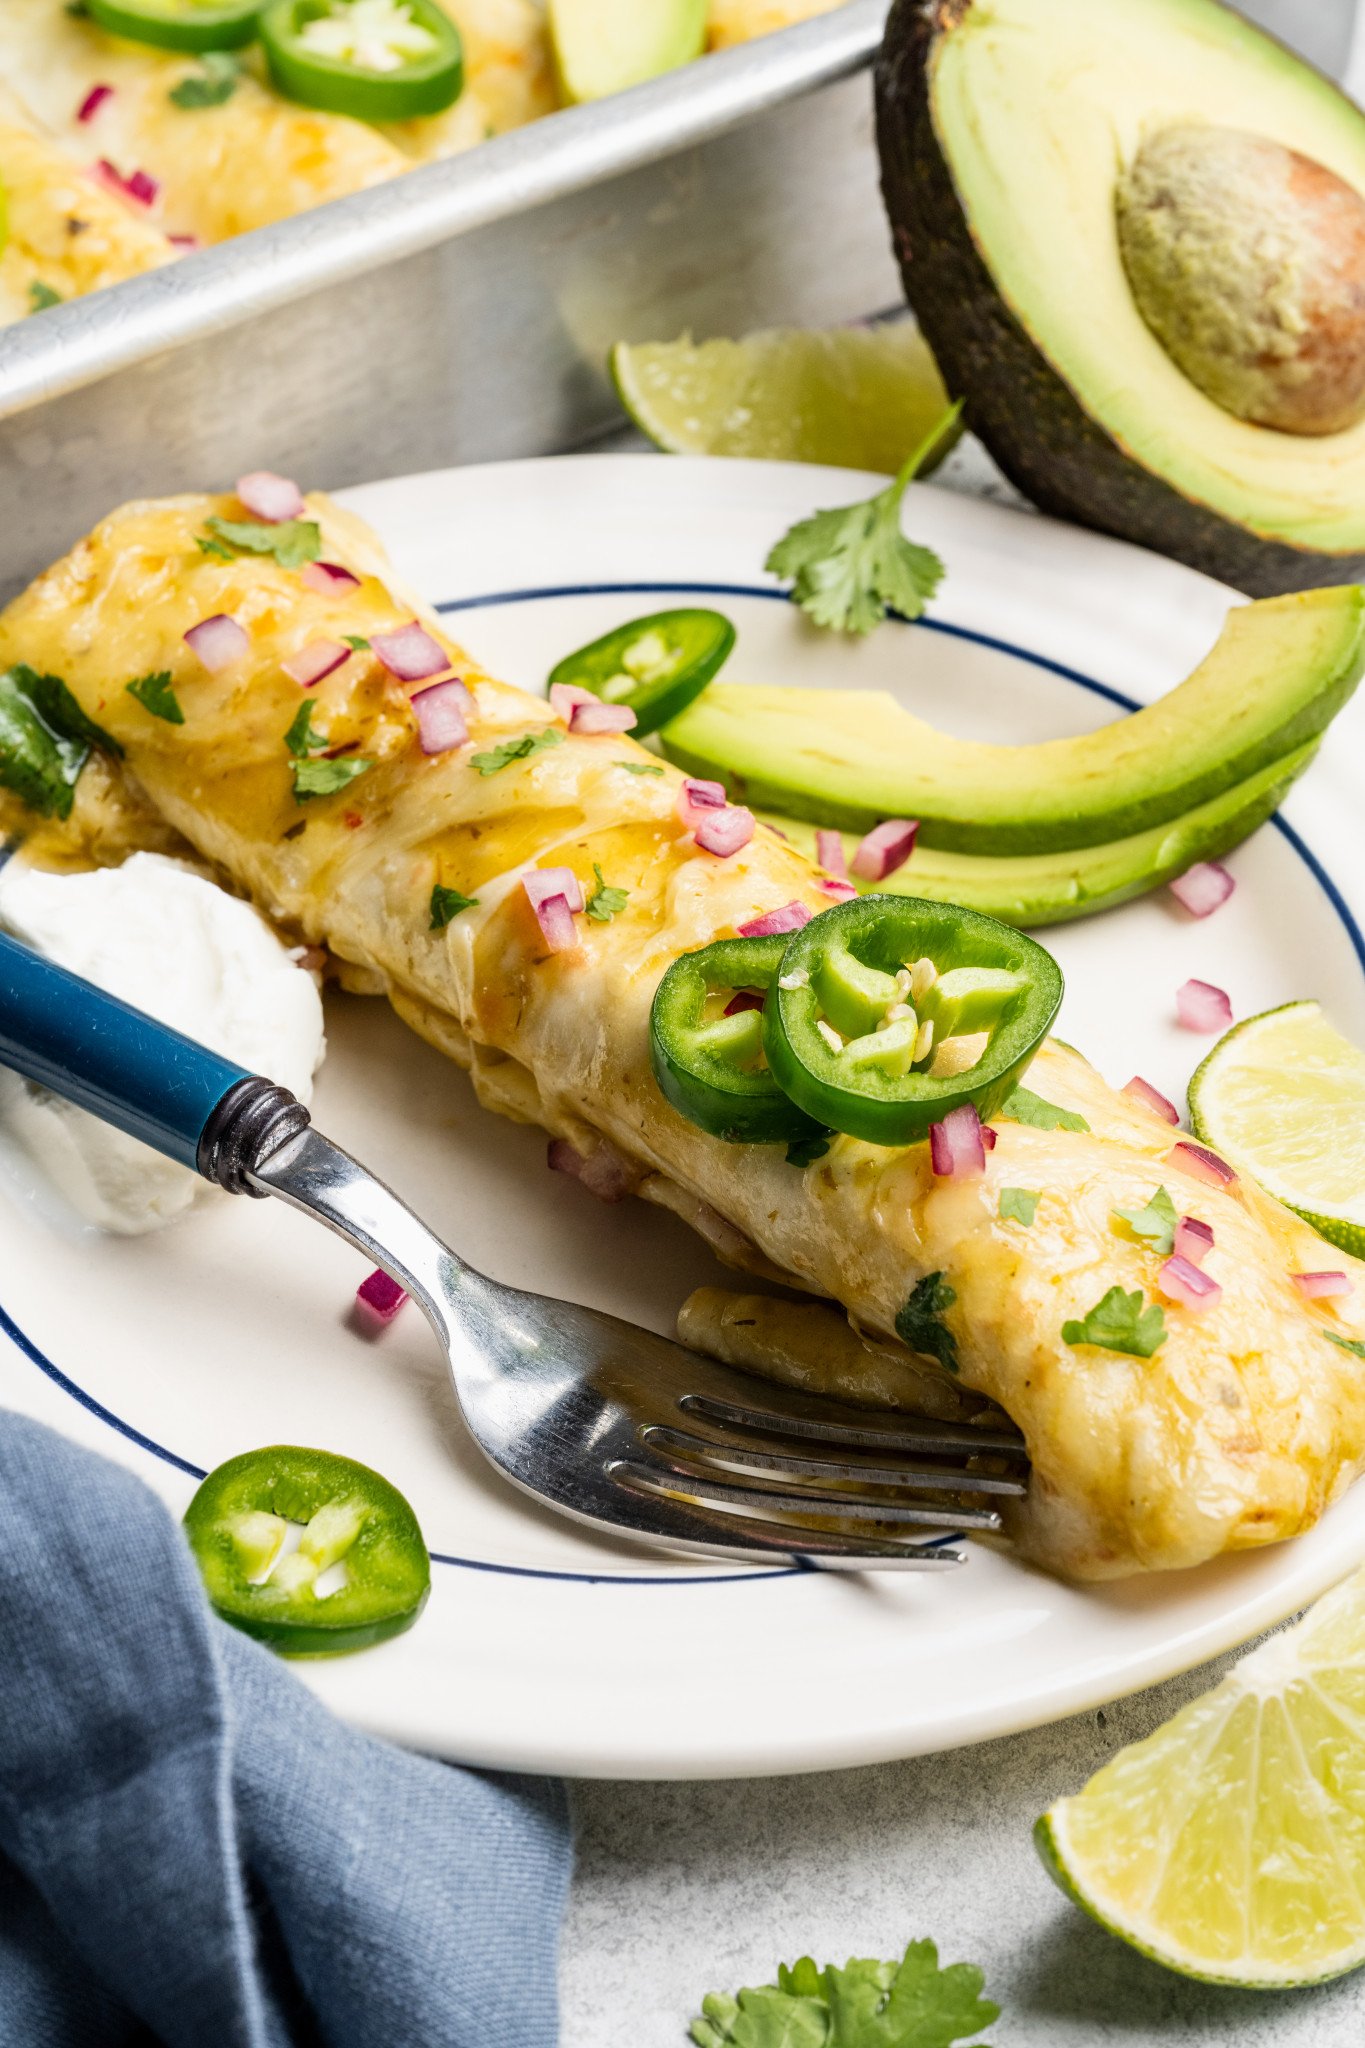

 Table Talk with Tawnie

Let’s talk about easy weeknight dinners for a second. We all have those staple recipes we keep coming back to, no matter the season, and these enchiladas are definitely one of mine. They come together in no time, taste incredible, and are always a hit with the whole family. Honestly, what more could you want? If you’re like me and like to have a few staple weeknight recipes on hand, try a few of my favorites, including my Shell Pasta with Ground Turkey, Taco Skillet, and Hamburger Macaroni.
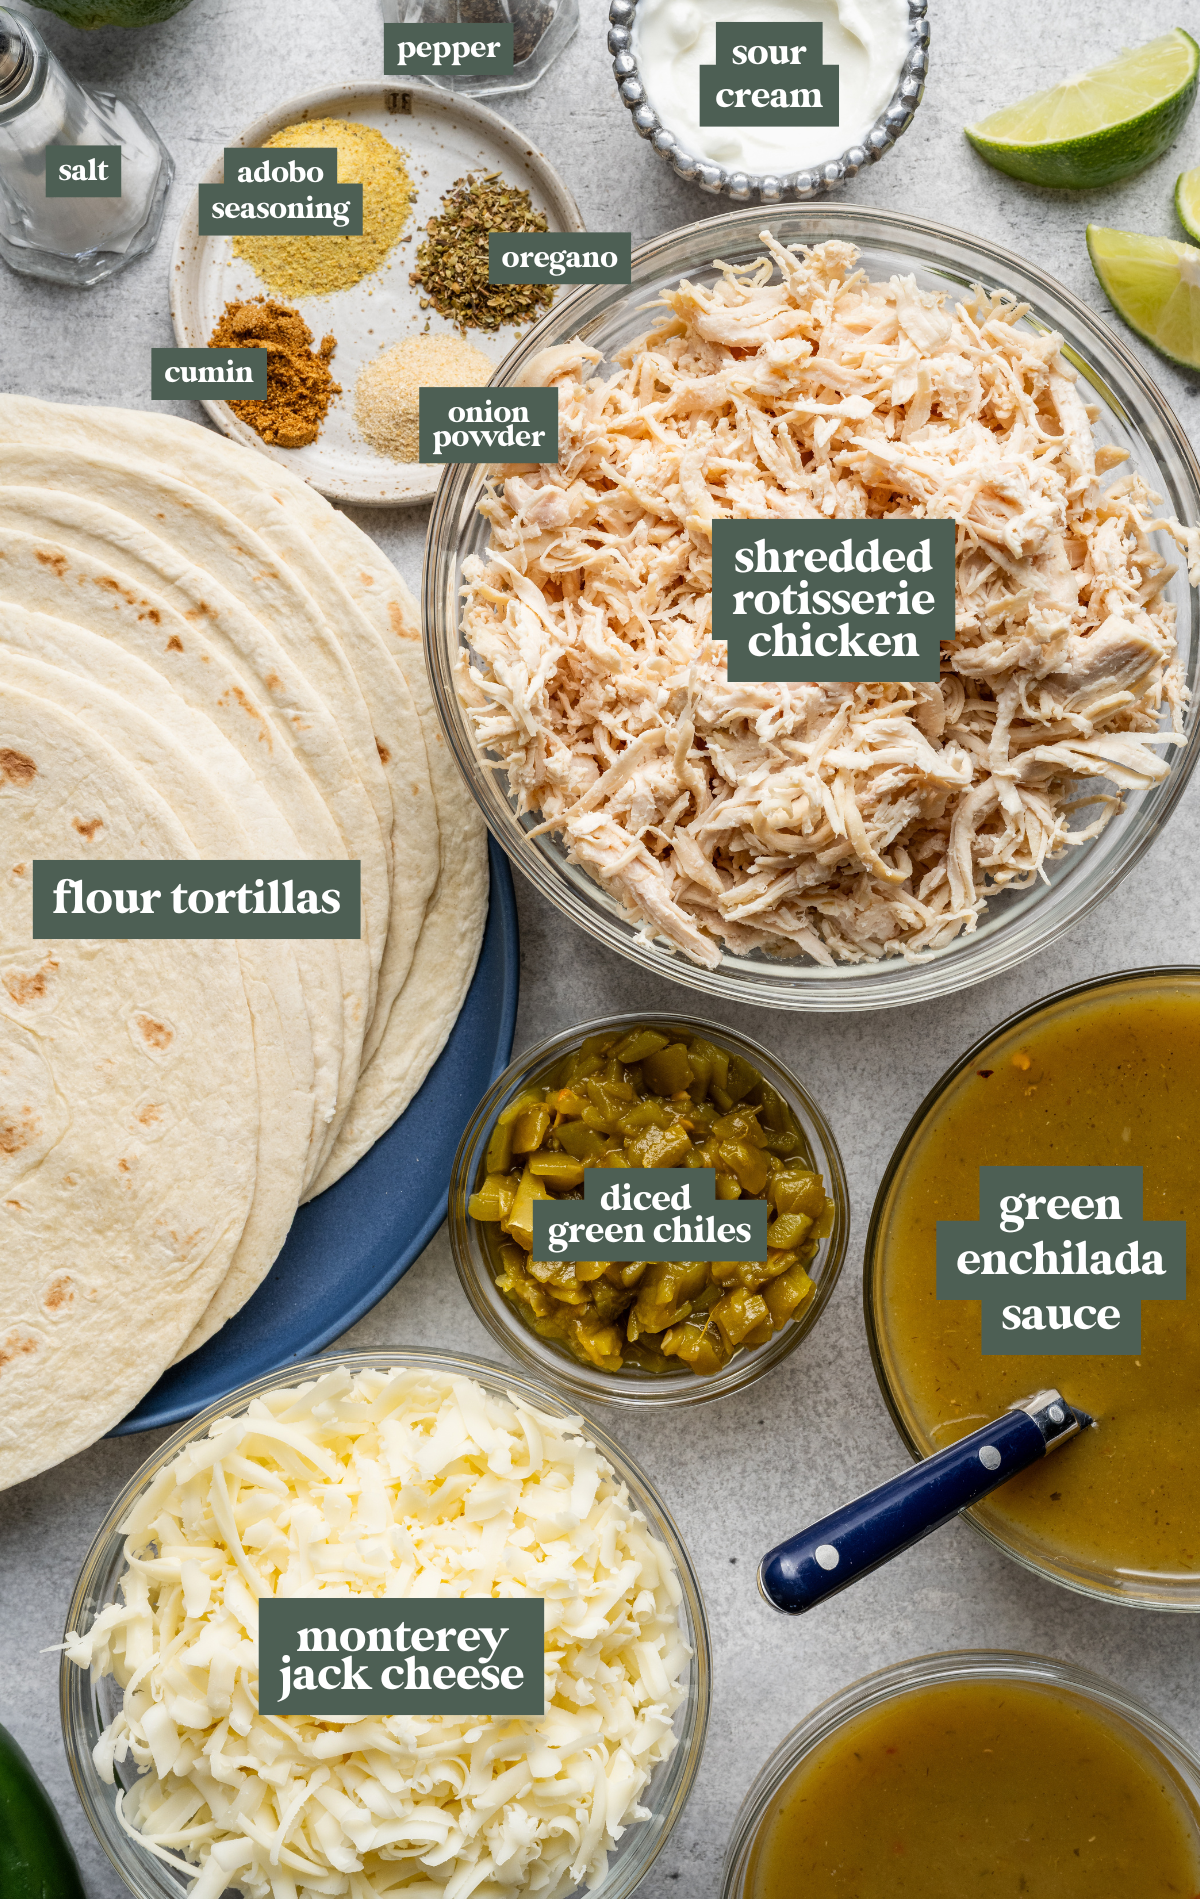
- Chicken: Shredded rotisserie chicken makes this recipe super quick and easy. You can buy the pre-shredded kind or buy a whole rotisserie chicken and shred your own. I like to use my stand mixer to quickly shred the chicken.
- Monterey Jack cheese: For the best taste and melt, I prefer to shred my own cheese (I promise it only takes a few extra minutes and is SO worth it), but pre-shredded will also work.
- Green enchilada sauce: Use your favorite store-bought brand or homemade version.
- Flour tortillas: I use the soft taco-size flour tortillas for these enchiladas. Using the soft tortillas helps to hold all the chicken filling while also baking up perfectly tender under the sauce.
- Seasonings: I used a blend of Adobo seasoning, onion powder, cumin, oregano, salt, and pepper. Feel free to add any other seasonings you like!
Step by Step Directions
(For the full recipe, scroll down to the recipe card below)
Mix the filling
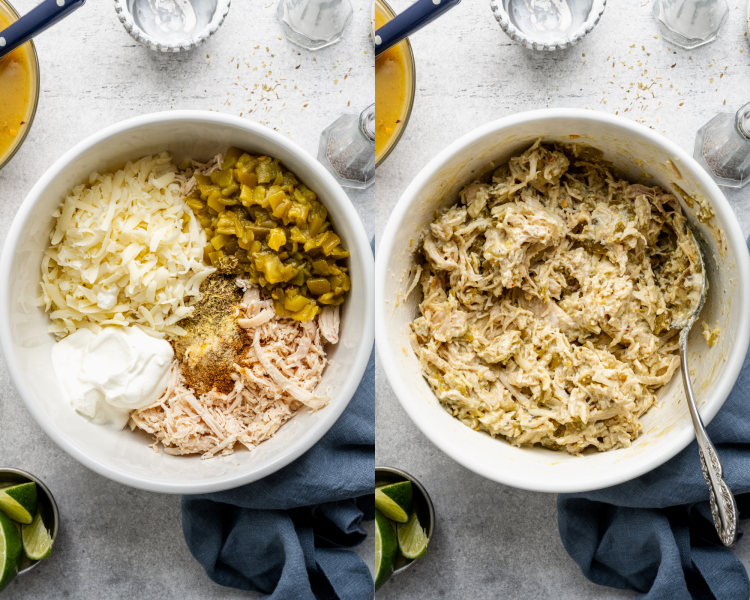
In a large bowl, add all of the enchilada filling ingredients and mix until combined.
Prepare the pan
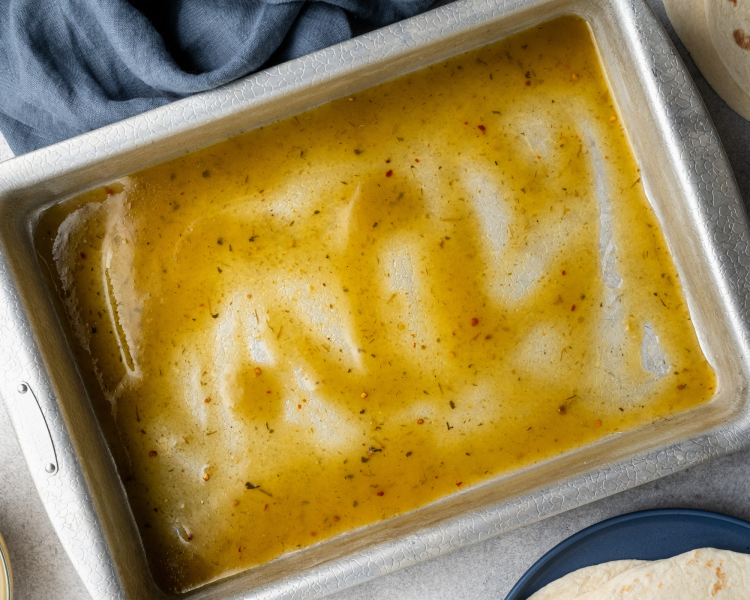
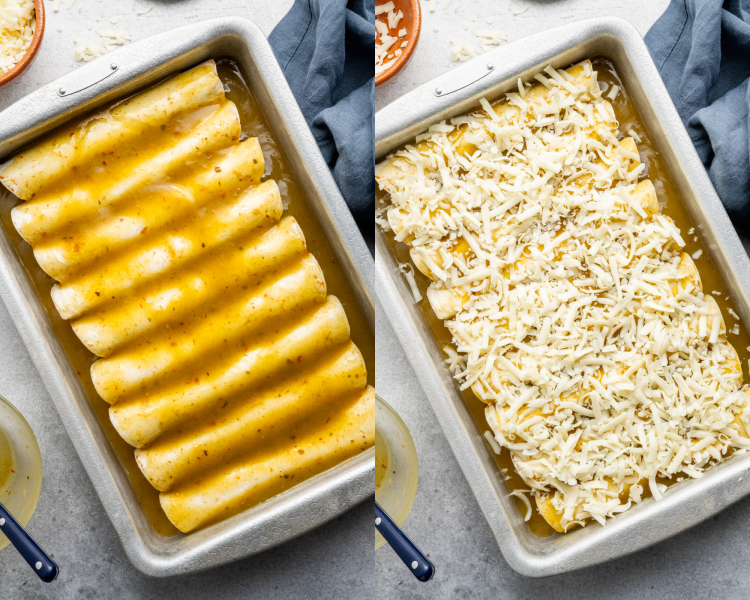
Spread a layer of enchilada sauce across the bottom of the prepared baking dish.
Assemble the enchiladas
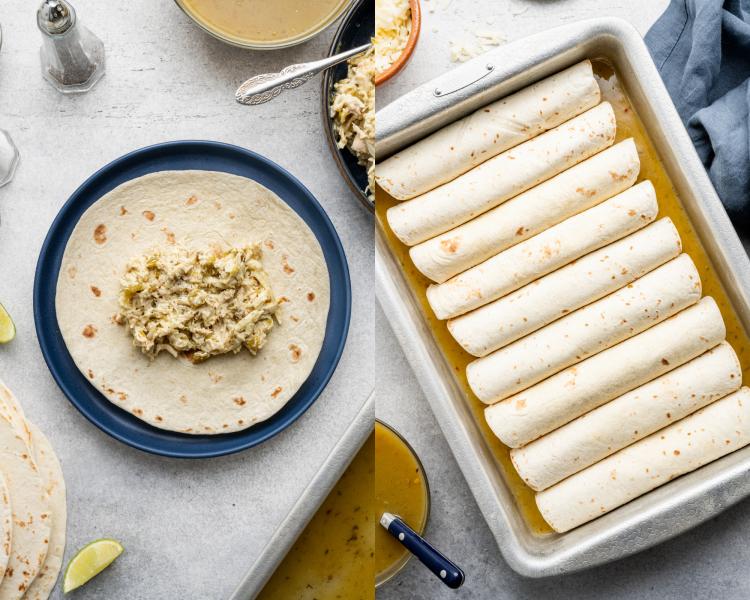
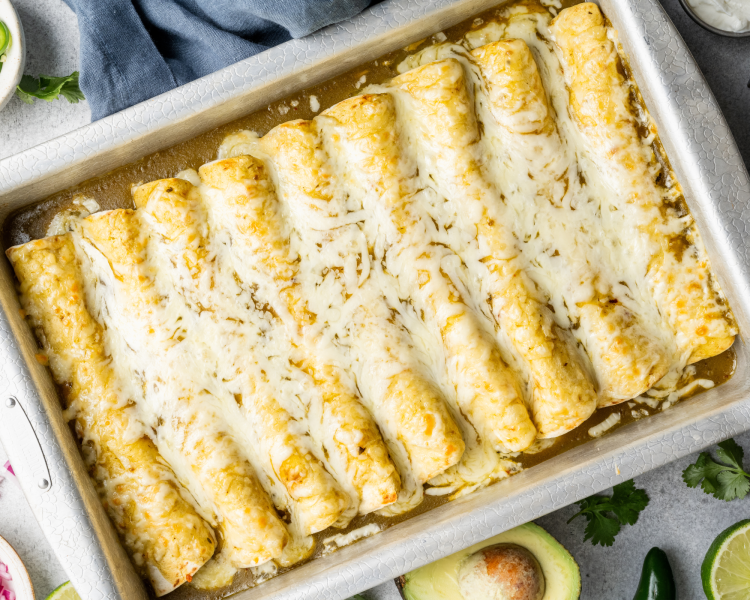
Lay a tortilla flat, spoon the chicken mixture down the center, and roll tightly. Place seam side down in the pan.
Add sauce & cheese
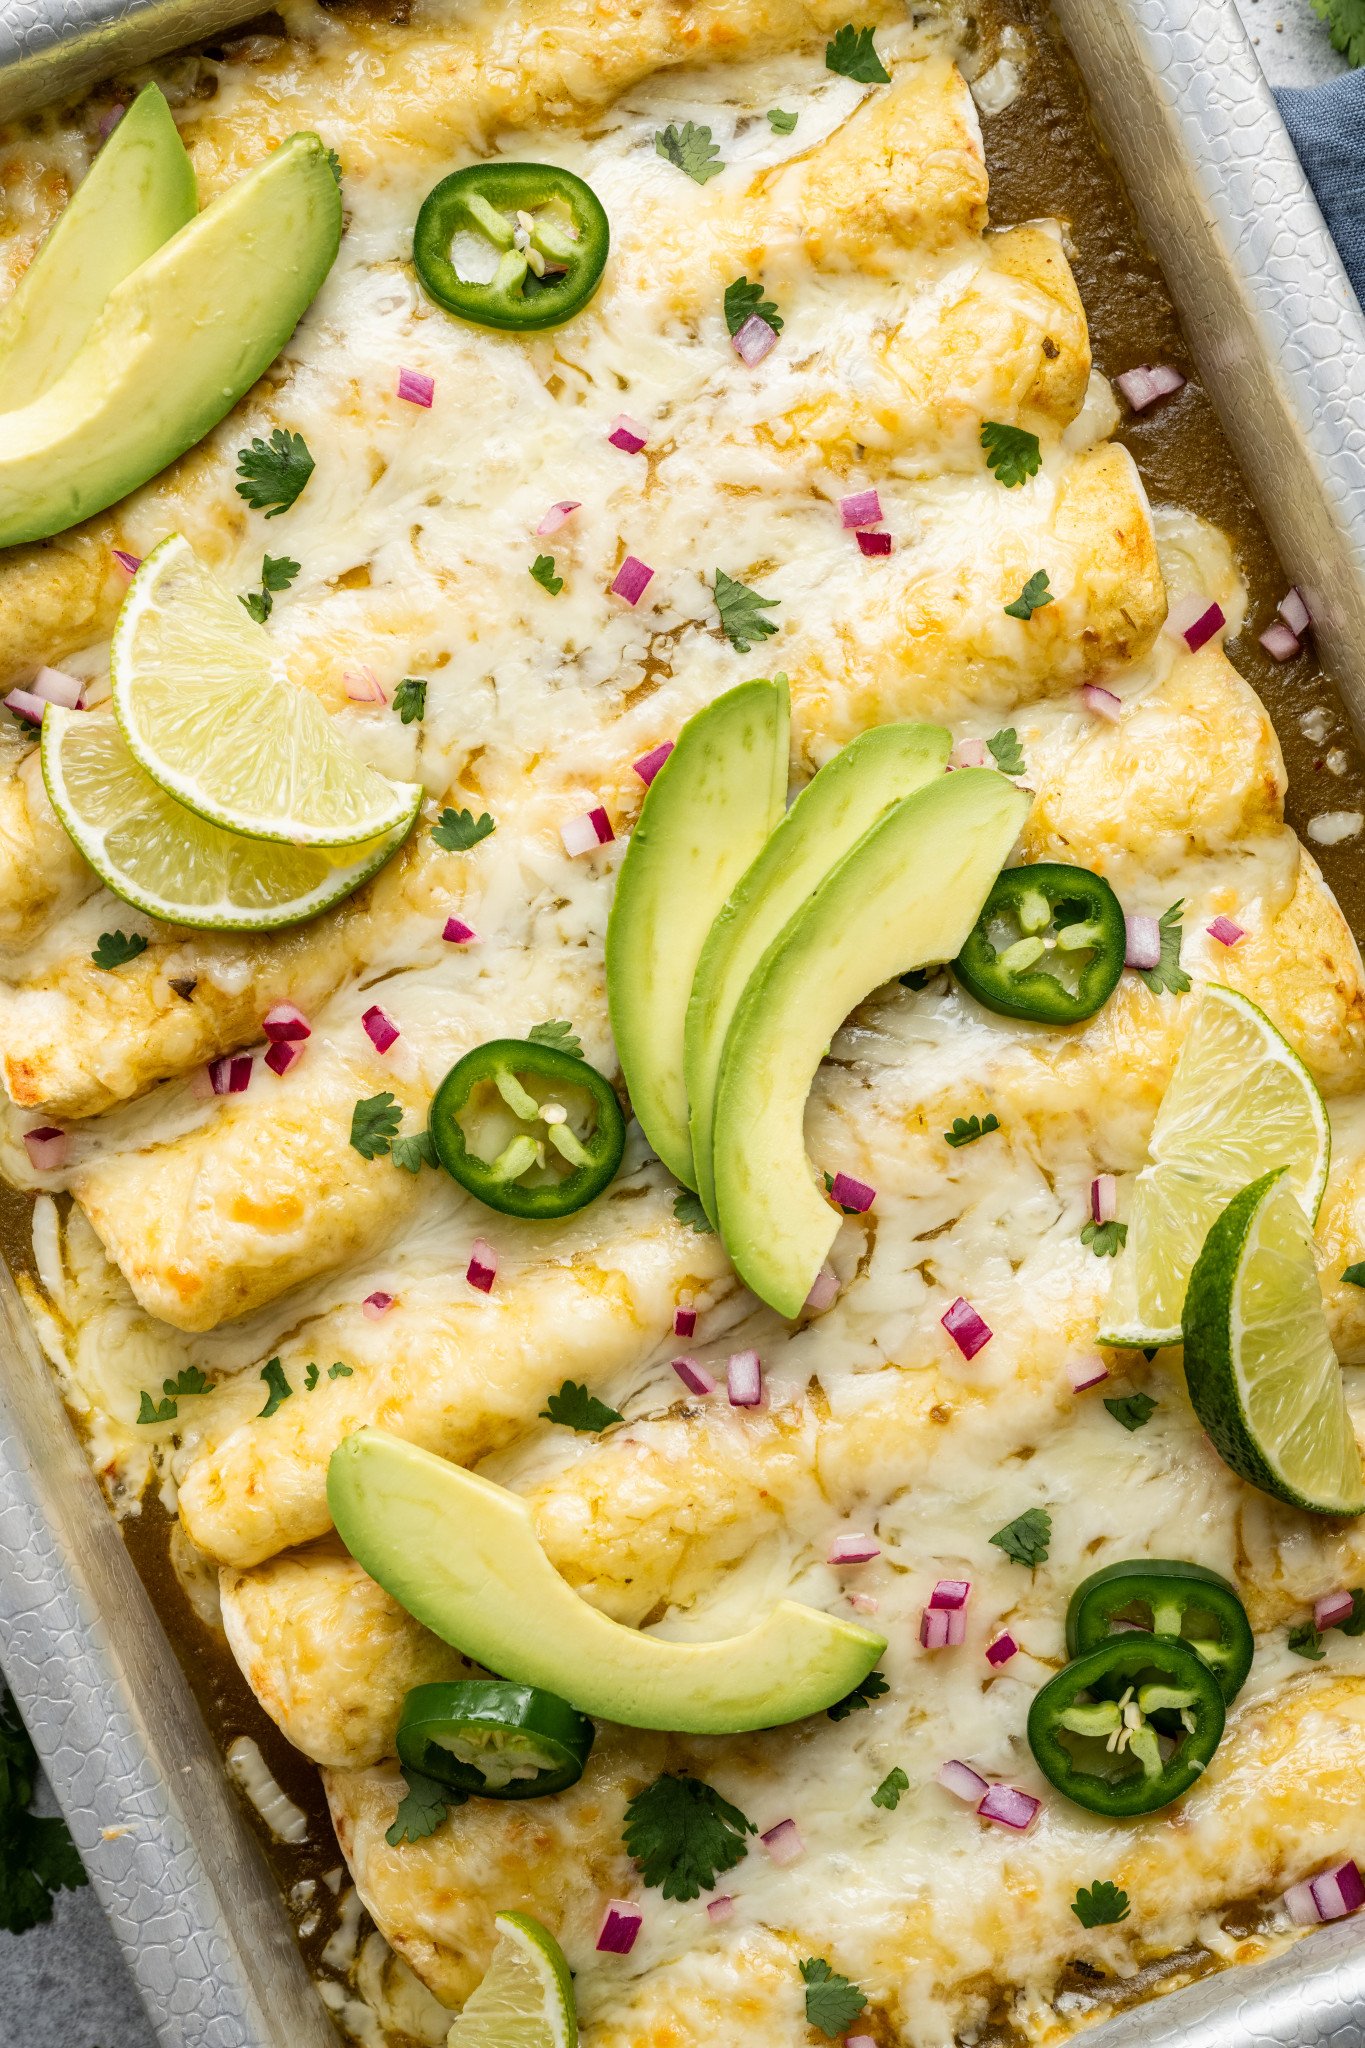
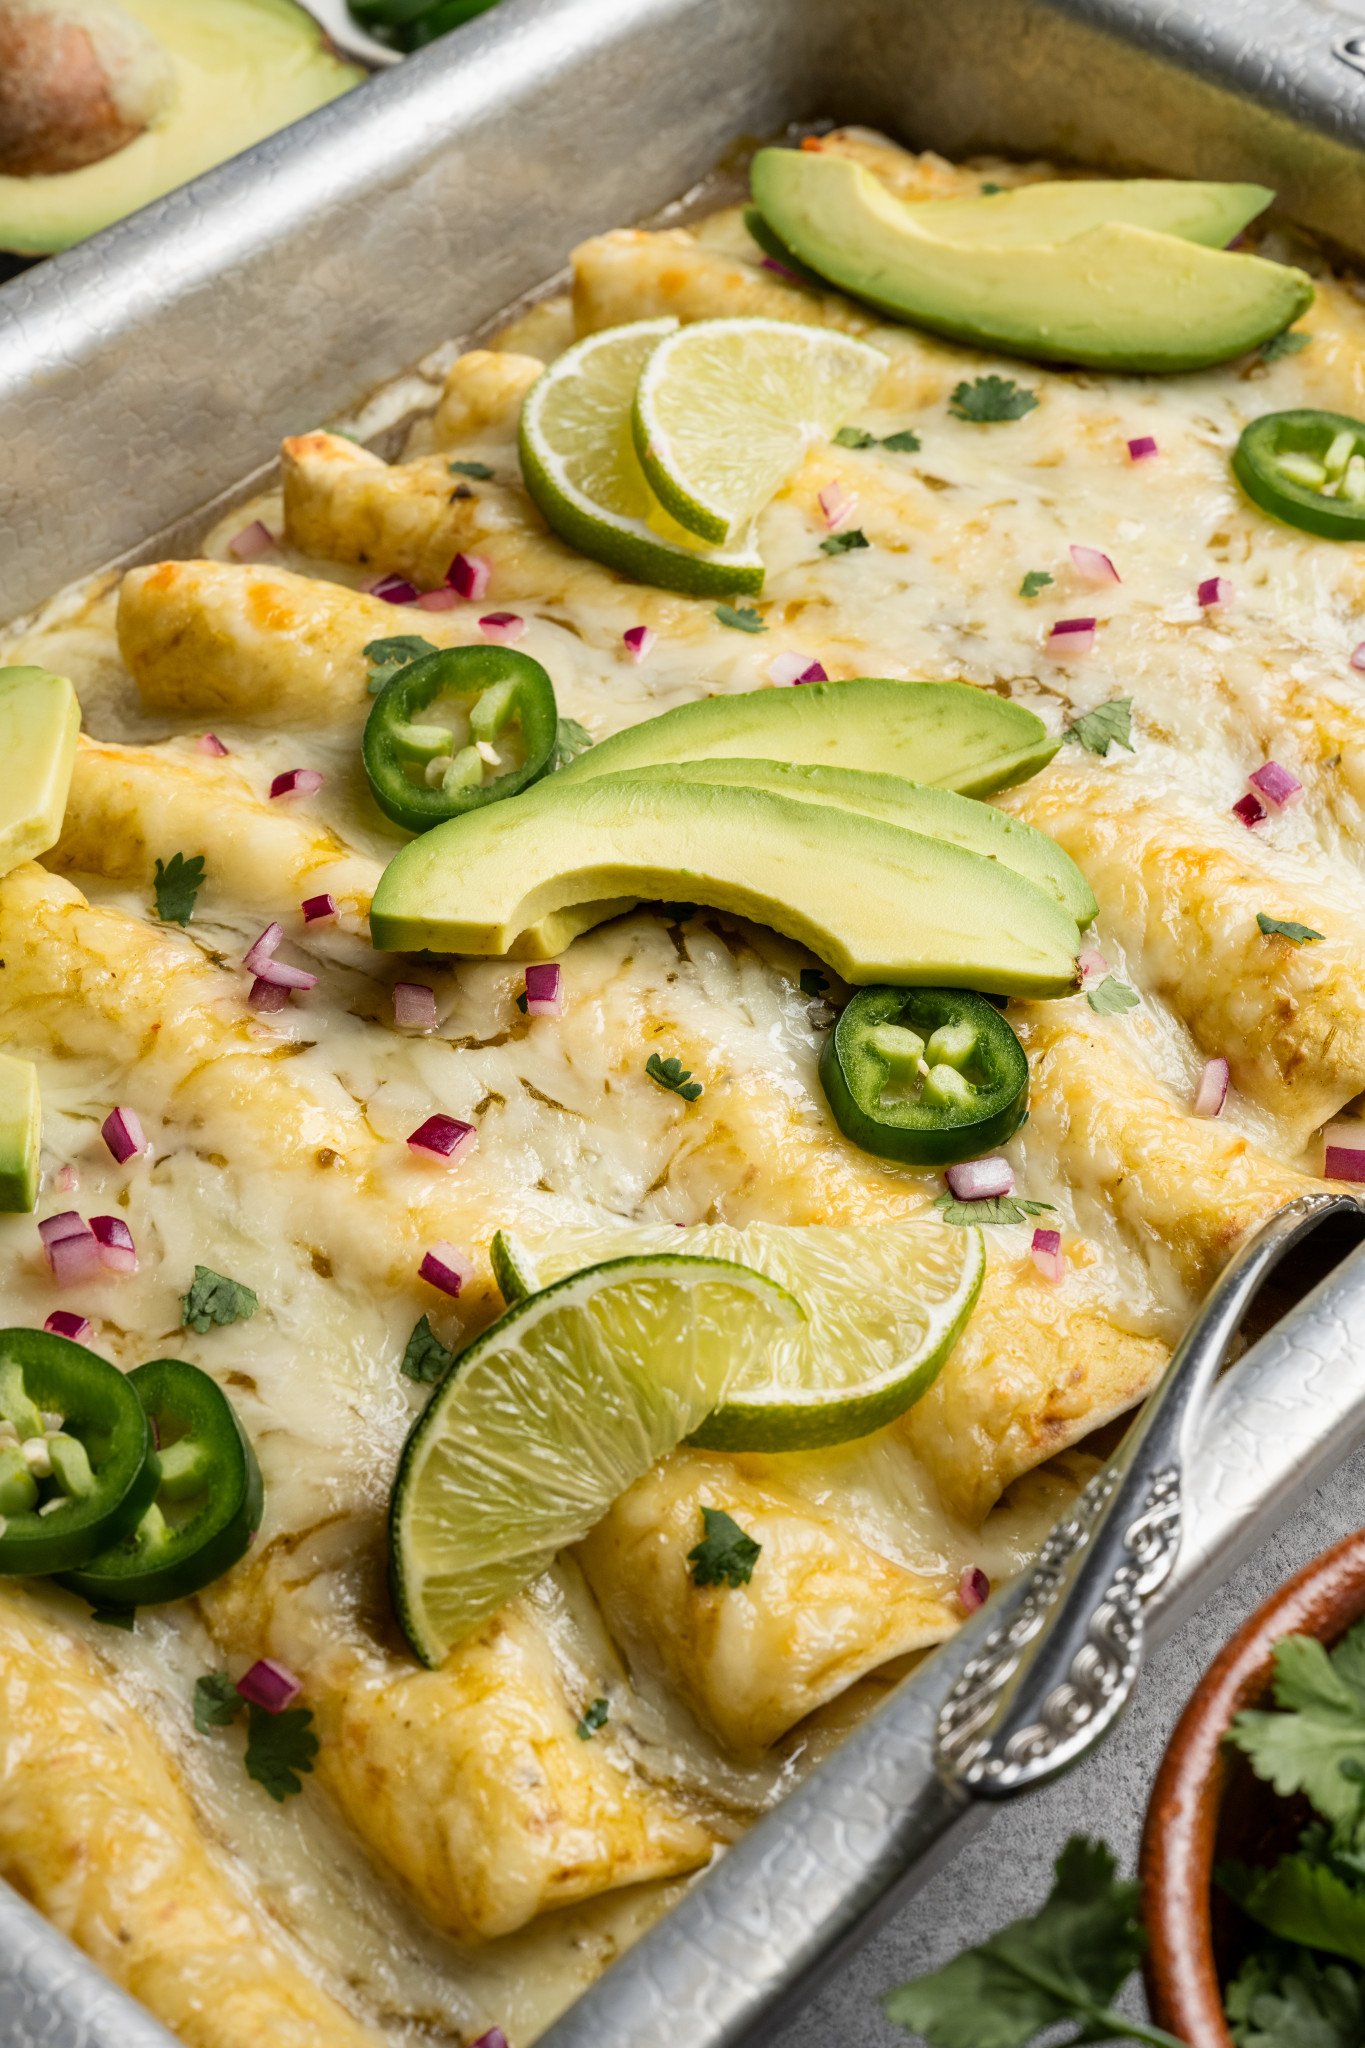
Pour the remaining enchilada sauce over the enchiladas and sprinkle with the remaining cheese…adding a little more cheese on top if you want (I usually do)! 😉
Bake & enjoy!
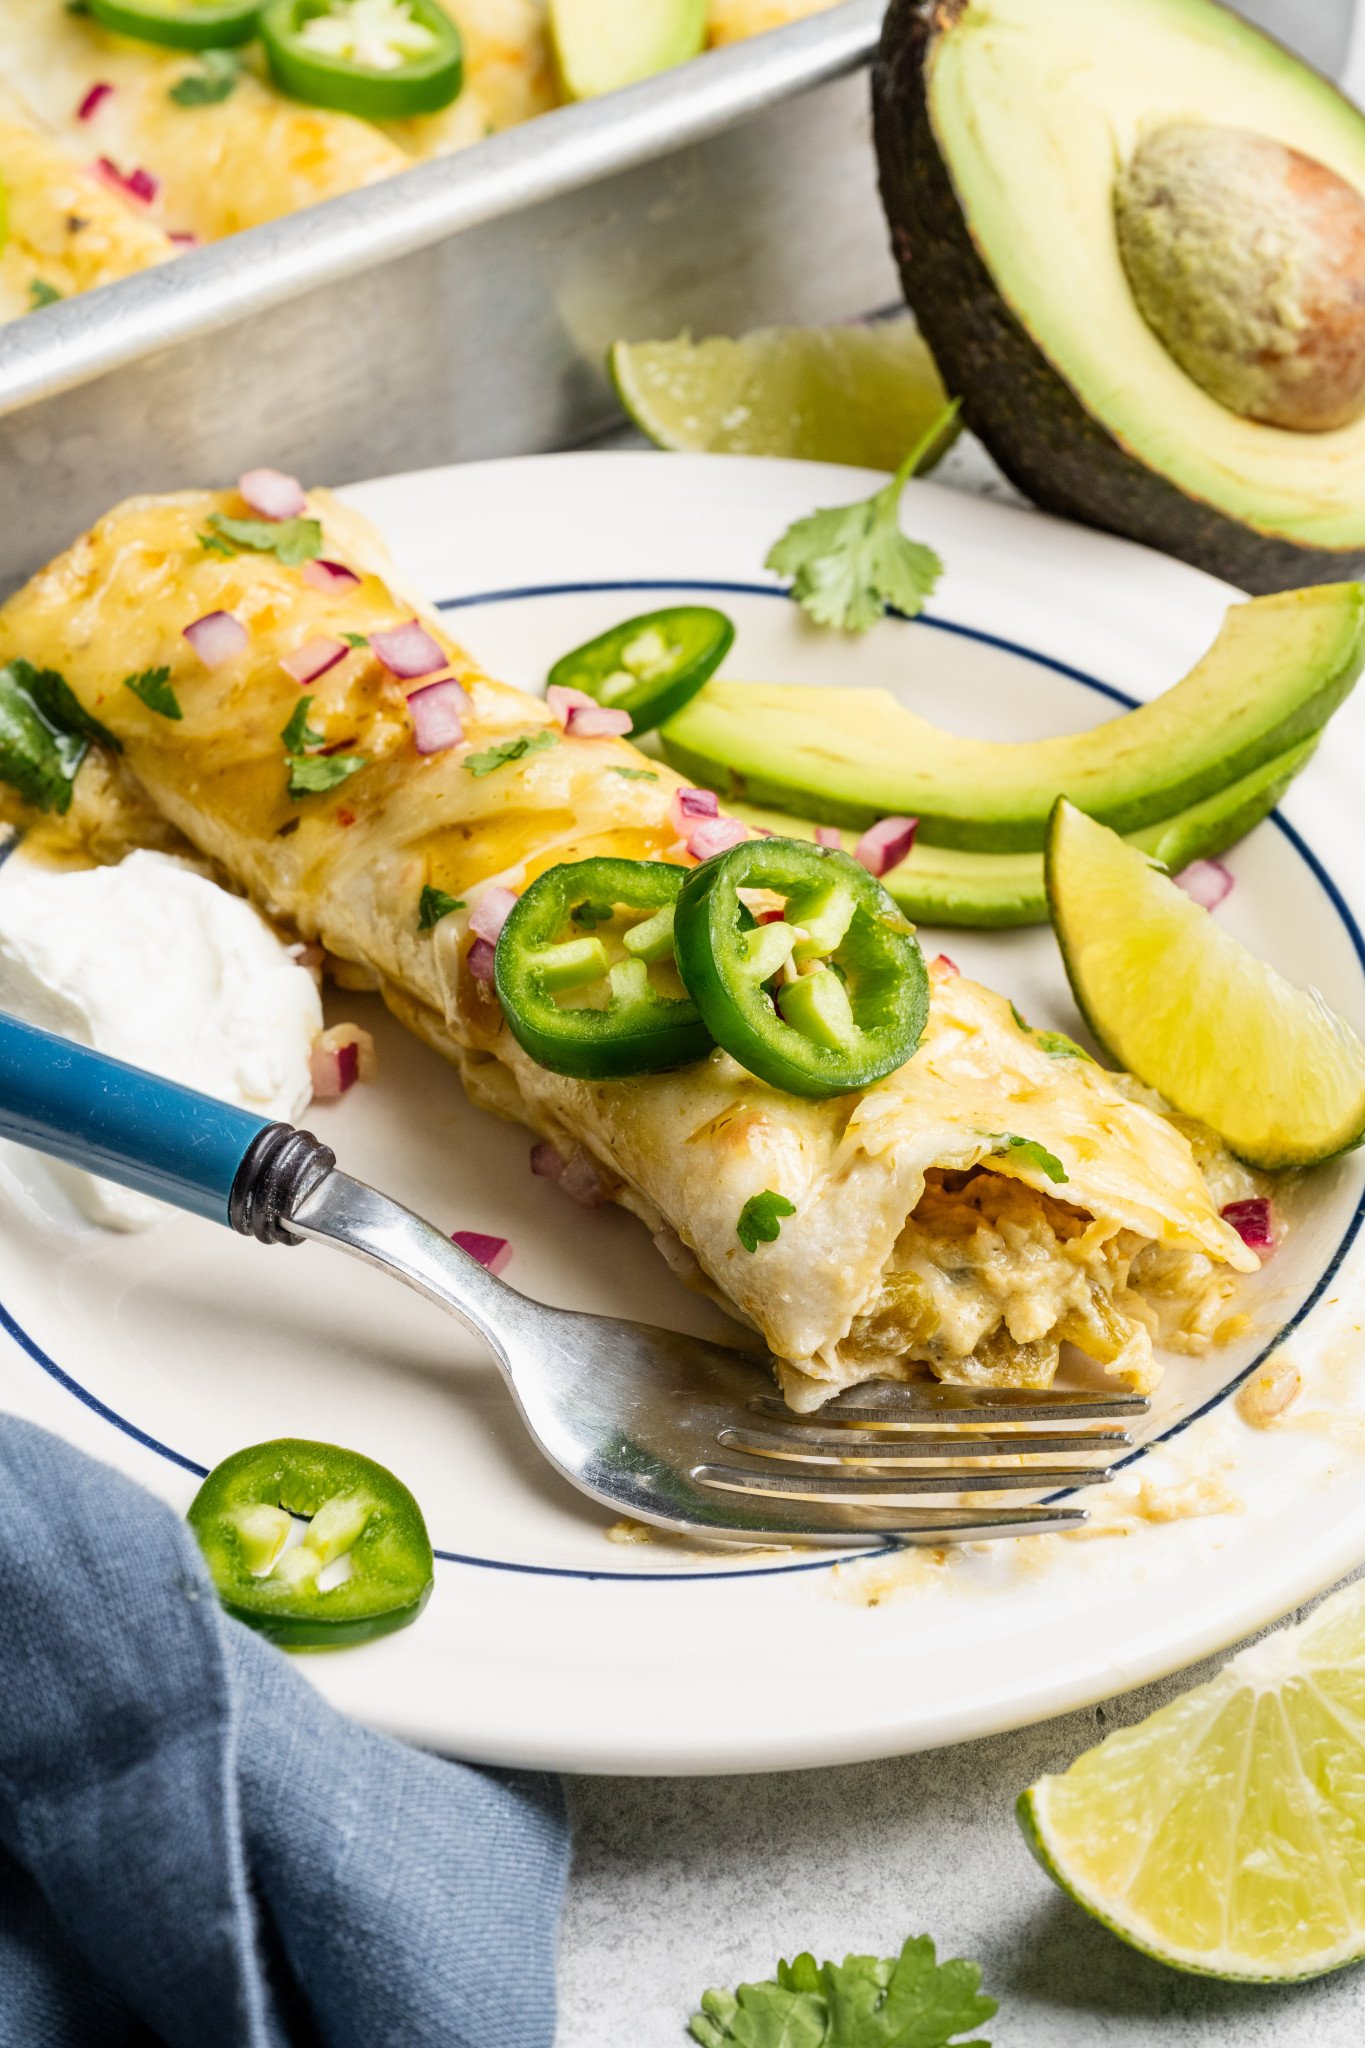
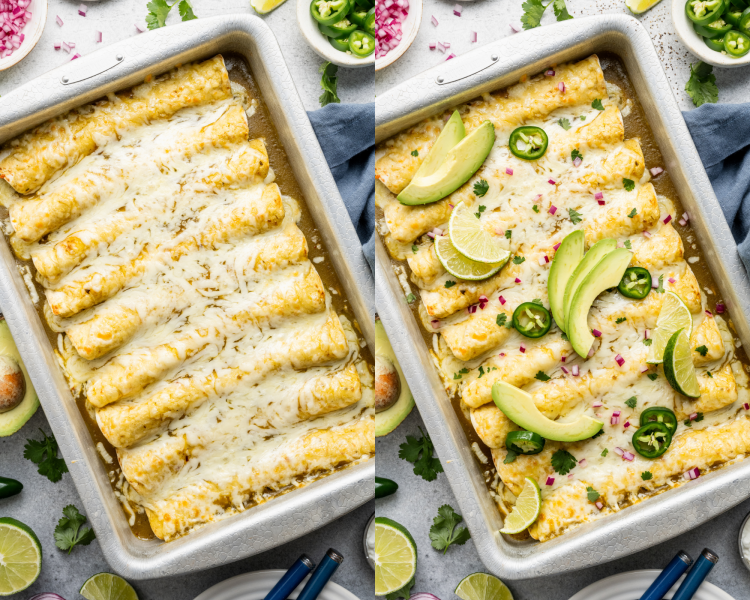
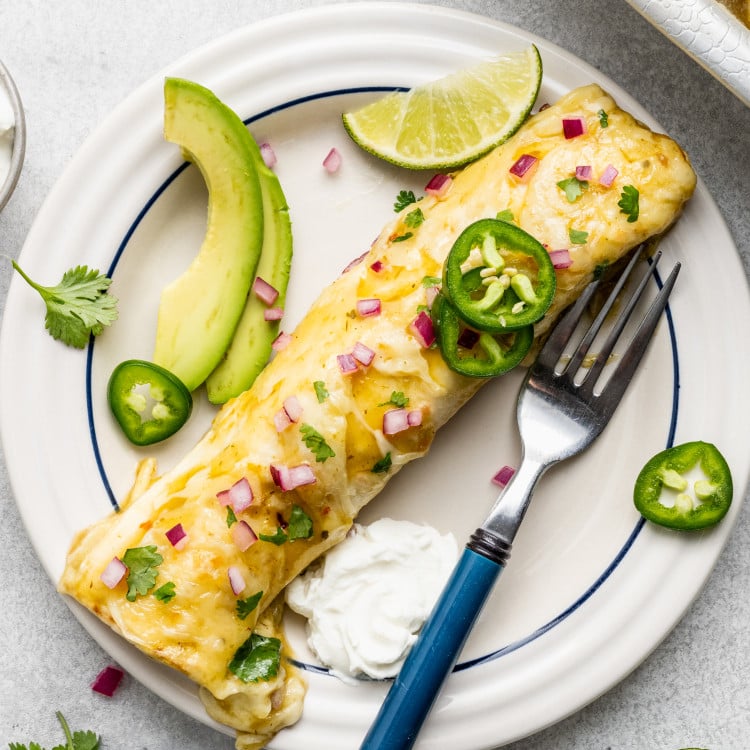
Bake for 20-25 minutes. You can also broil for 1-2 minutes at the end to give the cheese a nice color! Let rest for a few minutes before serving, then garnish with your favorite toppings and enjoy!
Expert Tips
- Warm the tortillas first: Cover the tortillas with a damp paper towel and briefly heat your tortillas in the microwave before filling. This makes them more flexible and less likely to tear when rolling.
- Don’t overfill: About ~1/3 cup of chicken filling is plenty! If you overstuff the tortillas, they will burst or get soggy once baked.
- Layer the sauce: Adding a thin layer of green enchilada sauce on the bottom of your baking dish before adding the rolled enchiladas helps to prevent sticking and to keep the bottoms moist.
- Bake covered, then uncover: Covering the dish with foil for the first 15 minutes of baking helps to keep everything moist, then uncovering for the last bit of cooking lets the cheese get golden brown and bubbly!
Variations / Substitutions
- Corn tortillas: I prefer using flour tortillas for these enchiladas because they’re easier to fill, but if you want to use corn tortillas, I recommend dipping them in the enchilada sauce before filling and rolling.
- Sour cream: The sour cream is optional, but I really love adding it to the filling to give it a creamy texture! You could also use Greek yogurt if you prefer.
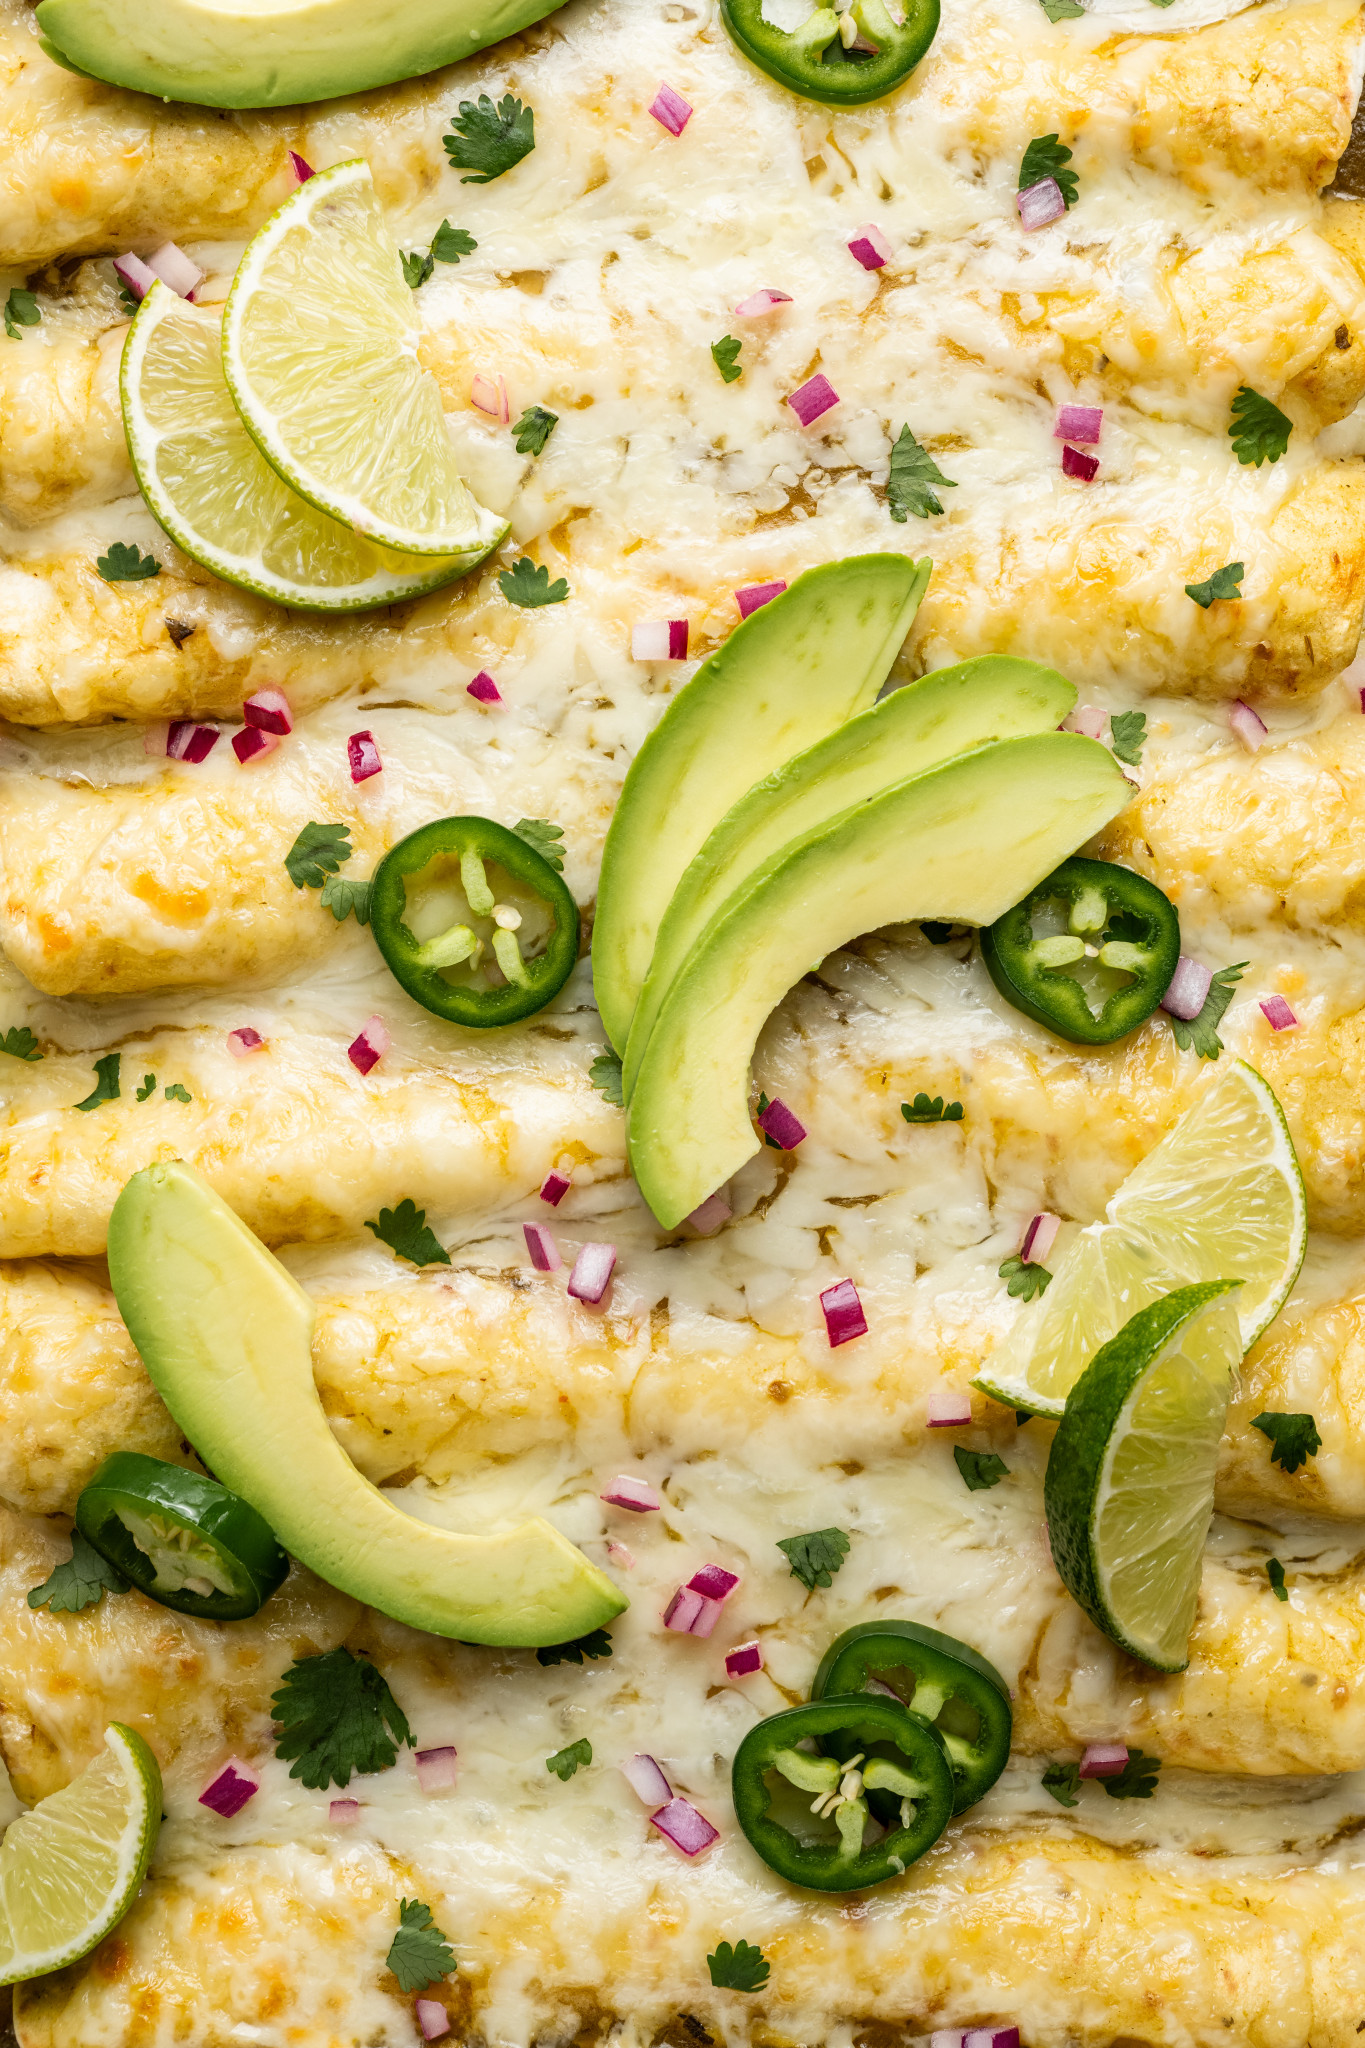
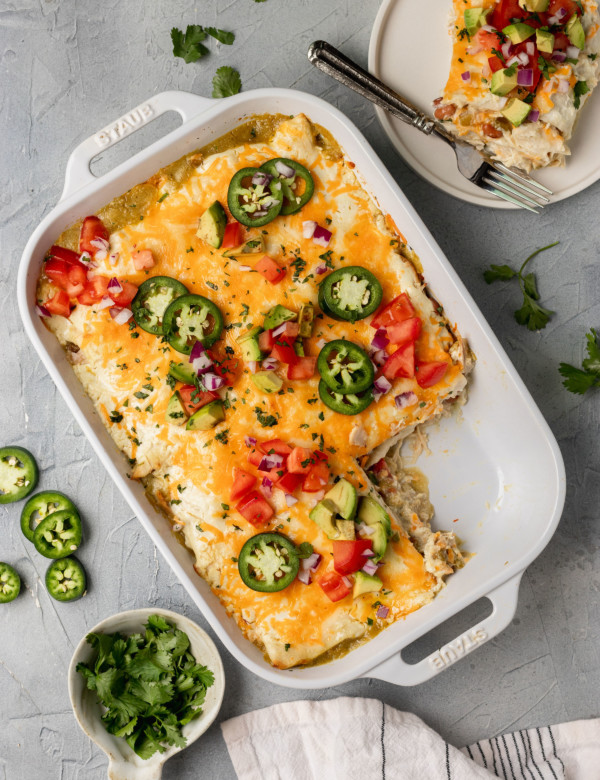
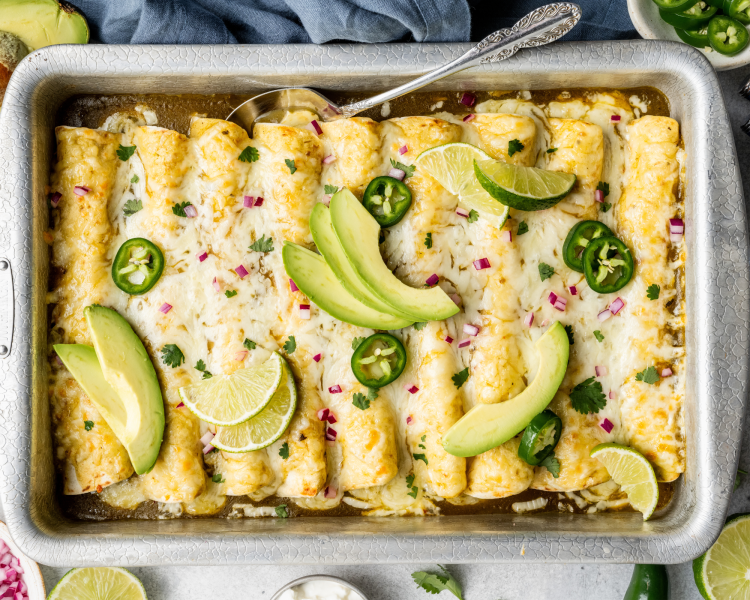
- Toppings: Garnish these enchiladas with fresh cilantro, diced avocado, a squeeze of lime juice, or any of your favorite enchilada toppings to really bring these enchiladas over the top!
Storage / Freezing
- Storage: Store leftover enchiladas in an airtight container in the refrigerator for up to 4 days.
- Reheat: Reheat individual portions in the microwave until warmed through, or bake covered at 350°F for 15–20 minutes to keep the tortillas from getting soggy.
- Freezing: Let enchiladas cool completely. Cover tightly with plastic wrap and foil, then freeze for up to 3 months. Reheat at 350°F from frozen, covered with foil, until warmed through.
shop this post
 Buy Now →
  Buy Now →
 More Mexican Recipes You’ll Love

Before You Begin! If you make this, please leave a review and rating letting us know how you liked this recipe! This helps our business thrive & continue providing free recipes.
Green Chicken Enchiladas
Ingredients
- 3 cups shredded rotisserie chicken
- 2 cups Monterey Jack cheese (divided)
- salt and pepper (to taste)
- 1 tsp. Adobo seasoning
- 1/2 tsp. ground cumin
- 1/2 tsp. dried oregano
- 1/2 tsp. onion powder
- 8-10 flour tortillas (soft taco size)
- 1 (28 oz.) can green enchilada sauce (divided)
- 1 (4-oz.) can diced green chiles
- 1/3 cup sour cream (optional, for creaminess)
- Toppings and for serving: cilantro, avocado, jalapeño slices, red onion diced small, limes, tortilla chips
Last step! If you make this, please leave a review and rating letting us know how you liked this recipe! This helps our business thrive & continue providing free recipes.
Instructions
- Preheat the oven: Preheat your oven to 350°F (177°C). Lightly grease a 9×13-inch oven-safe baking dish.
- Mix the filling: In a large bowl, combine the shredded chicken, 1 cup Monterey Jack cheese, green chiles, sour cream (if using), Adobo, cumin, oregano, onion powder, salt, and pepper. Pour in about 1 cup of the enchilada sauce and mix until everything is evenly coated.3 cups shredded rotisserie chicken, 2 cups Monterey Jack cheese, salt and pepper, 1 tsp. Adobo seasoning, 1/2 tsp. ground cumin, 1/2 tsp. dried oregano, 1/2 tsp. onion powder, 1 (28 oz.) can green enchilada sauce, 1/3 cup sour cream, 1 (4-oz.) can diced green chiles

- Prepare the pan: Spread 1/2–3/4 cup of enchilada sauce across the bottom of the prepared baking dish to keep the tortillas from sticking.
- Assemble the enchiladas: Lay a tortilla flat, spoon about 1/3 cup of the chicken mixture down the center, and roll tightly. Place seam side down in the pan. Repeat with the remaining tortillas and filling. You should get about 8-10 enchiladas.8-10 flour tortillas
- Add sauce & cheese: Pour the remaining enchilada sauce evenly over the top of the rolled tortillas and sprinkle with the remaining 1 cup of cheese…adding a little more cheese on top if you want (I usually do)! 😉
- Bake: Cover with foil and bake for 15 minutes to heat through. Then remove the foil and bake another 5–10 minutes, until cheese is melted and bubbly. You can also broil for 1-2 minutes to give the cheese a nice color. Start Timer
- Serve: Let rest for a few minutes before serving. Garnish with fresh cilantro, sliced green onions, a drizzle of sour cream, or any other of your favorite toppings for enchiladas!Toppings and for serving: cilantro, avocado, jalapeño slices, red onion diced small, limes, tortilla chips
Notes
- Storage: Store leftover enchiladas in an airtight container in the refrigerator for up to 4 days.
- Reheat: Reheat individual portions in the microwave until warmed through, or bake covered at 350°F for 15–20 minutes to keep the tortillas from getting soggy.
- Freezing: Let enchiladas cool completely. Cover tightly with plastic wrap and foil, then freeze for up to 3 months. Reheat at 350°F from frozen, covered with foil, until warmed through.
Nutrition Information
Nutritional information is provided as a courtesy and is automatically calculated. It should only be construed as an estimate rather than a guarantee. Ingredients can vary and Kroll’s Korner can’t make any guarantees to the accuracy of this information.
📸 Photography by Creating Kaitlin

Great dish. Made according to recipe. Low prep time does not do it justice. Simply great period, Did skip special Mexican spice. The onion powder, cumin and oregano is all that is needed, the adobo seasoning is redundant. Use green onion. Much tastier and good red onions are hard to get . Most store bought reds are low quality.
So glad you loved this one, Roger! Thanks for leaving a review! 🫶🏻
This was so good! I’ve been craving enchiladas and this was easy to follow and super delicious!!
Soo glad you liked it! Thank you 🙂
This enchilada recipe is where it’s at! So delicious! Seasonings and measurements are perfect! A family favorite for sure! Thanks Tawnie!
So happy you enjoyed it 🙂 thank you!!
This recipe was easy to make, reasonably priced and yummy! Love all your recipes!
So glad you enjoyed this one Stephanie, thank you! 🙂
What version of adobo seasoning do you use? I’ve noticed there are several different versions.
Good q! I use usually Morton and Bassett or Simply Organic 🙂