Puff Pastry Apple Tart
This post may contain affiliate links. Please read our disclosure policy.
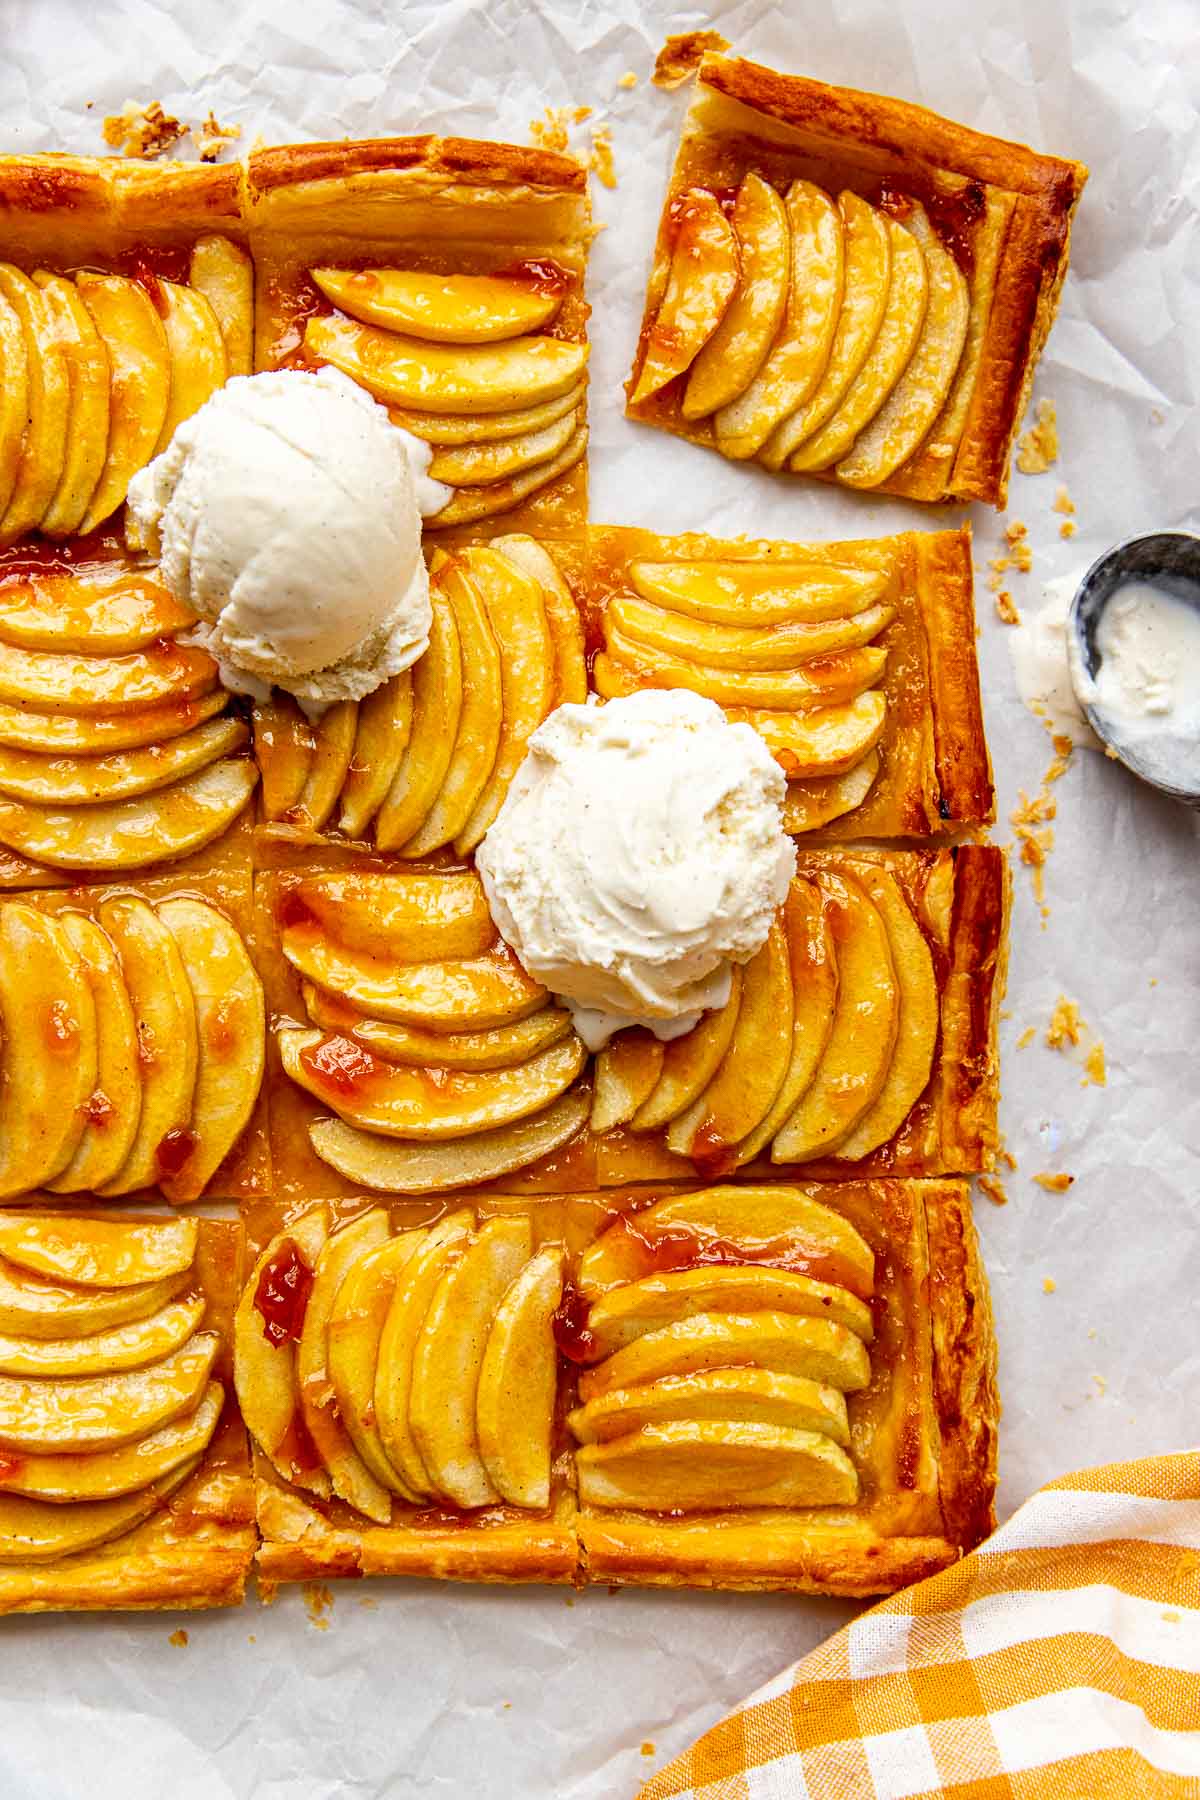
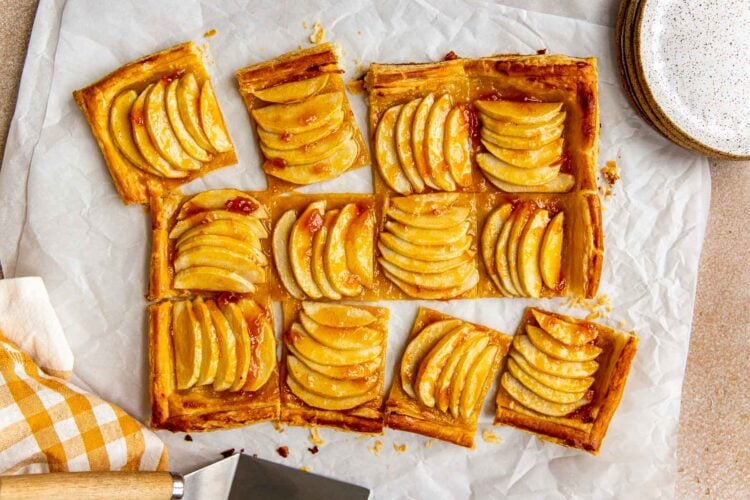
This gorgeous Puff Pastry Apple Tart checks all the boxes: simple to prepare, buttery, flaky pastry goodness, sweet and slightly tart apples, and a total crowd pleaser.
Puff pastry has been all the hype for some time now and I’ve been wanting to make a yummy recipe with it. My mind obviously went to apple desserts, because yum, and this dessert is a breeze to bring together. It reminds me of my Apple Galette recipe and a much much easier version of making an entire apple pie.
What is puff pastry?
- Puff pastry is a versatile and flaky pastry dough that can be used in both sweet and savory dishes. It is known for its delicate, buttery layers that puff up when baked, resulting in a light and airy texture.
- You can make it from scratch, but it is also readily available in most grocery stores, which I buy and use for this apple tart recipe.
Why this recipe works
- It’s easy peasy!
- Satisfies your apple pie cravings without the fuss.
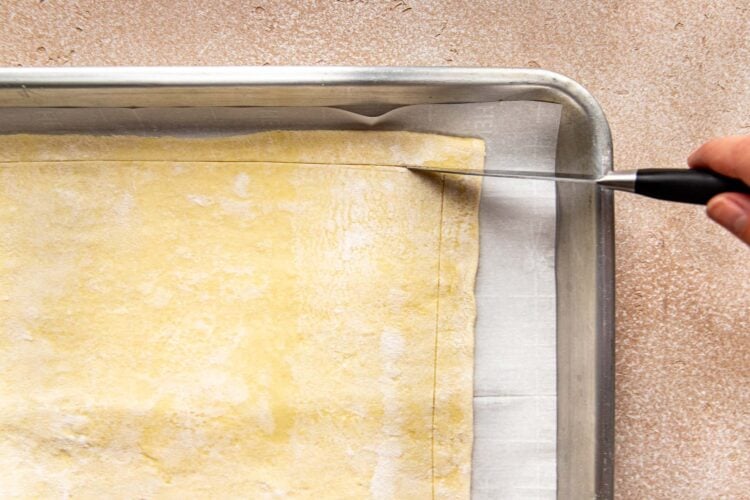
- Scoring the pastry dough helps to create edges that puff up when baking.
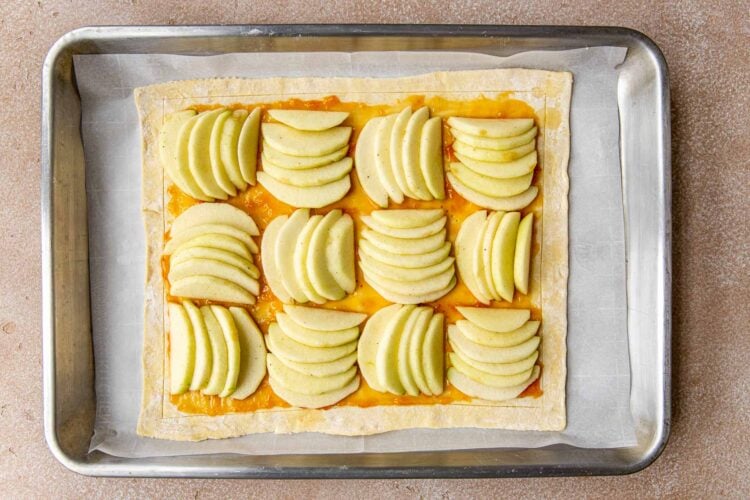
- The beautifully arranged apple slices creates an eye-catching dessert
- No extensive baking skills required.
Ingredient Notes
For the ingredient measurements and entire recipe, be sure to scroll down to the bottom of the blog post where the recipe card is located.
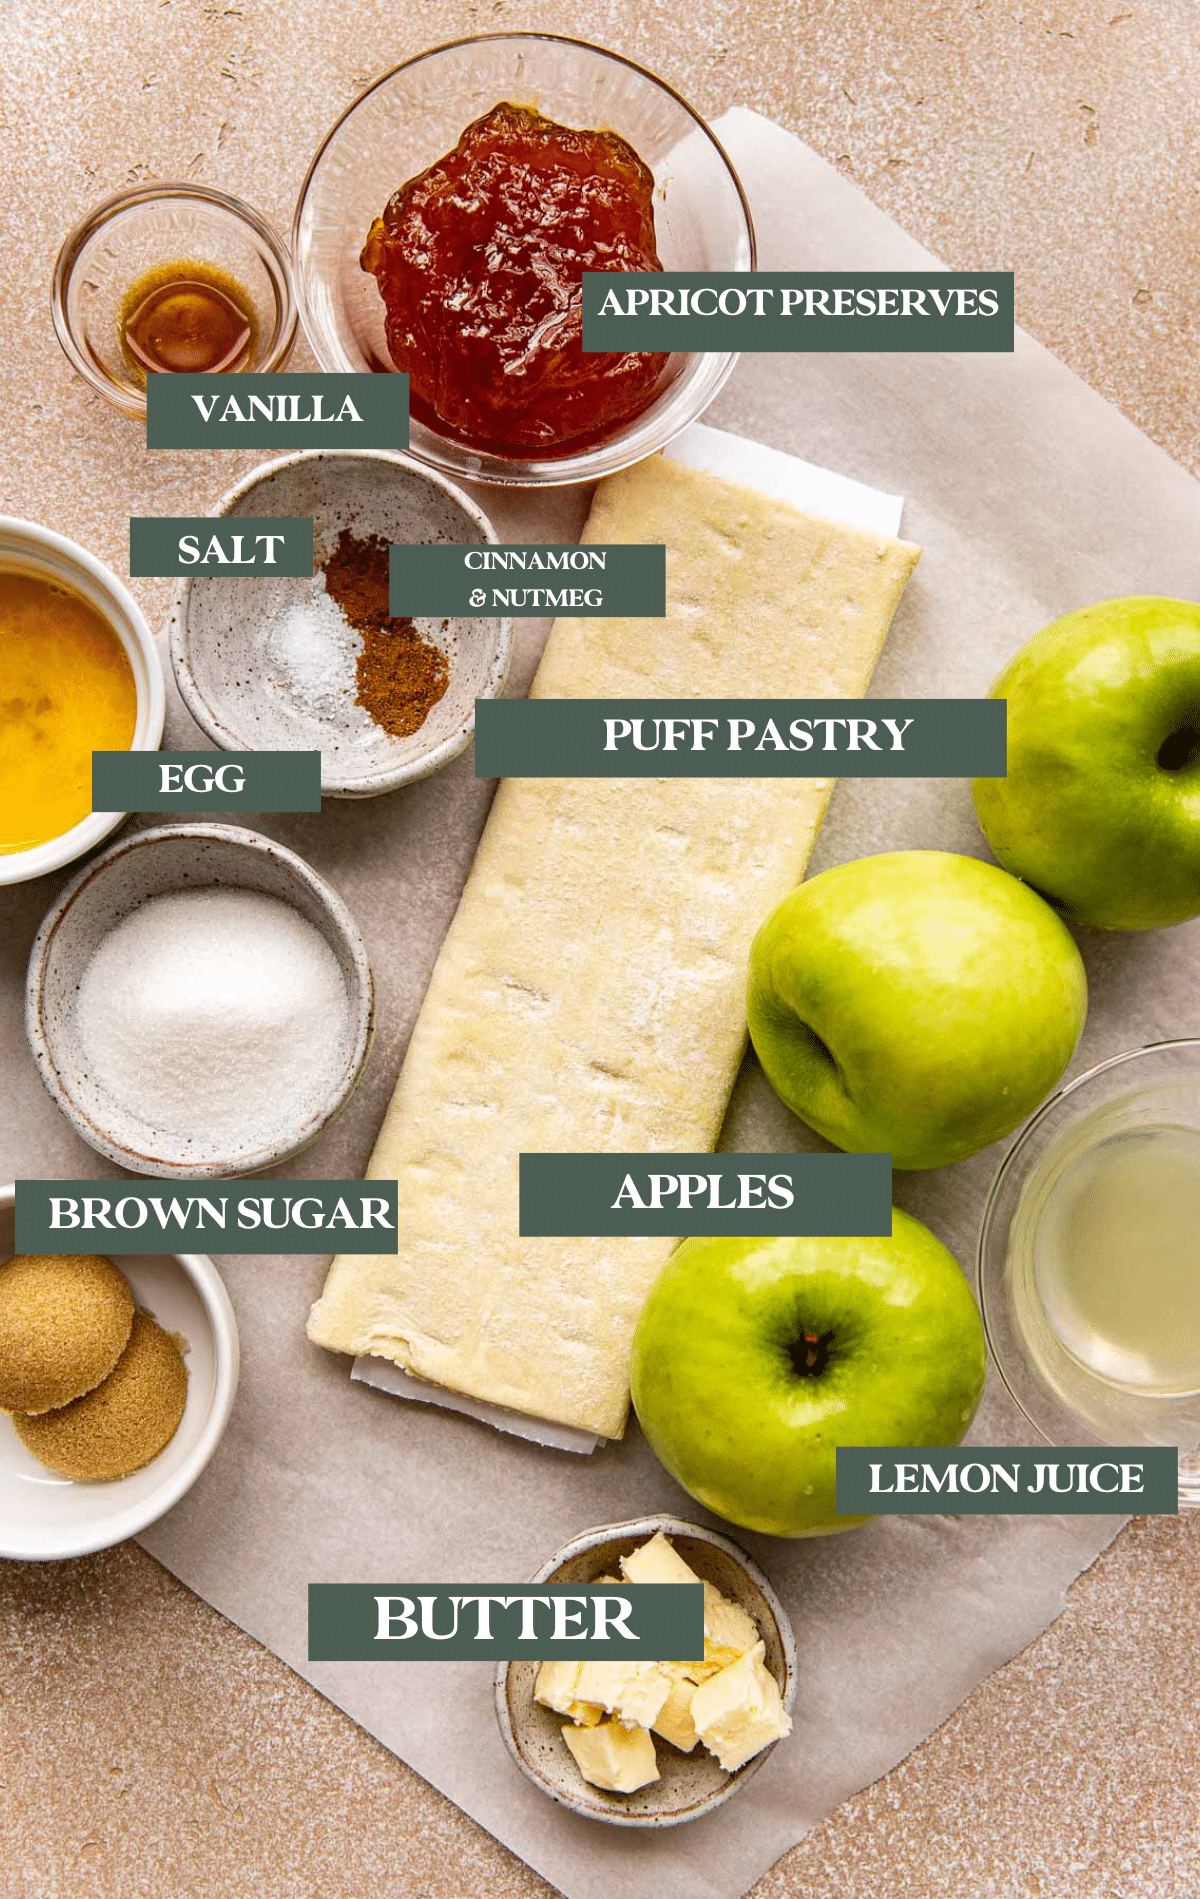
- Puff pastry dough: obviously the foundation of this delicious tart! It’s known for its flaky, buttery layers and it serves as the crispy, golden-brown base that encases the apple filling. The layers puff up during baking, creating a delightful contrast in texture. I buy mine at my local grocery store from the freezer section, be sure to take it out of the freezer ~30 minutes prior to starting the recipe so it can defrost a bit.
- Apples: the star of the show in this dessert. They provide a natural sweetness that intensifies as they bake, while their tartness adds a pleasing contrast. I like to use honeycrisp and granny smith.
- Sugar: Sugar plays a crucial role in sweetening the apples and enhancing their flavor. It also contributes to the caramelization process, creating a golden-brown and slightly sticky surface on the apples. I like to use a combination of granulated white sugar and brown sugar.
- Lemon juice: helps prevent the apple slices from browning but it also adds a touch of acidity which balances the sweetness of the filling.
- Apricot jam or preserves: I like to use a little bit as a base on the pastry dough before the apples get layered on and as as a glaze to give the tart a shiny finish.
- Other ingredients used: cinnamon, nutmeg, vanilla, salt, butter and an egg for the egg wash.
Step by Step Directions
For the full recipe instructions, scroll down to the bottom of the blog post to the recipe card.
- Thaw puff pastry.
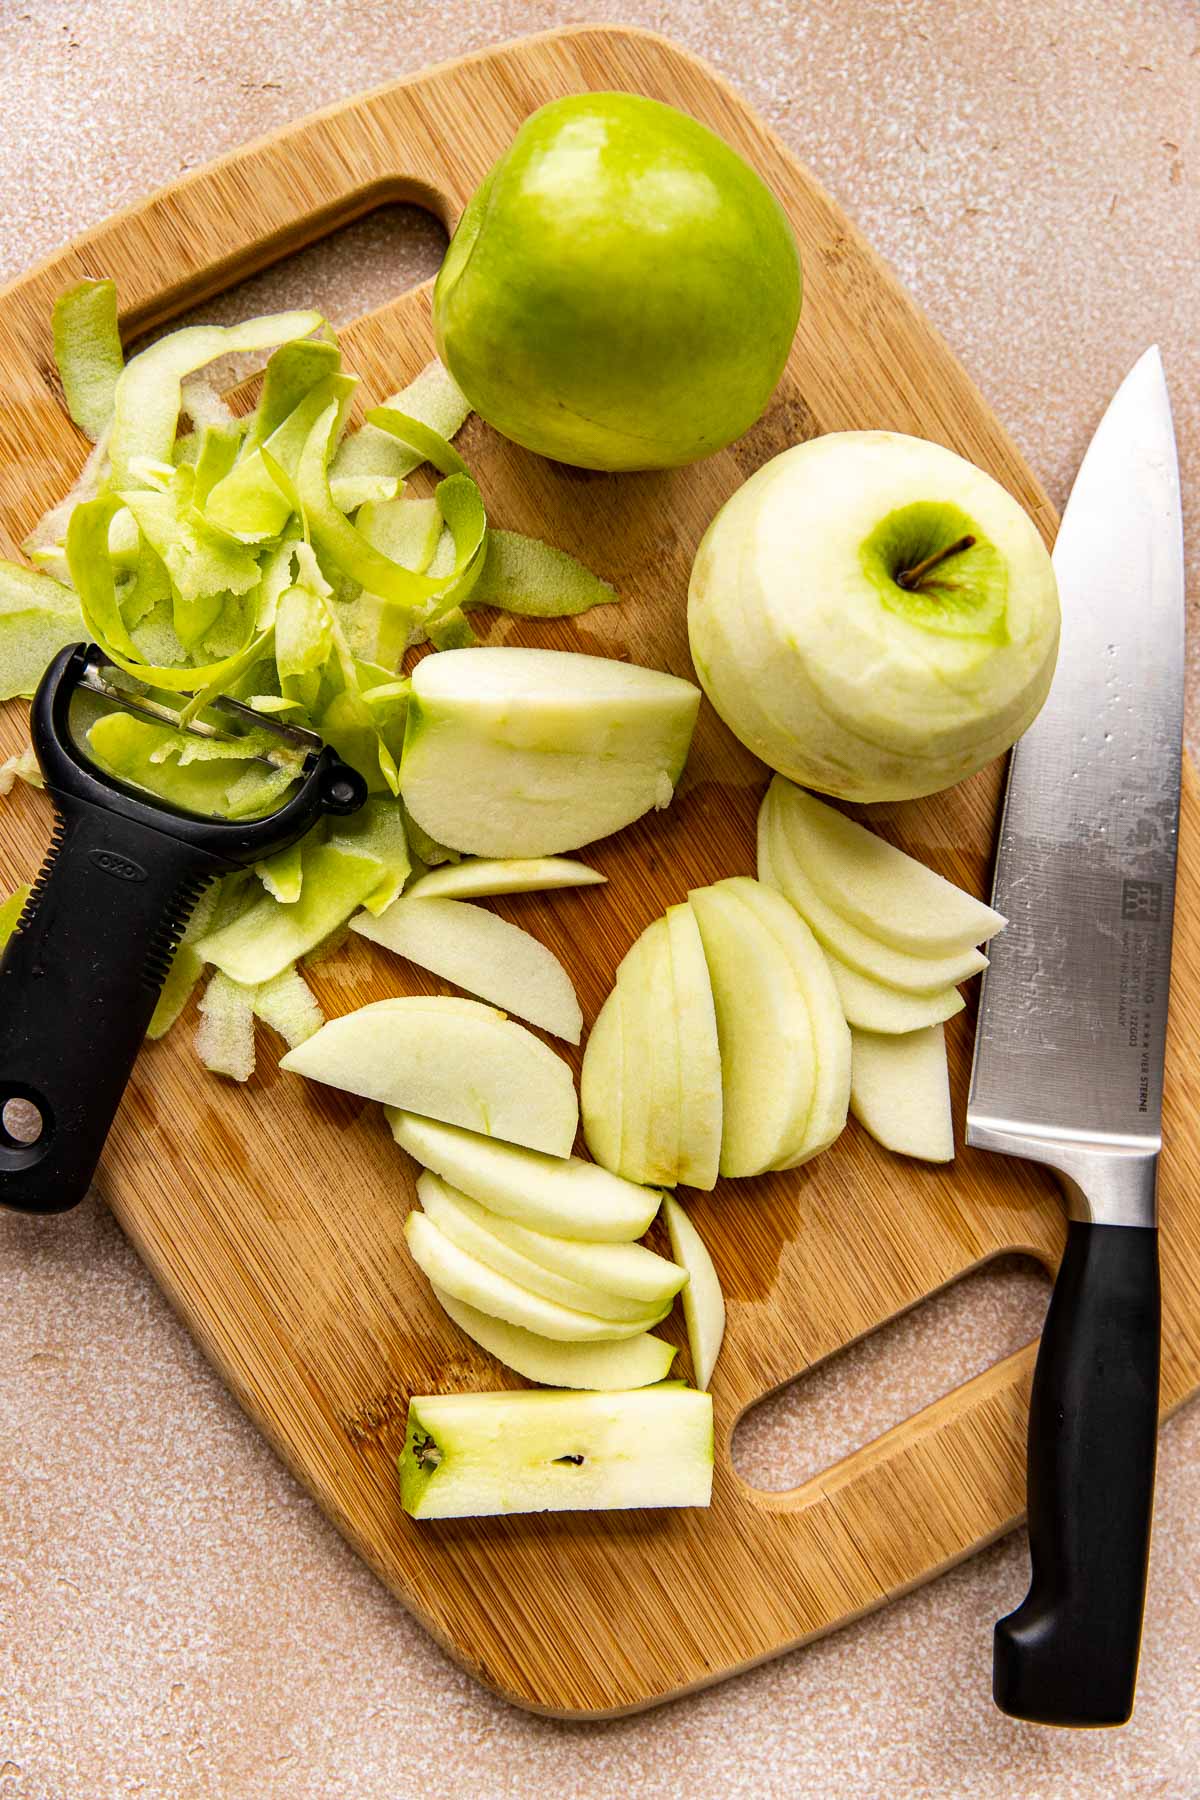
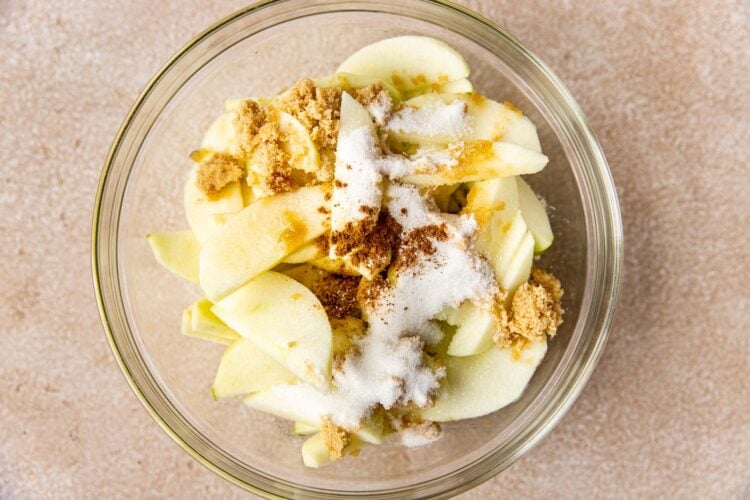
- Slice apples and add to a bowl with sugars, spices, lemon juice and vanilla.
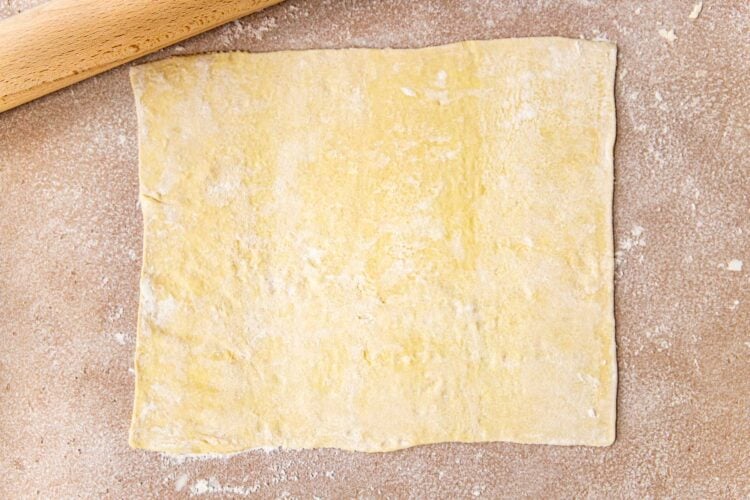
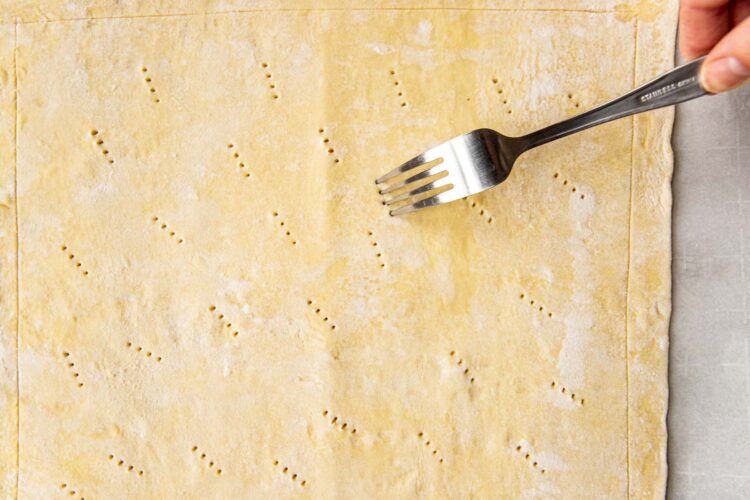
- Roll out puff pastry, score along edges, then prick with fork all over in the middle.
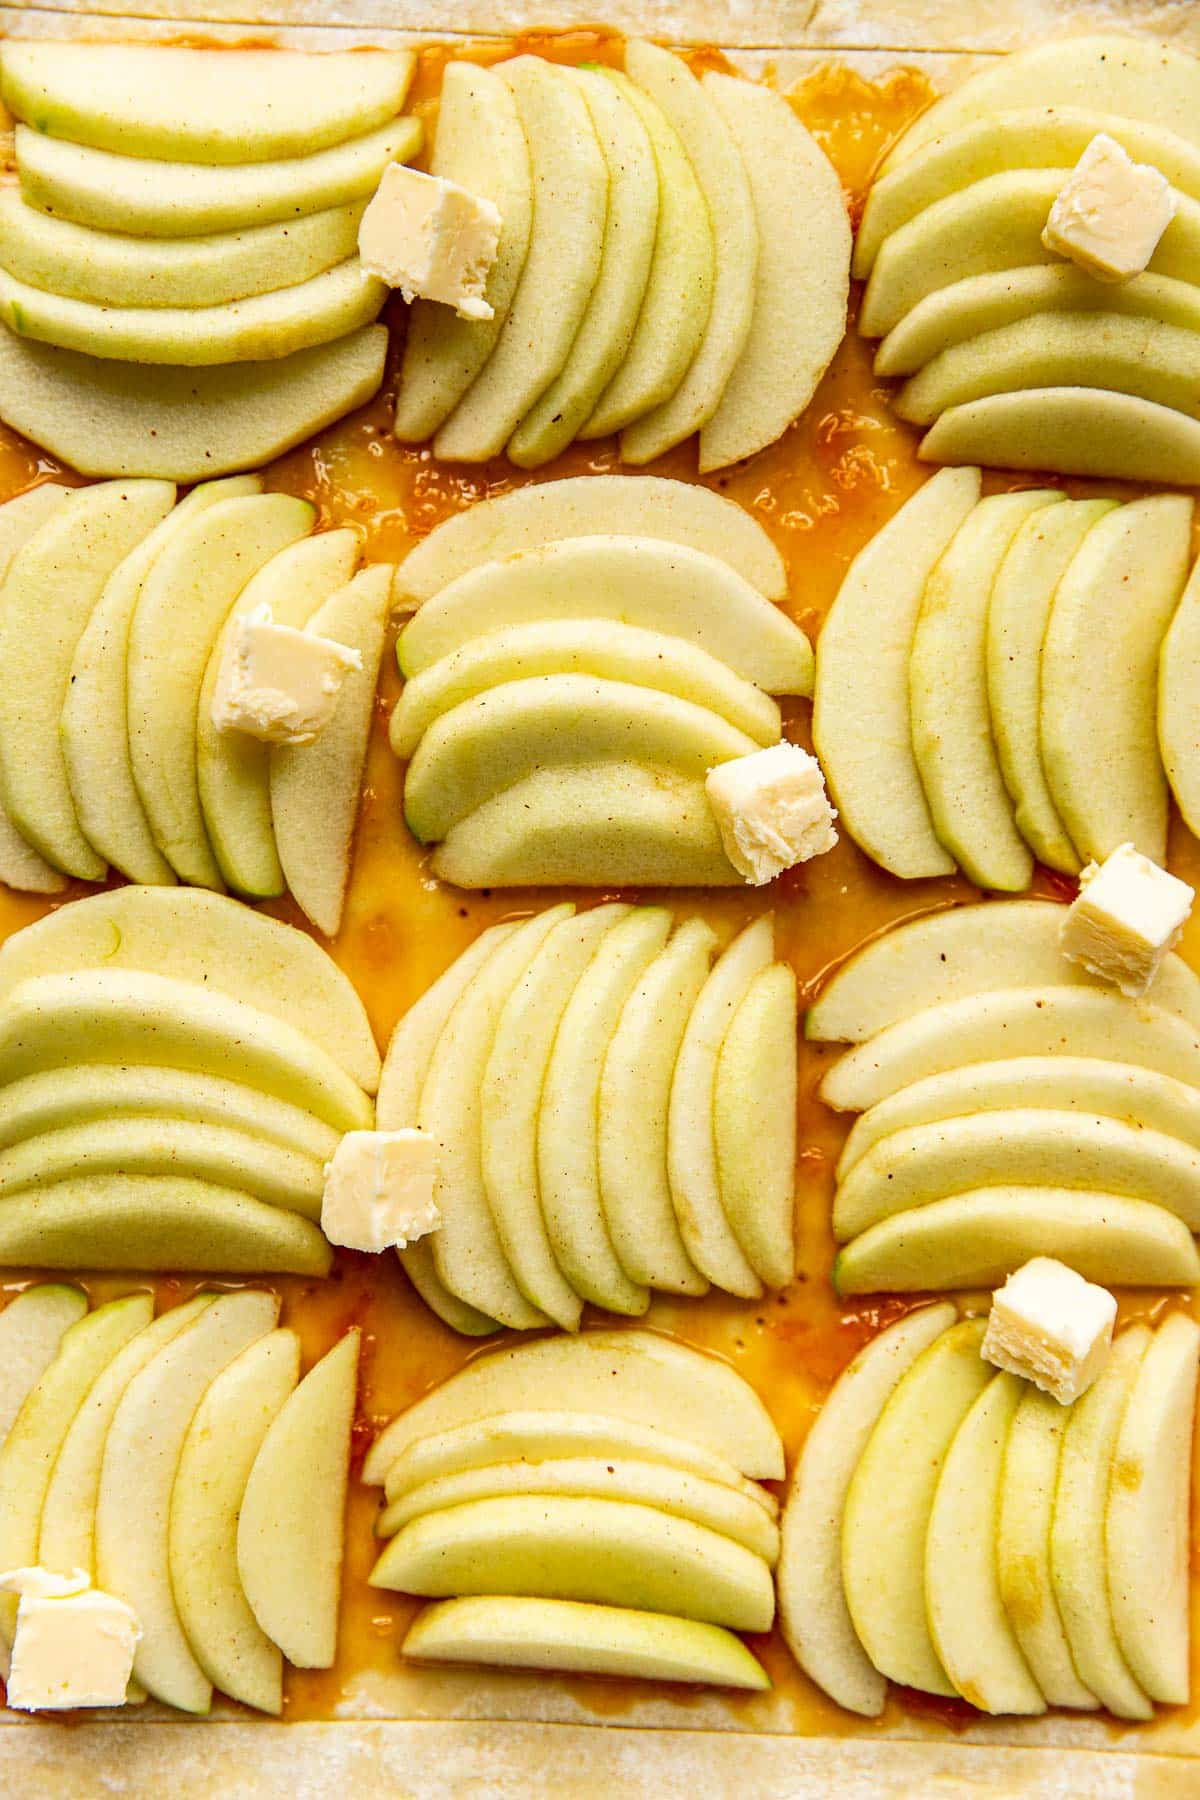
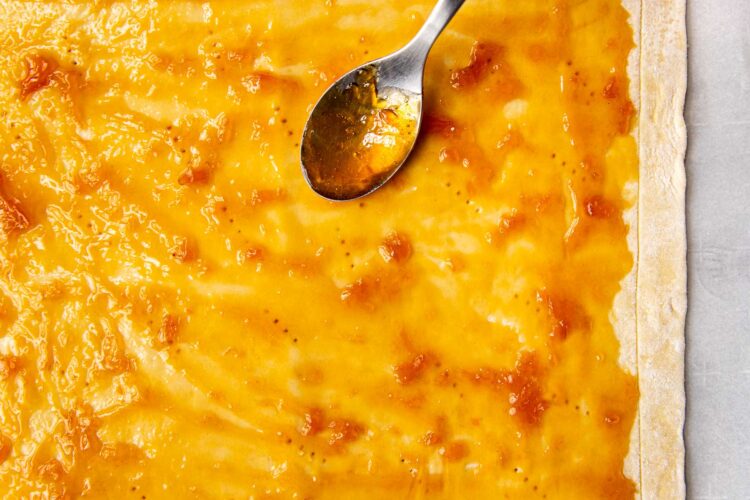
- Spread apricot jam down, arrange apples, dot with butter.
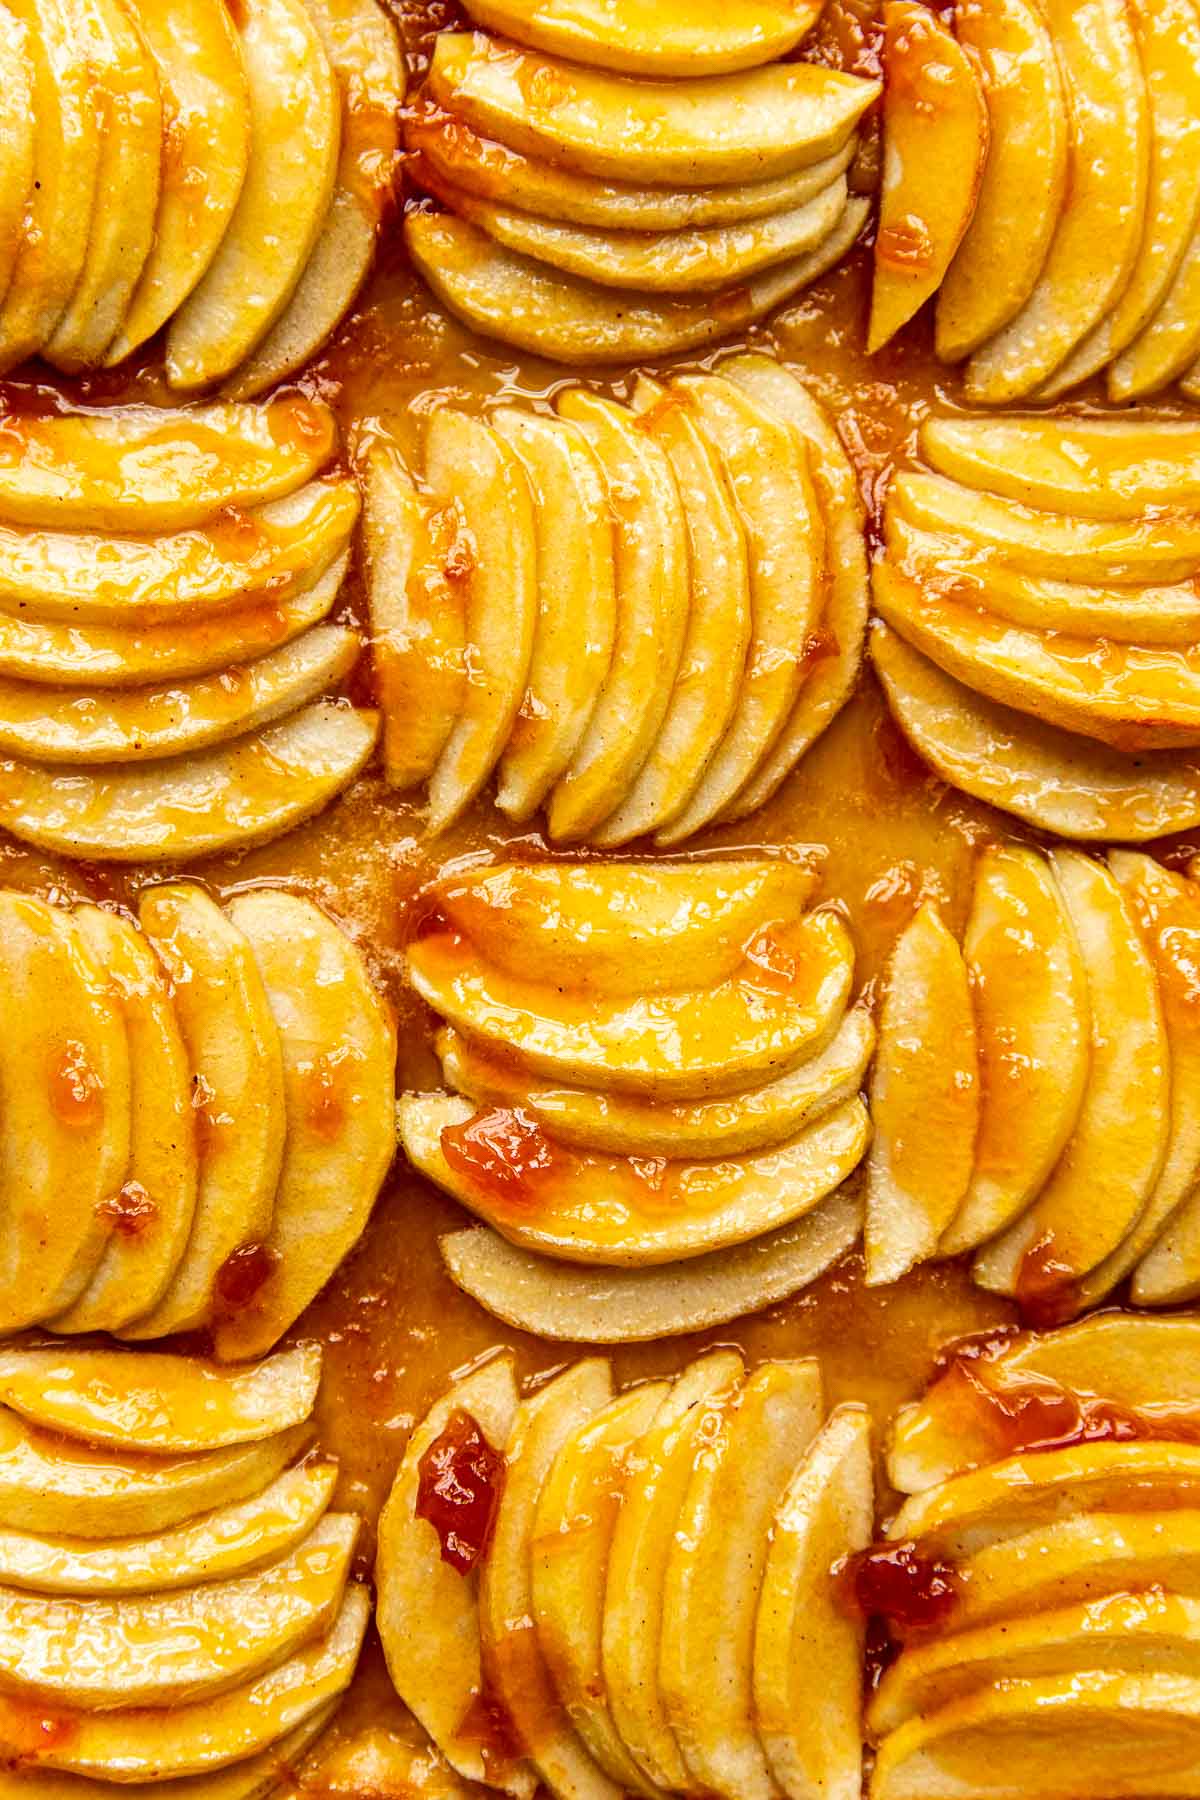
- Bake, brush with more apricot jam, slice and serve!
Tips on thawing puff pastry
- Don’t try to manipulate Puff Pastry that’s not completely thawed; unfolding it while it’s still frozen could tear the sheet.
- Thaw time may vary but typically it should take around 30 minutes, and no more than 40 minutes. Simply remove the pastry sheet from the box and thaw until the pastry unfolds easily but will still be a bit cold after thawing.
- You can thaw Puff Pastry in the fridge, it just takes a bit more time than at room temperature. Separate and place each sheet on a plate, cover with plastic wrap and defrost in the refrigerator for about 4 hours.
- To thaw in the microwave: remove 1 pastry sheet from the box and outer wrapping and wrap in a paper towel. Microwave on HIGH for 15 seconds. Turn the pastry sheet over. Microwave another 15 seconds. If pastry doesn’t unfold easily, microwave for another 5 seconds on each side.
More helpful tips
- Heavy rolling pin: When rolling out the puff pastry, use a long, heavy rolling pin. This will help to create a pastry that’s even all over.
- Avoid pressing too hard: You should try to avoid pressing too hard when rolling out the ends and edges, this can lead to pressing the edge layers together, and may prevent the pastry from rising properly.
- Prick the Pastry: Before adding your filling, use a fork to prick the pastry’s surface all over. This helps prevent excessive puffing during baking, ensuring your tart has a flat base for the filling.
- Chill Before Baking: After assembling the tart with the filling, you can place it in the refrigerator for about 15-30 minutes before baking if you’d like. This helps firm up the pastry and prevent it from becoming soggy.
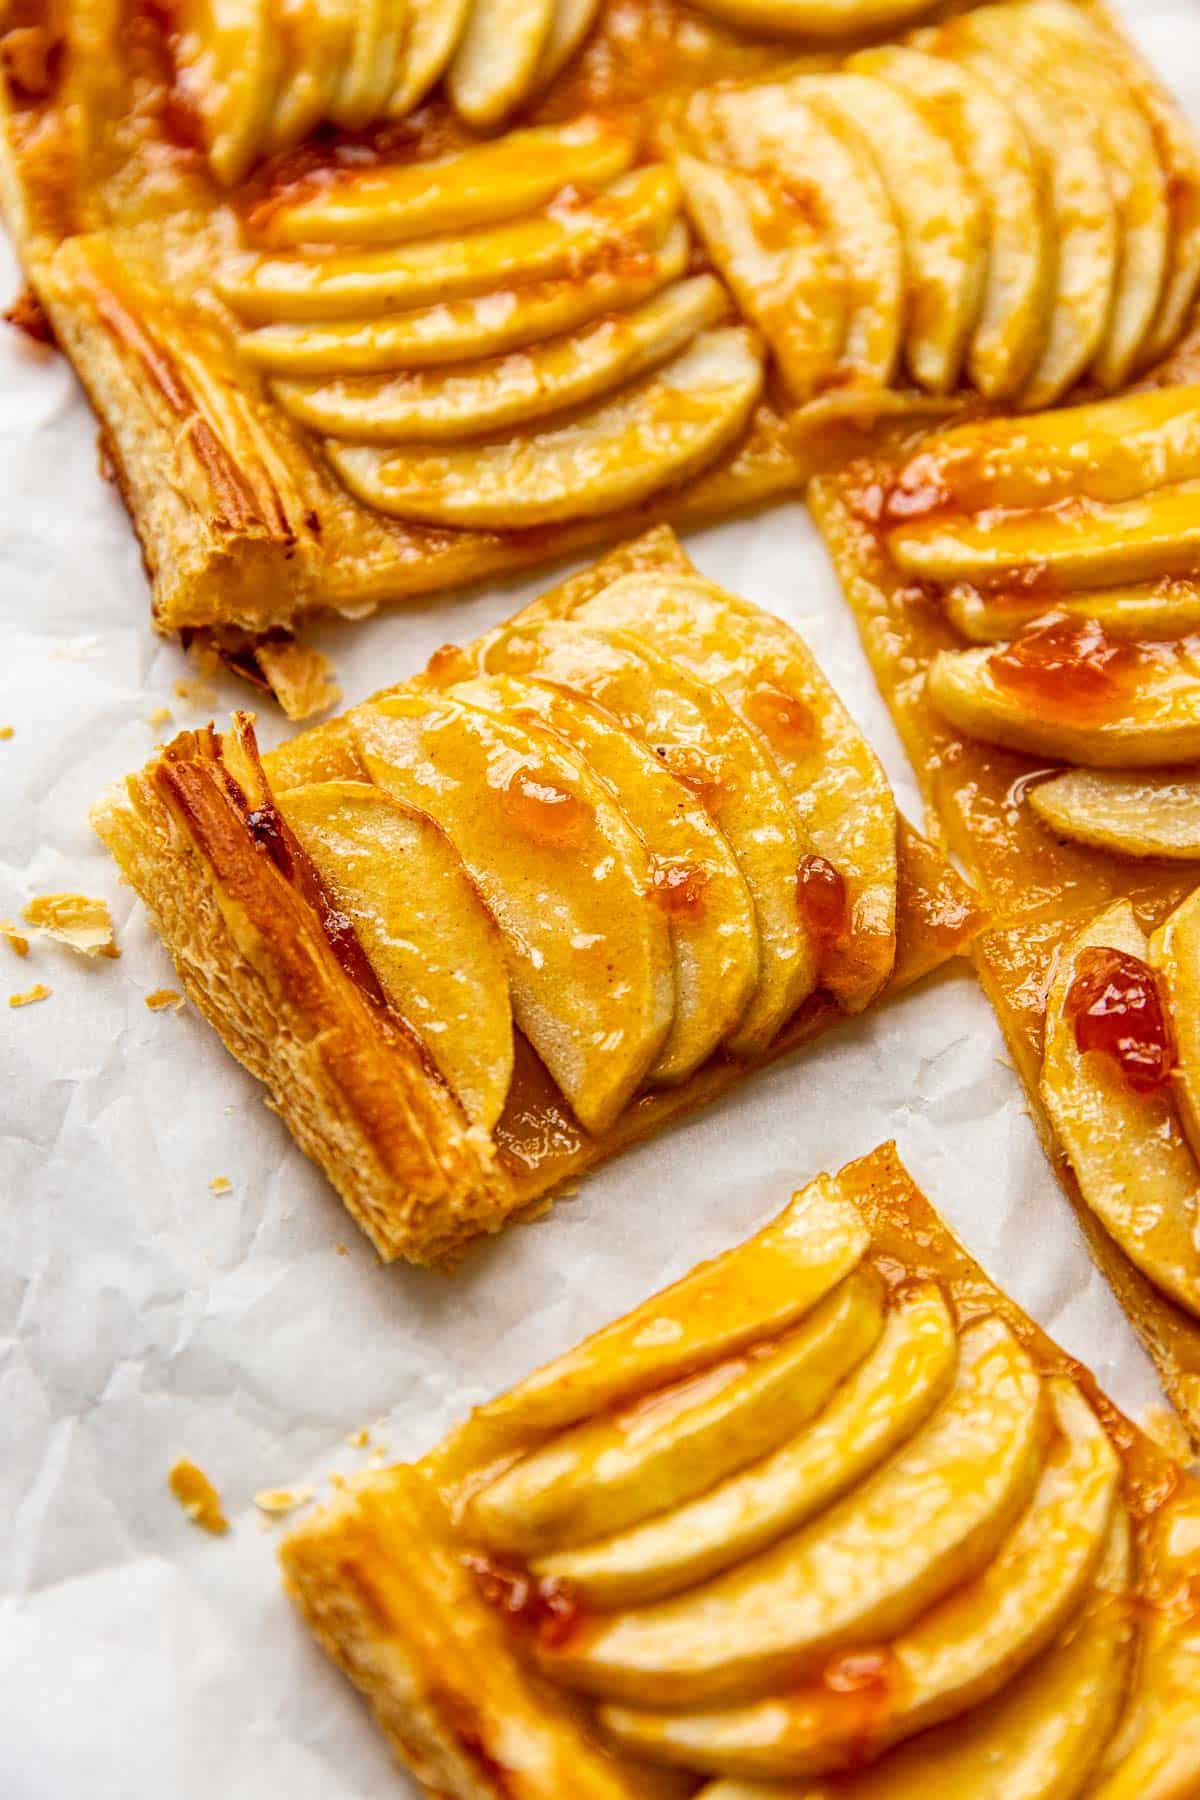
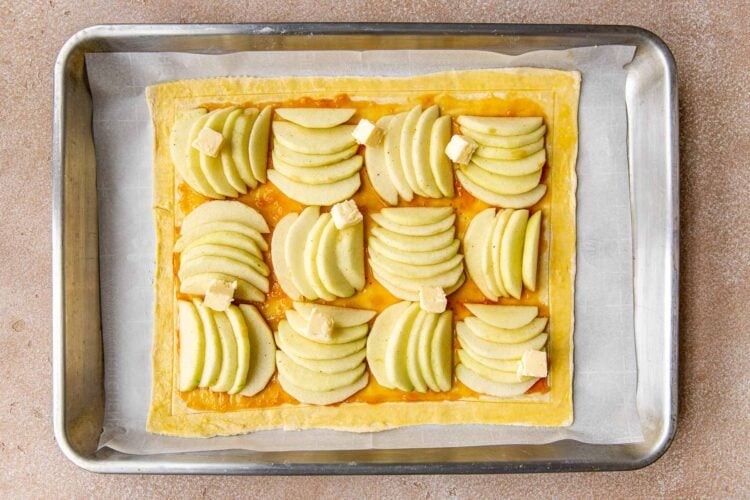
- Arrange Apples Neatly: When arranging apple slices on the pastry, aim for a neat and even pattern like shown in the photos. Overlapping the slices slightly can help create an attractive presentation, just be sure not to pile them on. Less is more for this dessert!
Variations
You can customize this dessert easily by adding different spices, nuts, or even a drizzle of caramel or honey. Here are some ideas:
- Apple and Berry: Combine sliced apples with berries like raspberries, blueberries, or blackberries for a sweet and tart contrast.
- Apple and Pears: Combine apples with sliced pears for a dual fruit flavor that works beautifully together.
- Apple and Nuts: Sprinkle chopped nuts like pecans, walnuts, or hazelnuts over the apples for added texture and flavor.
- Apple and Cream Cheese: instead of the apricot preserves, spread a layer of sweetened cream cheese or mascarpone cheese on the pastry before adding the apple slices.
- Apple and Bourbon: Spike the apple filling and the apricot preserves with a splash of bourbon for a sophisticated twist, also making this more like a French Apple Tart variation.
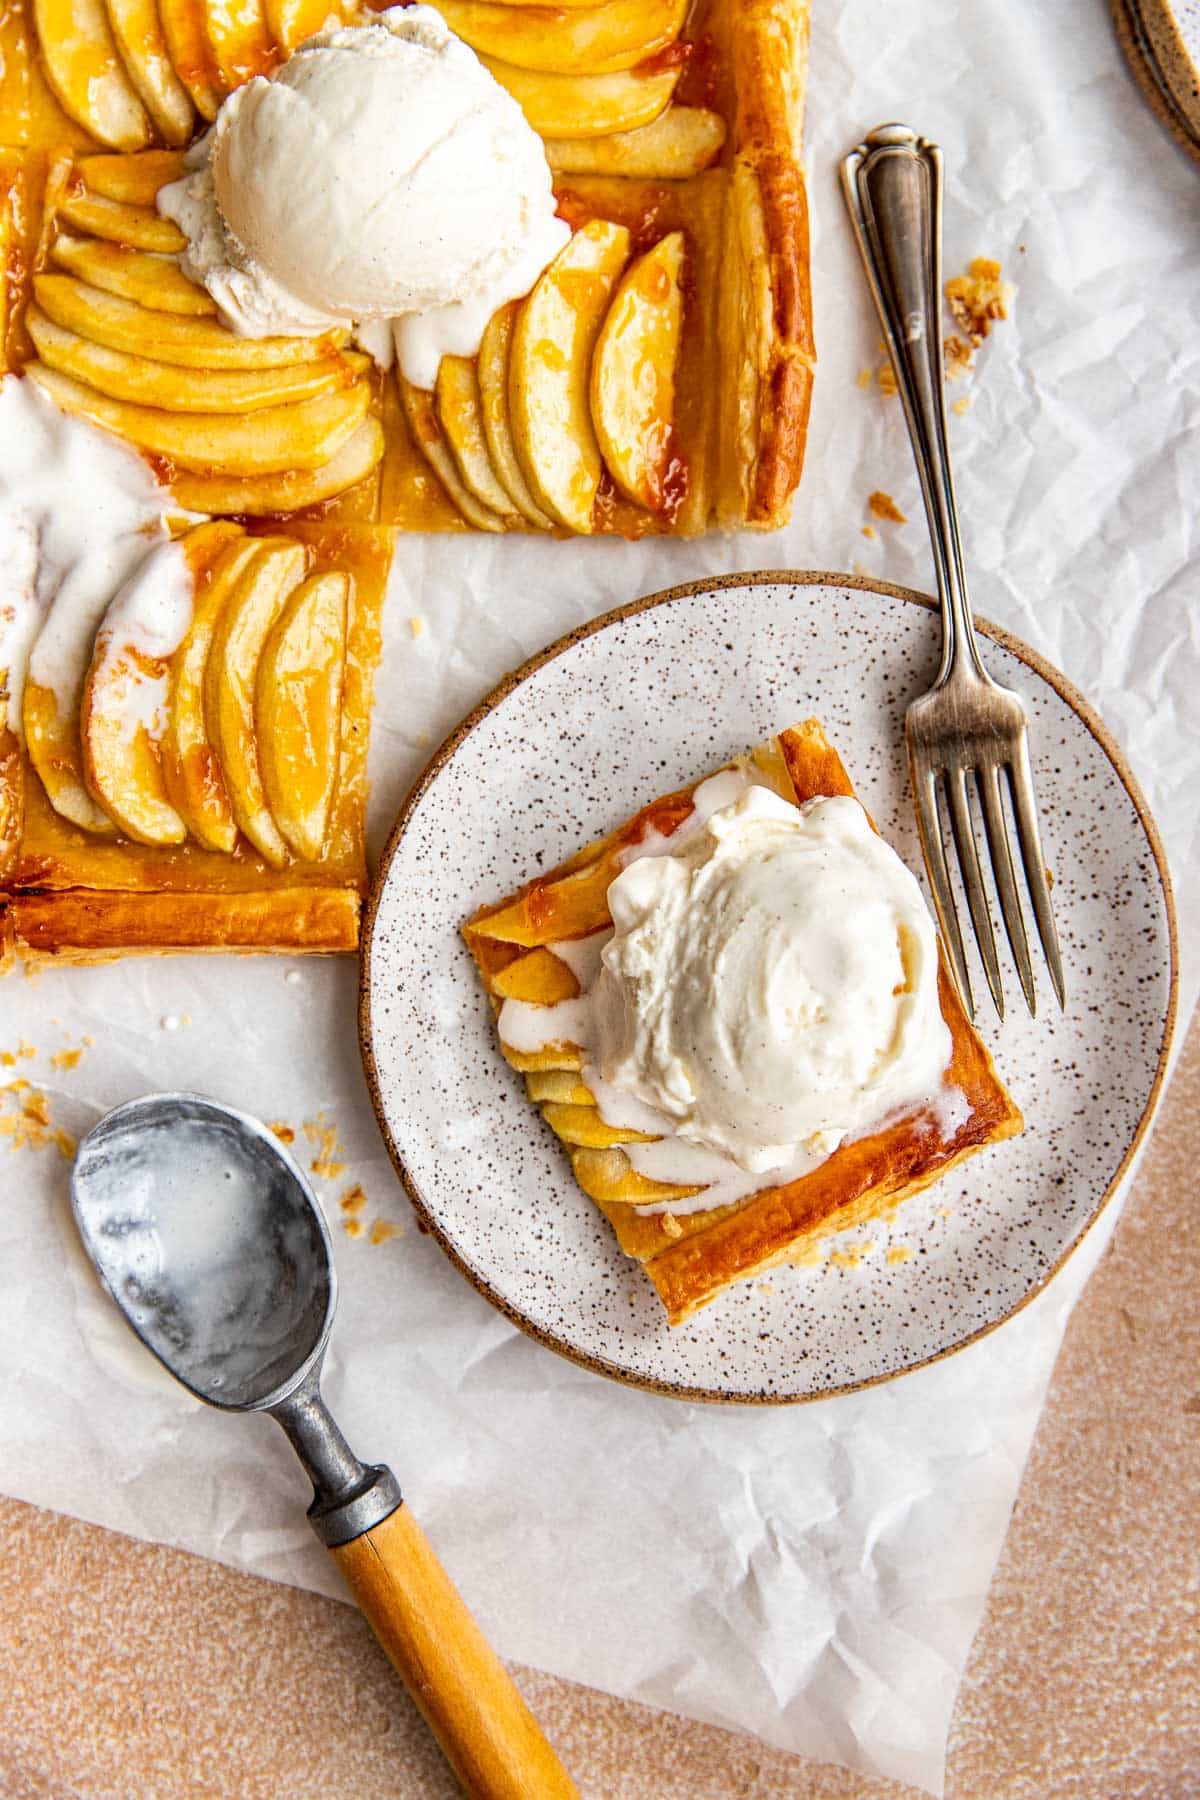
Storage
- Best served day of: A freshly baked puff pastry apple tart is at its best when served the same day it’s made. It will have a crispy, flaky crust, and the filling will be at its peak flavor and texture.
- Refrigerator: if you do have leftovers, store in an air tight container for 2 to 3 days.
shop this post
 Buy Now →
  Buy Now →
 Before You Begin! If you make this, please leave a review and rating letting us know how you liked this recipe! This helps our business thrive & continue providing free recipes.
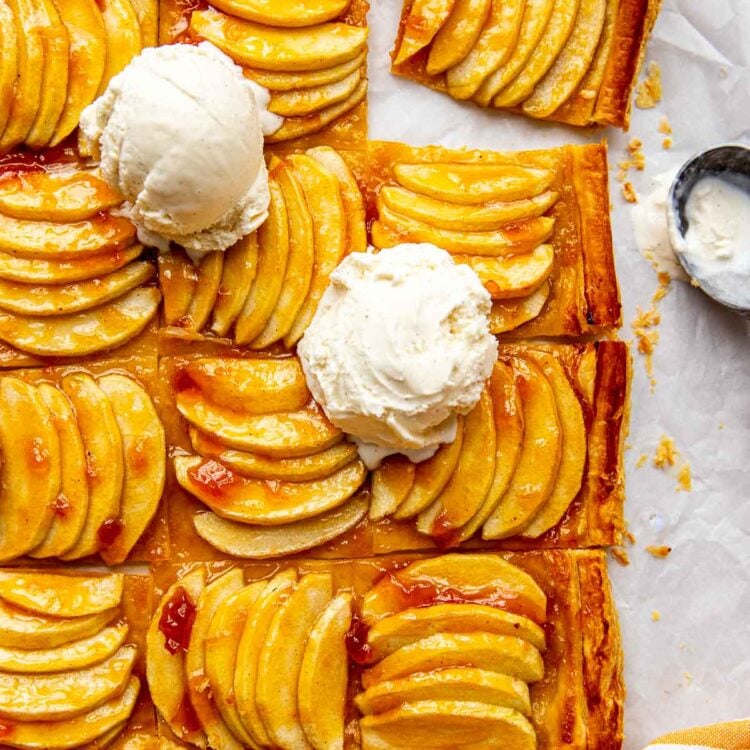
Puff Pastry Apple Tart
Ingredients
- 1 frozen puff pastry sheet
- 2-3 small/medium apples, peeled (I used a both Granny Smith and Honey Crisp)
- 2 Tbsp. brown sugar
- 2 Tbsp. granulated sugar
- 2 Tbsp. lemon juice, fresh
- 1/2 tsp. pure vanilla extract
- dash of salt
- pinch of ground cinnamon and nutmeg
- 2 Tbsp. butter, cut into small cubes
- 1 egg, whisked (for the egg wash)
- 1/3 cup apricot preserves
- ice cream or caramel for serving
Last step! If you make this, please leave a review and rating letting us know how you liked this recipe! This helps our business thrive & continue providing free recipes.
Instructions
- Allow puff pastry to thaw at room temperature for ~30 minutes.1 frozen puff pastry sheet
- Slice the peeled apples ¼ inch thick. Add them to a mixing bowl.2-3 small/medium apples, peeled (I used a both Granny Smith and Honey Crisp)
- To the apples, add the sugars, lemon juice, vanilla, salt, cinnamon and nutmeg. Stir to combine and set aside.2 Tbsp. brown sugar, 2 Tbsp. granulated sugar, 2 Tbsp. lemon juice, fresh, 1/2 tsp. pure vanilla extract, dash of salt, pinch of ground cinnamon and nutmeg

- Preheat the oven to 400°F and line a baking sheet with parchment paper.
- Lightly flour a clean work surface. Unwrap the thawed puff pastry and remove the paper, place on work surface, lightly flour the pastry too and roll out the puff pastry. Carefully transfer to the parchment paper on the baking sheet. If you feel the pastry got too soft, you can place in the freezer for a bit.

- Score the pastry using a sharp knife around the edges, about ¼ inch from the edge. It should not cut all the way through, you’re basically making a square inside so the edges will puff up properly as it bakes.

- Then poke the inside of the puff pastry all around with a fork.

- Microwave about 2-3 tbsp. apricot preserves for ~20-30 seconds (cover it with a paper towel just in case it splatters) and spread in an even layer on the bottom of the puff pastry. I just used the back of a spoon to make it even.1/3 cup apricot preserves

- Arrange the apples on top, leaving the juices behind. Making them in a pretty pattern. Just make sure they aren’t piled on top of each other too much because it will get mushy. Less is more for this dessert! You can save any remaining apples for snacking 🙂

- Dot cubed butter over the tops of the apples.2 Tbsp. butter, cut into small cubes

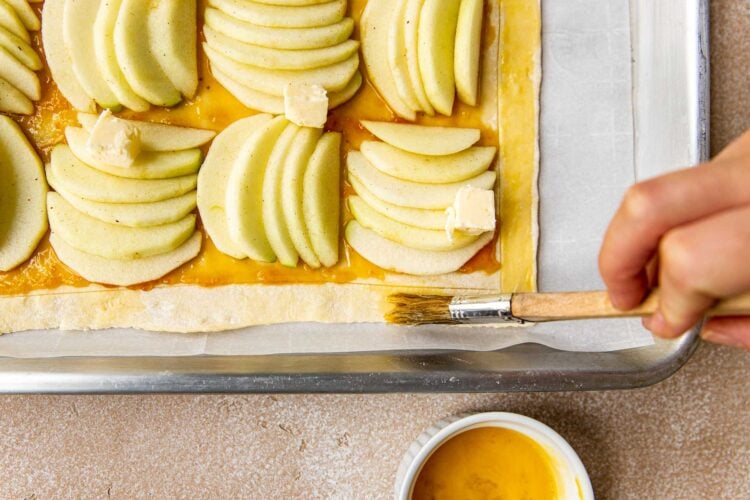
- Brush the edges with the egg wash, careful to not let it drip down the sides onto the parchment paper because it will stick and not rise and puff up properly.1 egg, whisked (for the egg wash)

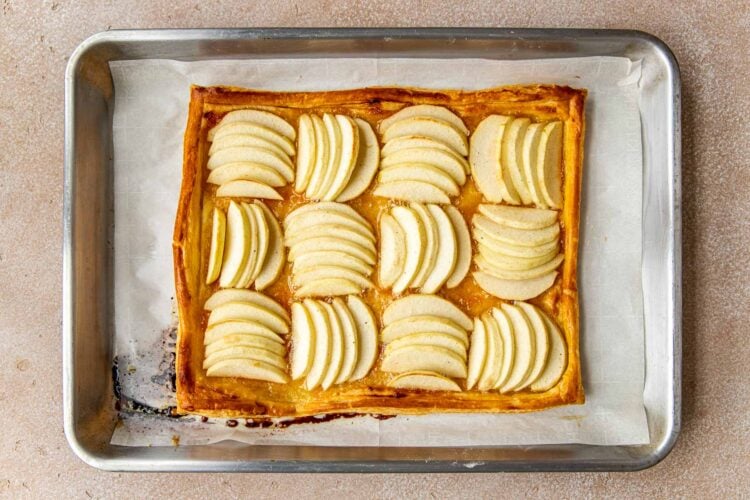
- Bake for ~30 minutes or until the pastry is golden and the apples are tender.

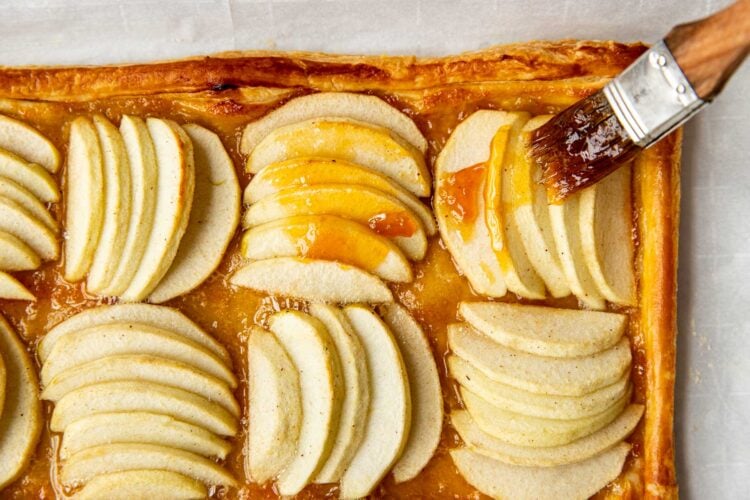
- Microwave the rest of the apricot preserves and brush on top of apples.

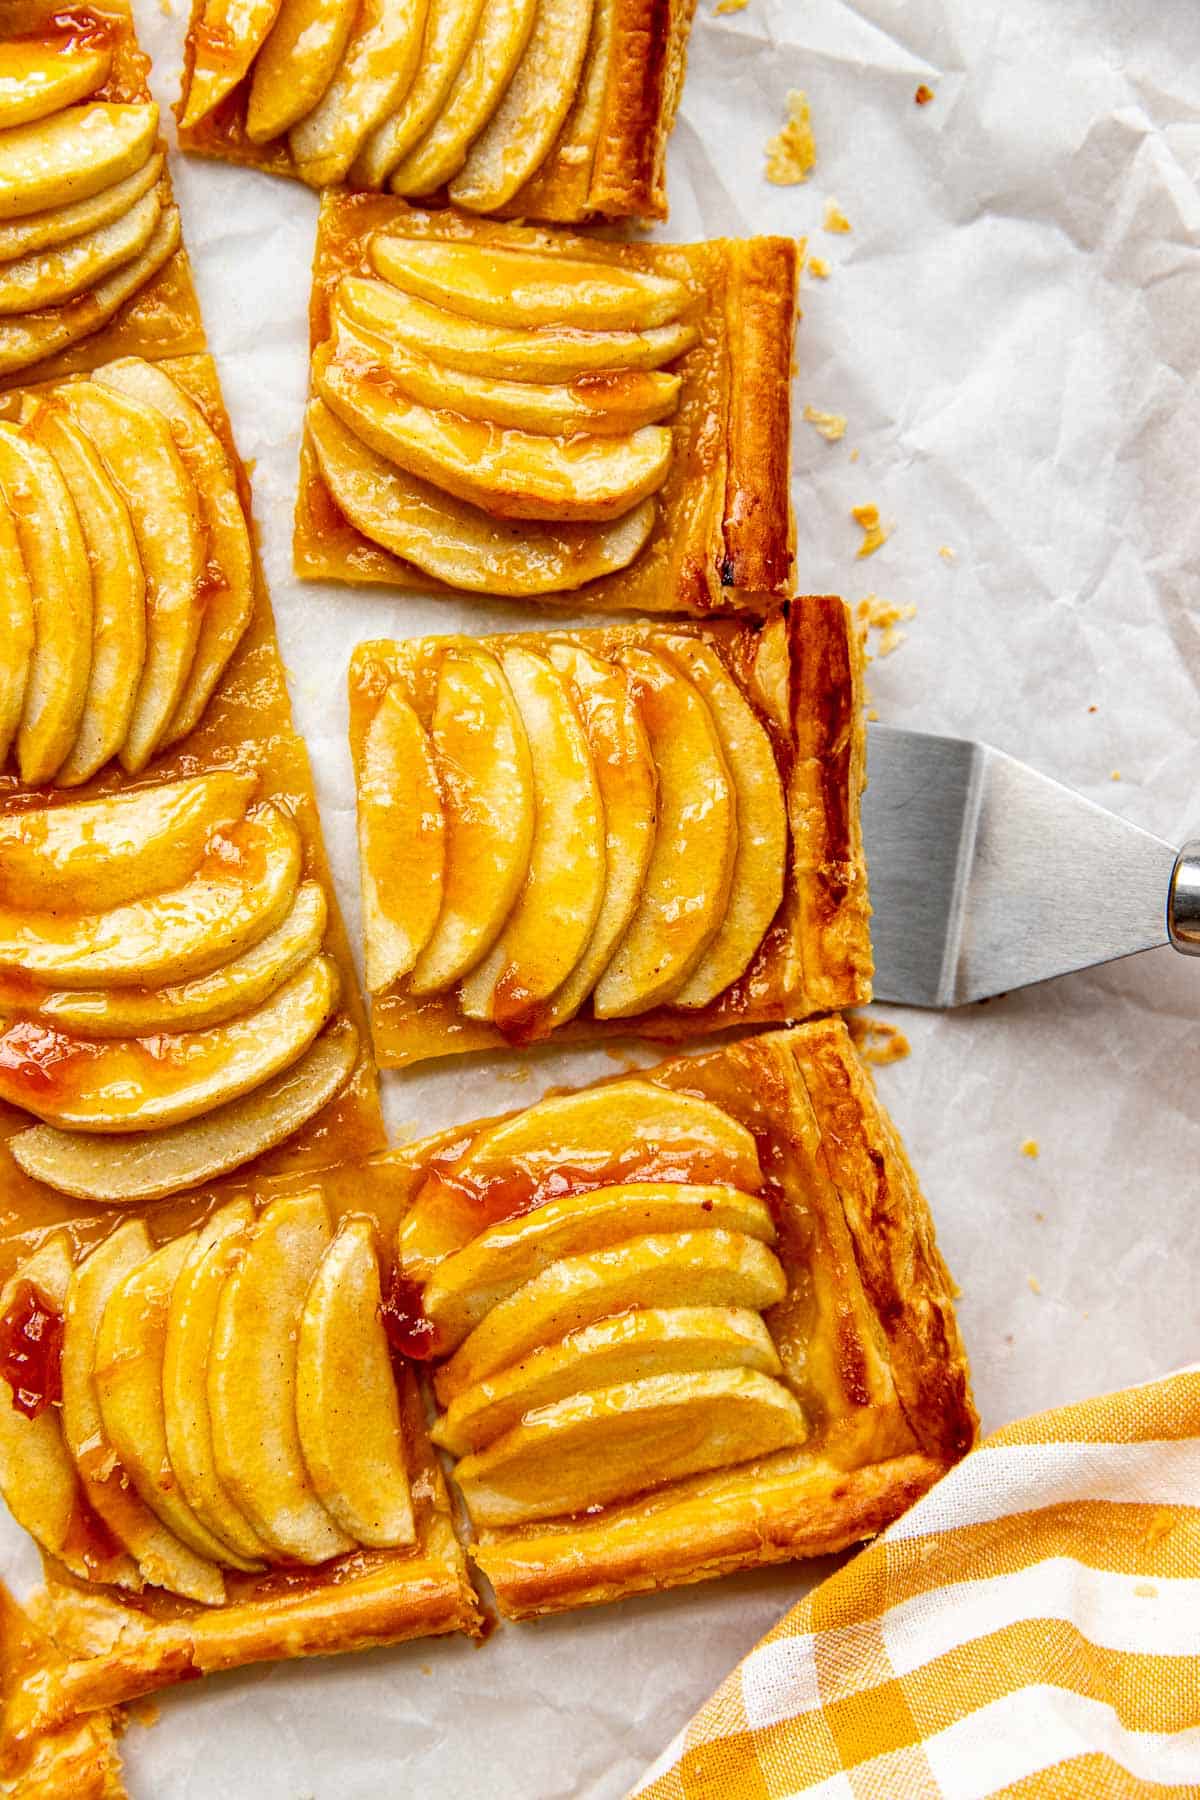
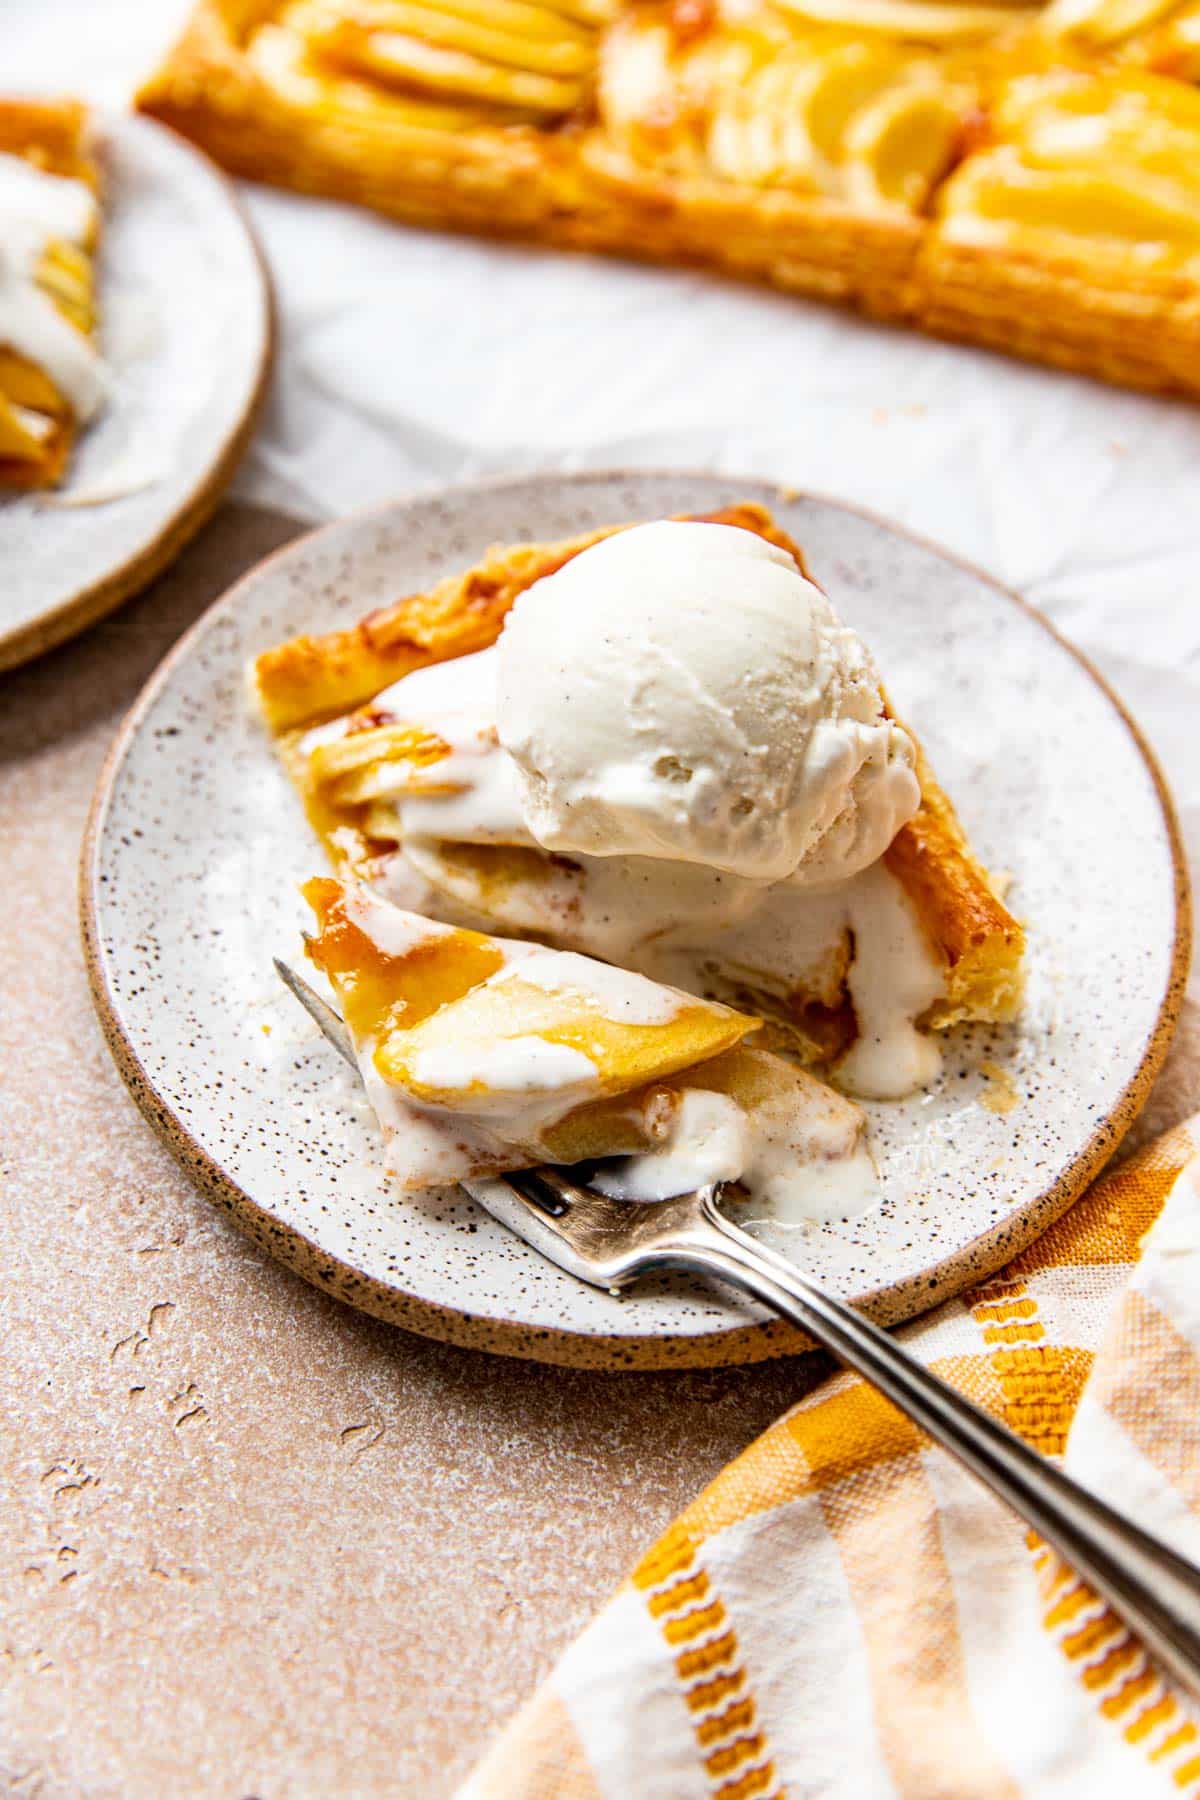
- Cut into pieces and serve the tart warm or at room temperature with ice cream or a caramel drizzle. YUMMMOOO!ice cream or caramel for serving

Notes
- Storage: Best served day of: A freshly baked puff pastry apple tart is at its best when served the same day it’s made. It will have a crispy, flaky crust, and the filling will be at its peak flavor and texture. Refrigerator: if you do have leftovers, store in an air tight container for 2 to 3 days.
- Make ahead: you can prep this up until baking, just keep it in the fridge for up to 24 hours then bake as directed when ready. This desserts doesn’t have to be served warm, so you can bake it a few hours before you plan on serving it, and serve at room temperature.
Nutrition Information
Nutritional information is provided as a courtesy and is automatically calculated. It should only be construed as an estimate rather than a guarantee. Ingredients can vary and Kroll’s Korner can’t make any guarantees to the accuracy of this information.
Photography: photos taken in this post are by Megan from The Broke Girl Table.

A fairly easy, very flavorful dish. And presentation is beautiful.
So happy to hear that!! Thank you for making && leaving a review 🙂
I love these apple tarts! I made them individual just for fun and brushed them with a little leftover apricot jam for some shine. For serving, we had ice cream and caramel sauce. Just perfect!
Well how perfect is that! I love the individual size. Reminds me of a poptart merged with an apple tart 🥰 So glad you enjoyed them!! 🫶🏻
My family and I loved this quick and yummy dessert. I served it warm with homemade caramel sauce & vailla ice cream. A huge hit. Easy directions and the ingredient amounts are with each step. No more scrolling up and down. Thank you ❤️
So glad you enjoyed this one!! Thank you! 🙂
The instructions are clear and fabulous! I changed the recipe by using tart cherry jam and it was divine! Loved the ease, thank you!
I really appreciate that – thank you soo much Amy! The cherry jam sounds incredible!
These were a big hit! Thank you! The texture was lovely, and the apricot jam was a great addition to the apples.
I am so glad, thank you!! 🙂
Made this for Christmas morning. It turned out beautifully! I followed the directions exactly. The recipe is easy to follow and easy to do. This may be my new go-to holiday treat! Thank you!
This makes me so happy! Thanks so much for leaving a review 🫶🏻
This was a hit for thanksgiving. So delicious and pretty. I am not a cook or baker, but enjoy making things from time to time. The directions were very easy to follow. Thank you for sharing this recipe.
This recipe is easy to follow and bakes up nicely.
I did not have apricot preserves so used a pineapple-passion fruit spread which worked beautifully. Topped it with a French Vanilla ice cream and it was delightful. Will definitely use this recipe again!
that sounds wonderful! thank you so much Susan for the review + picture, looks perfect!