Pan Banging Chocolate Chunk Cookies
This post may contain affiliate links. Please read our disclosure policy.
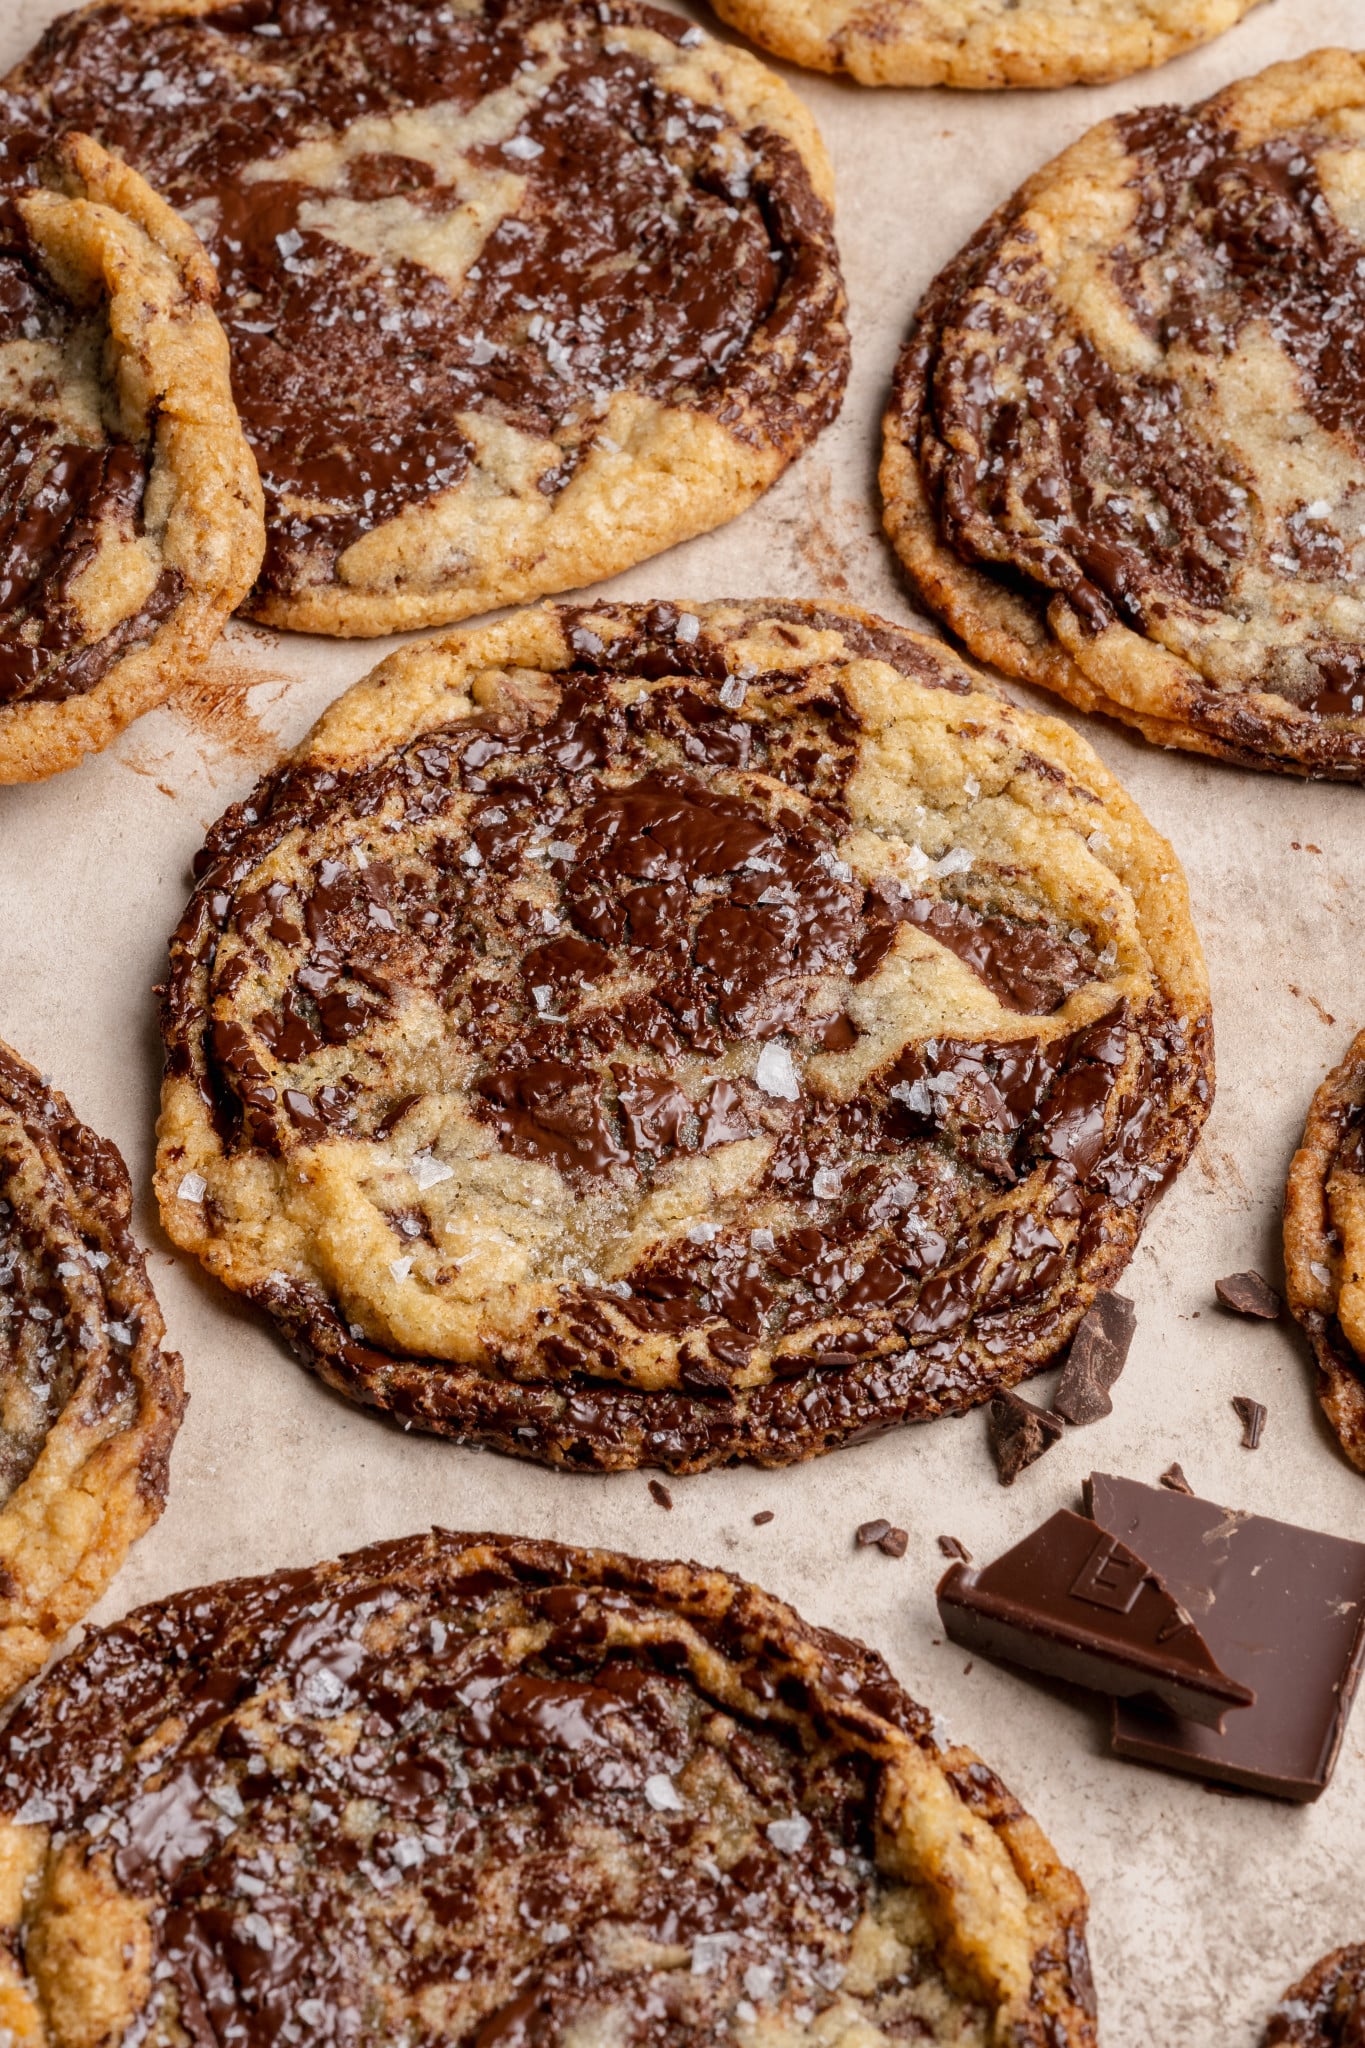
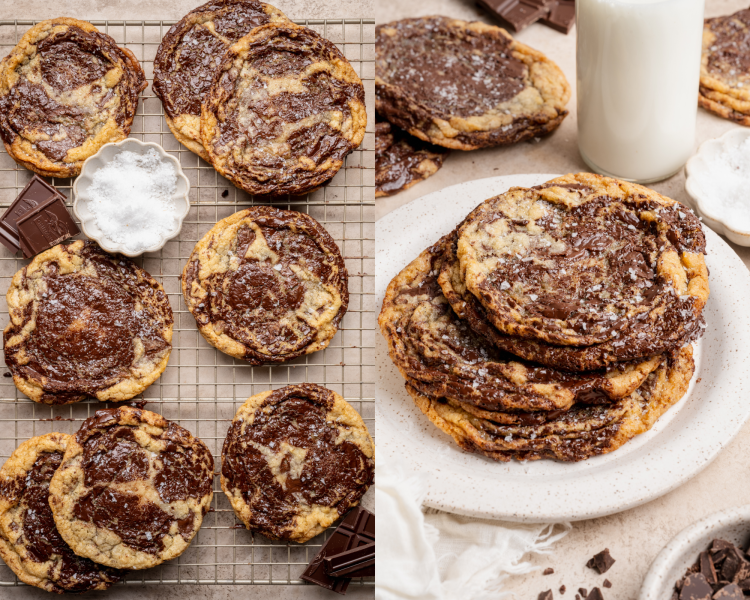
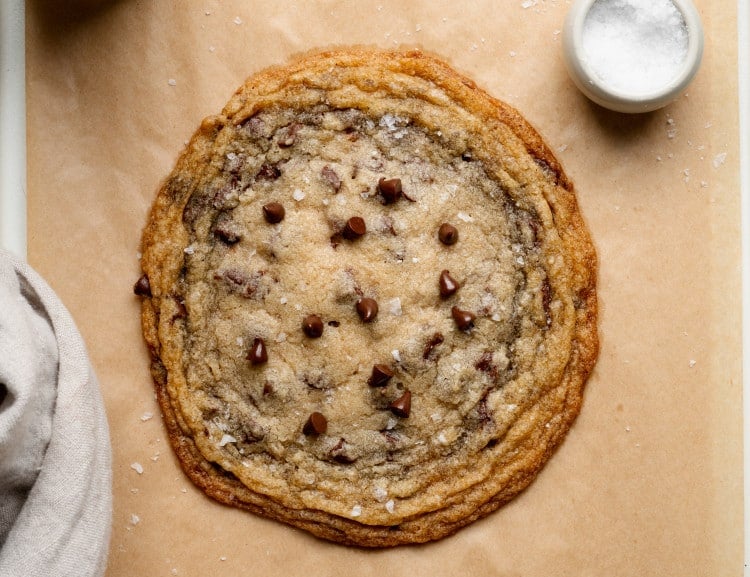
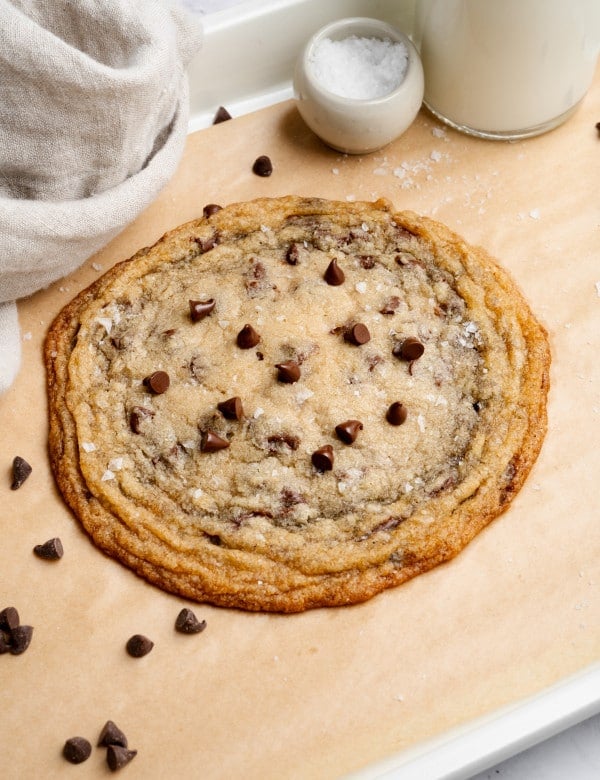
If you’ve never made pan-banging cookies before, this is your sign! With crisp, rippled edges and soft, gooey centers, they strike that perfect bakery-style balance without any complicated techniques.
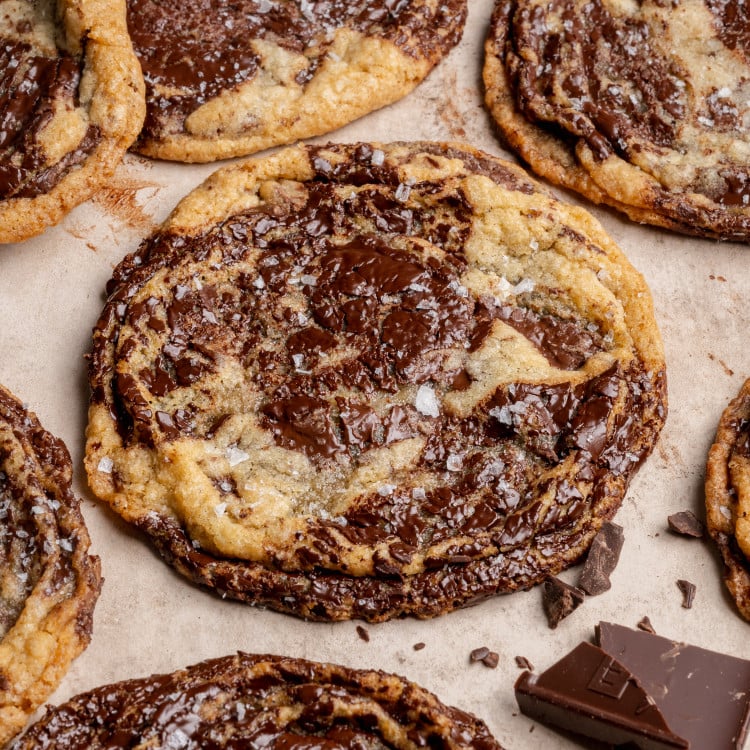
The magic happens with a couple of quick pan taps that create those signature crinkles and layers, giving you cookies that are beautiful AND delicious. These cookies are loaded with melty chocolate chunks and have just the right amount of chew to create the most irresistible treat. They may look fancy, but you’ll love how easy they are to make at home!
And if you love a thin and chewy cookie but don’t want to make a whole batch, try my Single Serve Thin and Chewy Chocolate Chip Cookie. Or for a crowd, try my Sheet Pan Chocolate Chip Cookies. I have tons of different cookie recipes on the blog that are perfect for any craving or occasion!
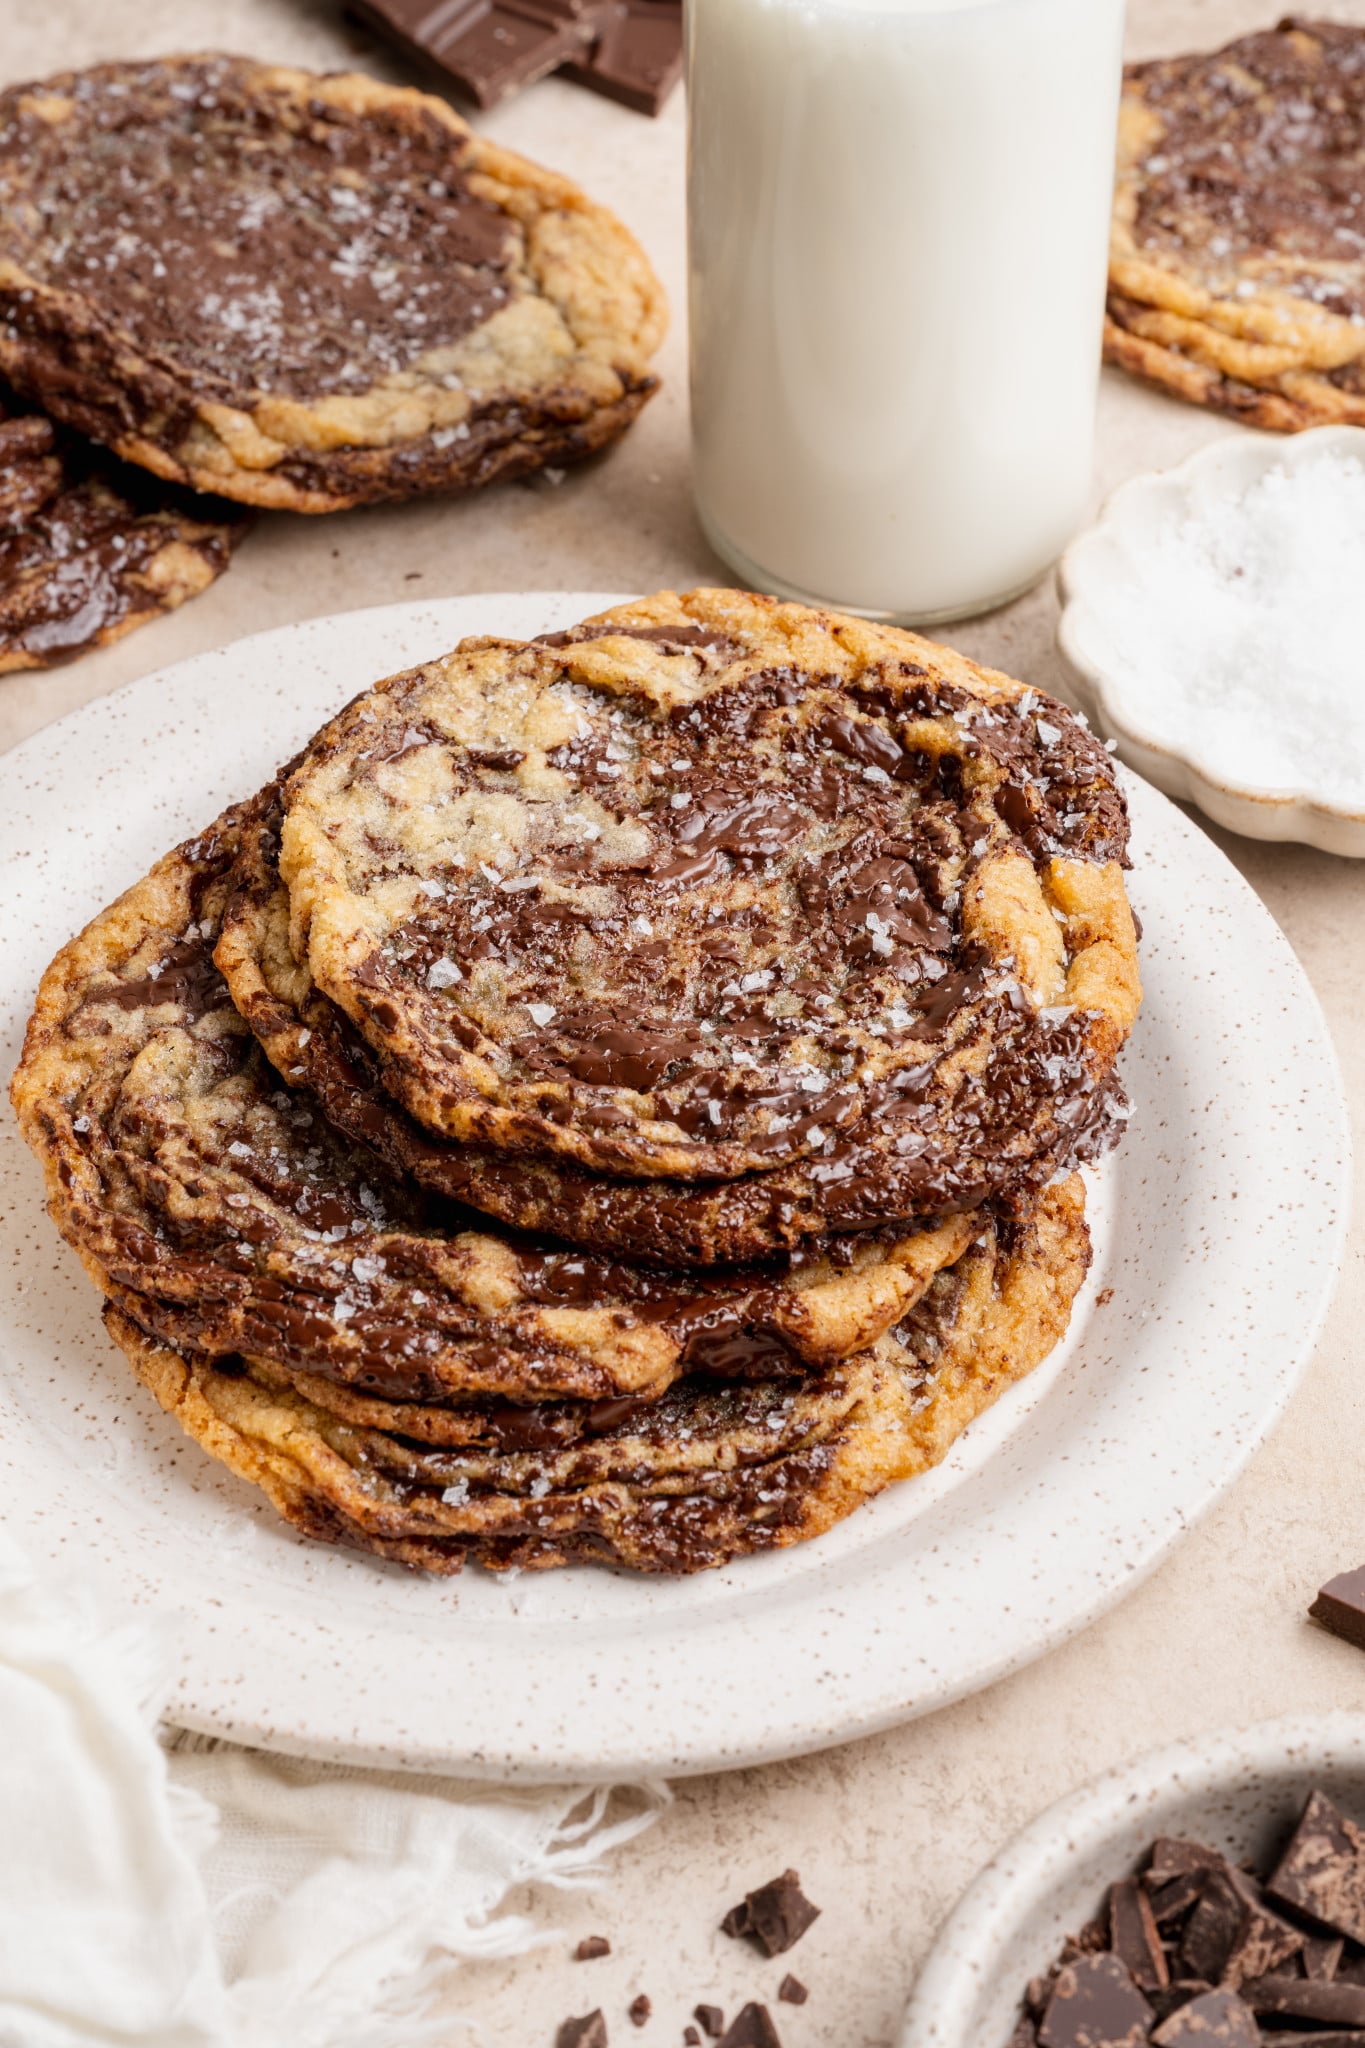

 Table Talk with Tawnie

I’ve wanted to make a pan-banging chocolate chunk cookie recipe for YEARS, and I am honestly so sad it took me this long to make them because these cookies are out of this world CRAZY GOOD! I’ve made this recipe already for family, friends, birthday’s, and holidays, and everyone gets so excited when they see I’ve brought them. They look like they’re made in a bakery. Everyone will be begging you for this recipe, trust meeeee!!

- Flour: All-purpose flour is the only flour I’ve tested this cookie recipe with. As always, it’s very important to make sure you’re using the spoon and level method to measure your flour when baking (you can also use a kitchen scale to weigh your ingredients). Too much flour can result in drier, harder cookies, which you definitely don’t want with these!
- Unsalted butter: Make sure the butter is at room temperature for easier creaming with sugar, which helps create a tender and chewy texture. I use unsalted butter, but if you must use salted butter, simply omit the extra salt listed later in the ingredients.
- Egg + egg yolk: Be sure to bring them to room temperature. Adding the extra egg yolk really helps give the cookies that nice chew we’re looking for!
- Cornstarch: The cornstarch helps to thicken the cookies and prevent them from baking too flat (since we’re already banging them, we don’t want them to start off too flat, so that way they get the nice ripples). It also helps to create a super soft, buttery cookie.
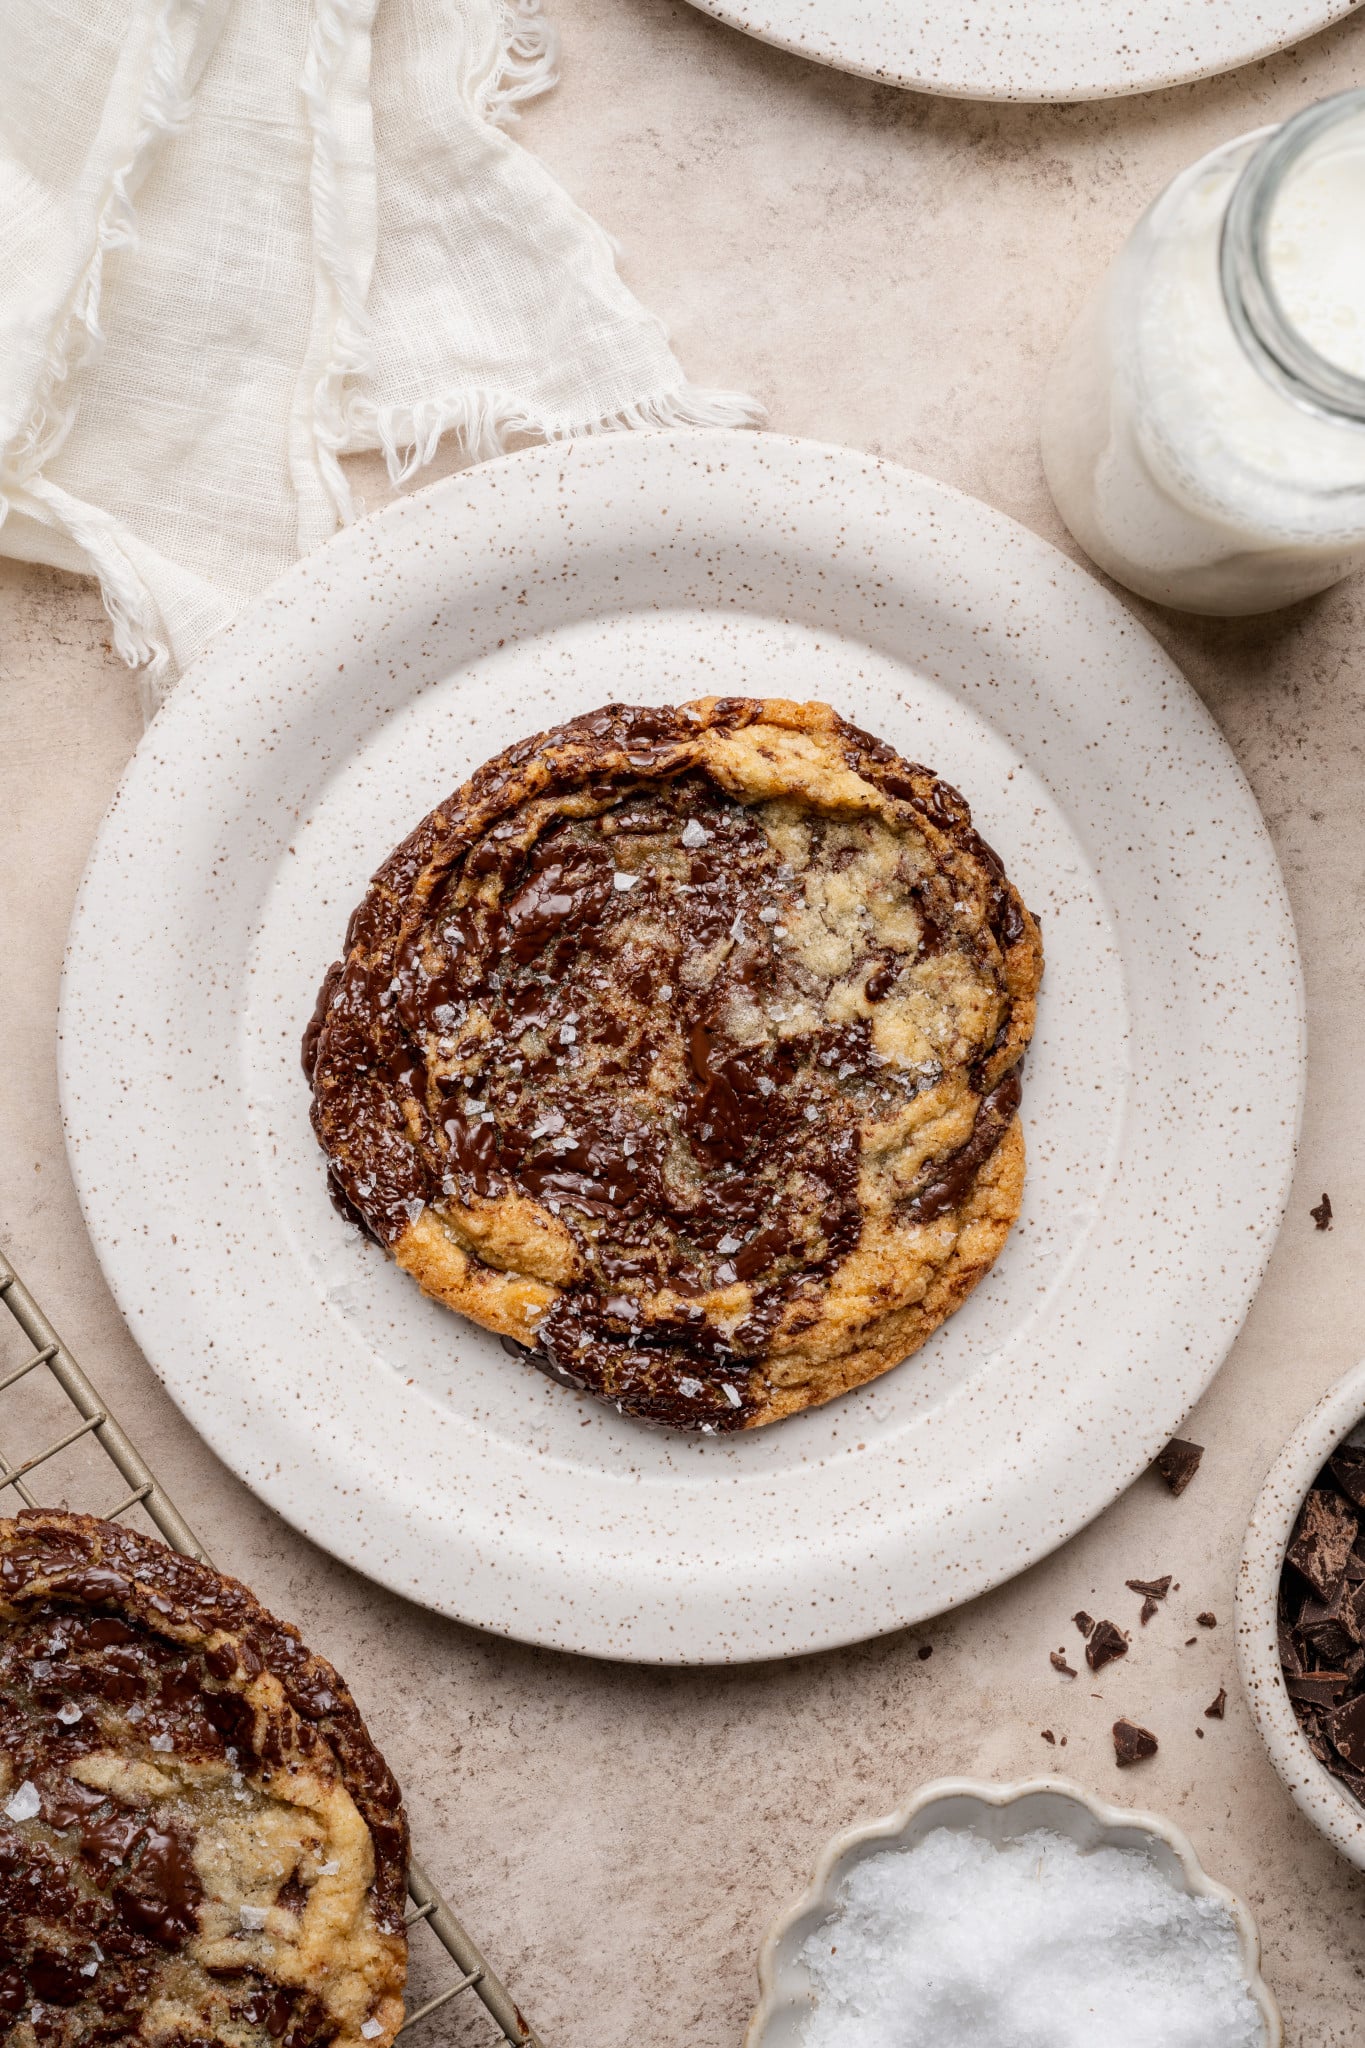
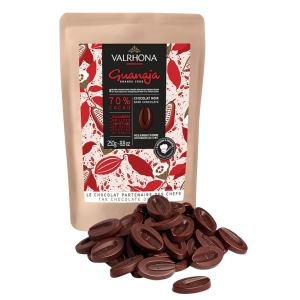
- Chopped chocolate: It’s important to use bars, not chocolate chips. They won’t spread if using chips. I like to use a semi-sweet Ghirardelli bar, and then roughly chop some of these chocolate discs (or this Ghirardelli bar), plus a little more for garnishing the tops of the cookies prior to baking to get those chocolate puddles on top. Using 60-70% chocolate is ideal for creating glossy, melty pools because it has enough cocoa butter to spread smoothly while its richer, less-sweet flavor balances the cookie dough and holds its shape just enough for that bakery-style finish.
Step by Step Directions
(For the full recipe, scroll down to the recipe card below)
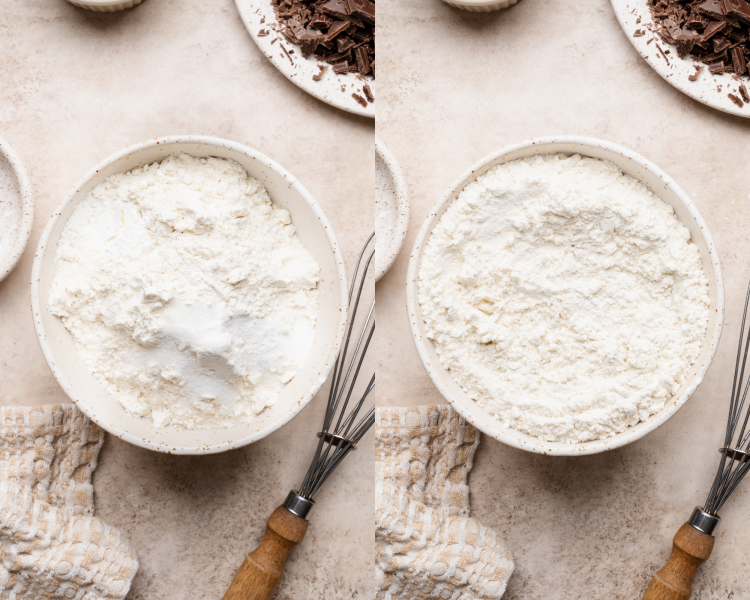
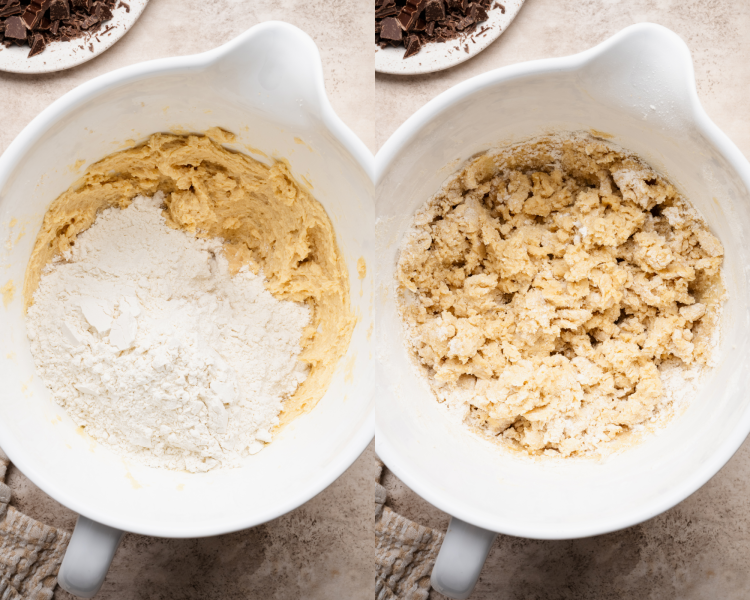
Whisk the dry ingredients
In a medium bowl, whisk together the dry ingredients.
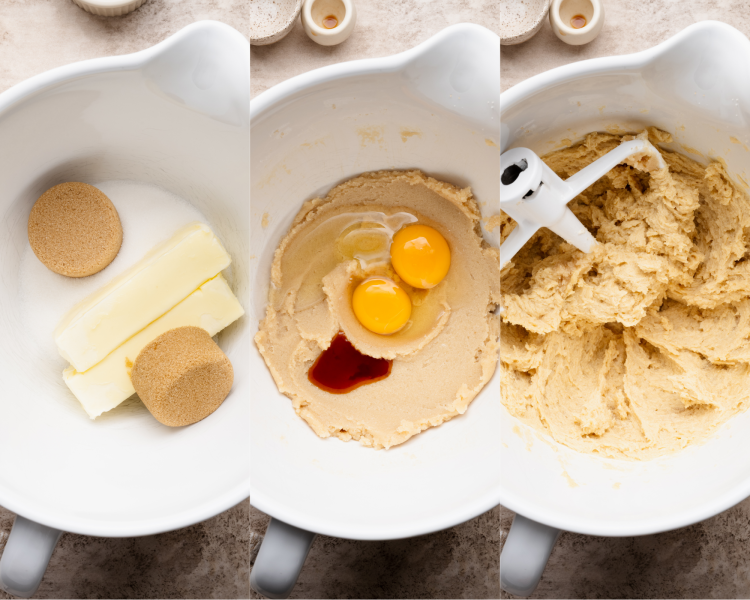
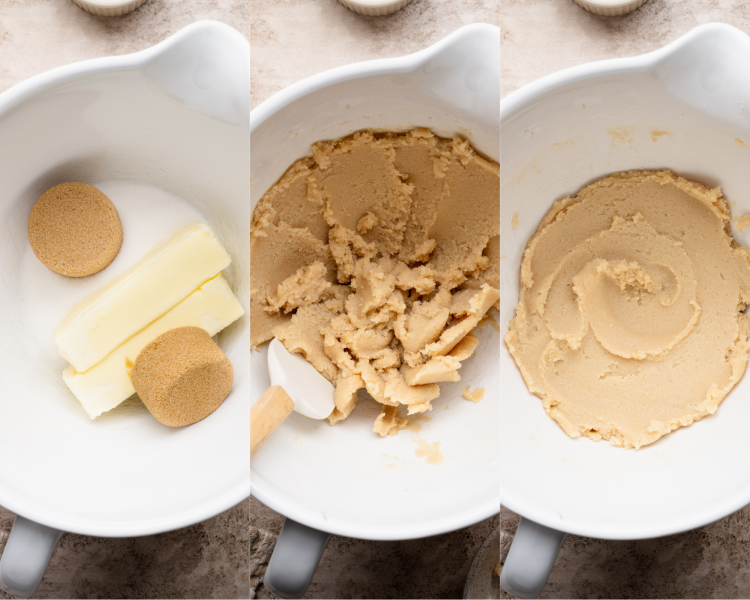
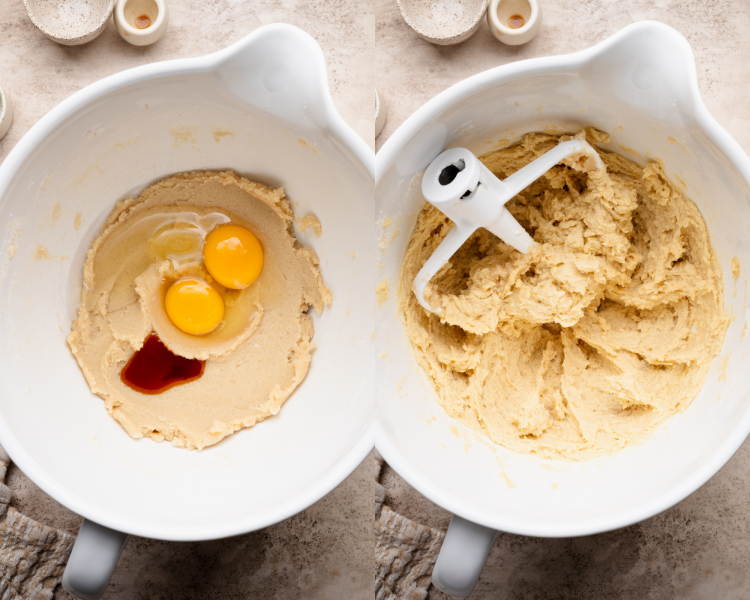
Mix wet ingredients
In a bowl of a stand mixer fitted with the paddle attachment, beat the butter and sugars. Then add the rest of the wet ingredients and mix until smooth.
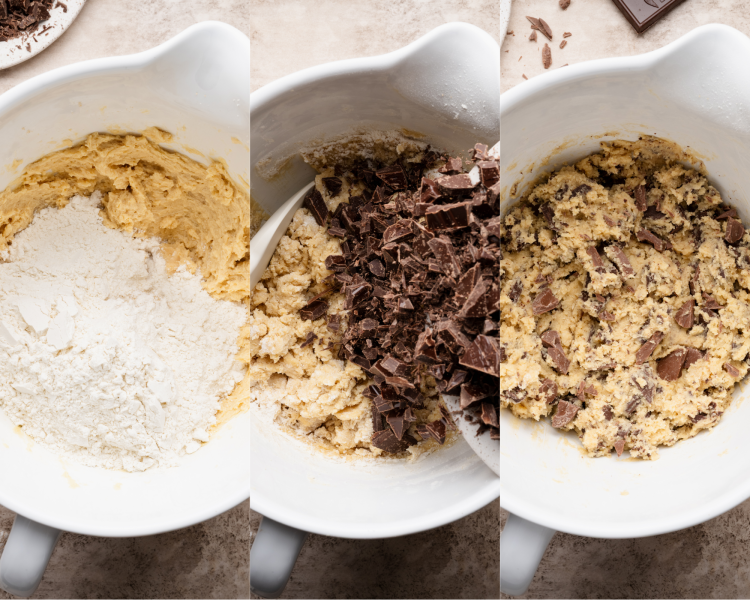
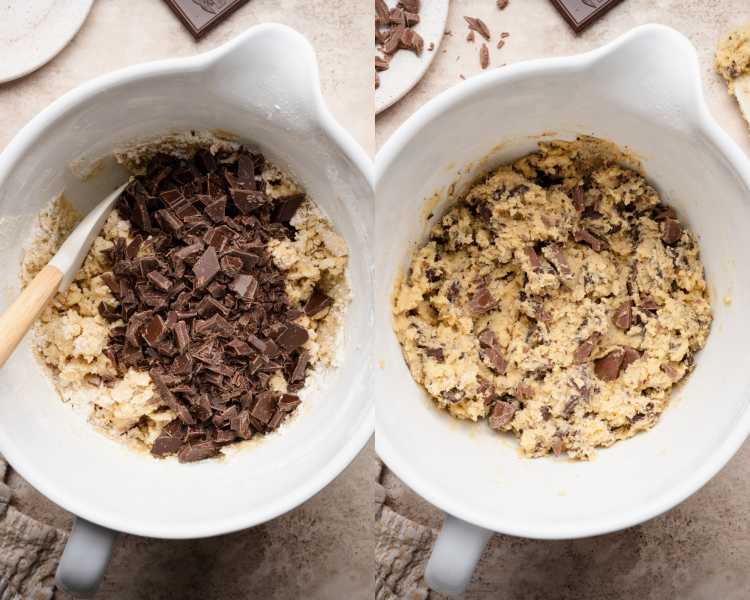
Combine & chill
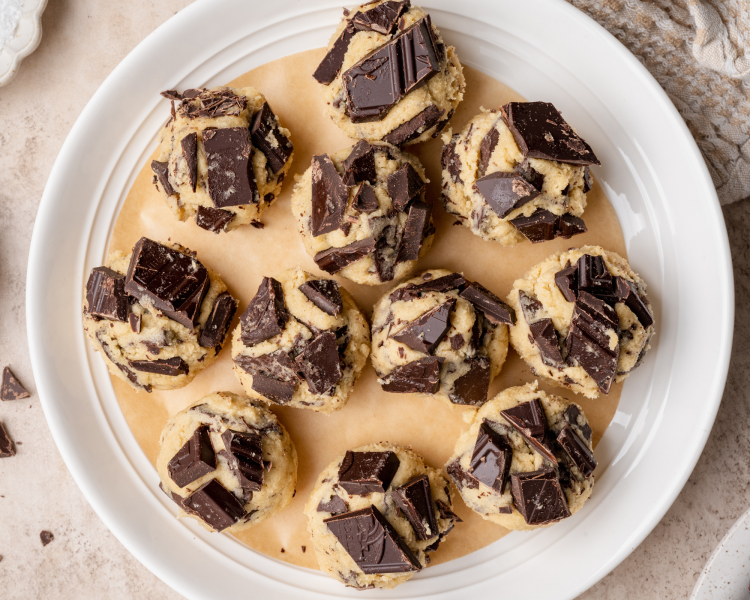
Combine the wet and dry ingredients. Then fold in the chopped chocolate. Scoop the dough into large balls and freeze for 15-30 minutes.
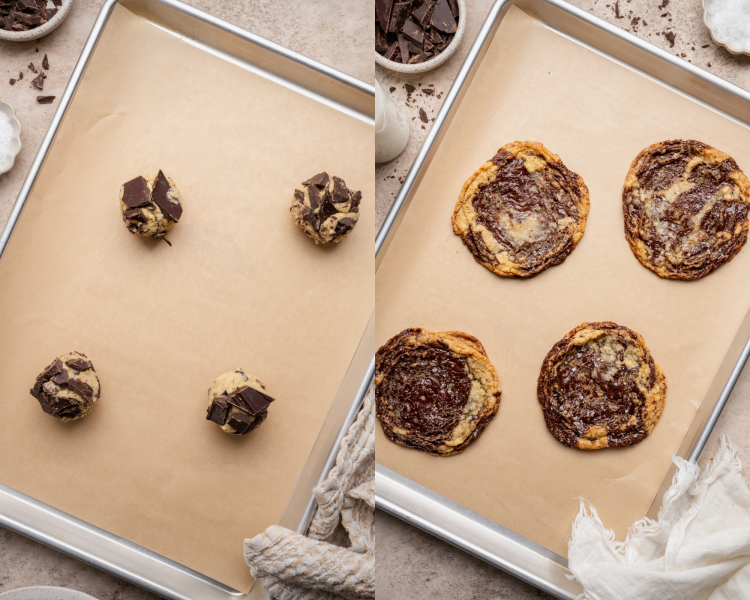
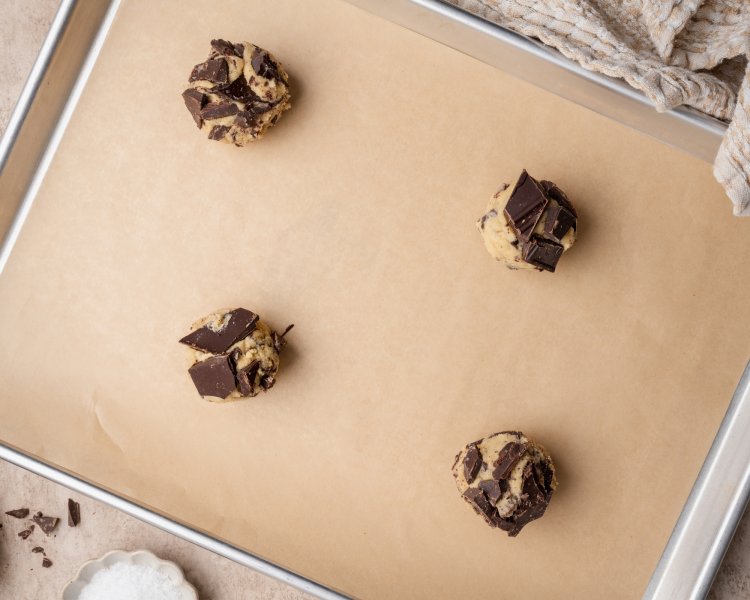
Bake & bang!
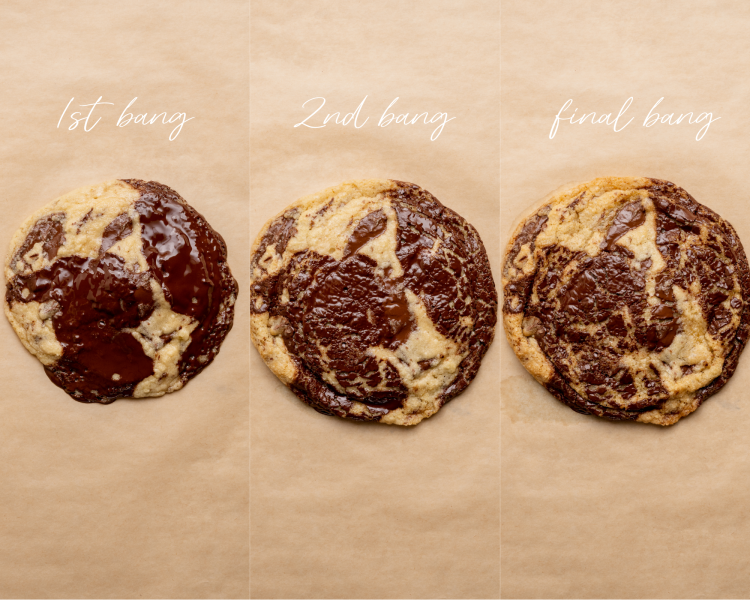
Place 4 cookies per baking sheet. Bake for 8 minutes, then:
→Remove the pan from the oven, lift the pan a few inches, and bang it firmly on the counter.
→Return to the oven for 3 minutes
→Remove and bang again
→Bake another 2-3 minutes (total bake time should be around 14-16 minutes)
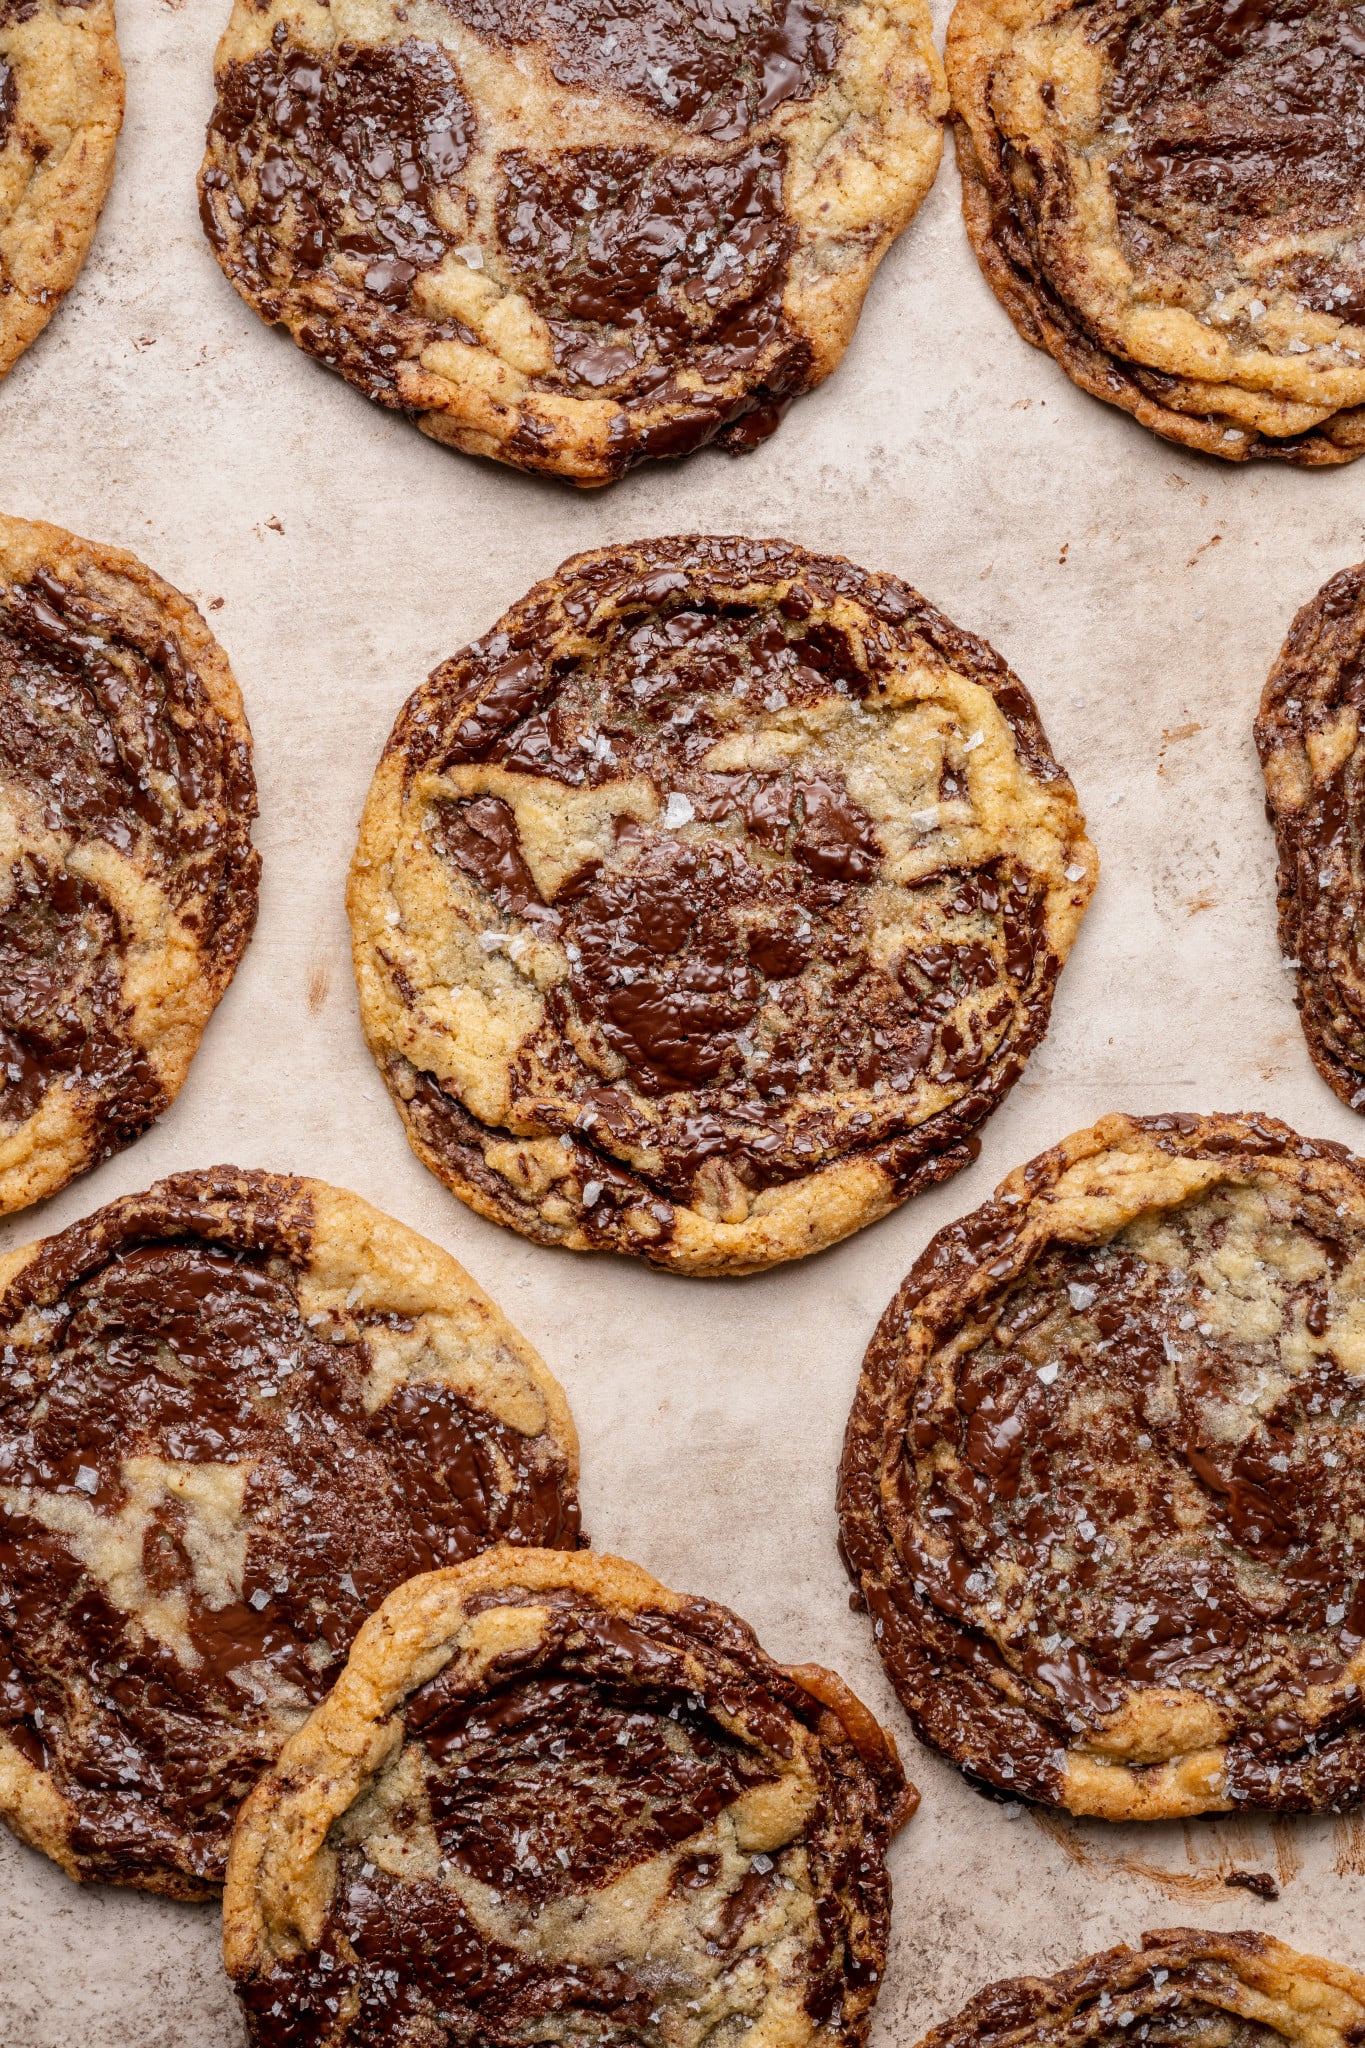
→Final bang! That’s it! The cookies will look rippled with golden edges and soft centers
Finish & enjoy!
Sprinkle with flaky sea salt and let cool. Then ENJOY THE BEST COOKIE EVERR!!
Expert Tips
- Spoon and level flour properly: Spoon the flour into your measuring cup and be sure it’s leveled. Do not scoop the flour out of the container/bag with your measuring cup because you could end up with 50% more than you need. Spoon and level by using a spoon to scoop the flour into the measuring cup and use the back of a knife to level off the top of it.
- Use the right chocolate: Using 60-70% chocolate is ideal for creating glossy, melty pools because it has enough cocoa butter to spread smoothly while its richer, less-sweet flavor balances the cookie dough and holds its shape just enough for that bakery-style finish. I like these chocolate discs, or you can just chop up this dark chocolate Ghirardelli bar! And remember, don’t use chocolate chips!
- Don’t over-mix the dough: Mix until the ingredients are just combined. Over-mixing can develop too much gluten, making the cookies tough. To prevent this, I like to fold in the dry ingredients just until no more dry flour pockets are left.
- Keep the other cookie dough balls in the freezer between batches: Keeping your cookie dough cold before baking slows the spread, allowing the cookies to puff first and then collapse when pan-banged. This creates those signature rippled edges with thick, chewy centers instead of flat, greasy cookies.
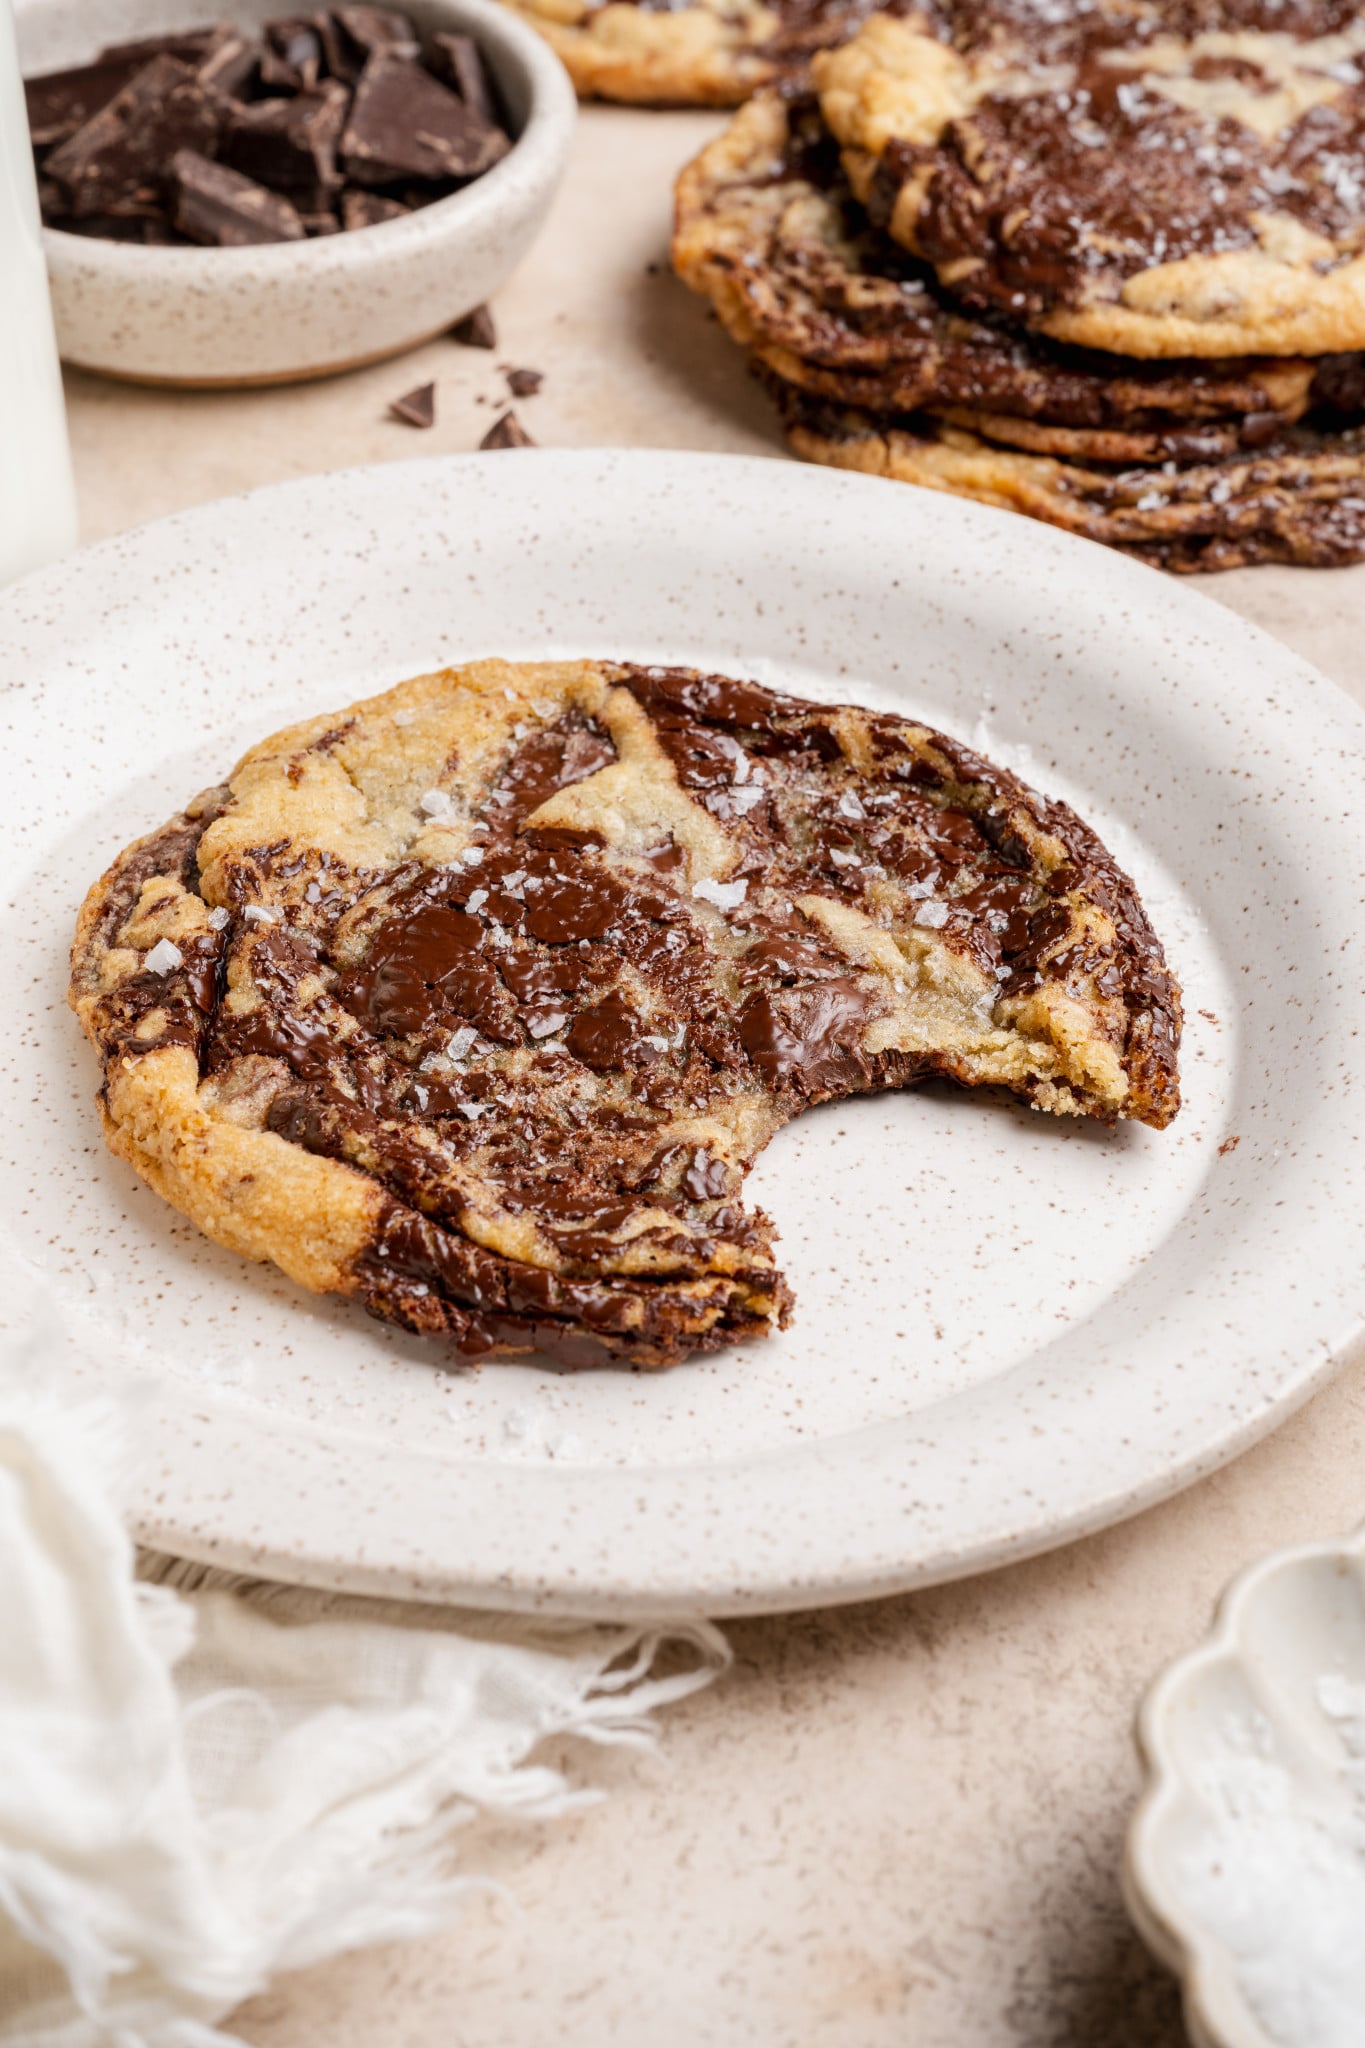
- Don’t over-bake: These cookies look very soft and slightly underbaked when you take them out of the oven. The centers will continue to set as the cookies cool, keeping them soft and chewy with melty chocolate puddles.
- Do not crowd the baking sheet: These cookies are large, so I only like to bake 4 cookies at a time to make sure to give them the space they need. Overcrowding the cookies can lead to them baking into each other and creating wonky shapes. We want the heat to circulate evenly around the cookies, so if you find your cookies are spreading too much, bake fewer cookies on your sheet at one time.
If your cookies get a little wonky after banging them on the counter, you can leave them like that if you like the rustic vibe OR place a large circle cookie cutter or a circular drinking glass (it should be larger than the cookie so you don’t cut off any edges) around each of the cookies while they’re still warm and give the cookies a spin. It’s so quick and easy and makes a huge difference!
Variations / Substitutions
- Gluten-free: Swap the all-purpose flour for Bob’s Red Mill Gluten Free 1-to-1 Baking Flour.
- Chocolate: Feel free to swap the semi-sweet chocolate for milk or dark chocolate. You can also use a combination of two.
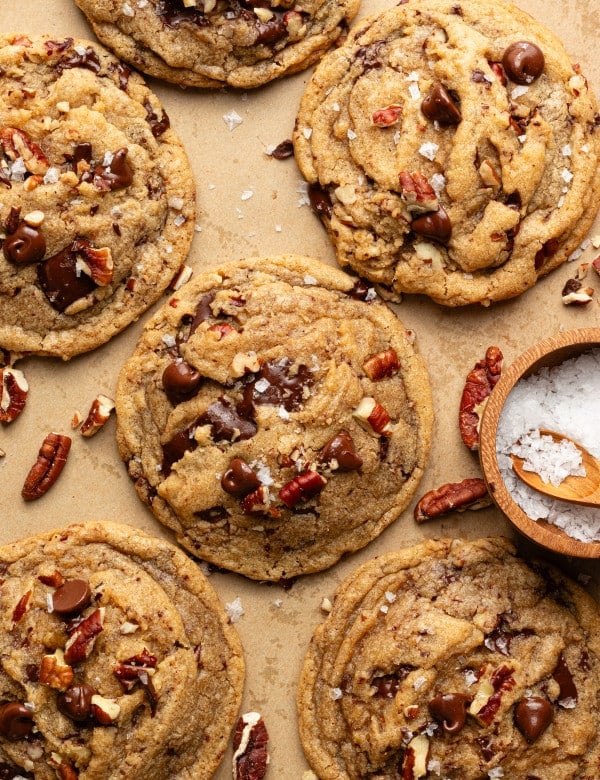
- Nuts: Feel free to add your favorite nuts like pecans, almonds, peanuts, or walnuts if you like a little extra crunch!
- Extra chocolate: Want more chocolate? Dip these cookies in chocolate like my Chocolate Dipped Brown Butter Cookies.
If you’re looking for a quick cookie fix just for one, try my new Single-Serve Thin and Chewy Chocolate Chip Cookie. You can even add pecans
Storage / Freezing
- Store these cookies in a sealed container at room temperature for up to 5 days, or in the freezer for up to 3 months.
- To freeze: Scoop the dough into 3 Tbsp. sized balls and freeze in a single layer in an airtight container for up to 3 months. You can bake the frozen cookie dough from frozen, just add an extra minute or so to your bake time.
shop this post
 Buy Now →
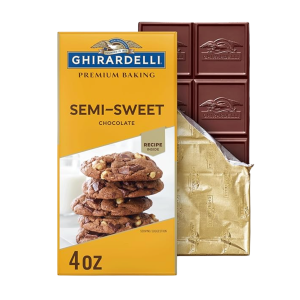
Ghirardelli Semi-Sweet Chocolate Bar
Buy Now → Buy Now →
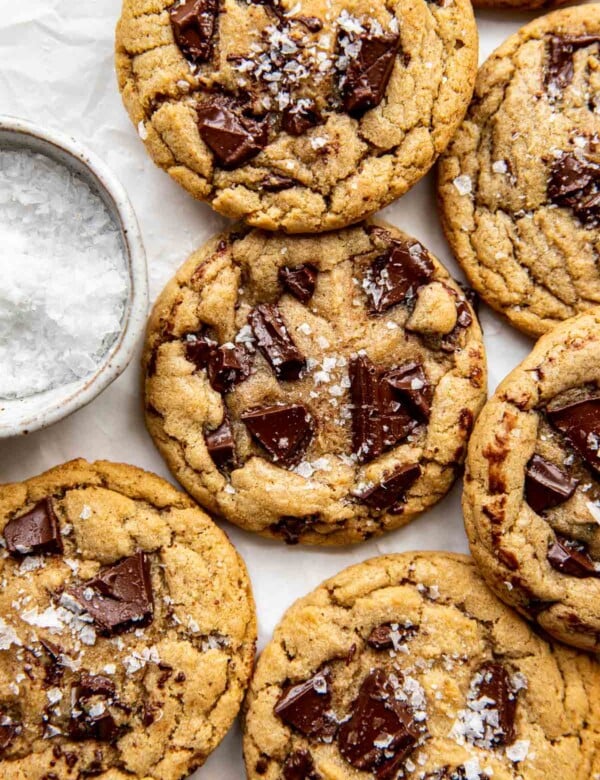
Before You Begin! If you make this, please leave a review and rating letting us know how you liked this recipe! This helps our business thrive & continue providing free recipes.
Ingredients
- 2¼ cups all-purpose flour
- 1 tsp. cornstarch
- 3/4 tsp. baking soda
- 3/4 tsp. fine salt
- 1 cup unsalted butter (softened)
- 1⅛ cups granulated sugar
- 2/3 cup light brown sugar (packed)
- 1 large egg + 1 egg yolk (room temperature)
- 1 Tbsp. water
- 1 tsp. vanilla extract
- 8 oz. chopped chocolate bars (It’s important to use bars, not chocolate chips. They won’t spread if using chips. I like to use a semi-sweet Ghirardelli bar, and then roughly chop some of these chocolate discs, plus a little more for garnishing the tops of the cookies prior to baking to get those chocolate puddles on top.)
- Maldon flaky sea salt (for finishing)
Last step! If you make this, please leave a review and rating letting us know how you liked this recipe! This helps our business thrive & continue providing free recipes.
Instructions
- Prep: Line a few baking sheets with parchment paper and set aside.
- Mix dry ingredients: In a medium bowl, whisk together the flour, cornstarch, baking soda, and salt. Set aside.2¼ cups all-purpose flour, 1 tsp. cornstarch, 3/4 tsp. baking soda, 3/4 tsp. fine salt

- Cream butter & sugars: In a bowl of a stand mixer fitted with the paddle attachment, beat the softened butter, granulated sugar, and brown sugar until light and fluffy, about 2-3 minutes Start Timer. Scrape down the sides of the bowl.1⅛ cups granulated sugar, 2/3 cup light brown sugar, 1 cup unsalted butter
- Add wet ingredients: Add the egg, egg yolk, vanilla, and water. Mix until smooth and fully combined, again scraping down the sides of the bowl as needed.1 large egg + 1 egg yolk, 1 tsp. vanilla extract, 1 Tbsp. water
- Combine: Add the dry ingredients to the wet ingredients and mix just a few times, the flour won’t be fully incorporated yet.
- Add chopped chocolate: Fold in the chopped chocolate.8 oz. chopped chocolate bars
- Scoop & chill: Scoop the dough into large balls (I use a 3 Tbsp. cookie scoop) and place on a large plate or a small baking sheet that will fit in the freezer. Freeze for 15-30 minutes. Start Timer
- Preheat: During this time, preheat the oven to 350°F.
- Add to baking sheet: Place 4 cookies per baking sheet (these are big cookies, so it’s important to give them the space they need!)
- Bake (pan-banging method): Bake for 8 minutes Start Timer, thenRemove the pan from the oven, lift the pan a few inches, and bang it firmly on the counter.Return to the oven for 3 minutes Start Timer.Remove and bang again.Bake another 2-3 minutes Start Timer (total bake time should be around 14-16 minutes).Final bang! That's it! The cookies will look rippled with golden edges and soft centers.The cookies will puff up between bangs, totally normal.Keep the other cookie dough balls in the freezer between batches.
- Cool and finish: Sprinkle with flaky sea salt. Cool on the pan for ~2-3 minutes Start Timer, then carefully transfer the cookies to a cooling rack. ENJOY THE BEST COOKIE EVERR!!Maldon flaky sea salt
Notes
- Keep the other cookie dough balls in the freezer between batches: Keeping your cookie dough cold before baking slows the spread, allowing the cookies to puff first and then collapse when pan-banged. This creates those signature rippled edges with thick, chewy centers instead of flat, greasy cookies.
- Do not crowd the baking sheet: These cookies are large, so I only like to bake 4 cookies at a time to make sure to give them the space they need. Overcrowding the cookies can lead to them baking into each other and creating wonky shapes. We want the heat to circulate evenly around the cookies, so if you find your cookies are spreading too much, bake fewer cookies on your sheet at one time.
- Store: Store these cookies in a sealed container at room temperature for up to 5 days, or in the freezer for up to 3 months.
- To freeze: Scoop the dough into 3 Tbsp. sized balls and freeze in a single layer in an airtight container for up to 3 months. You can bake the frozen cookie dough from frozen, just add an extra minute or so to your bake time.
Nutrition Information
Nutritional information is provided as a courtesy and is automatically calculated. It should only be construed as an estimate rather than a guarantee. Ingredients can vary and Kroll’s Korner can’t make any guarantees to the accuracy of this information.
📸 Photography by Creating Kaitlin

These are the best chocolate chip cookies I have had in a really long time! I love that they are crisp on the edges but stay nice and chewy in the centers! They are delicious!
Wow so kind of you! Thank you!! 🙂 they look great
These were so yummy and fun!
Our 5 year old was pretty proud of all the chocolate she put on top. We ended up making them a lot smaller, and ended up with about 30 so we could share! Everyone loved them!
They look sooo so good! So cute your daughter helped out 🙂 thank you!
These really are the best chocolate chip cookies ever …I used a chopped Hersheys dark chocolate bar ..and of course added the maldon salt flakes to the top before cooled ..oh man … the best !!
THEY LOOK SO GOOD!!! thank you Melissa 🙂
This recipe was so delicious! My kids loved these cookies, they were so soft and chewy! I loved using the big bars of semi sweet chocolate and the sea salt was also a must! Will definitely be making these again!!
They look great Tara!! thank you!!
This recipe was so delicious! My kids loved these cookies, they were so soft and chewy! I loved using the big bars of semi sweet chocolate and the sea salt was also a must! Will definitely be making these again!
Thank you sooo so much! 🙂
Delicious! I’m not sure I hit it hard enough but still tasted good. I baked a few and put the rest in the freezer for later.
Hi! Oh no, looks like they could have used a few more bangs haha sorry about that! thank you! 🙂
Delicious! Love the salt. I used chocolate chunks because my grocery store didn’t have a great chocolate bar, and actually I ended up using 12 oz instead of 8. My cookie scoop is slightly smaller so I baked 6 at a time and kept an eye on them pretty closely.
They’re beautiful! Thank you so much 🙂 glad you enjoyed!
Yum!! I doubled the vanilla extract for additional flavor. Also, I loved the way these browned all over! They’re so chewy and decadent.
Yummmmm! Can’t go wrong with more vanilla 🙂 thank you! They look so yum!
These are DELICIOUS! My mom said “these are awesome!” I almost don’t want to share these! They were super easy to make and came out so good. I forgot to put the extra chocolate on top before baking so the chocolate didn’t pool quite as well as Tawnie’s but they still taste so good! I highly recommend these – 5 stars!
They look phenomenal!! Thank you sooo so much 🙂
Made these for a birthday party – they were a hit.
Aw I am so glad, they look great! Thank you 🙂