Our Favorite Classic Cheesecake Recipe
This post may contain affiliate links. Please read our disclosure policy.
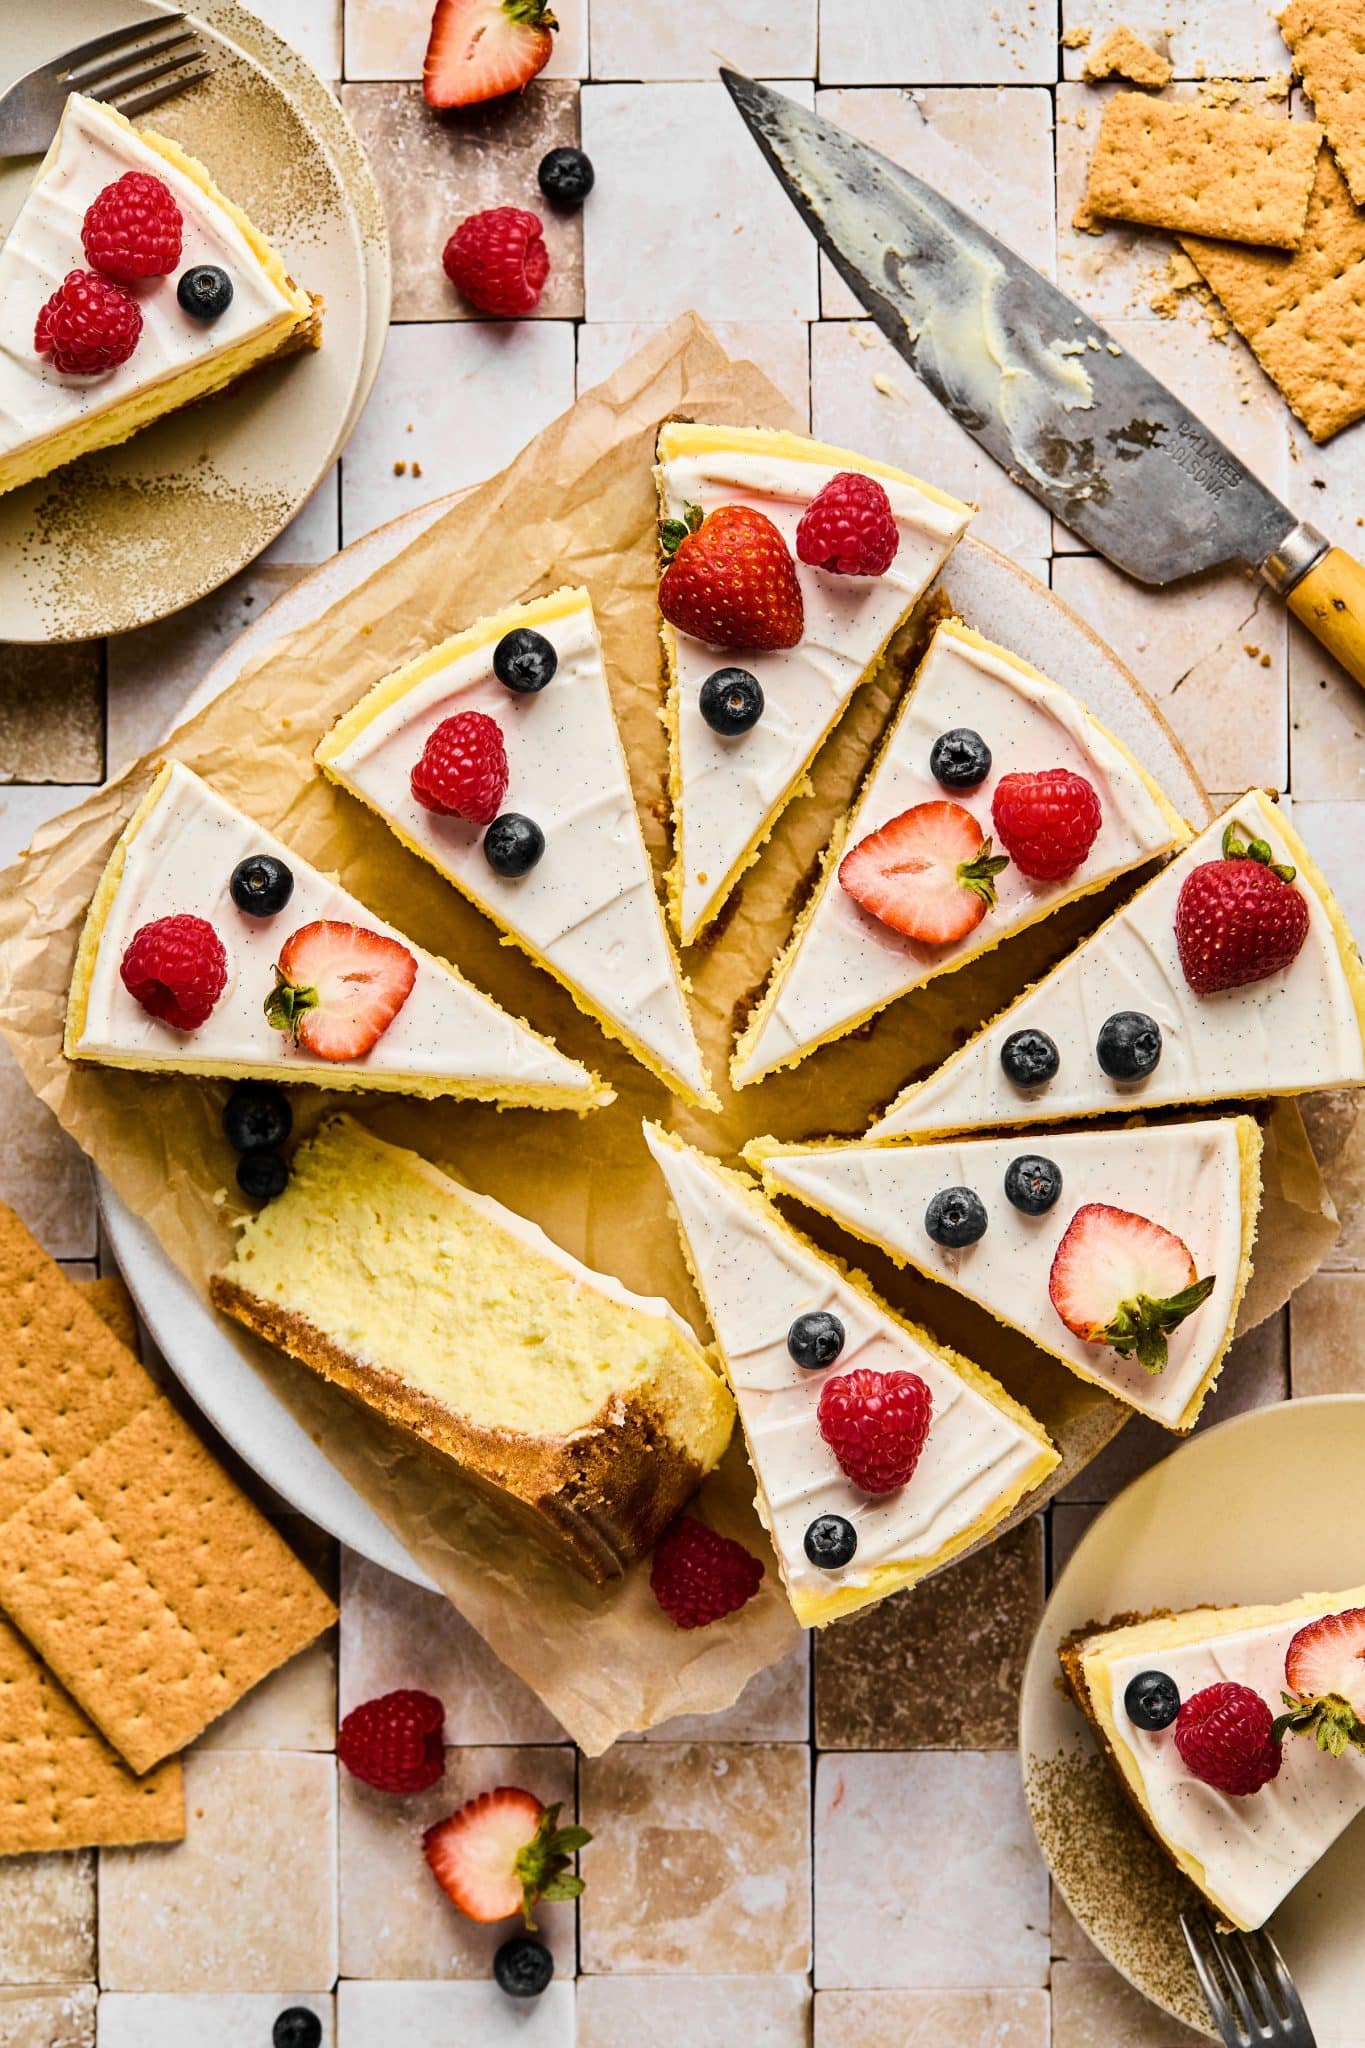
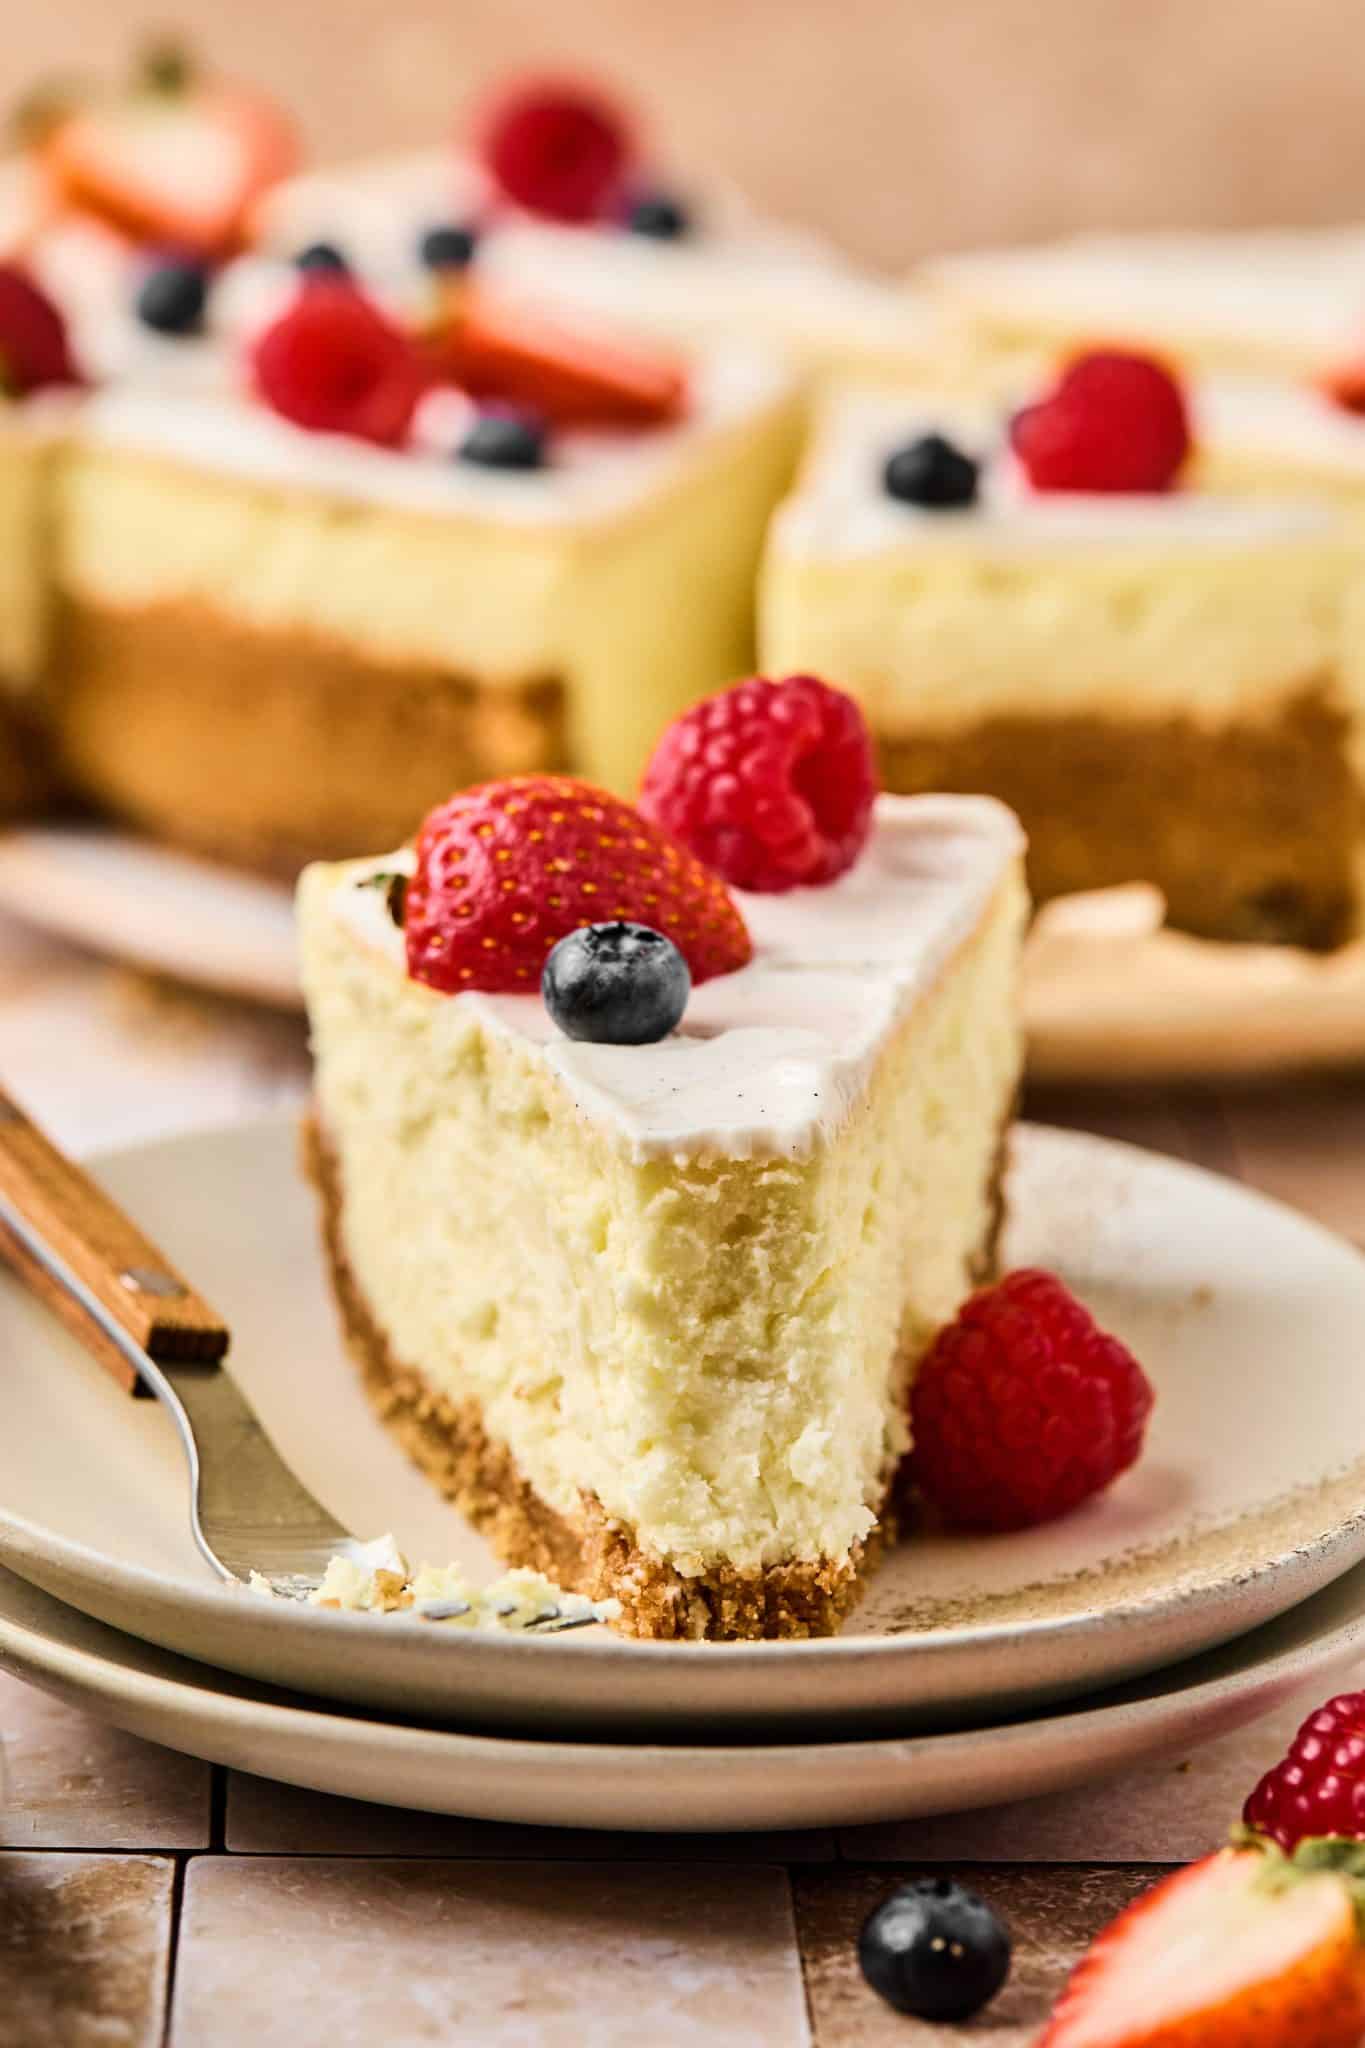
I can never turn down a bite of cheesecake and this Classic Cheesecake Recipe with a vanilla bean sour cream topping is our absolute favorite classic cheesecake EVER.
I’ll take cheesecake in just about any form… Cheesecake Cookie Bars, Raspberry Cheesecake Cookies, or even Pumpkin Cheesecake made in an Instant Pot. The creamy, smooth filling and graham cracker crust gets me every time!

If your love for cheesecake is as big as mine you’re going to reallyyy appreciate this recipe. It’s rich, smooth and creamy, tangy (in the best way) and a luxurious crowd-pleasing dessert.
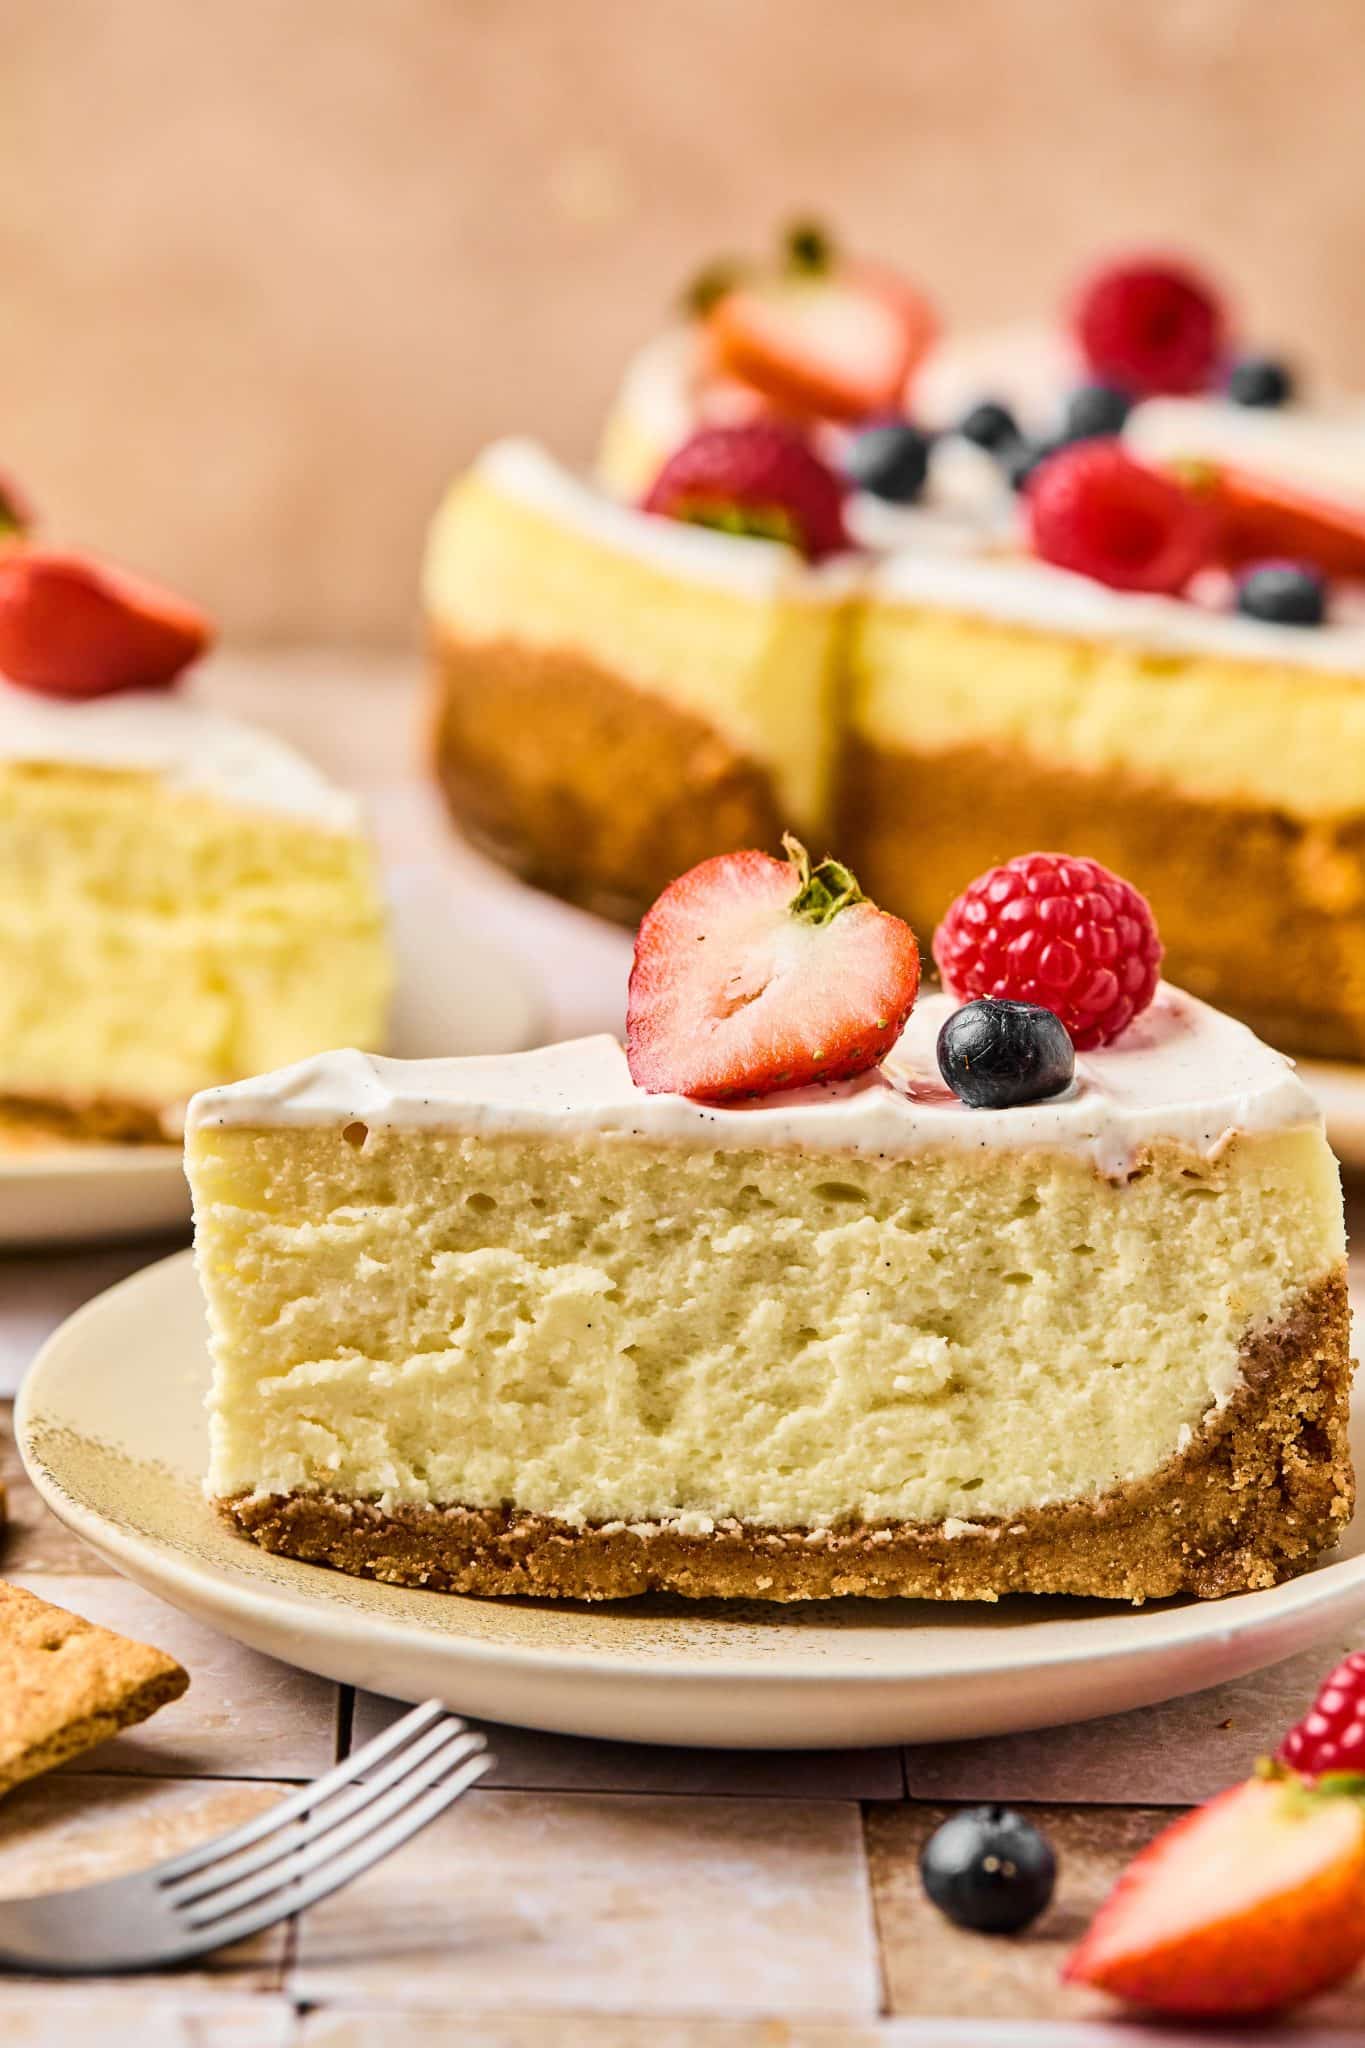
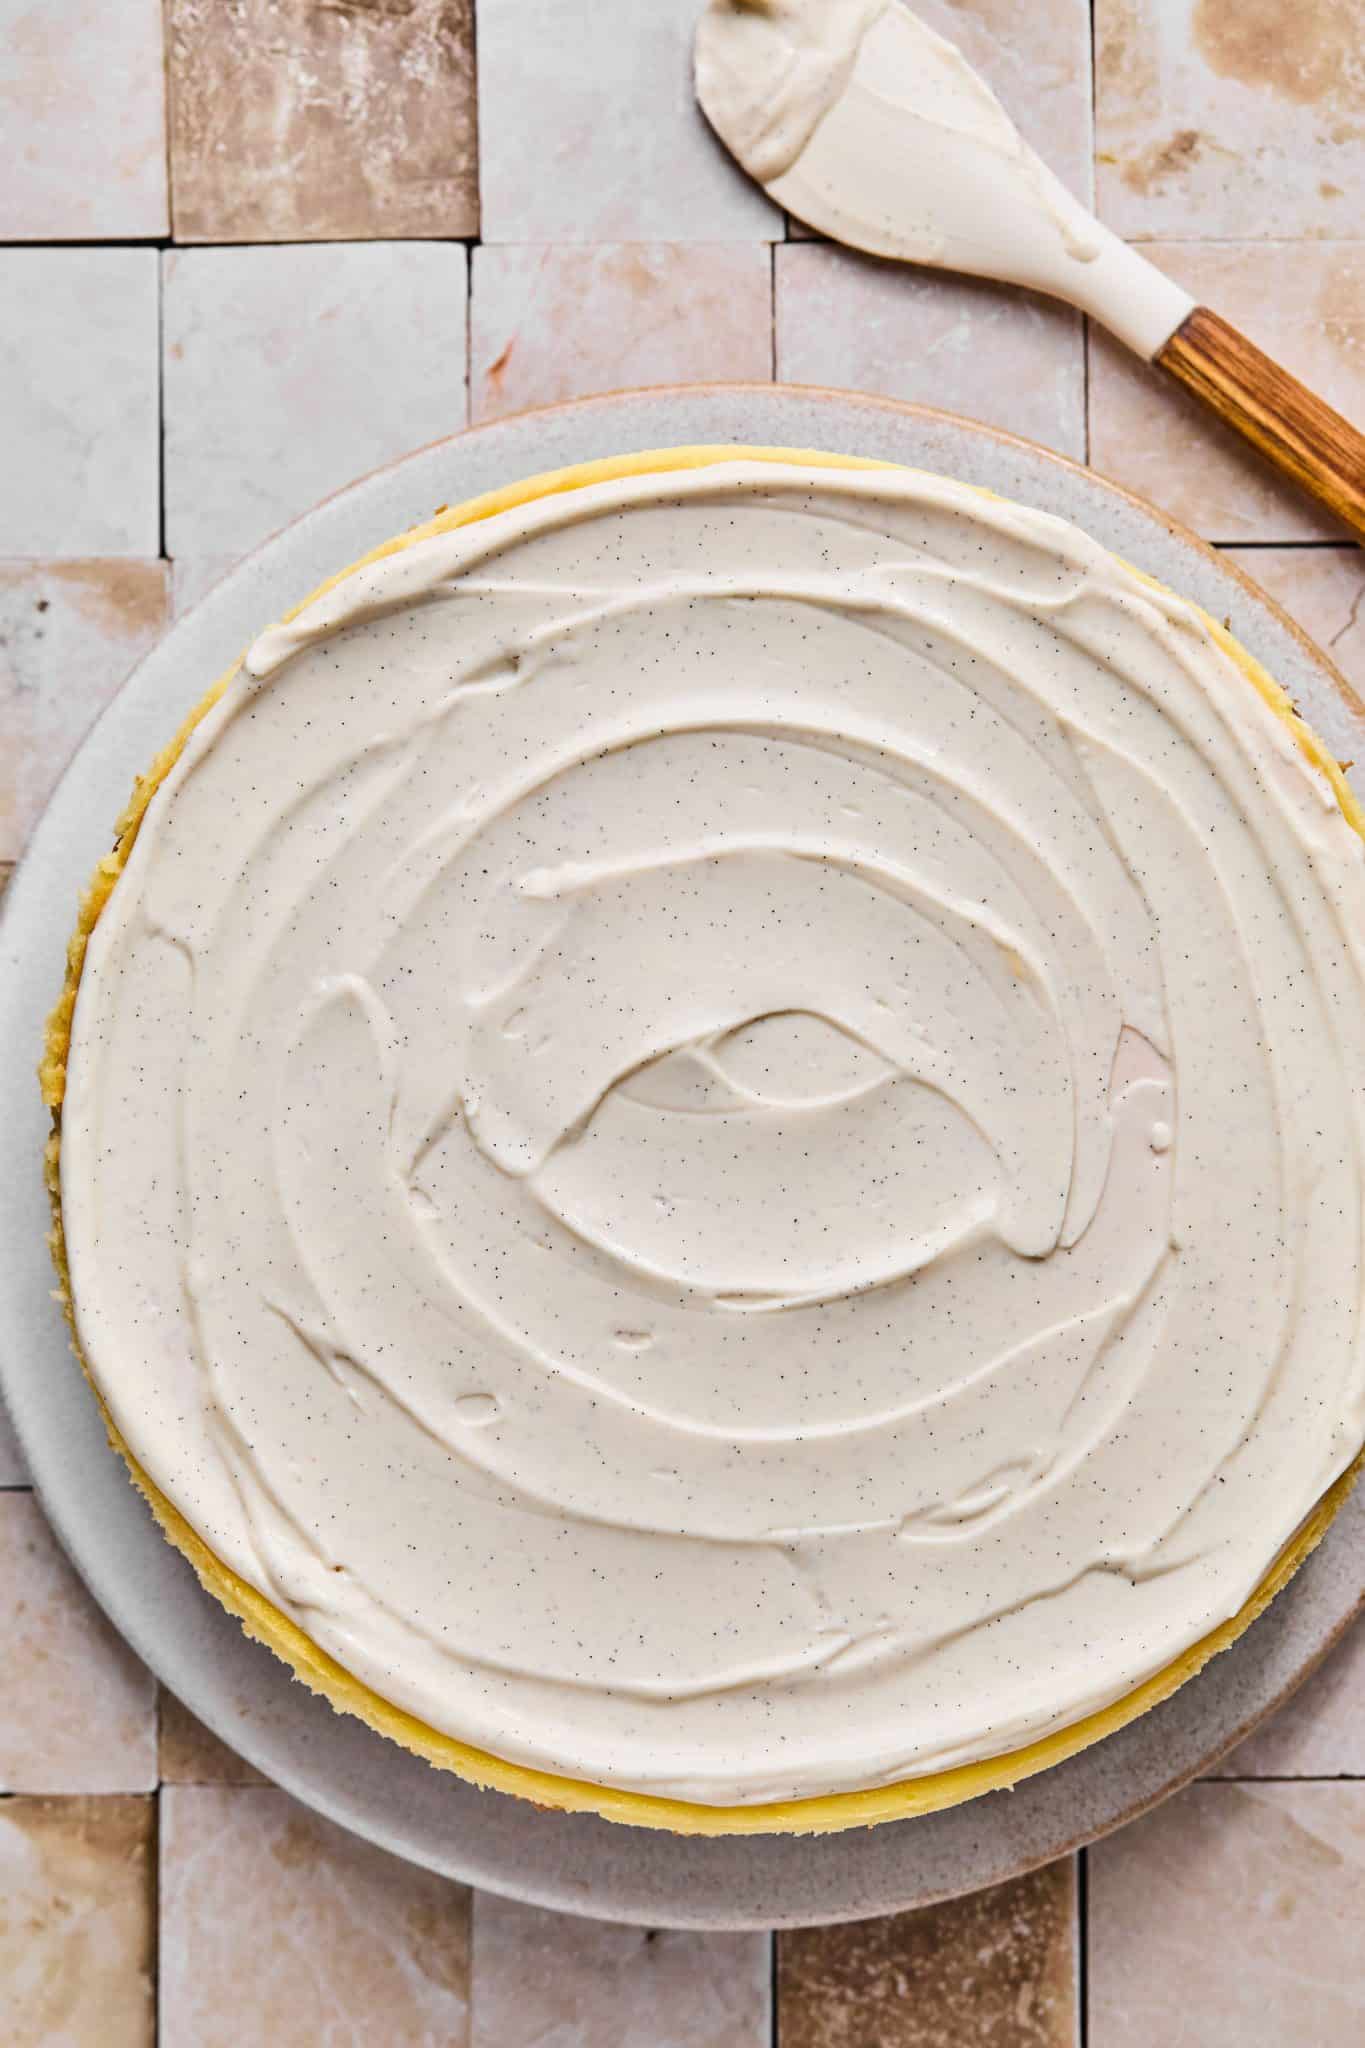
I like to break down this classic cheesecake recipe into 3 layers: 1. First is a thick buttery, graham cracker crust layer. 2. Second is a luscious cream cheese filling made with 4 blocks of cream cheese (yes, 4!) 3. Third is a delicate vanilla-bean-infused sour cream layer.
It’s a straightforward cheesecake with graham crackers, cream cheese, sugar, eggs, etc., you know the drill. But what’s fun is the gorgeous speckles of vanilla bean in the sour cream topping.
Top with your favorite fresh berries and a dollop of whipped cream and dive into pure bliss with this creamy classic.
Ingredient Notes
One of the biggest things to note about the ingredients for this Classic Cheesecake Recipe is they need to be same temperature, room temperature. (About 70-75°F). This is essential for a smooth cheesecake. Cold ingredients or cold cream cheese will create a lumpy batter. We want the ingredients to combine effortlessly so using room temperature is best.
Be sure to scroll down to the recipe card for the full recipe ingredients & measurements.
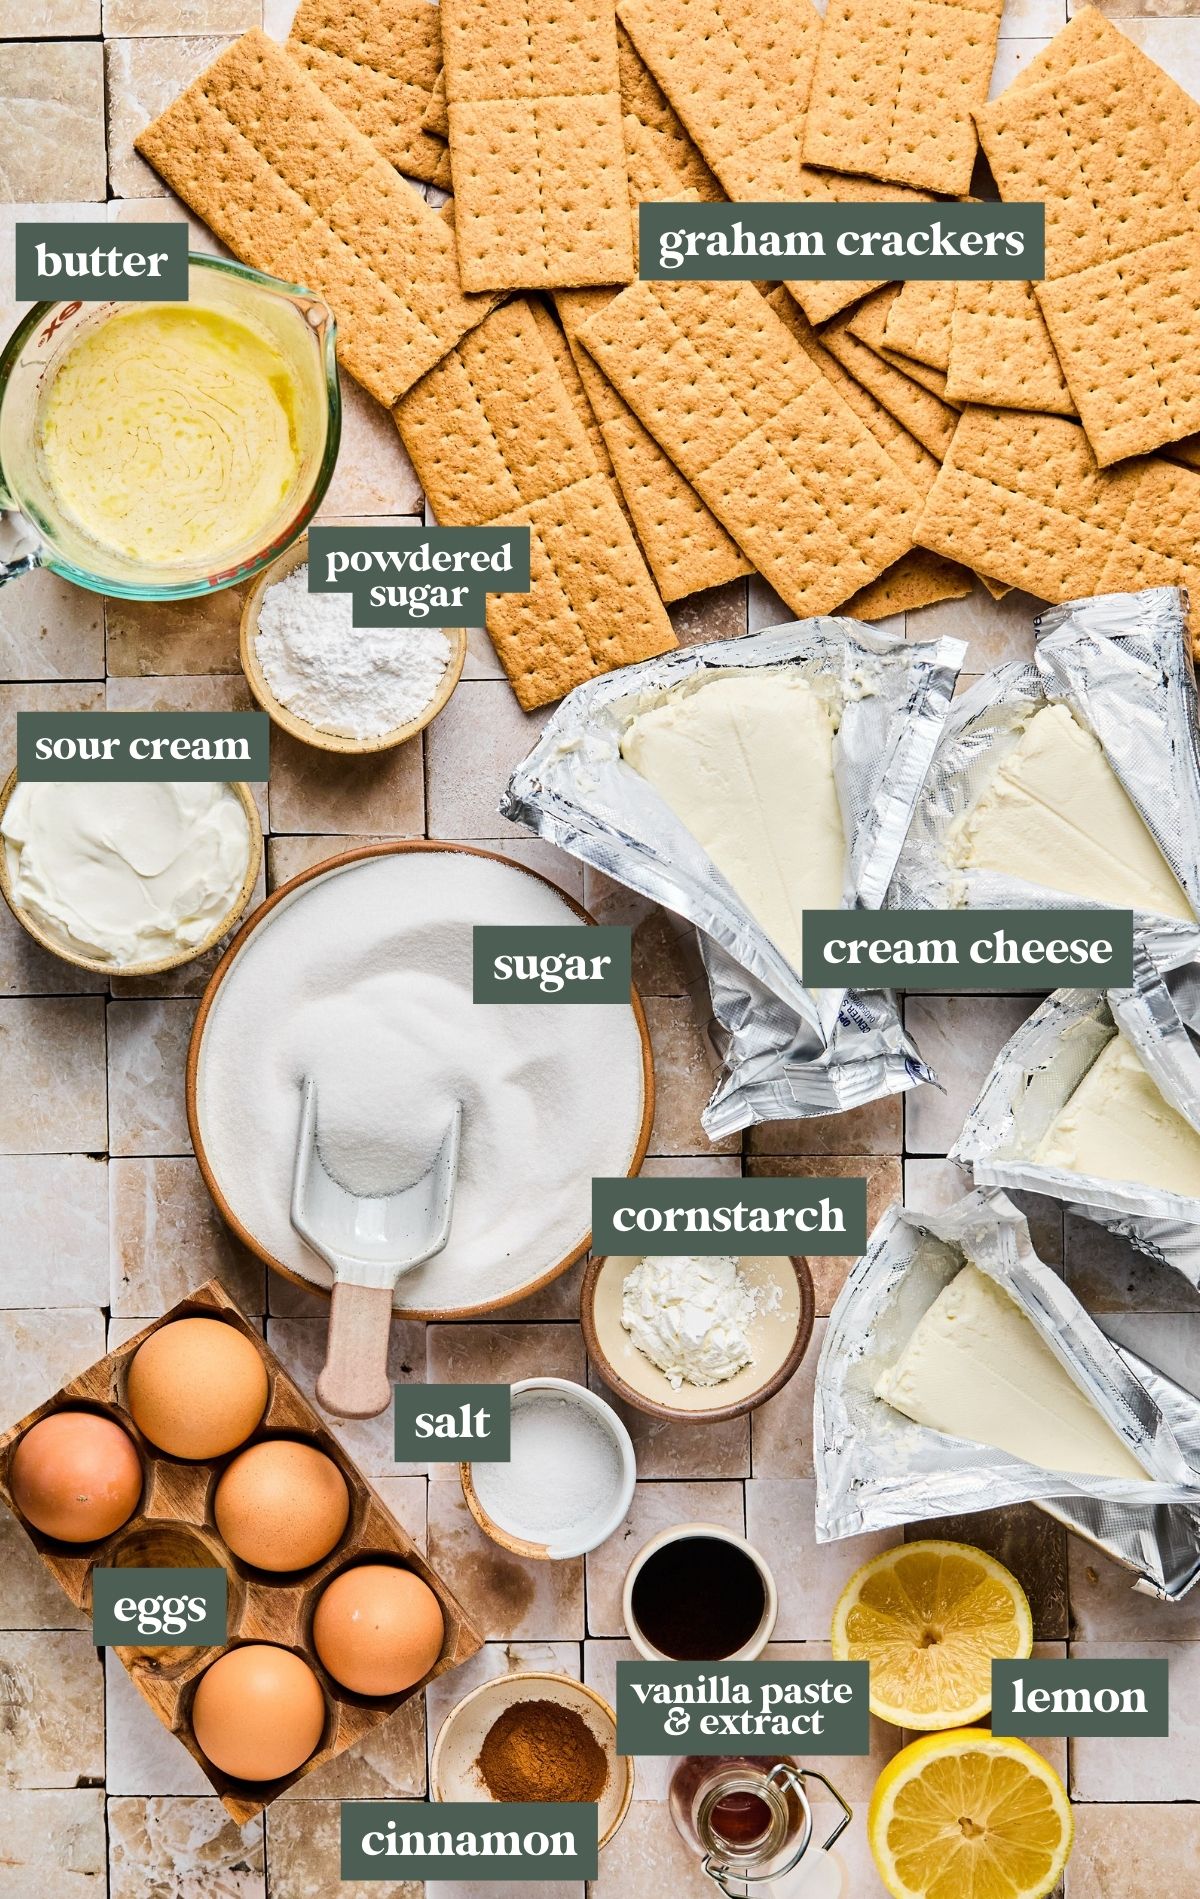
- Cream cheese: I recommend using a good quality, full-fat cream cheese for best results. You’ll need 4 blocks at room temperature
- Sugar: superfine granulated sugar or regular granulated sugar works well.
- Eggs: room temperature. You’ll need 5 eggs for this recipe. The eggs help give cheesecake its rich texture.
- Sour cream: You guessed it – room temperature! Full fat recommended. I love adding in a bit of sour cream to help with the airy, soft texture.
- Vanilla: Use a high quality vanilla extract for best results.
- Lemon Juice: a little fresh lemon juice in cheesecake helps to balance and brighten the flavors.
- Cornstarch: the cornstarch makes this cheesecake a bit more sturdy and it will set up firm (possibly preventing cracks on top too!).
- Graham crackers: You’ll need 2 1/2 cups crumbled graham crackers. Don’t skimp on this part! You’ll love the thick , buttery graham cracker base layer.
- Salt and cinnamon: Added flavors for the crust.
- Vanilla bean paste: To add those visually appealing specs to the sour cream topping!
Step by Step Directions:
Scroll down to the recipe card for the full recipe instructions.
Make the graham cracker crust
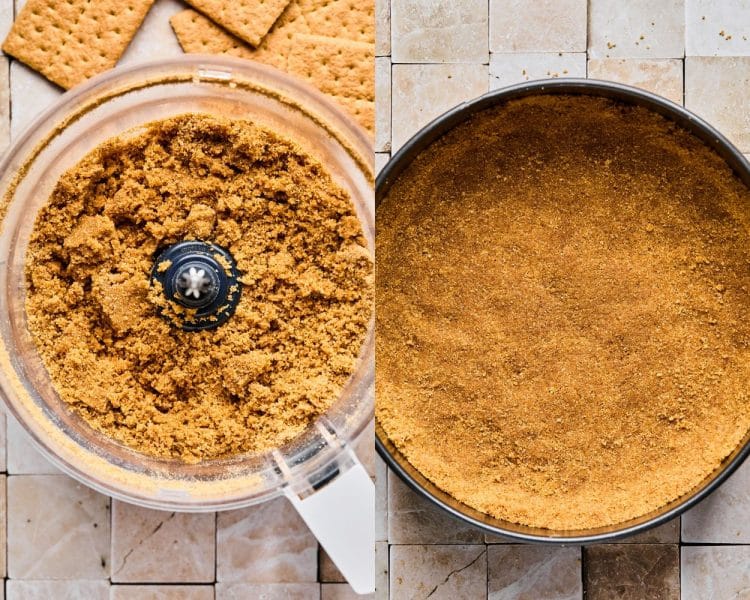
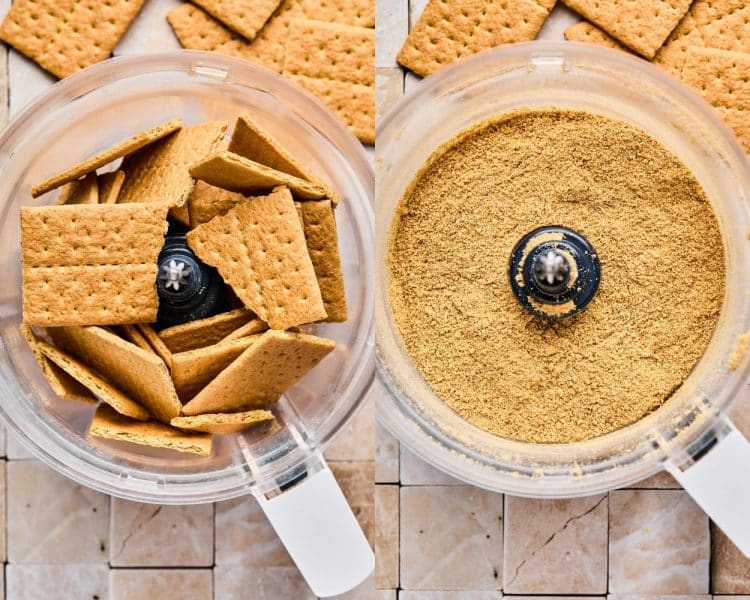
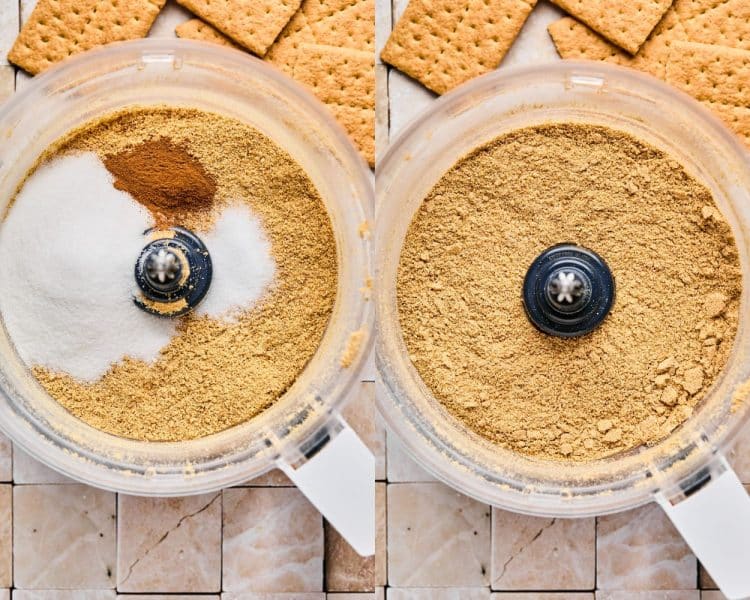
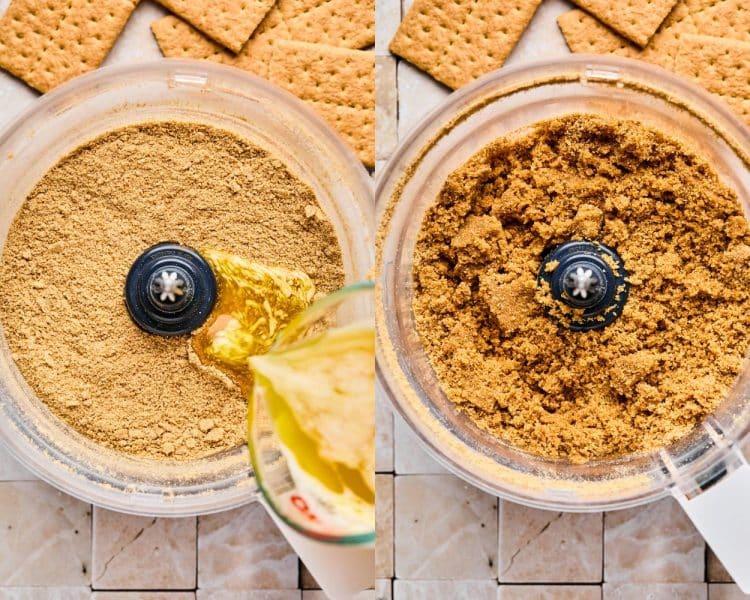
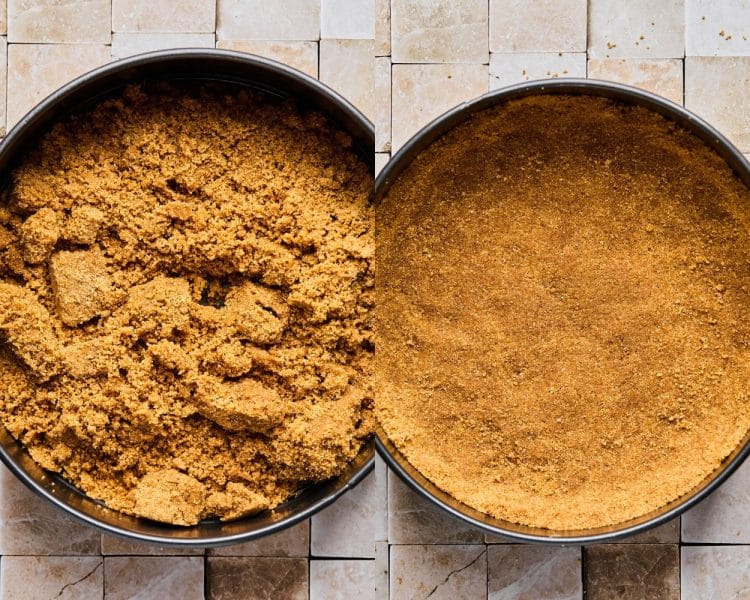
Use a food processor to make the graham cracker crust. Press the mixture into a 9-inch springform pan or cheesecake pan. Bake for 10 minutes, then cool.
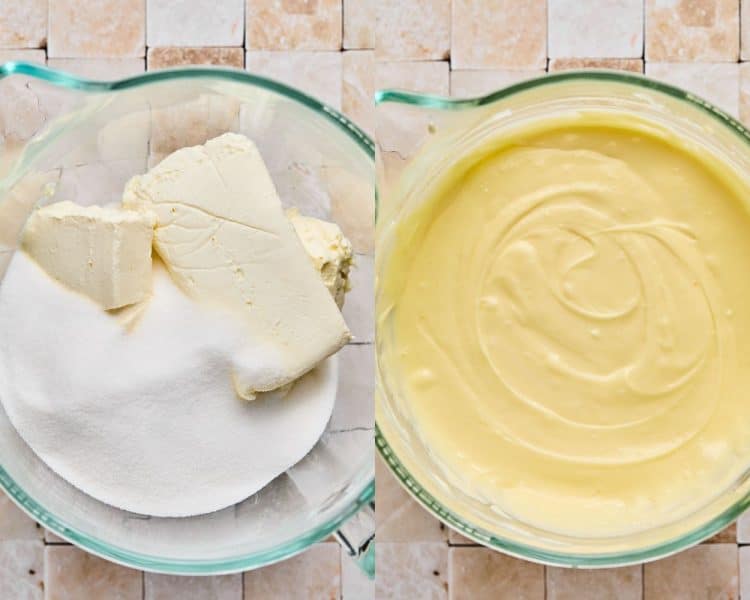
Prepare the cheesecake filling
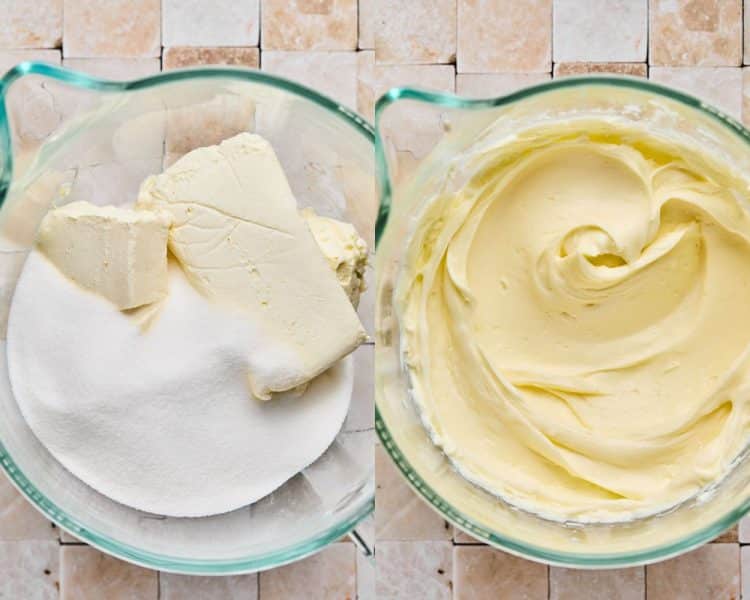
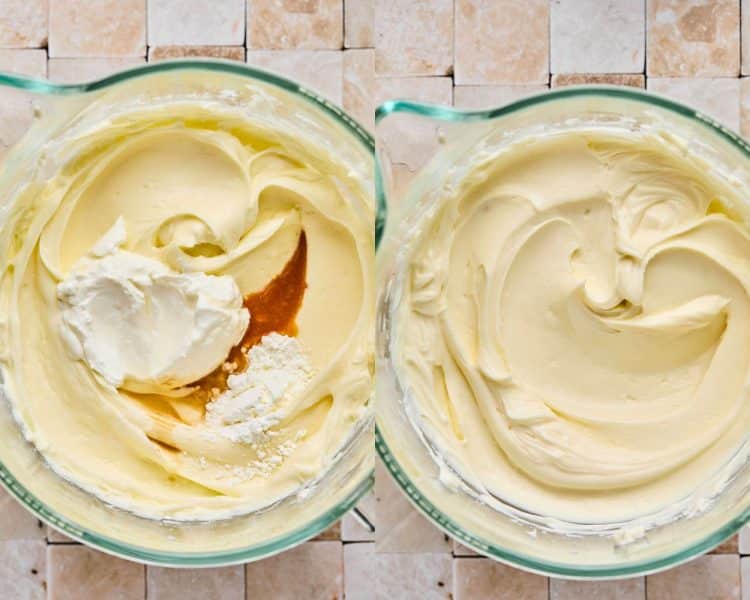
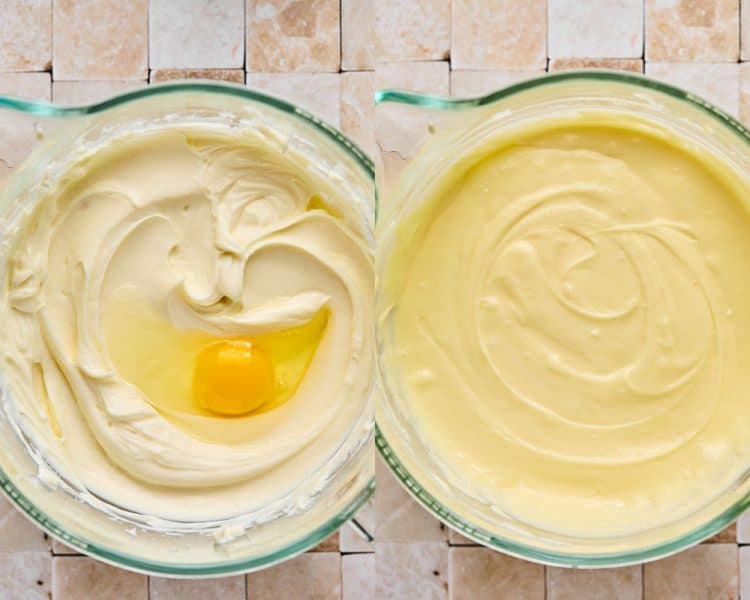
Mix the cream cheese and sugar together using a stand mixer for 1-2 minutes. Add in the sour cream, lemon juice, vanilla extract, cornstarch and salt and mix until fully combined. Then add in room temperature eggs, one at a time, beating until just combined.
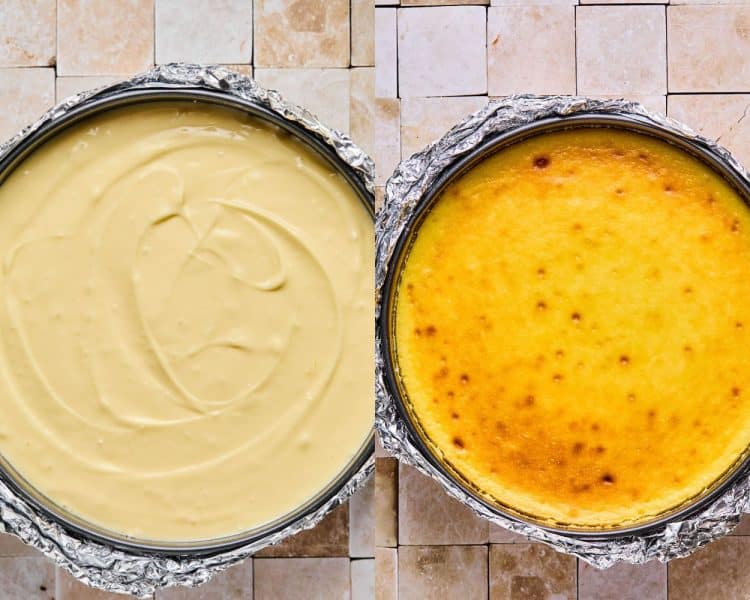
Pour into pie crust & bake
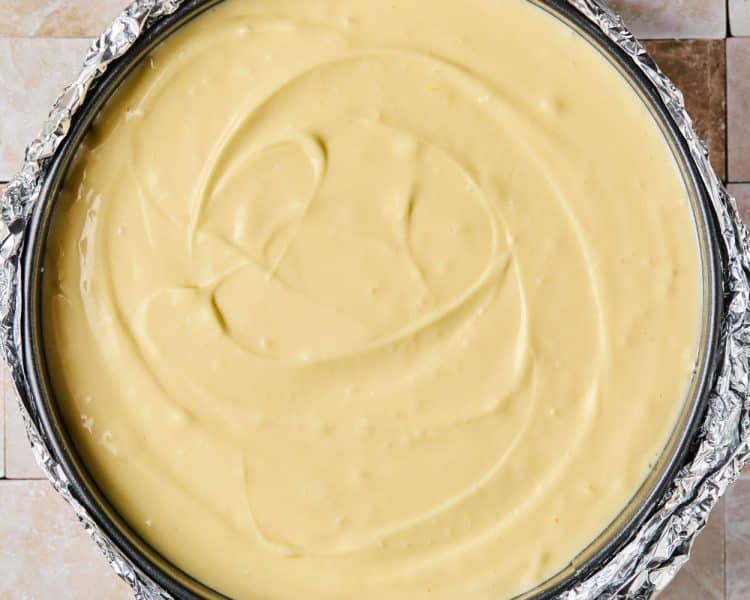
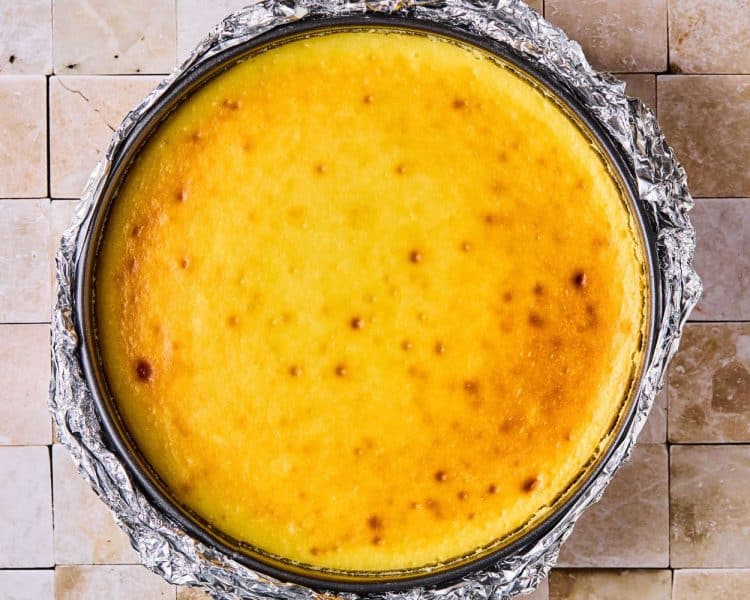
Pour filling into the chilled crust. Prepare the water bath. Bake for 12 minutes at 475°F and then lower the oven temperature down to 350°F and bake for 50-55 minutes.
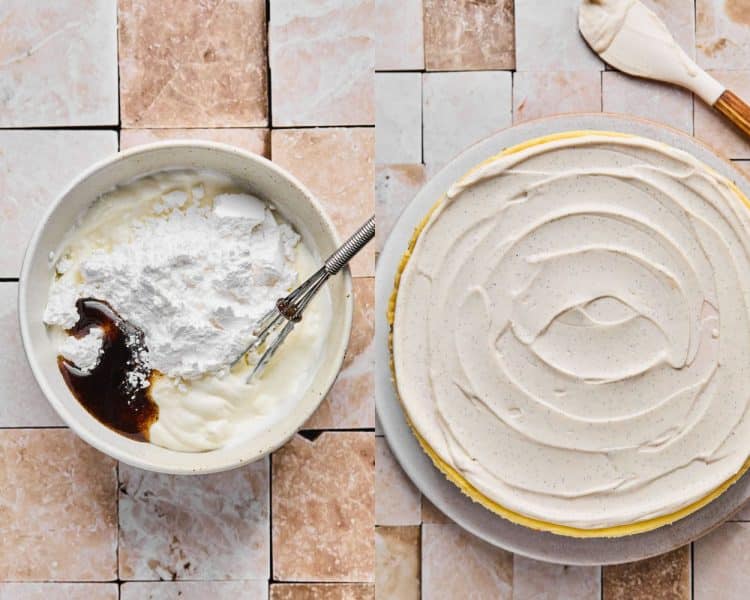
Prepare sour cream topping
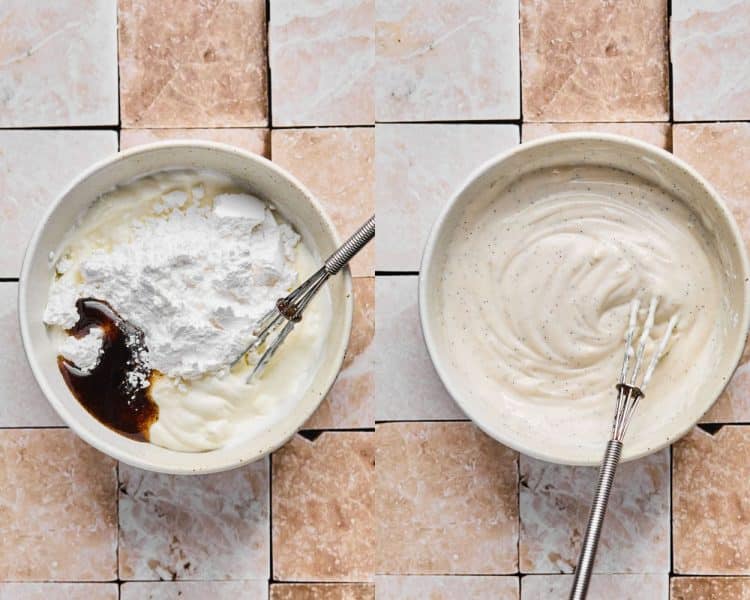
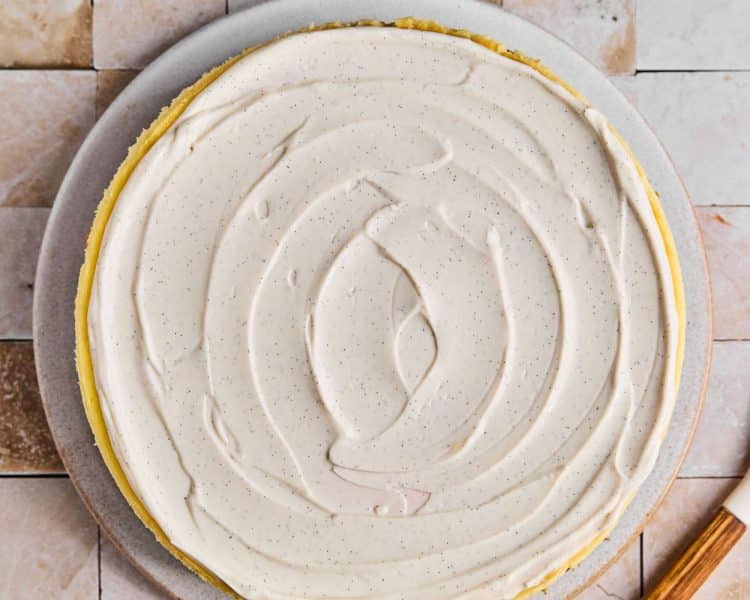
Mix the ingredients for the sour cream topping. Spread evenly over the top of the cooled cheesecake.

Slice, top, and serve!
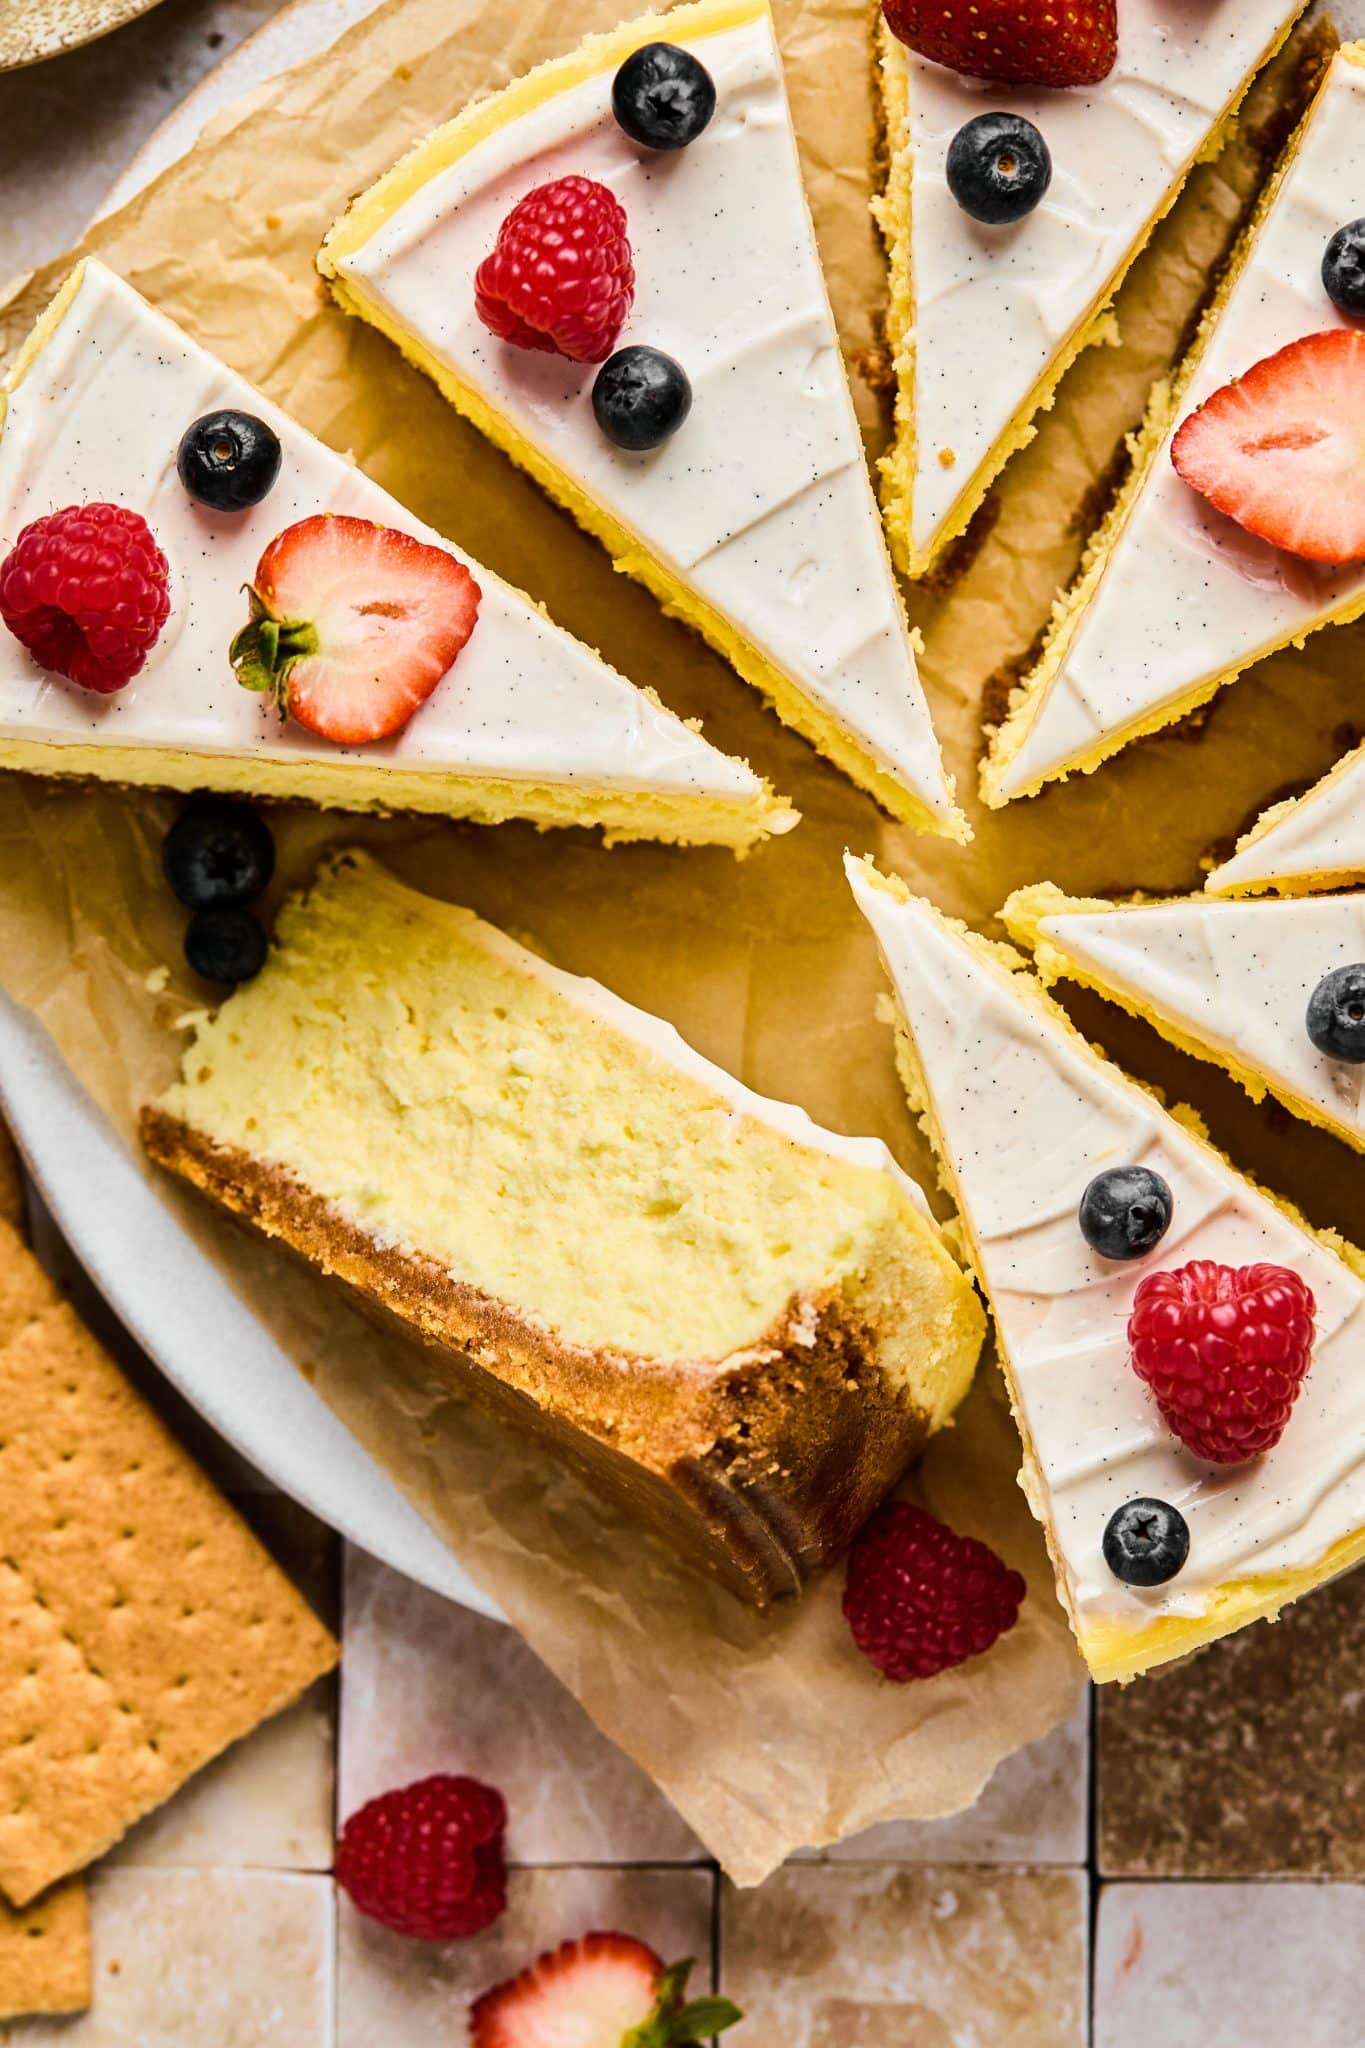
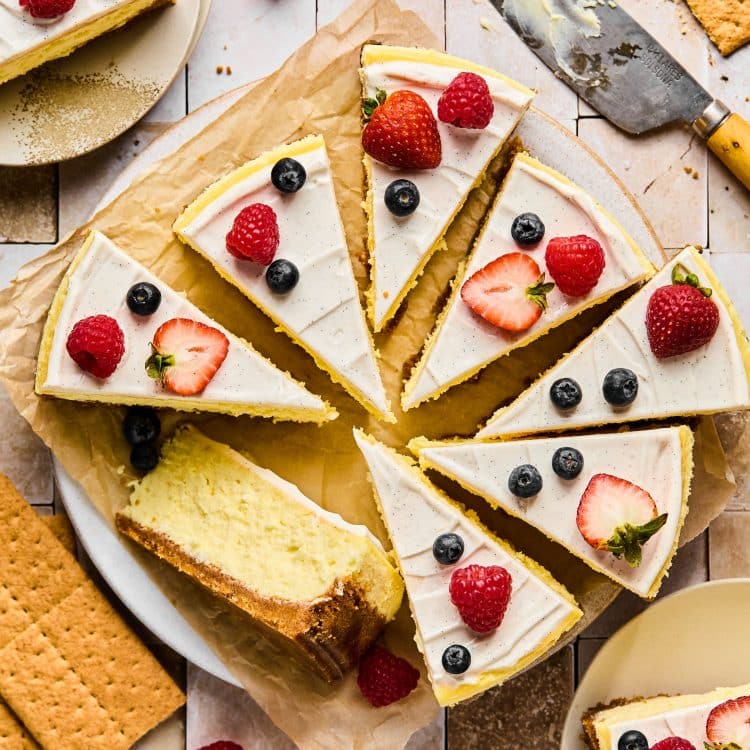
Slice the cheesecake into slices using clean, sharp knife. Top with your favorite berries and whipped cream, and enjoy!
Expert Tips
Use these tips for a flawless, foolproof cheesecake every single time:
- Use room temperature (same temperature) ingredients. When I know I am going to make a cheesecake, I usually take the cream cheese, sour cream and eggs all out of the fridge in the morning. Then by the afternoon when I’m ready to bake, all ingredients are room temperature. This is important for creating a smooth, creamy cheesecake filling.
- Add the eggs in one at a time. You don’t want to over beat the filling and adding in eggs one at a time, just until combined helps. Over beating will lead to cracks. We want to mix the filling enough, but not too much.
- Scrape down the sides of the mixing bowl. When baking the filling, occasionally scrape down the sides of the bowl to make sure the filling gets evenly incorporated, which can help prevent lumps or clumpy batter.
- Use a springform pan. It’s the easiest pan for removal of the cake since you can gently release the outer ring.
- Double wrap the springform pan with heavy duty foil. Wrapping aluminum foil around the exterior of the pan helps to prevent water from the water bath to seep in.
- Press the crust up the sides of the pan. Use the bottom of a measuring cup or bottom of a flat glass to evenly press the crust on the bottom of the pan and then, press crust up the sides as well. This recipe makes a nice thick crust to there is plenty of crust to push up the sides.
- Don’t skip pre baking the crust. I always like to pre bake the graham cracker crust for 10 minutes before adding the filling. This helps to ensure it stays a crispy, heavenly crust. You don’t need any pie weights, just pop it in for 10 minutes at 350°F.
- Strain the cheesecake batter. An optional step to ensure super smooth, silky non-clumpy cheesecake is to run the batter through a fine mesh strainer before pouring on to the crust. Usually, a few tiny clumps of cheesecake are OK and will melt as the cheesecake bakes. It’s the large, huge clumps you want to look out for!
- Slice with a sharp, warmed knife. Dip a knife in hot water, or run it under hot water. Wipe water off with a towel, slice and then repeat for perfectly clean cut slices. Cleaning the knife in between cuts and using warm water is key.
FAQs
How can I tell when my cheesecake is done?
The cheesecake will wobble slightly if you gently jiggle the pan. The edges should be firm, the center will be slightly wobbly. If it’s entirely watery, it needs to bake longer. I don’t recommend poking too many holes in your beautiful cheesecake but you can check the internal temperature with a thermometer. When the thermometer reads 145°F-150°F, turn off the oven, slightly crack open the oven door and leave the cheesecake in the oven for another hour.
Why do I need to use a water bath when baking cheesecake?
A water bath when making cheesecake is the reassurance you need to preventing cracks. It sounds intimidating but a water bath is simply a pan of hot water that you set the cheesecake into. The hot water helps bake the cake more evenly and provides a humid environment for the cheesecake which helps prevent cracks. And after all the time you’ve dedicated to making this glorious dessert we don’t want cracks, right?! However, life happens and if you get a few cracks they’re easy to cover with fruits and syrups. I know it’s an extra step to do a water bath but it’s worth it! (I use a large roasting pan to set my cheesecake in, see video).
Why did my cheesecake crack?
You possibly over baked the cheesecake. Cracks form when the cheesecake is too dry. To prevent the cheesecake from cracking, don’t over bake the cheese, don’t over beat the eggs and be sure to use a water bath. Don’t stress if you get a few cracks on top. This recipe has a beautiful layer of sour cream on top to cover up any imperfections and it adds creaminess in each bite.
How do you cool a cheesecake?
For this recipe, you will cook the cheesecake in the oven with the oven door slightly ajar for 1 hour. This can help prevent the top from cracking and sinking as it cools. Remove from the oven, remove from the water bath and let cool completely. Then, loosely cover and place in the fridge ideally overnight or minimum 4-6 hours.
Why is my cheesecake batter lumpy?
The cream cheese and other ingredients may not have been at room temperature. Cold ingredients tend to do this. Before making the filling, allow cream cheese, sour cream and eggs to sit on the counter for a few hours to get to room temperature.
More Recipes You Will Love
shop this post
 Buy Now →
  Buy Now →
 Before You Begin! If you make this, please leave a review and rating letting us know how you liked this recipe! This helps our business thrive & continue providing free recipes.
Our Favorite Classic Cheesecake Recipe
Ingredients
Graham Cracker Crust
- 2 1/2 cups graham cracker crumbs (about 22 graham cracker sheets)
- 1/4 cup granulated sugar
- 3/4 tsp. ground cinnamon
- pinch kosher salt
- 3/4 cup unsalted butter, melted and slightly cooled (12 Tbsp.)
Cheesecake filling
- 4, (8 oz.) full fat cream cheese blocks, softened to room temperature
- 1 1/4 cup granulated sugar or superfine granulated sugar
- 1/2 cup full fat sour cream, room temperature
- 1 Tbsp. cornstarch
- 2 tsp. pure vanilla extract
- 2 tsp. fresh lemon juice
- 1/4 tsp. kosher salt
- 5 large eggs, room temperature
Sour cream topping
- 1/2 cup sour cream, room temperature
- 2 Tbsp. powdered sugar
- 1 tsp. vanilla bean paste
Last step! If you make this, please leave a review and rating letting us know how you liked this recipe! This helps our business thrive & continue providing free recipes.
Instructions
- Preheat oven to 350°F.
- Pulse graham crackers in a food processor until crumbly. Add graham cracker sheets gradually so you don't crowd the processor.2 1/2 cups graham cracker crumbs (about 22 graham cracker sheets)

- Add in the sugar, cinnamon and salt.1/4 cup granulated sugar, 3/4 tsp. ground cinnamon, pinch kosher salt

- Slowly stream in melted butter and process until mixture is sandy.3/4 cup unsalted butter, melted and slightly cooled (12 Tbsp.)

- Press crumbs into a 9-inch springform pan (no need to grease the bottom). Use the back of a measuring cup or fingers, press evenly along the bottom and up the sides of the pan.

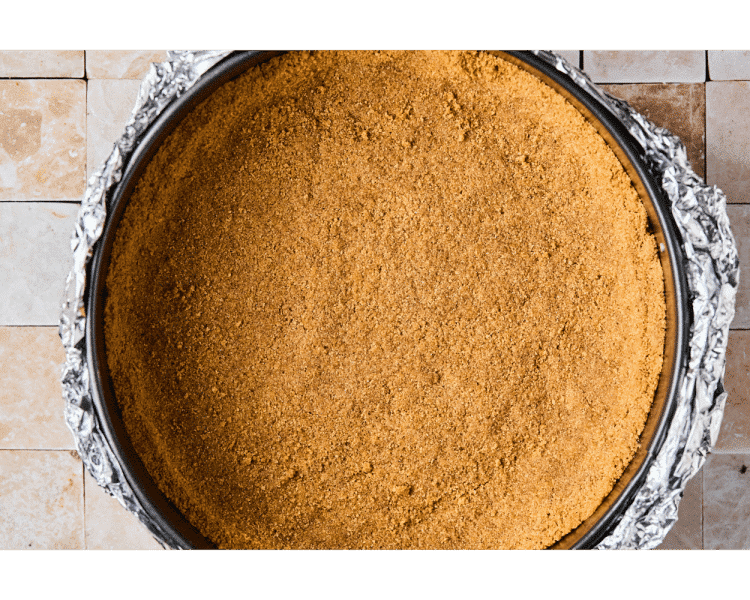
- Wrap 2 sheets of heavy duty aluminum foil around the exterior of the pan. Bake crust in preheated oven for 10 minutes. Allow to cool slightly then place in freezer while you prepare the filling.

- Increase the oven temperature to 475°F.
- Make the filling: Mix the room temperature cream cheese and sugar together using the paddle attachment in a stand mixer on medium-high speed for 1-2 minutes.4, (8 oz.) full fat cream cheese blocks, softened to room temperature, 1 1/4 cup granulated sugar or superfine granulated sugar

- Then add in the sour cream, lemon juice, vanilla extract, cornstarch and salt until fully combined. Scrape down sides of bowl as needed.1/2 cup full fat sour cream, room temperature, 1 Tbsp. cornstarch, 2 tsp. pure vanilla extract, 2 tsp. fresh lemon juice, 1/4 tsp. kosher salt

- Add in room temperature eggs on medium-low speed, one at a time, beating until just combined. Scrape down sides to fully incorporate ingredients and be careful not to over beat the filling (this can help prevent cheesecake from cracking on the top).5 large eggs, room temperature

- Pour filling into the chilled crust.

- Prepare the water bath (it's easy, I promise! See video for guidance). I like to use a roasting pan, I find that it's easiest but any large pan will work. Boil a large pot of water, you'll need enough to fill the pan with 1 inch of water. Place cheesecake in the pan in the oven and then pour the water into the pan. This way, you don't have to carry a heavy pan with hot water and place in the oven.
- Bake for 12 minutes at 475°F and then lower the oven temperature down to 350°F and bake for 50-55 minutes, or until the middle is almost set and top has turned golden. Turn the oven off, open the oven door slightly and let cheesecake sit in oven for 1 hour. Remove from oven and remove from the water bath. Allow to further cool completely at room temperature. You can remove the foil at this step if you'd like.

- Leave in the springform pan and place in the fridge for 4 hours or preferably overnight.
- Once chilled, remove from springform pan. Make the sour cream topping. In a small bowl, combine the sour cream, powdered sugar and vanilla bean paste.1/2 cup sour cream, room temperature, 2 Tbsp. powdered sugar, 1 tsp. vanilla bean paste

- Spread evenly on top of cheesecake. Place back in fridge for an hour or until the sour cream topping sets up.

- Use a clean sharp knife to cut the cheesecake. Run knife under hot water in between slices and clean knife off to get beautiful, clean cuts.
- Serve cheesecake with your favorite toppings, we love whipped cream and fresh berries. Cover and store in the fridge for up to 5 days, if it lasts that long! Or freeze for up to 3 months.

Notes
- Room temperature ingredients are important for a creamy, silky cheesecake filling. I usually take my ingredients out and set on the counter 4 hours before I begin baking.
- Don’t skip pre baking the crust. I always like to pre bake the graham cracker crust for 10 minutes before adding the filling. This helps to ensure it stays a crispy, heavenly crust. You don’t need any pie weights, just pop it in for 10 minutes at 350°F.
- Strain the cheesecake batter. An optional step to ensure super smooth, silky non-clumpy cheesecake is to run the batter through a fine mesh strainer before pouring on to the crust. Usually, a few tiny clumps of cheesecake are OK and will melt as the cheesecake bakes. It’s the large, huge clumps you want to look out for!
- Slice with a sharp, warmed knife. Dip a knife in hot water, or run it under hot water. Wipe water off with a towel, slice and then repeat for perfectly clean cut slices. Cleaning the knife in between cuts and using warm water is key.
- Recipe inspired by The Cheesecake Factory Original Cheesecake
Nutrition Information
Nutritional information is provided as a courtesy and is automatically calculated. It should only be construed as an estimate rather than a guarantee. Ingredients can vary and Kroll’s Korner can’t make any guarantees to the accuracy of this information.
This recipe was originally posted in February 2022 and was updated in December 2024 with new photos by Sierra Ashleigh Photography.


Absolutely delicious, everyone who tried it has raved about how good it is!! Easy to make just need to plan accordingly for chill time!
It looks incredible!! Thank you! 🙂
Combination of cheesecake and pumpkin mousse recipes
Wow so yummy! Thank you:)
yumm
Absolutely AMAZING. Directions were clear and easy to follow. Will be making many more times!
It looks great! So glad you enjoyed it and that my directions were simple to follow, woo! Thank you sooo much!!