Classic Buttermilk Waffles
This post may contain affiliate links. Please read our disclosure policy.
I always love to whip up a batch of homemade buttermilk waffles for breakfast on the weekends and they never disappoint. They’re always a hit and so easy to make!
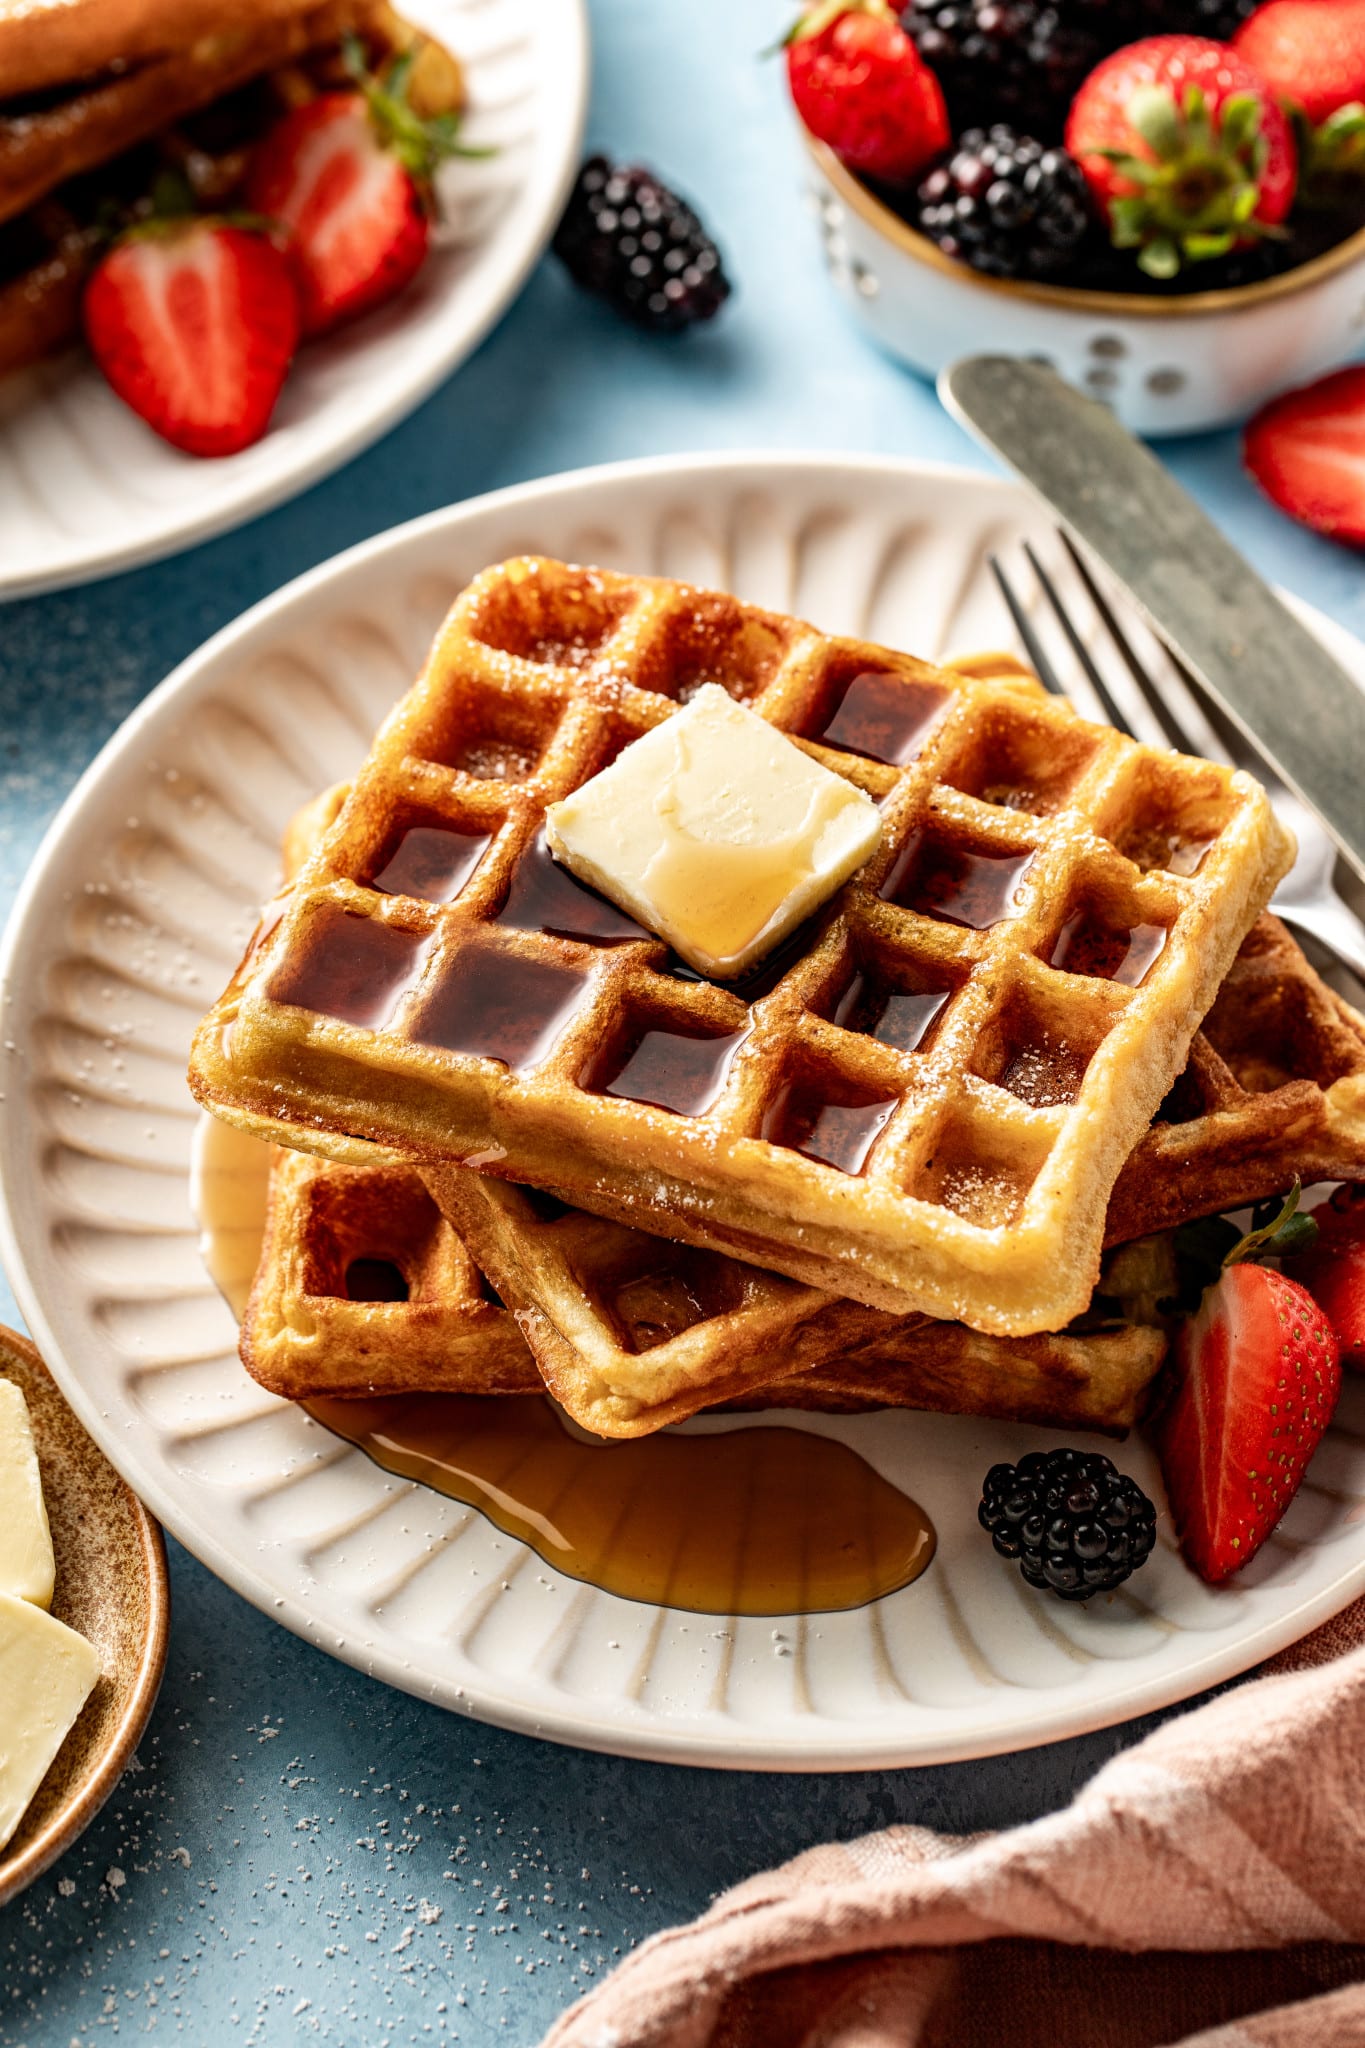
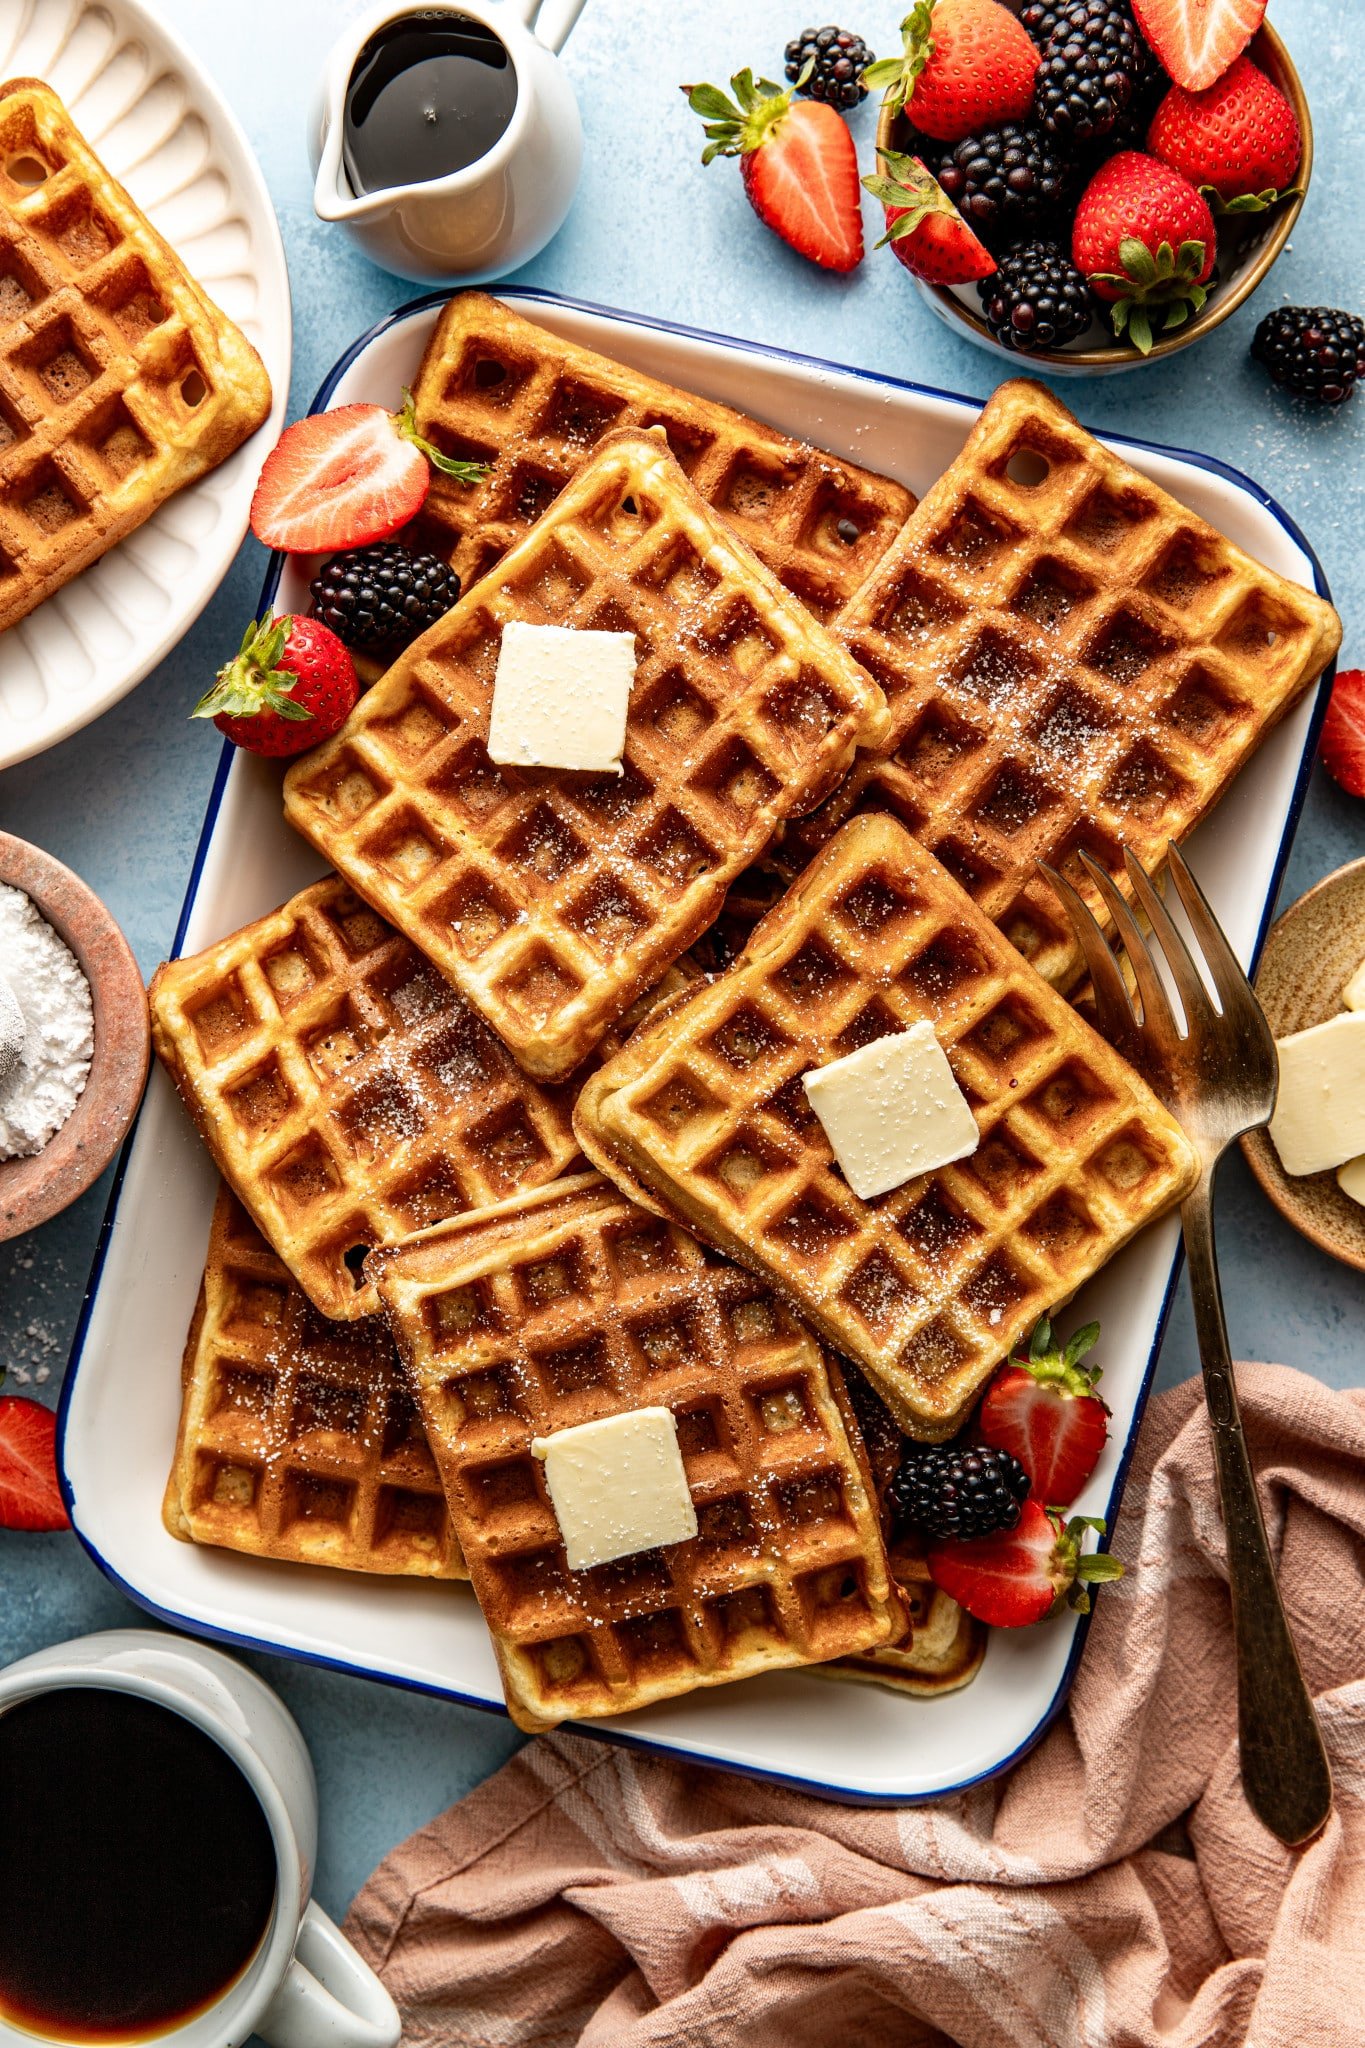
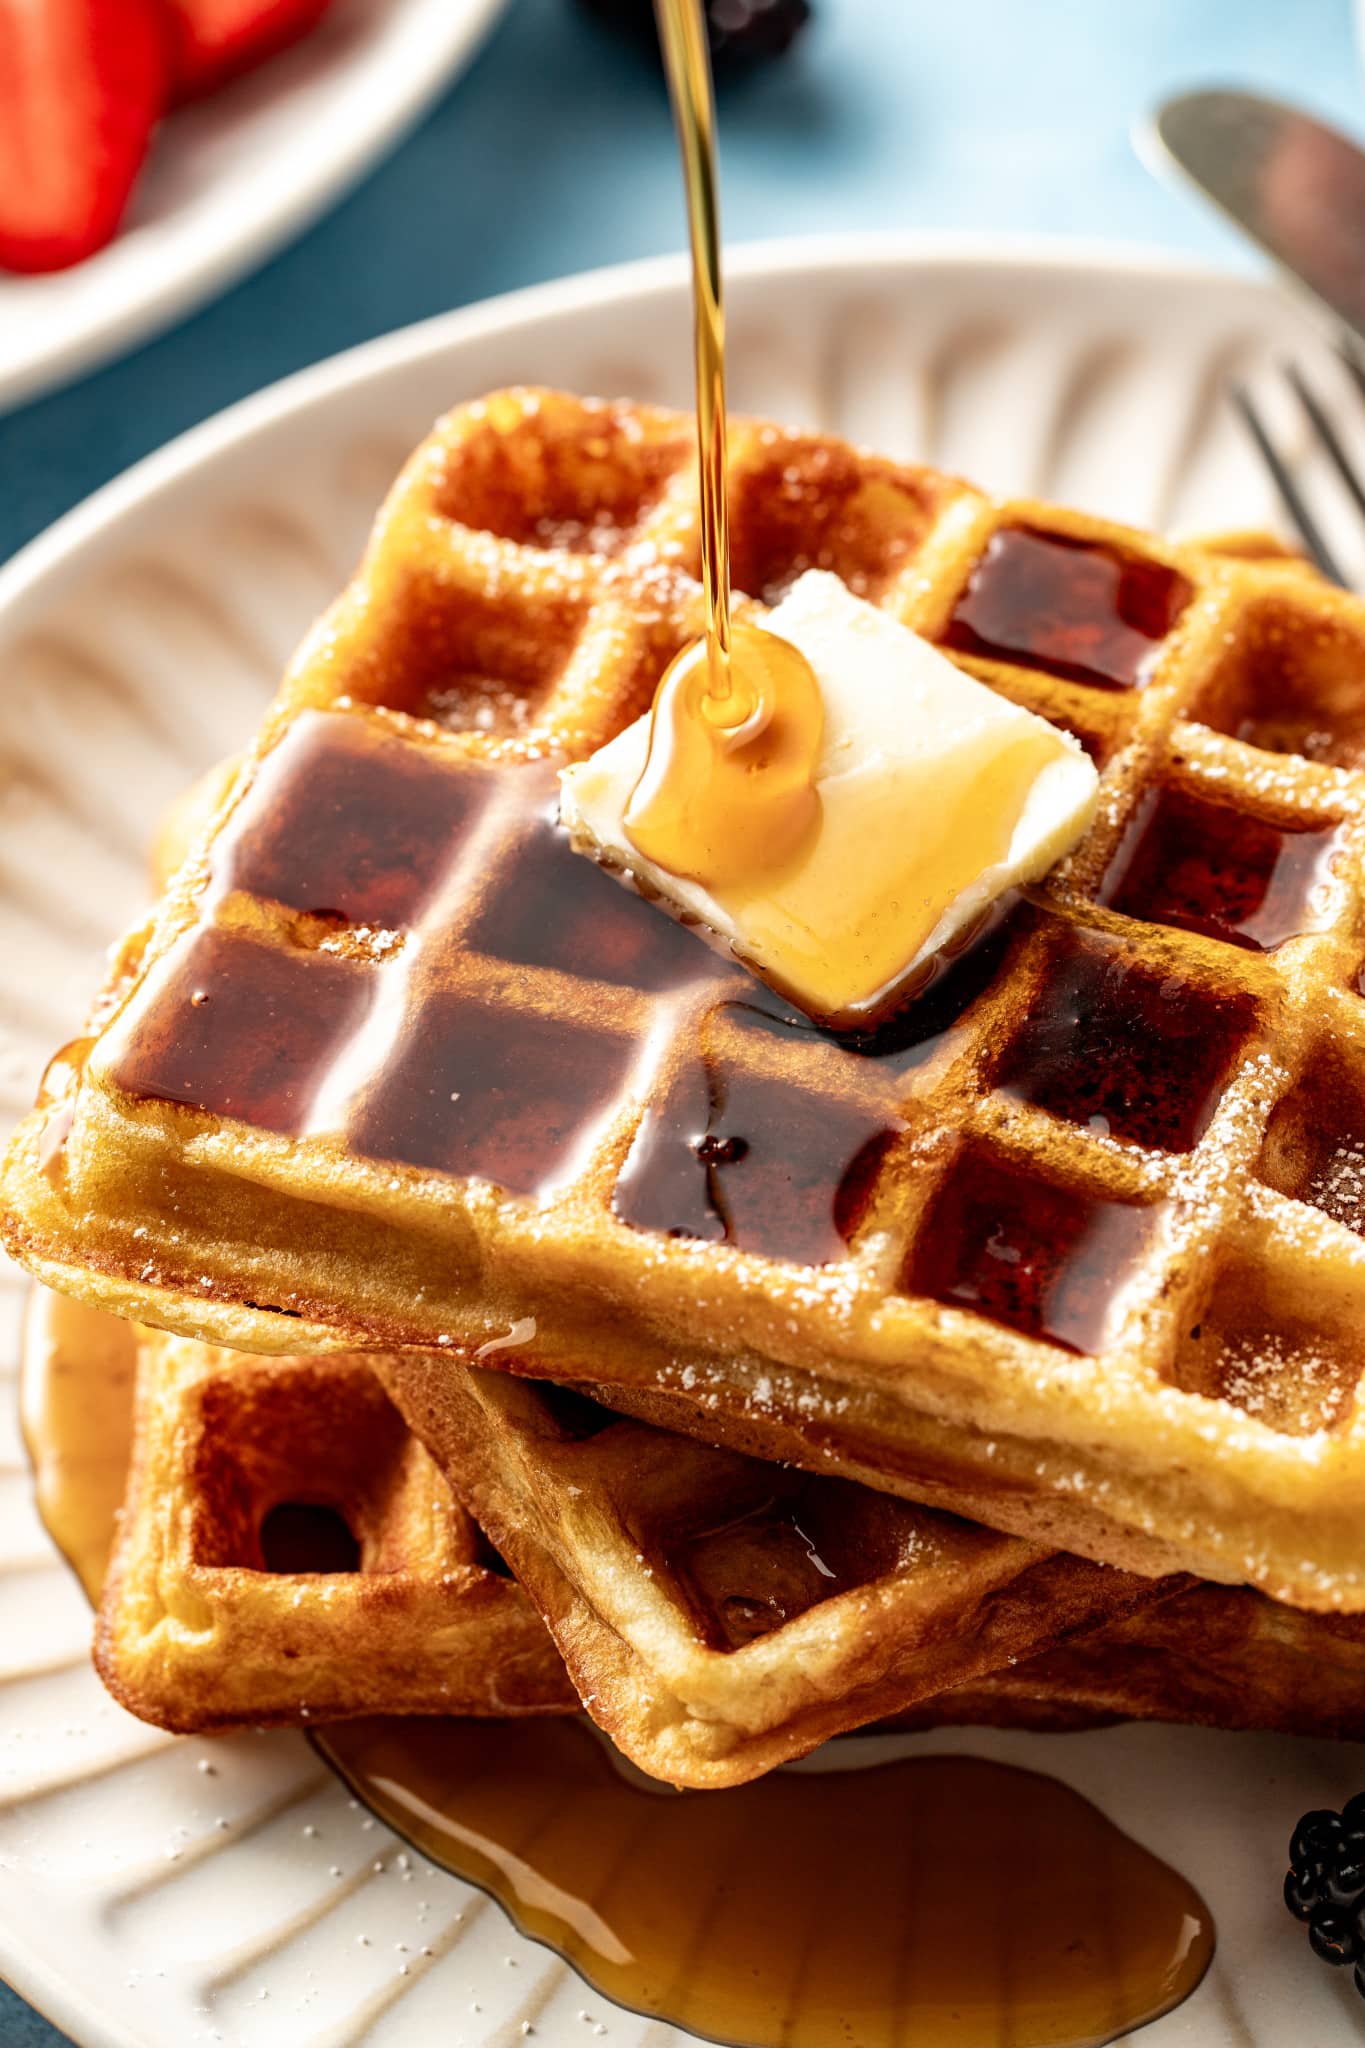
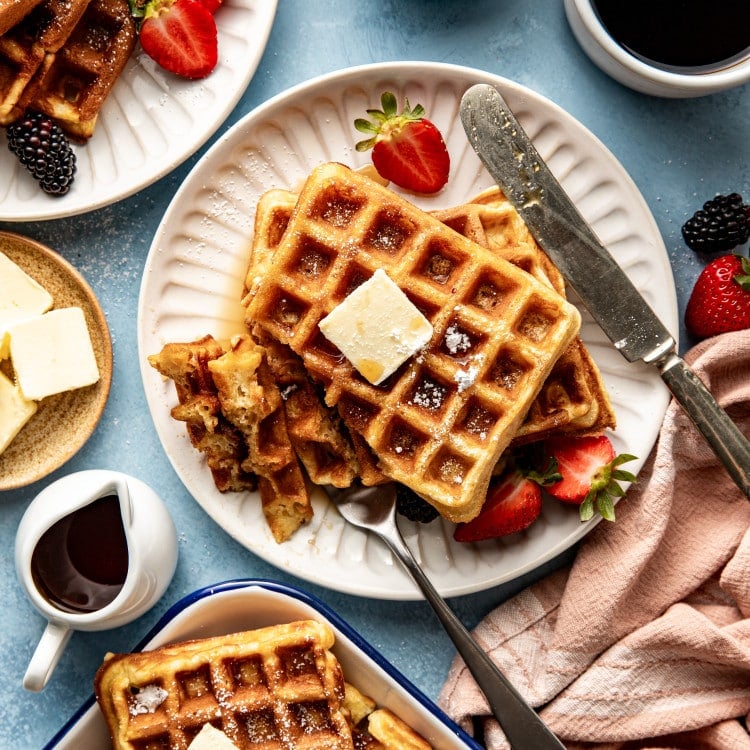
Waffles from scratch are a timeless breakfast staple, and these are everything you want them to be. They’re crispy and golden on the outside and soft and fluffy on the inside. My favorite part? The little pockets that can hold peanut butter, maple syrup, honey butter, berries, whipped cream, you name it!
Making waffles from scratch is 100% less intimidating than you may think. I am telling you, this recipe is EASY PEASY.
These buttermilk waffles are great on their own, or serve with a savory side like my scrambled eggs, sheet pan eggs, sausage gravy, or your favorite bacon!


 Table Talk with Tawnie

Homemade waffles from scratch are always one of my favorite ways to celebrate a special occasion. We love to make them for birthdays, holidays, or just an extra cozy Sunday morning. You guys know we’re always whipping up a batch of my Buttermilk Pancakes on the weekend, but sometimes it’s nice to switch things up! These waffles are truly so easy to make, and I promise you’ll love them as much as we do!
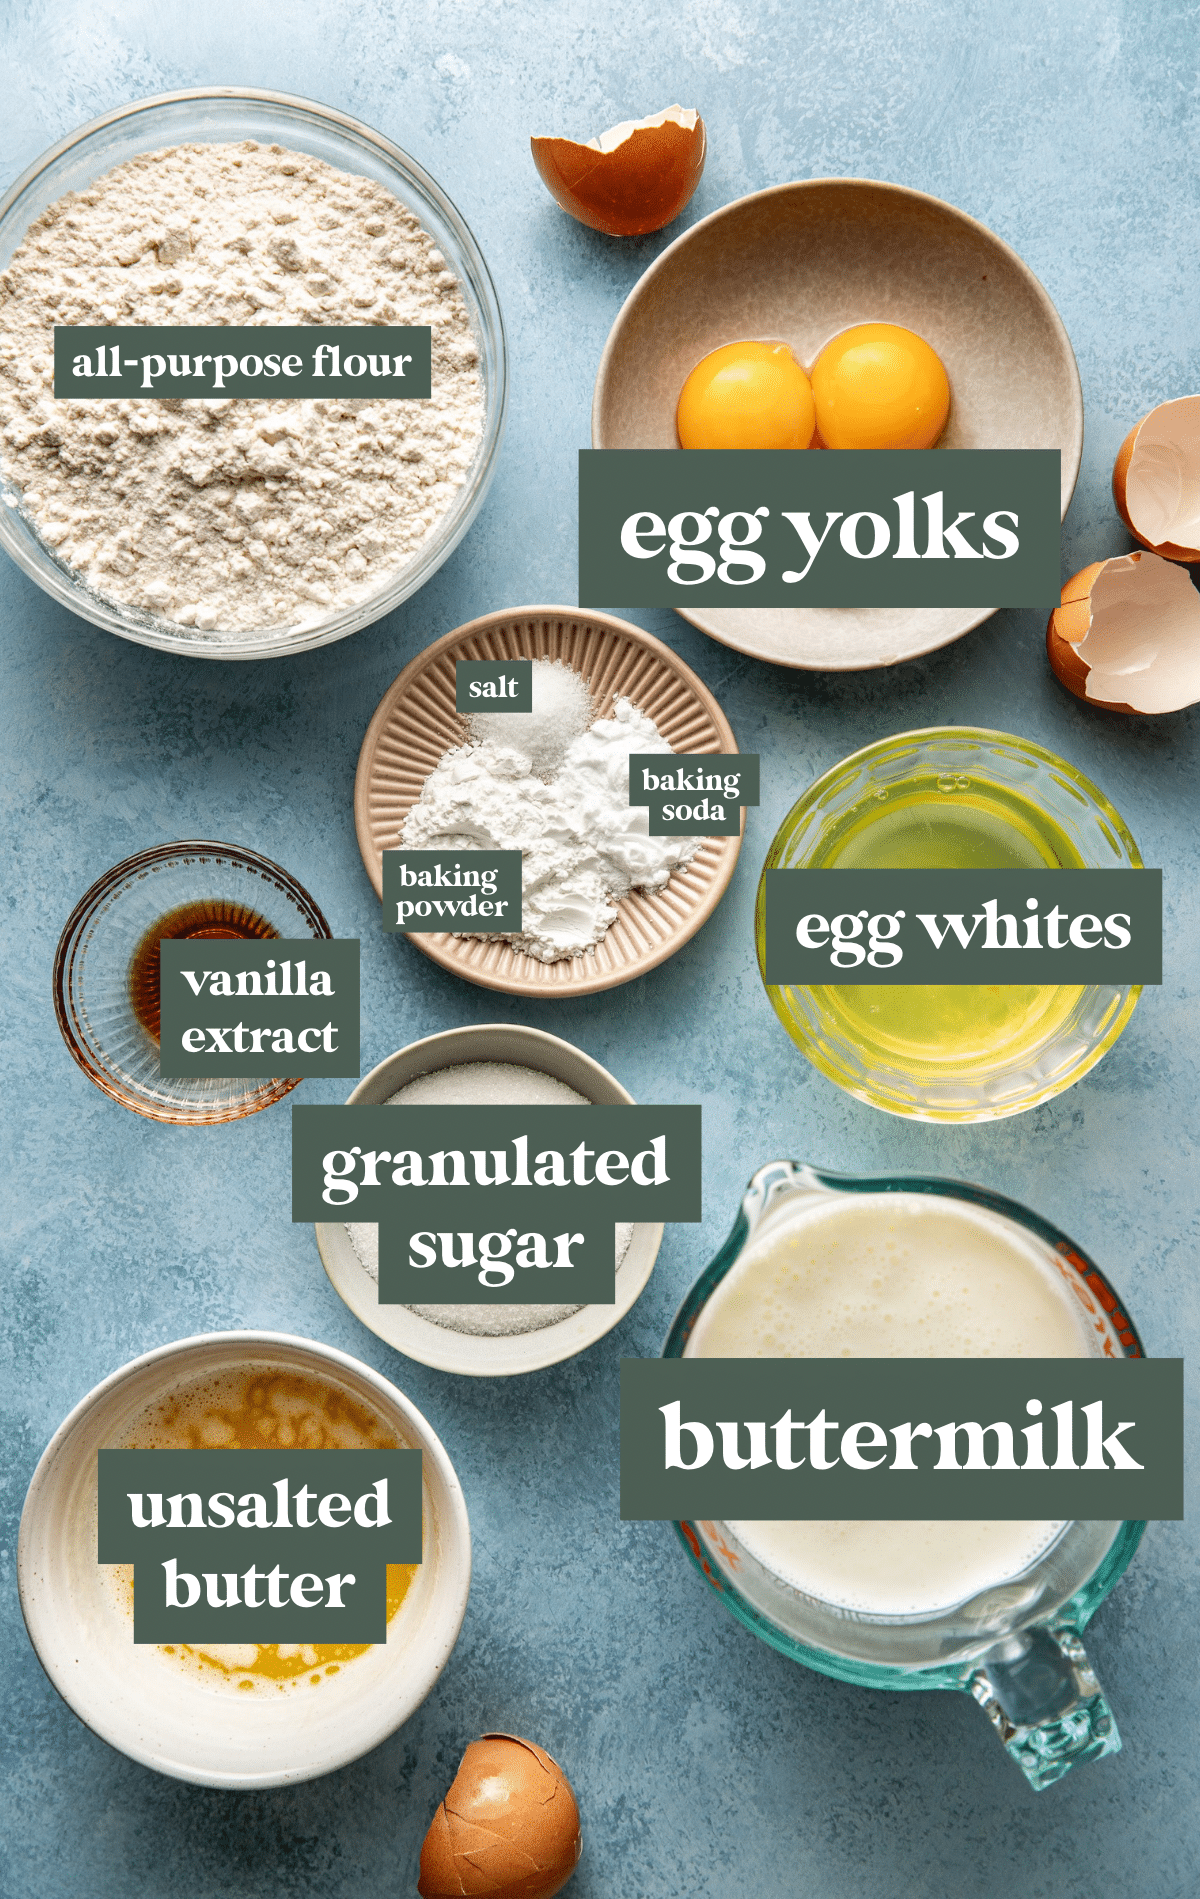
- All-purpose flour: This recipe was tested using all-purpose flour. However, a whole wheat flour or 1:1 gluten-free flour would work well, too.
- Buttermilk: If you don’t have buttermilk, I recommend using whole milk instead of trying to make a homemade buttermilk substitute. You want real buttermilk if you plan on making buttermilk waffles!
- Egg and egg yolks: Beaten egg whites are my secret weapon for extra fluffiness. This technique makes these waffles extra light and airy.
- Baking powder & baking soda: Both leavening agents work together to create light, fluffy waffles. Baking soda activates with the buttermilk, while baking powder gives extra rise.
- Salt: Be sure not to skip the salt in this recipe! Don’t worry, your waffles won’t taste salty at all. The salt just adds flavor to the batter and makes these buttermilk waffles taste even better.
Step by Step Directions
(For the full recipe, scroll down to the recipe card below)
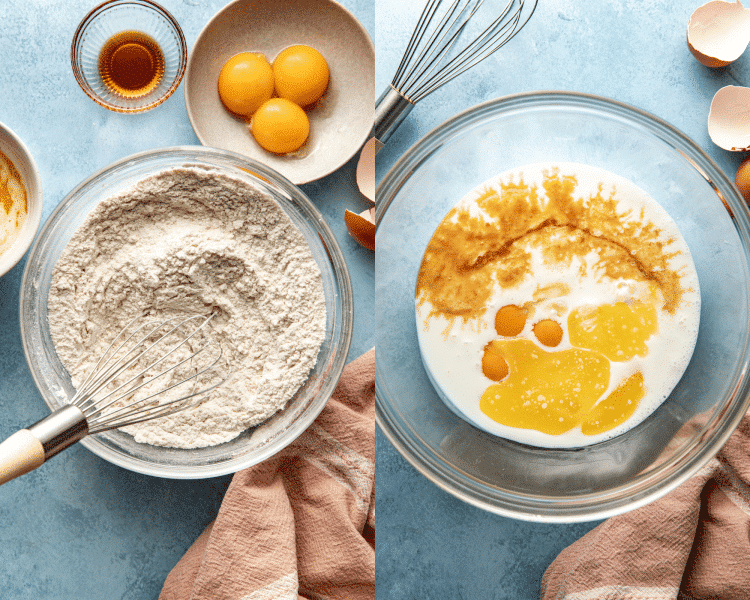
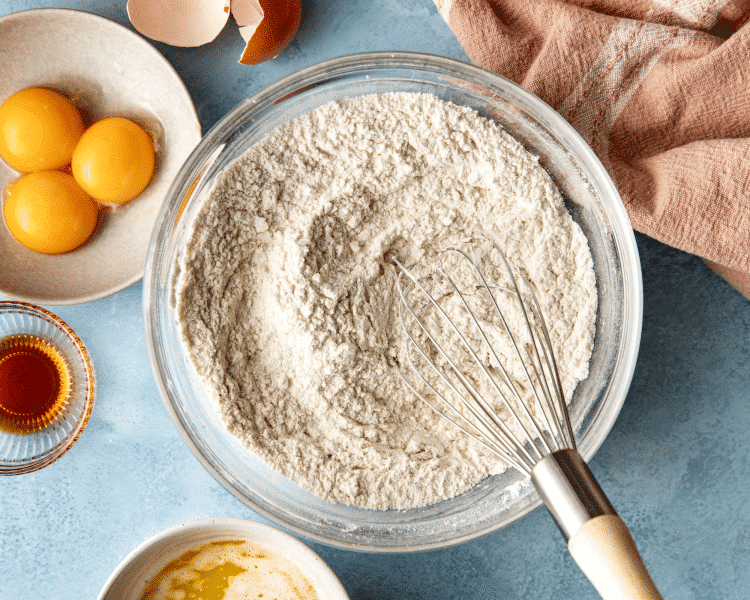
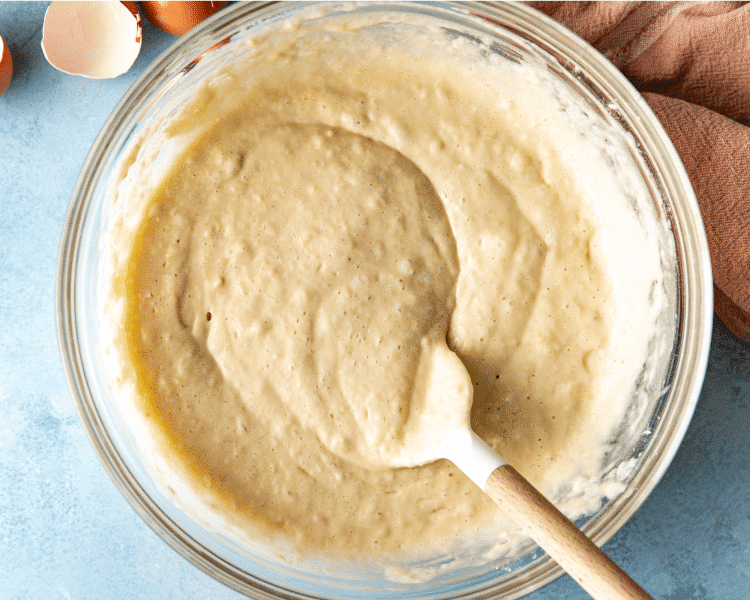
Mix dry & wet ingredients
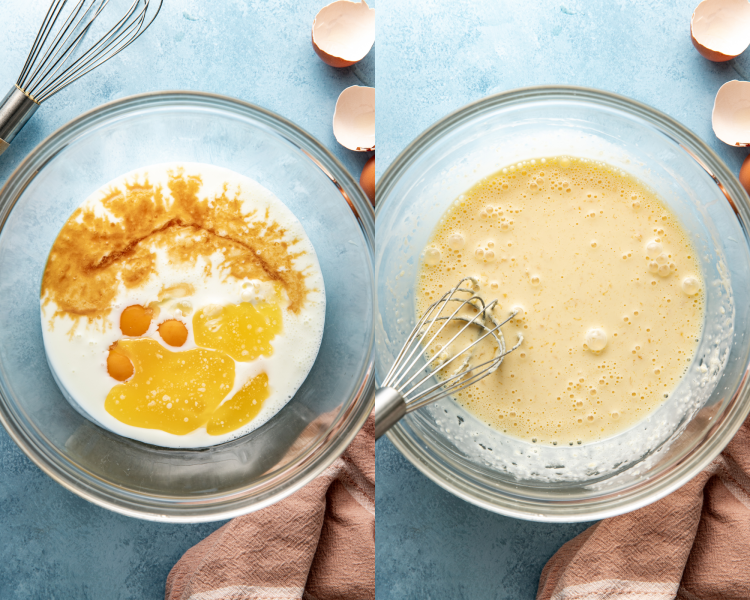
In a large bowl, whisk together the dry ingredients. Then in a separate bowl, mix the wet ingredients.
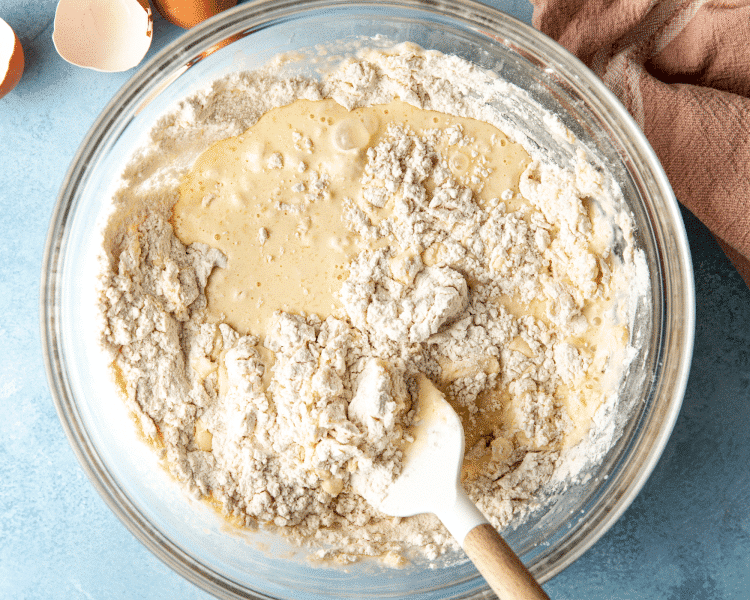
Combine wet and dry ingredients
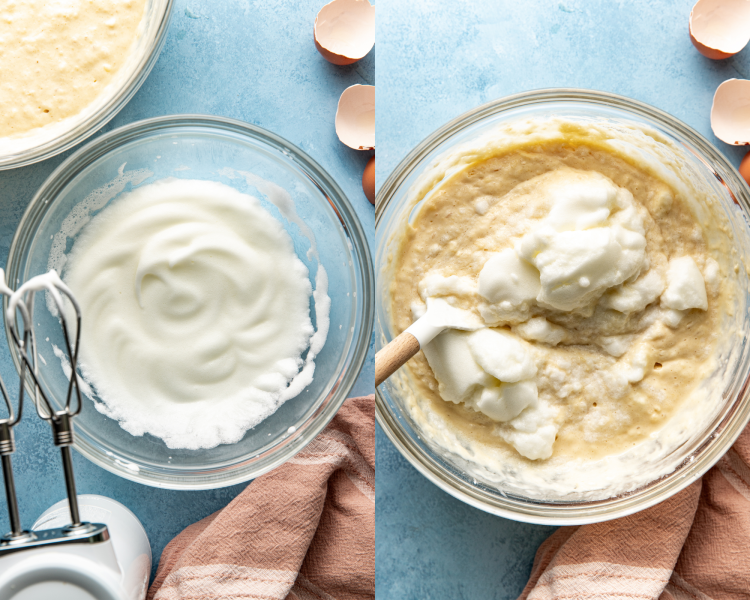
Add the egg whites

Cook waffles
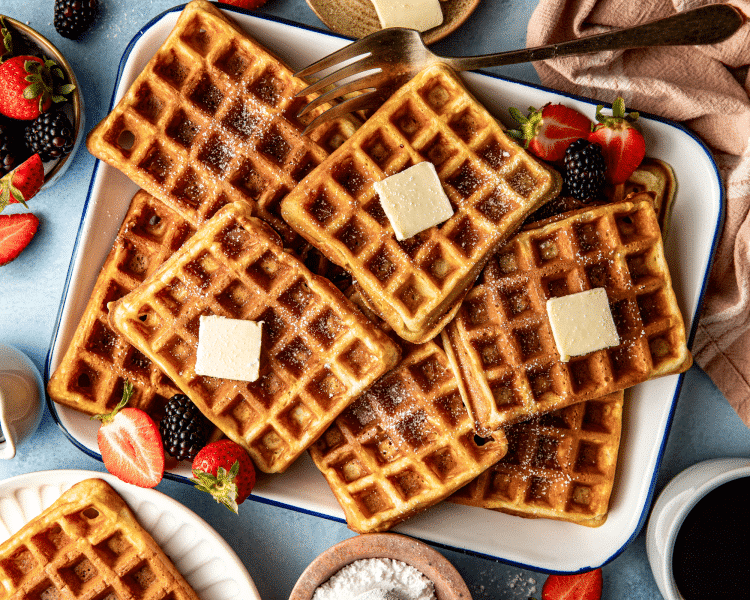
Serve & enjoy!
Serve hot with your favorite waffle toppings and ENJOY!!🧇🫐🍓🍫
Expert Tips
- Don’t skip the egg whites: Whipping the egg whites cannot be skipped if you’re looking for big, pillowy waffles from scratch! Use a handheld or stand mixer to get the job done.
- Let batter rest: Let the batter sit for 10 minutes before pouring into your waffle iron. This gives the batter time to relax and the leavening agents a chance to do their magic, which means your waffles will turn out extra light, fluffy, and tender.
- Hot waffle iron: Always make sure your waffle iron is good and hot before adding your batter. This helps to achieve a nice crispy waffle, not a soggy one!
- Serve immediately: These waffles are best served warm, immediately after cooking, as the exterior loses its slight crispness over time.
- For a crowd: If you’re making buttermilk waffles for a crowd, place them in the oven on an oven-safe dish and cover loosely with a damp tea towel. (The oven temperature should be very low.)
How To Whip Egg Whites
Not sure how to beat the egg whites? Take out your stand mixer or a hand mixer and beat the egg whites continuously until soft peaks form.
Check for the soft peaks by turning over your whisk and looking for a peak shape, but one that is loose (not pointy).
Topping Suggestions
Some waffle toppings you should try with these from-scratch waffles include:
🥜Peanut butter/almond butter/any nut butter
🤍Powdered sugar + maple syrup
🫐Fresh berries (such as raspberries, blueberries and strawberries) with whipped cream
🍯Honey butter (melt honey + butter in a small saucepan on the stove, pour on top. So good with pancakes too!)
🍳Fried egg + bacon
Storage / Freezing
- Store: These classic buttermilk waffles will last in the fridge up to 5 days in a sealed baggie. If you’re not going to eat them all that soon, you can also freeze them!
- Freeze: To freeze waffles, let them cool to room temperature before sealing them inside a freezer bag.
- Reheat: I love reheating them in the toaster or in the oven (But never in the microwave because they will get soggy that way!)
shop this post
 Buy Now →
  Buy Now →


Before You Begin! If you make this, please leave a review and rating letting us know how you liked this recipe! This helps our business thrive & continue providing free recipes.
Classic Buttermilk Waffles
Ingredients
- 2 cups all-purpose flour
- 3 Tbsp. granulated sugar
- 2-3 Tbsp. cornstarch (optional to make them crispy!)
- 2 1/2 tsp. baking powder
- 1 tsp. baking soda
- 1/2 tsp. salt
- 2 large eggs (separate whites and yolks)
- 2 cups buttermilk*
- 6 Tbsp. unsalted butter (melted)
- 1 tsp. vanilla extract
Last step! If you make this, please leave a review and rating letting us know how you liked this recipe! This helps our business thrive & continue providing free recipes.
Instructions
- Mix dry ingredients: In a large bowl, mix the all-purpose flour, sugar, baking powder, baking soda, and salt.2 cups all-purpose flour, 3 Tbsp. granulated sugar, 2 1/2 tsp. baking powder, 1/2 tsp. salt, 1 tsp. baking soda

- Combine wet ingredients: In a separate medium-sized bowl, whisk together the egg yolks, buttermilk, butter, and vanilla.
- Fold ingredients together: Fold the wet ingredients into the dry ingredients.
- Beat egg whites: Beat the egg whites with a hand mixer or stand mixer until soft peaks form. Then fold the egg whites into the batter.
- Let batter rest: Let the batter sit for 10 minutes before pouring into your waffle iron.
- Cook waffles: Spray your preheated waffle iron with non-stick cooking spray. Pour batter onto the hot waffle iron and cook until golden brown.
- Serve: Serve hot with your favorite waffle toppings!
Notes
-
- Store: These classic buttermilk waffles will last in the fridge up to 5 days in a sealed baggie. If you’re not going to eat them all that soon, you can also freeze them!
- *Buttermilk: I dont recommend using a homemade buttermilk for this recipe, it’s truly so much better with the real deal! Also, you can slightly warm the buttermilk to prevent the melted butter from solidifying in the batter. It will help create a more evenly textured waffle!
- Freeze: To freeze waffles, let them cool to room temperature before sealing them inside a freezer bag.
- Hot waffle iron: Always make sure your waffle iron is good and hot before adding your batter. This helps to achieve a nice crispy waffle, not a soggy one!
- Don’t skip the egg whites: Whipping the egg whites cannot be skipped if you’re looking for big, pillowy waffles from scratch! Use a handheld or stand mixer to get the job done.
- Serve immediately: These waffles are best served warm, immediately after cooking, as the exterior loses its slight crispness over time.
- For a crowd: If you’re making buttermilk waffles for a crowd, place them in the oven on an oven-safe dish and cover loosely with a damp tea towel. (The oven temperature should be very low.)
- Recipe update: This recipe was updated with new photos in September 2025 (same recipe, new photos).
Nutrition Information
Nutritional information is provided as a courtesy and is automatically calculated. It should only be construed as an estimate rather than a guarantee. Ingredients can vary and Kroll’s Korner can’t make any guarantees to the accuracy of this information.
📸 Photos by Megan McKeehan of The Broke Girl Table

Followed the instructions to a T and they were incredibly soggy seconds after taking them off of the waffle iron. Flavor is fine and they were fluffy for the few second before they got soggy.
Hi Jenna! Oh no, I’ve never had that happen to me before. Hmmm, let’s try to troubleshoot this together because this is my families fav recipe so I want to make sure it’s working for you, too! My first thought is maybe the waffle iron wasn’t hot enough and/or they could have cooked a little longer? I usually like to let my waffle iron preheat longer than when the light says, if it lights up then I wait just a few minutes longer for it to get super hot! Also, did you cool them on a wire cooling rack or on a plate/stacking them?? Another great tip is adding cornstarch. Try adding 3 Tbsp. cornstarch to the dry ingredients it’s help make them super light and crisp. Sorry about that and hope this helps!! 🙂
Beating the egg whites separately makes the difference from good to great. These are light yet filling. Real buttermilk is a must. No more boxed waffles for me. I made these as breakfast for dinner with thick crispy bacon. Heavenly!
So glad!! Thank you so much Ronda!
Scratch waffles really are like giving your family a big, comforting hug! No need for boxed mix with this easy recipe! Oh – and thanks for the really great tips on the absolute importance of completely separating the eggs and also beating the whites fully for the fluffiest waffles – what a difference that makes!
Waffles, waffles, waffles…perfect for my tea time! 😉 These look incredible. My husband has been begging for waffles lately…and I’ve been in a pancake mood. So, these might be the ticket! They look delicious!
Looks so good! Can’t wait to try this one.
Absolutely gorgeous waffles! They look so crisp and perfect I can’t wait to try them-love the recipe video too!
These waffles were so easy make and the kids loved it! Perfectly soft and delicious 🙂
I don’t see the point in folding egg whites separately. Besides it is hard to beat them to the consistency suggested. Awesome waffles!