Mixed Berry Galette
This post may contain affiliate links. Please read our disclosure policy.
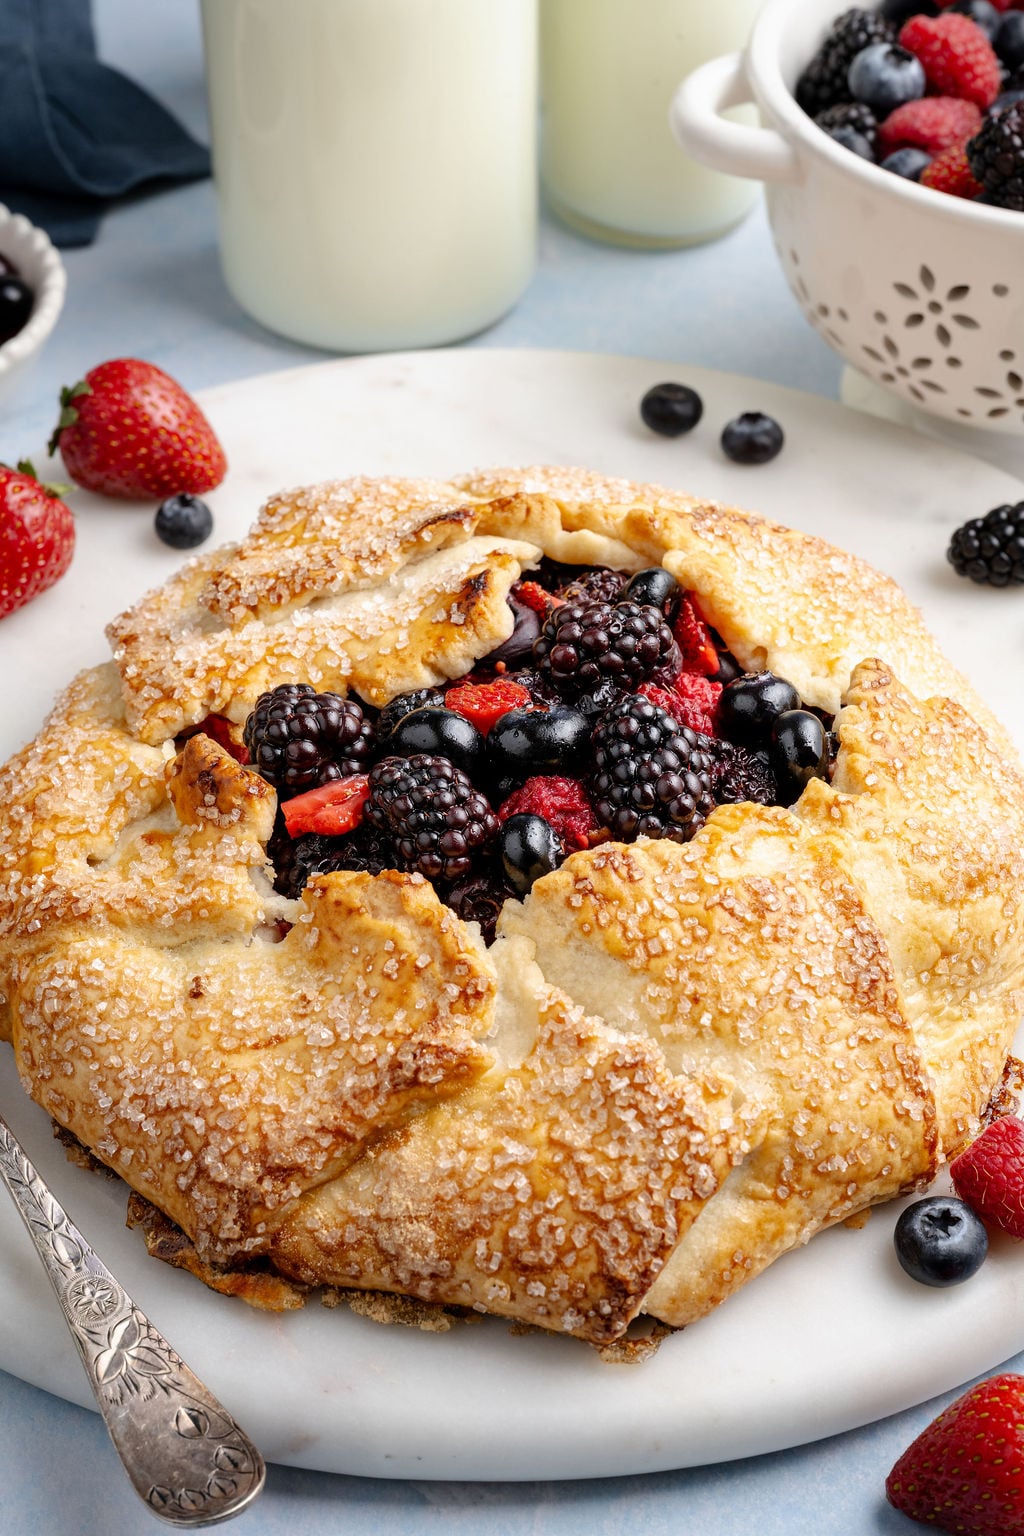
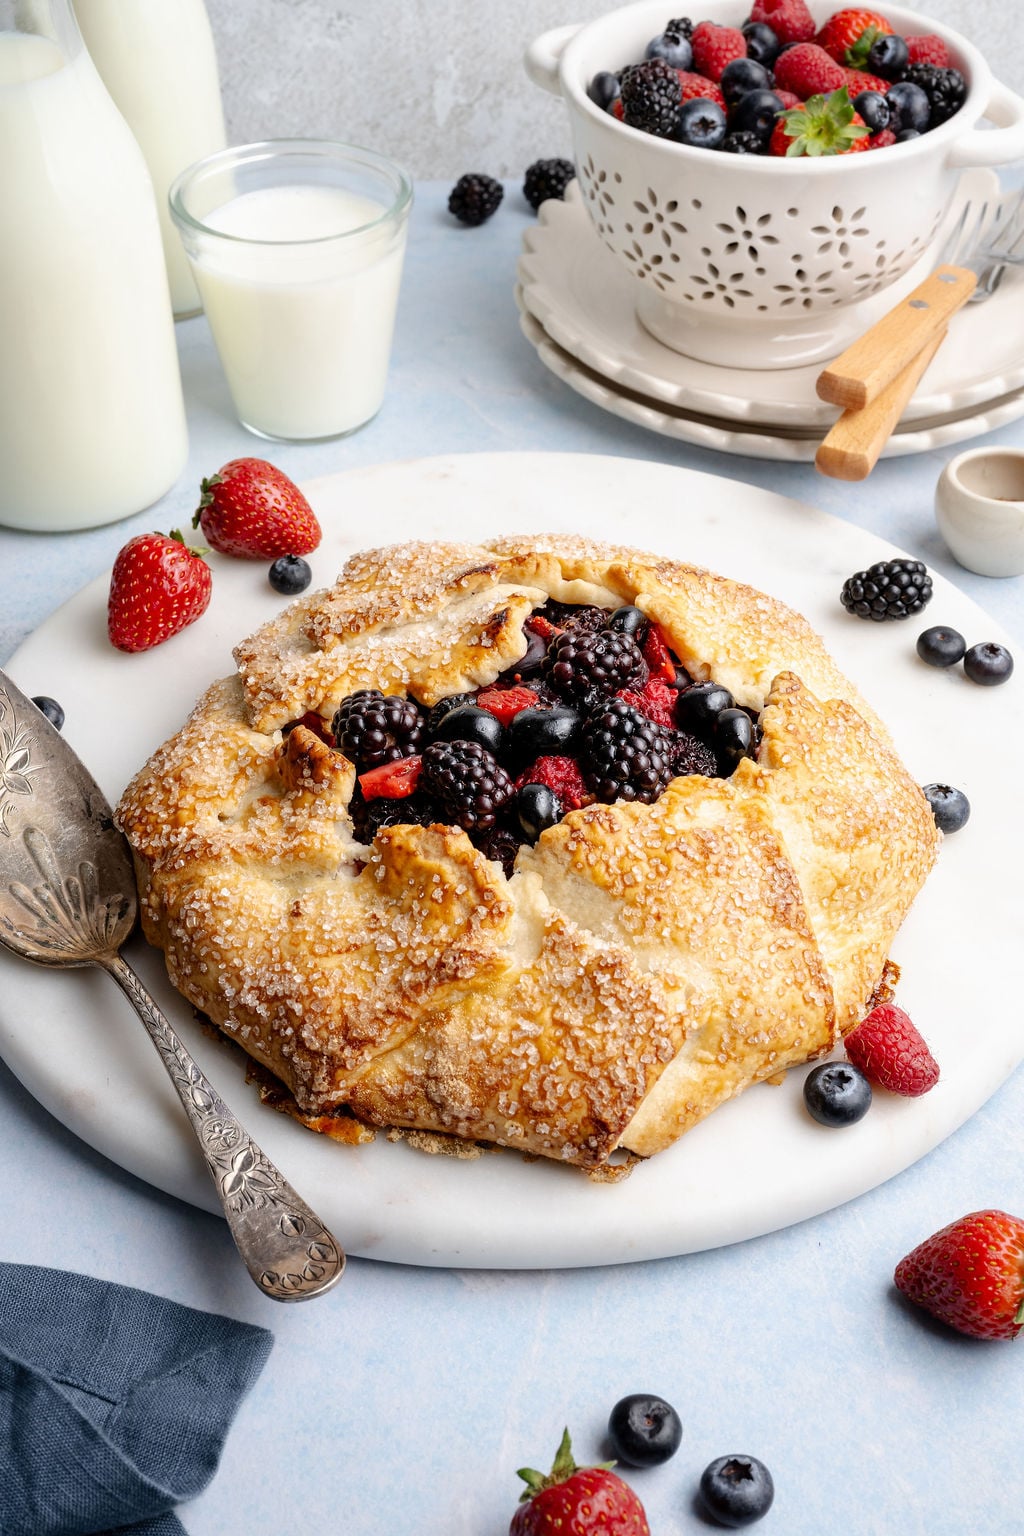
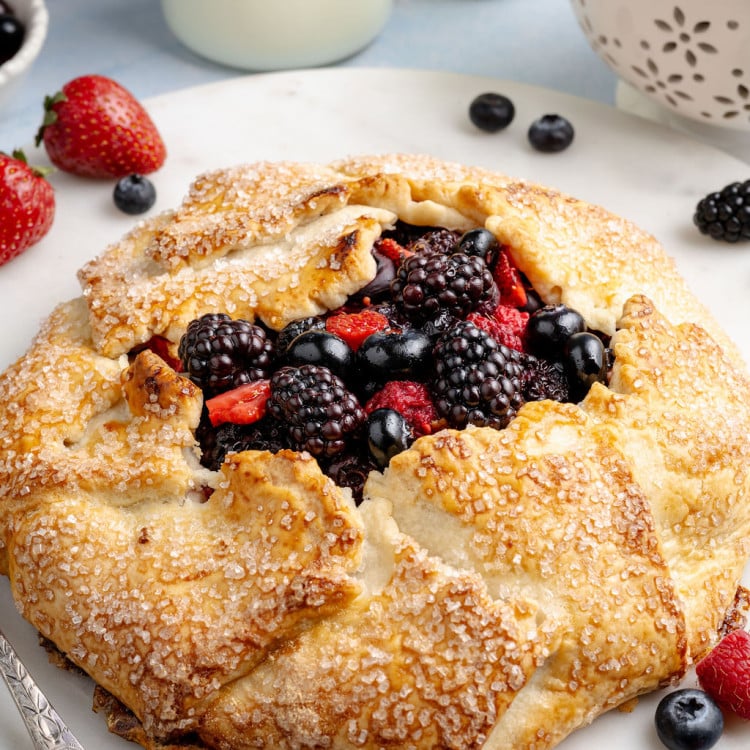
If you love the idea of homemade pie but don’t want to deal with all the fuss, this Mixed Berry Galette is about to become your new favorite dessert.
It has everything you love about a homemade pie (juicy berries, a buttery, flaky crust, and that irresistible golden sugar crunch) without the need for a pie dish or complicated shaping. The rustic look is part of the charm, so there’s no pressure to make it perfect.
One of my favorite parts about this Mixed Berry Galette recipe is how adaptable it is. You can use whatever berries you have on hand, and they bake down into the most vibrant, sweet-tart filling. I also like to add a simple layer under the fruit (more on that below!) to help soak up any extra juices and keep the crust perfectly crisp.
The dough comes together quickly in the food processor and gets folded a few times to create those flaky layers we all love. Once it’s rolled out, filled, and folded over, the oven does the rest of the work.
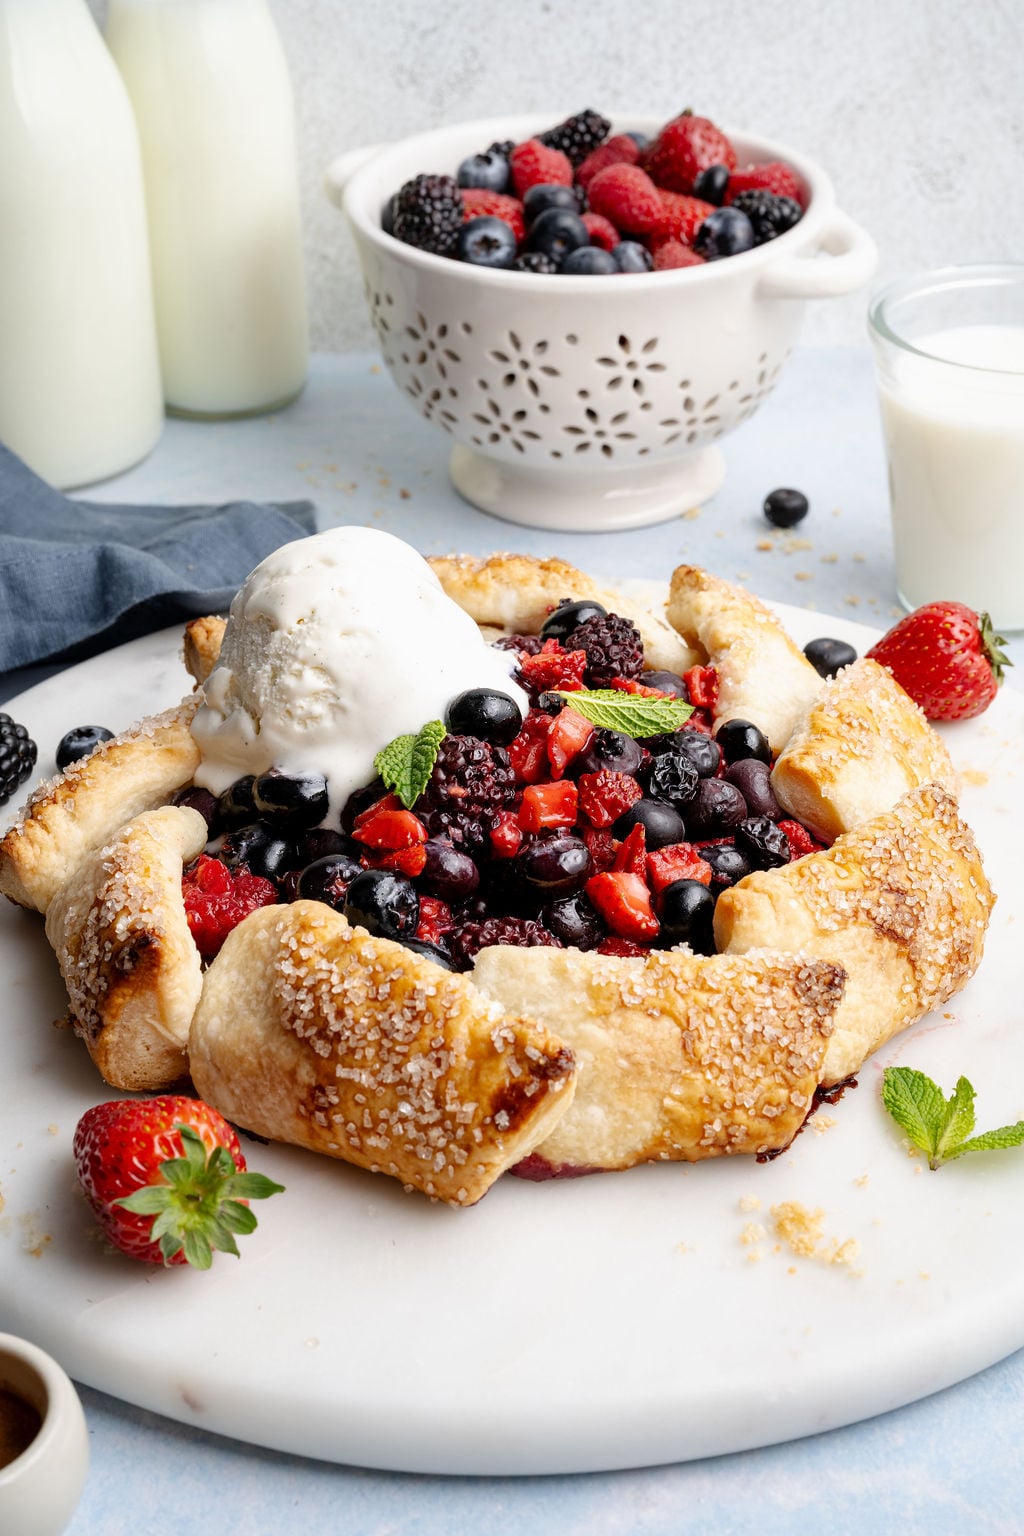
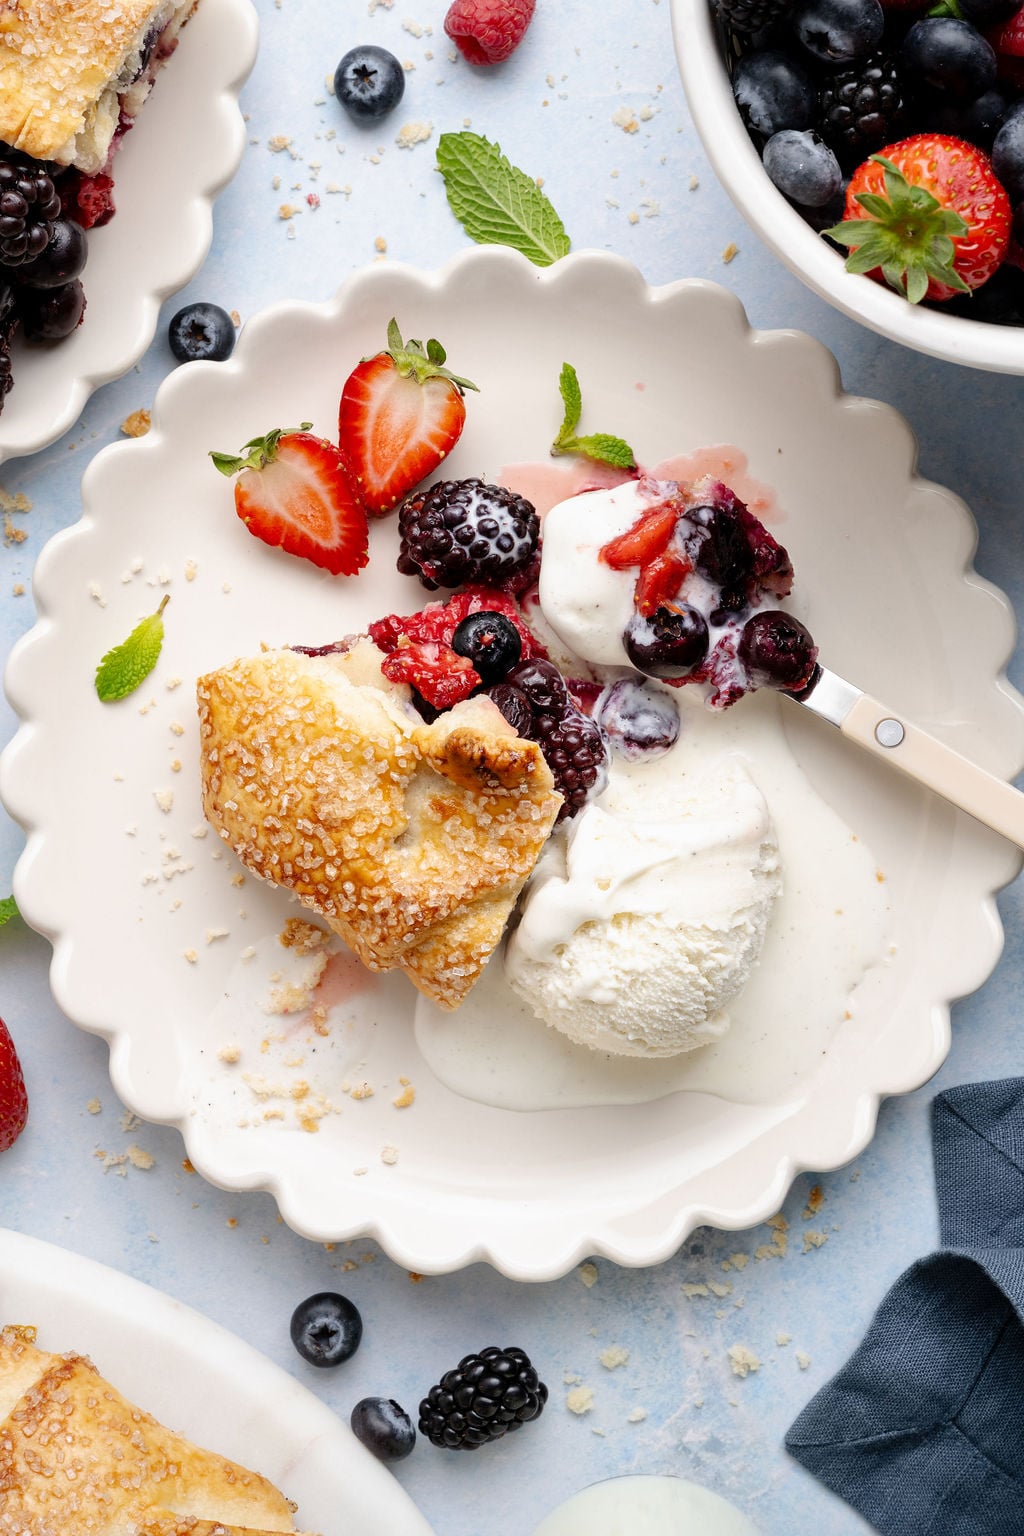
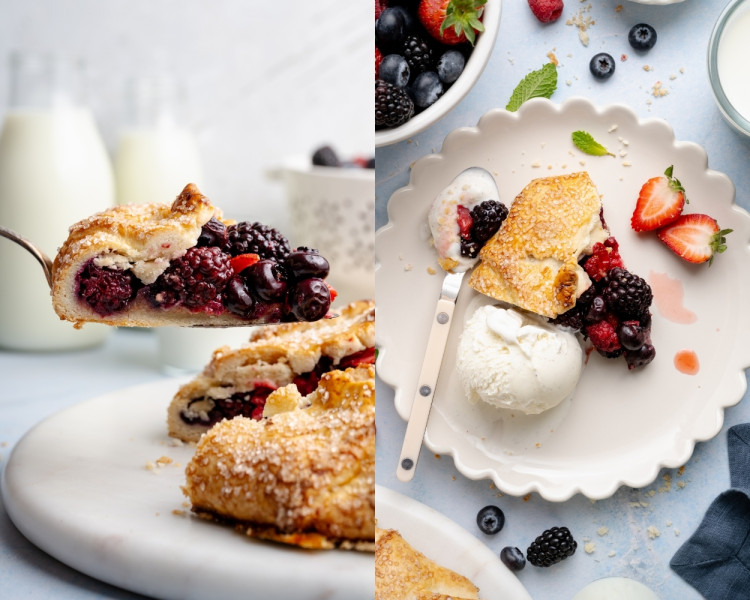
Serve it warm with a scoop of vanilla ice cream and you’ve got a dessert that feels a little elevated but is secretly sooooo easy to pull off. Perfect for summer gatherings, weekend baking, or anytime you want something simple and impressive.
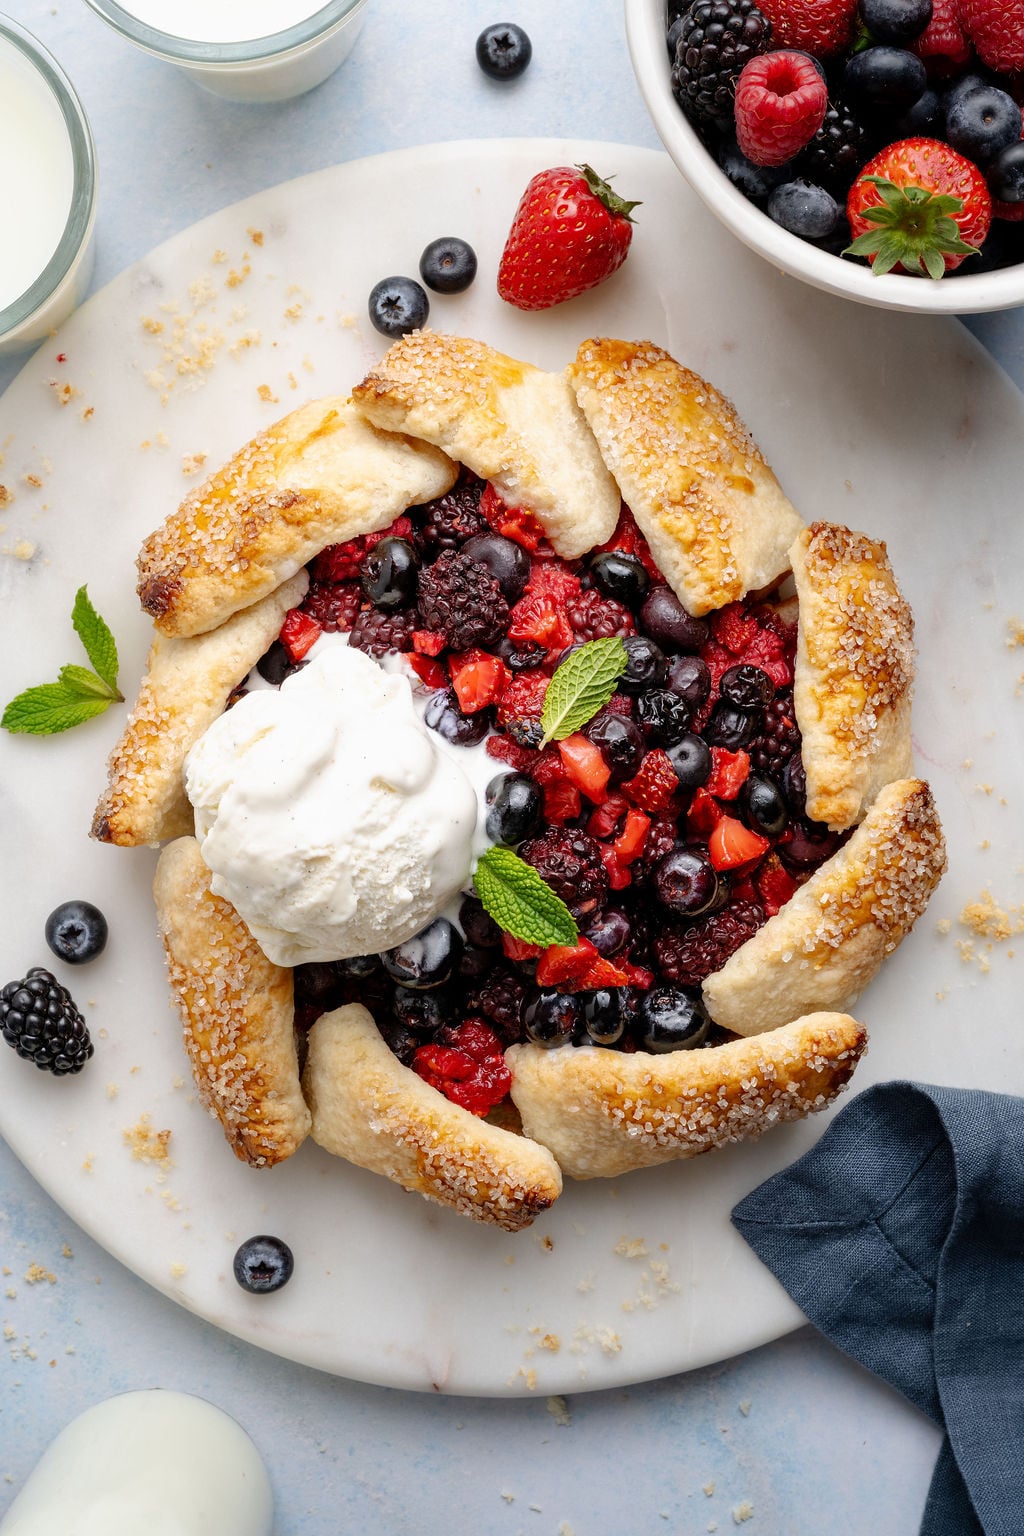

 Table Talk with Tawnie

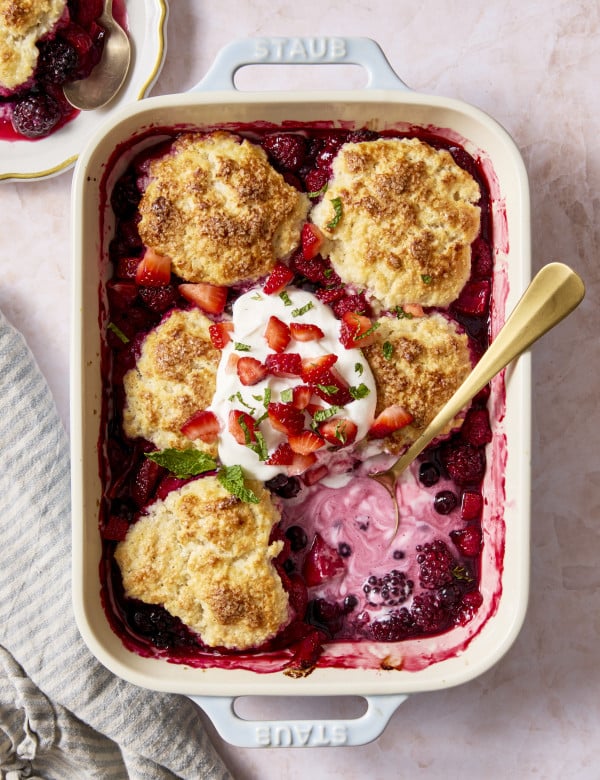
OK have you ever had a galette before?! If not I hope you become obsessed once you try this recipe. I’ve been making them for years (my Peach Galette is also a must try) & I love them. My family and I call them “lazy pies” because it’s essentially everything you love about pie but a lot easier (no pie dish necessary, no lattice crusts, all the same delicious flavors). I am a sucker for anything mixed berry (like my Mixed Berry Cobbler, you’ll also have to make that hehe) so I knew this galette needed it’s time to shine this summer with all the wonderful in season fruit. Can’t wait to hear what you think!
Looking for other bakery-worthy desserts that are easy to whip up at home? Check out my Flourless Chocolate Cake, Peanut Butter Dark Chocolate Chip Cookies, Carrot Cake Bars, and Peanut Butter Oreo Cheesecake Bites for more!
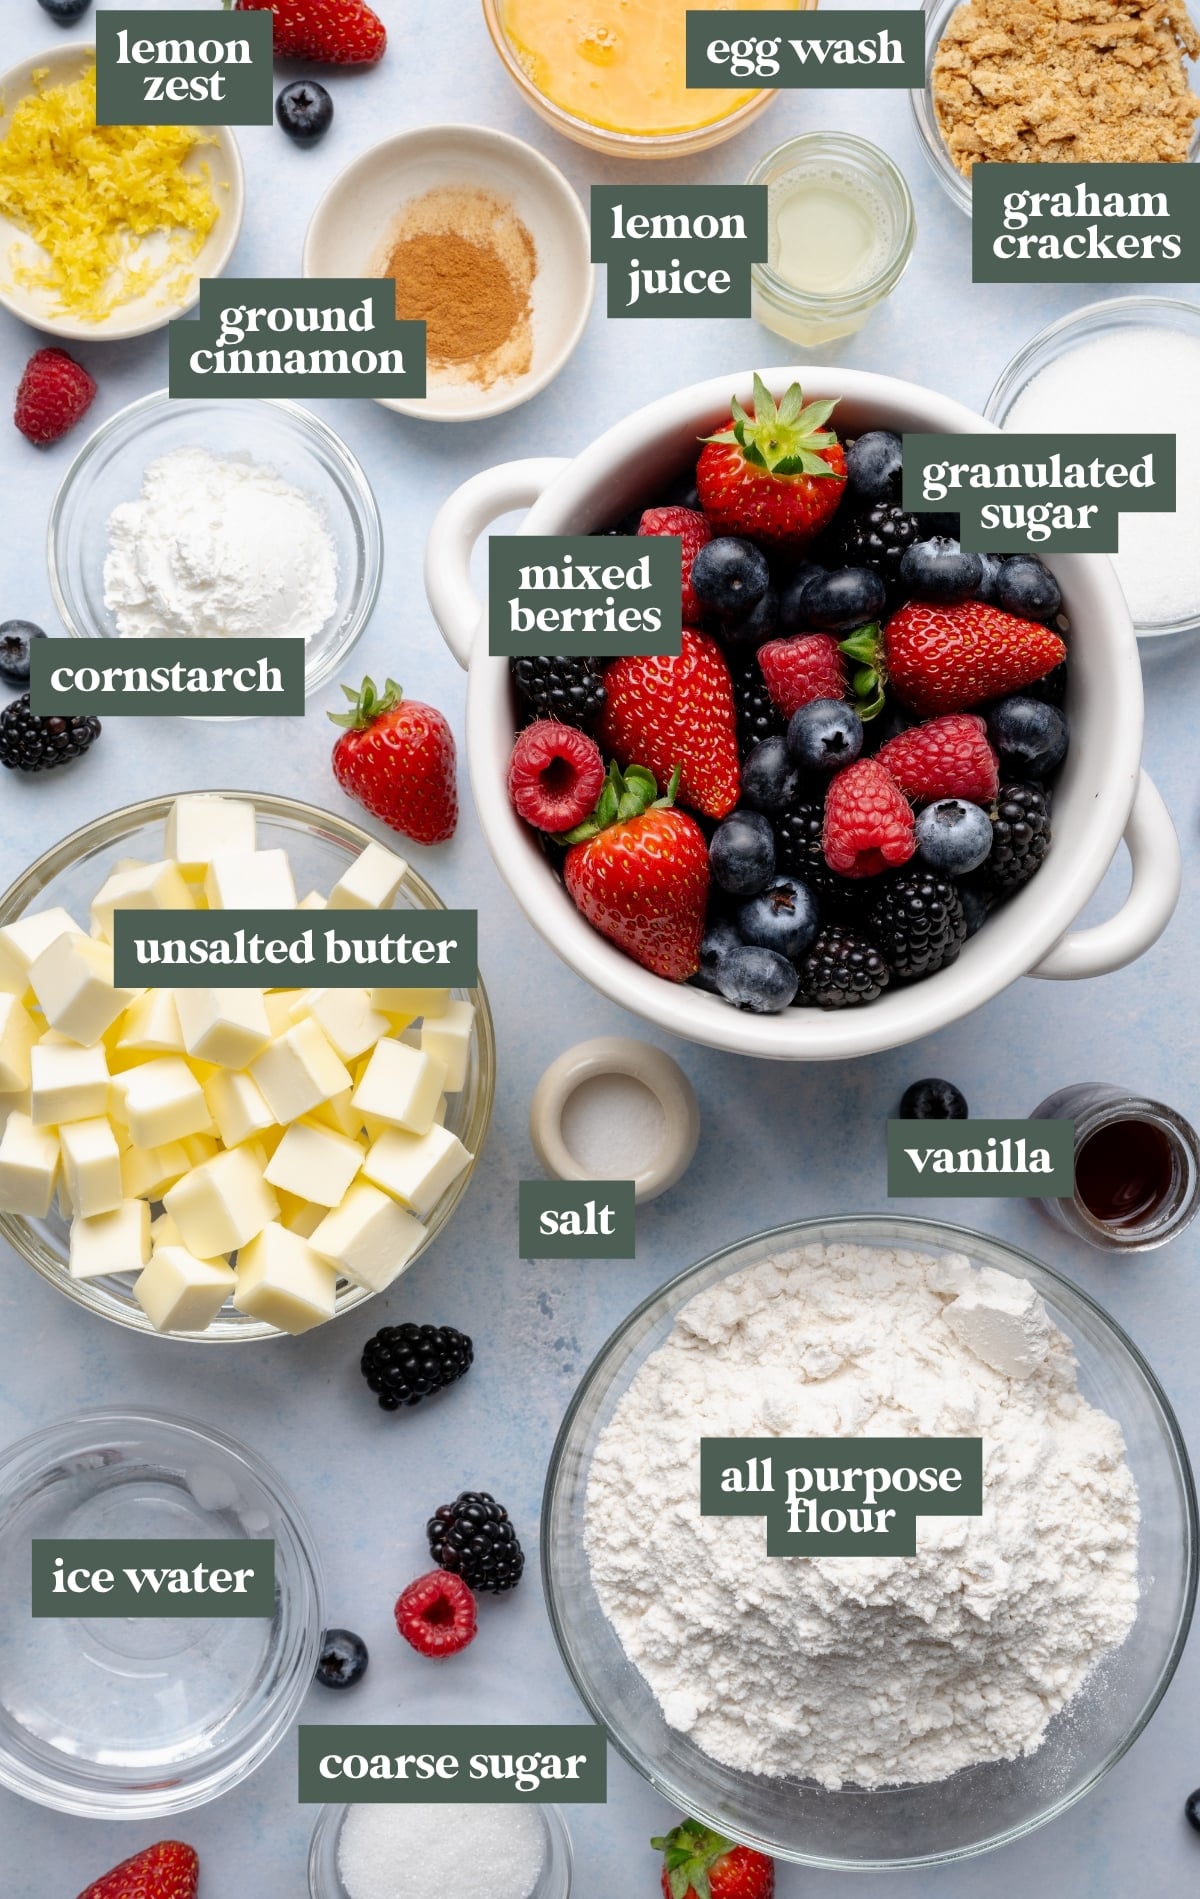
- All-Purpose Flour: The base of the galette dough. Be sure to spoon and level for the most accurate measurement. As always, too much flour can make the crust tough instead of tender and flaky.
- Unsalted Butter: Cold butter is key here! It creates those flaky layers in the crust as it melts in the oven. I like to cube it and keep it chilled right up until using.
- Ice Water: Helps bring the dough together without warming the butter. Add it gradually… you want just enough so the dough holds when pressed.
- Mixed Berries: The star of this Mixed Berry Galette! I love using a combination of strawberries, blueberries, blackberries, and raspberries for a balance of sweet and tart flavors, but you can use whatever you have on hand.
- Cornstarch: Helps to thicken the berry juices as the galette bakes, giving you that jammy filling instead of a runny one.
- Lemon Zest + Lemon Juice: Brightens up the filling and enhances the natural flavor of the berries. Don’t skip this… it really makes everything pop!
- Graham Crackers (or crumbs): My little trick for avoiding a soggy bottom! A layer of crumbs under the filling absorbs excess juices and keeps the crust crisp. You can use crushed graham crackers, Biscoff cookies, or Nilla wafers!
- Coarse Sugar: Sprinkled over the crust before baking for that golden, crunchy finish. It adds both texture and a bakery-style look.
- Other Ingredients Needed: Granulated sugar, ground cinnamon, vanilla extract, salt, and egg (for egg wash).
Step by Step Directions
(For the full recipe, scroll down to the recipe card below)
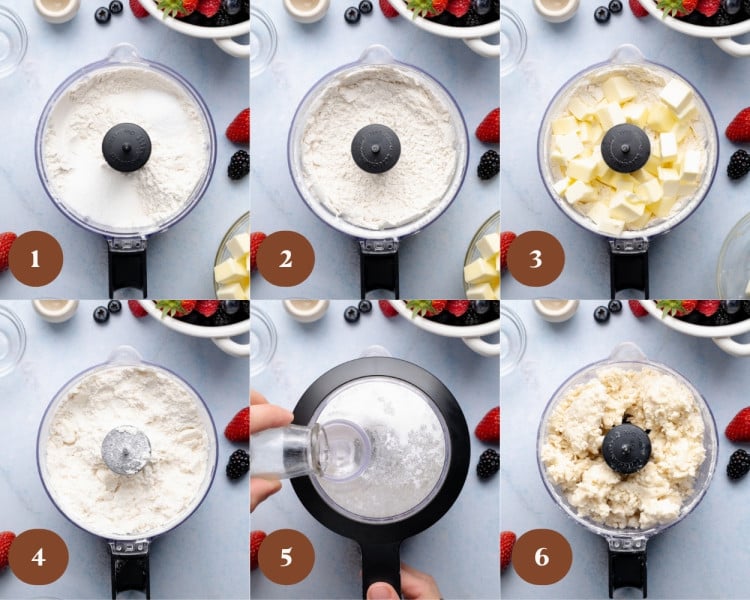
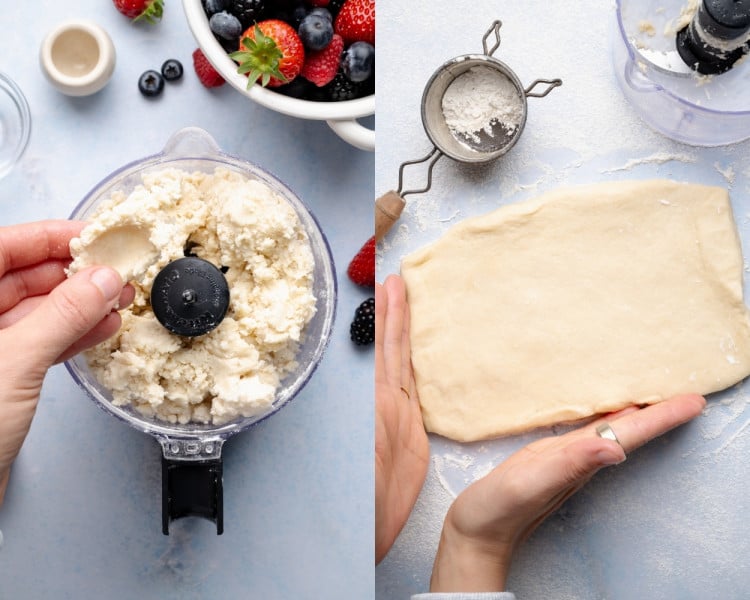
Make the dough
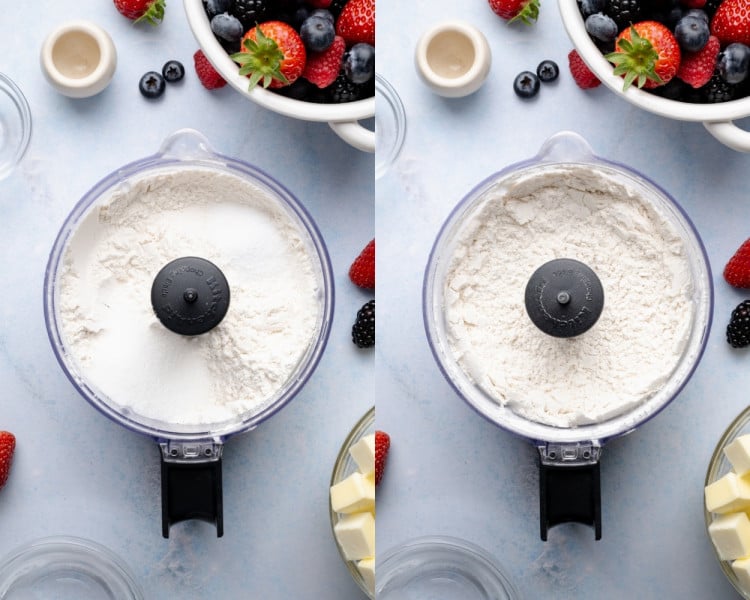
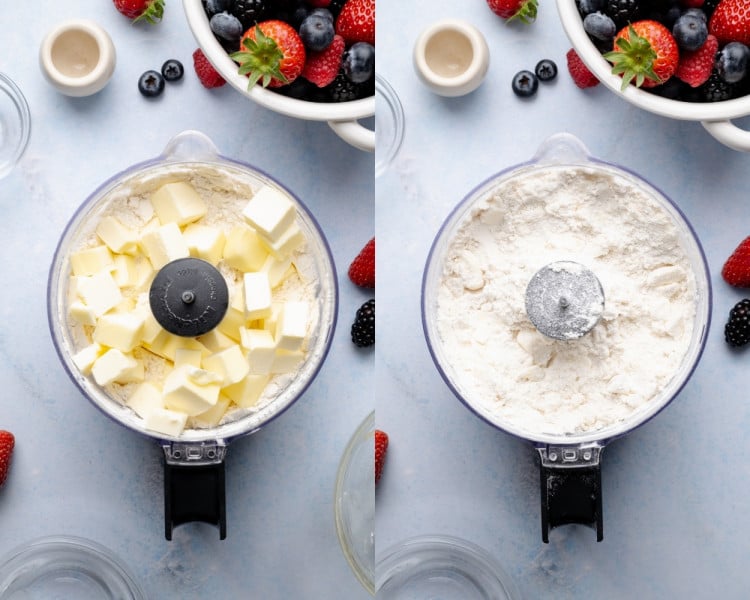
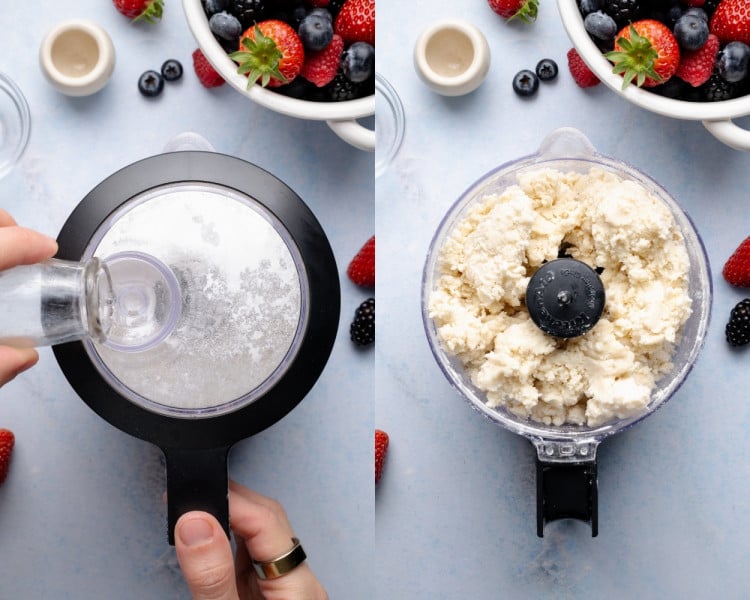
Pulse flour, sugar, and salt in a food processor. Add cold butter and pulse until crumbly, then drizzle in ice water just until the dough starts to come together.
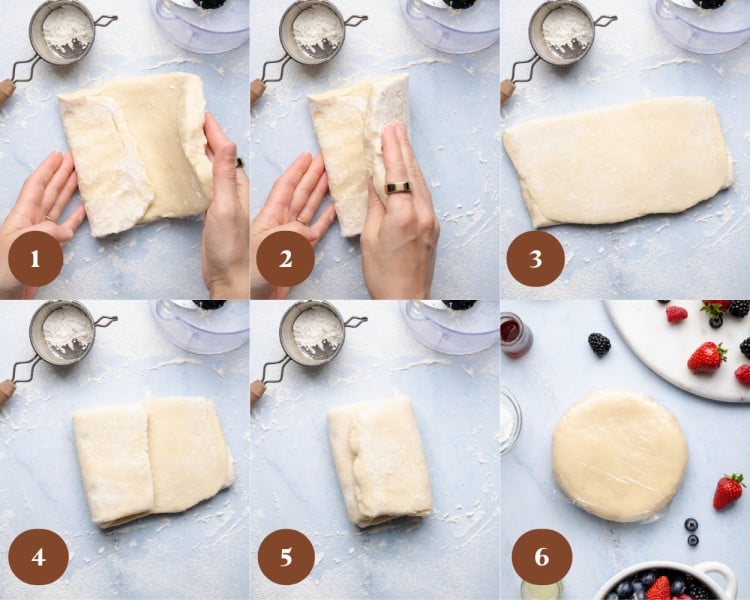
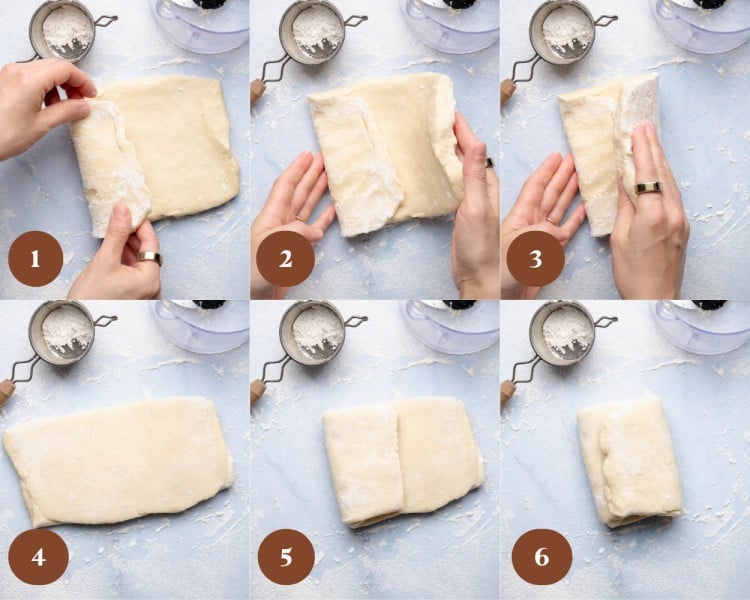
Fold and chill the dough
Turn dough out onto a floured surface, press together, then fold it over itself a few times to create layers. Shape into a disk, wrap tightly, and chill.

Make the berry filling
In a large bowl, toss the berries with sugar, lemon zest, lemon juice, cinnamon, and cornstarch until evenly coated and juicy.
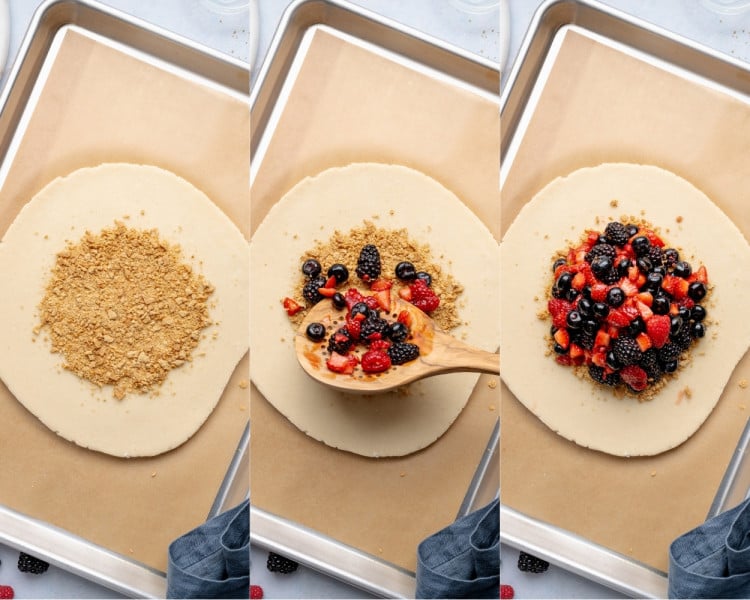
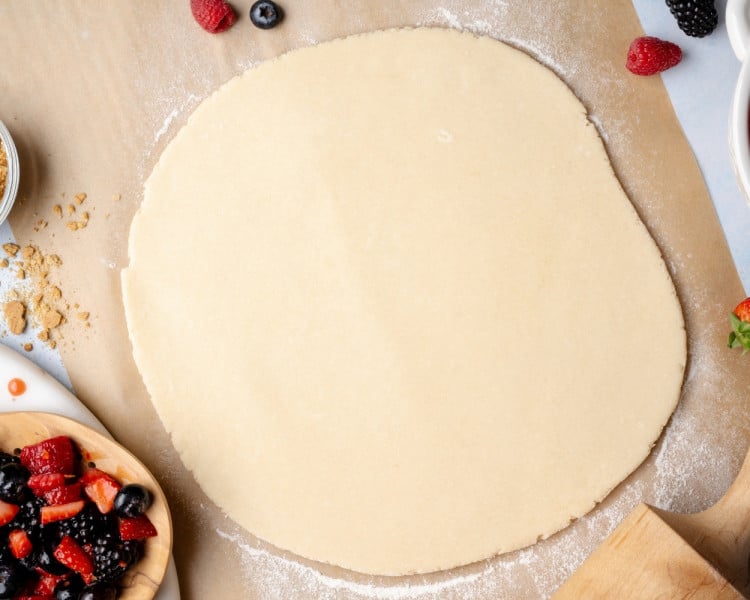
Roll and assemble the galette
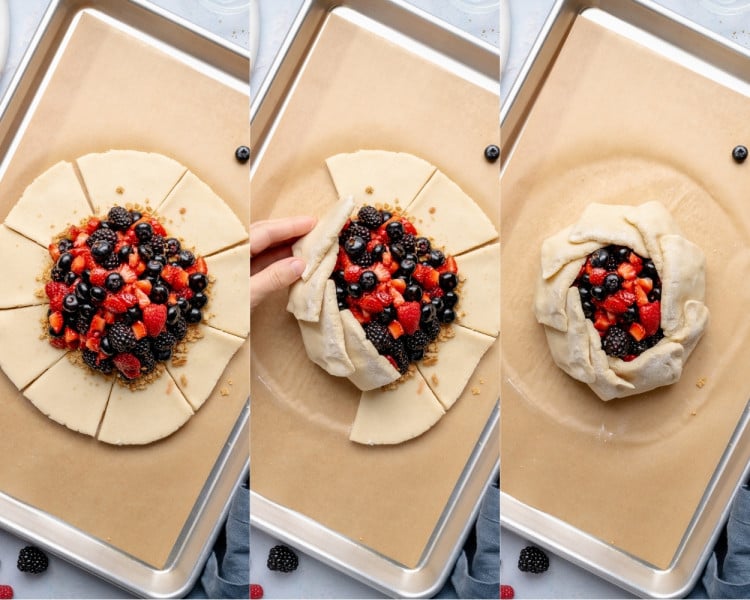
Roll dough into a large circle. Sprinkle graham cracker crumbs in the center, then spoon the berry filling on top, leaving a border.
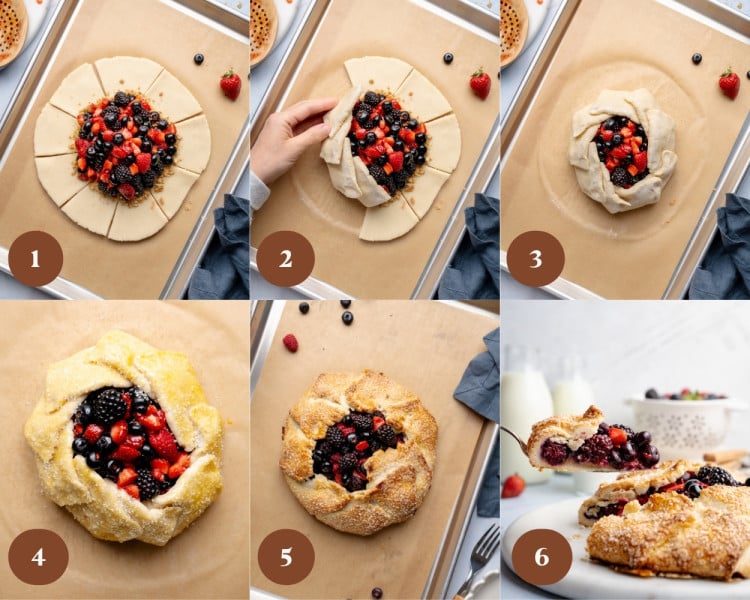
Fold and bake
Fold the edges of the dough over the filling, pleating as you go. Brush with egg wash, sprinkle with coarse sugar, and bake until golden and bubbly. Cool slightly before serving.
Expert Tips
- Keep everything cold: Cold butter = flaky layers. If your kitchen is warm, pop the dough in the fridge anytime it starts to feel soft.
- Don’t overwork the dough: Mix just until it comes together. Overworking can lead to a tough crust instead of tender and flaky.
- Fold for flaky layers: Folding the dough a few times creates those beautiful, bakery-style layers without extra effort.
- Chill before rolling: Letting the dough rest helps relax the gluten and makes it easier to roll out. Don’t skip any spot in the instructions where it says to chill the dough!
- Leave a border: Keep about a 1½–2 inch border around the edges so you have enough dough to fold over the filling.
- Use the graham cracker layer: This is your no soggy bottom trick—don’t skip it! It absorbs extra berry juices as the galette bakes. You can use crumbled graham crackers, Nilla wafers, or Biscoff cookies!
- Taste your berries: If they’re super sweet, reduce the sugar slightly before adding. If they’re tart, add a bit more.
- Juicy filling tip: If your berries are extra juicy, toss with a little extra cornstarch.
- Don’t overfill: It’s tempting, but too much filling can leak out and make the crust soggy.
- Bake until deeply golden: You want a rich golden color (not pale) for the best flavor and texture.
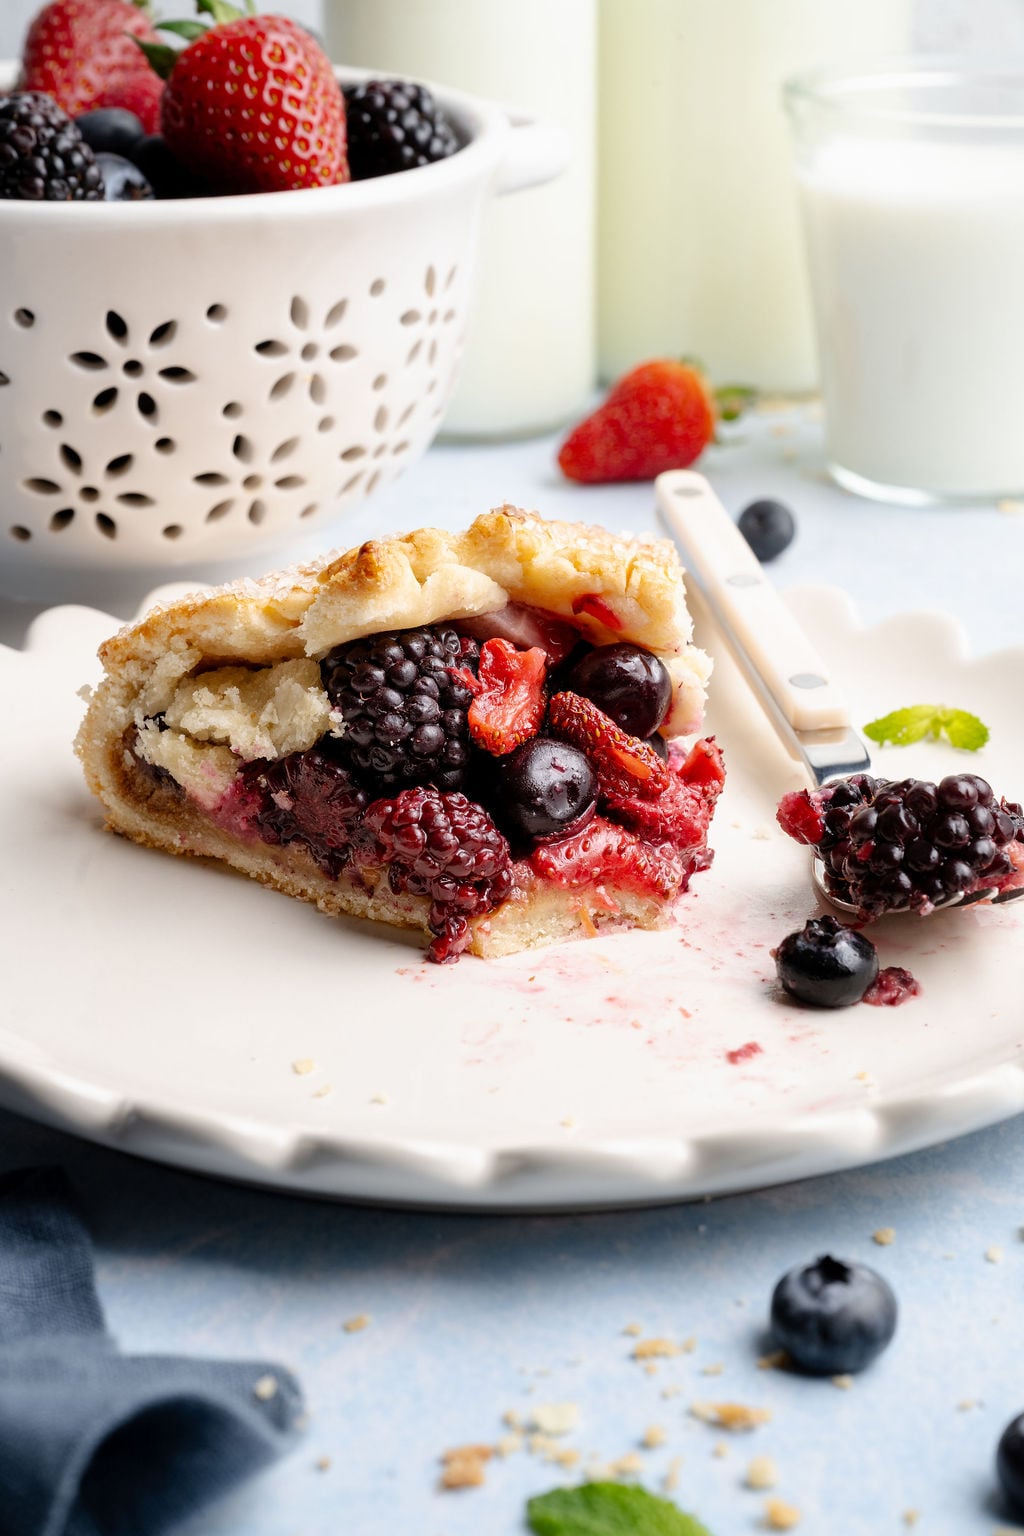
- Let it rest before slicing: Gives the filling time to set so it’s not too runny.
Variations / Substitutions
- Use different fruit: Swap the berries for peaches, nectarines, cherries, apples, or a mix depending on the season.
- Frozen berries: You can use berries straight from frozen. Don’t thaw them first, and make sure to add a little extra cornstarch to account for extra moisture.
- No graham crackers? Use crushed vanilla wafers, Biscoff cookies, shortbread cookies, or even almond flour.
- Make it citrusy: Try orange zest instead of lemon for a slightly sweeter citrus flavor.
- Gluten-free option: Use a 1:1 gluten-free flour blend for the crust.
- Mini mixed berry galettes: Divide the dough into smaller portions and make individual servings. Keep a close eye on the bake time so they don’t get too toasty!
Storage / Freezing
- Store at room temp: Keep loosely covered at room temperature for up to 1 day.
- Refrigerate: Store in the fridge for up to 3–4 days. Reheat before serving for best texture.
- Reheat tips: Warm in a 350°F oven for 10–15 minutes to crisp up the crust again.
- Avoid microwaving: It can make the crust soft instead of flaky.
- Freezing: I haven’t tried freezing this Mixed Berry Galette, as I find the best quality is when it’s made fresh. I think if you want to try freezing, your best bet is probably to assemble the galette, freeze until solid, then wrap well. Then bake straight from frozen, adding a few extra minutes.
- Make Ahead: Instead of freezing the fully assembled galette, you can also consider making the dough in advance, wrapping it tightly, and freezing for up to 2–3 months. Then thaw in the fridge overnight before using and following the rest of the directions as written.
FAQs
What is a galette?
A galette is a free-form, rustic pastry. Basically a “lazy pie” with no pan required!
Can I use frozen berries?
Yes! Use them straight from frozen and add a little extra cornstarch to help absorb the extra moisture.
Why is my galette soggy?
Too much filling or skipping the crumb layer can cause this. The graham cracker layer helps absorb excess juices.
Do I REALLY need to chill the dough?
Yes!! Do not skip any of the chilling steps. This helps the butter stay cold and creates a flakier crust.
Can I make this without a food processor?
Definitely! Use a pastry cutter or your hands to work the butter into the flour. The chilling will be extra important with this method, because the warmth from your hands will warm the butter up more than the food processor method.
What if my dough cracks when folding?
Totally normal! Just patch it together. Remember, it’s meant to look rustic. 😉
shop this post
 Buy Now →
  Buy Now →
Monthly Baking Challenge
This recipe was featured as the Kroll’s Korner Monthly Baking Challenge recipe in May 2026. For information on the current Monthly Baking Challenge recipe, click below!


Before You Begin! If you make this, please leave a review and rating letting us know how you liked this recipe! This helps our business thrive & continue providing free recipes.
Mixed Berry Galette
Ingredients
For the dough:
- 1 ½ cups all-purpose flour
- 1 tsp kosher salt
- 1 Tbsp granulated sugar
- 12 Tbsp unsalted butter (cold and cubed)
- 4-5 Tbsp ice water
- 1 tsp apple cider vinegar or lemon juice (optional)
For the filling
- 3 cups mixed berries (strawberries, blueberries, raspberries, blackberries)
- 1/4 – 1/3 cup granulated sugar (adjust based on sweetness of fruit)
- 1 ½ Tbsp cornstarch
- 1 Tbsp fresh lemon juice
- 1 tsp lemon zest
- 1 tsp vanilla extract
- Pinch of salt
- Pinch of cinnamon
- 3-4 Tbsp crushed graham crackers, Nilla wafers, or Biscoff cookies (For the bottom of galette dough. I’ve found using crushed cookies helps prevent a soggy bottom from the juices released from the berries!)
For assembling
- 1 batch galette dough (chilled)
- 1 egg (beaten, for egg wash)
- 1 Tbsp coarse sugar (optional, for sprinkling)
- vanilla ice cream (for serving)
Last step! If you make this, please leave a review and rating letting us know how you liked this recipe! This helps our business thrive & continue providing free recipes.
Instructions
- Mix dry ingredients: Add flour, salt, and sugar to a food processor. Pulse a few times to combine.1 ½ cups all-purpose flour, 1 tsp kosher salt, 1 Tbsp granulated sugar

- Cut in the butter: Add the cold, cubed butter and pulse until the mixture resembles coarse crumbs with some pea-sized and a few larger chunks of butter remaining. Those larger pieces = flaky layers!12 Tbsp unsalted butter
- Add liquid: With the processor running, slowly drizzle in 4 Tbsp ice water (and vinegar or lemon juice if using). Pulse just until the dough starts to come together. If needed, add more water 1 tsp at a time until the dough holds when pressed (it should not feel sticky).4-5 Tbsp ice water, 1 tsp apple cider vinegar or lemon juice
- Bring the dough together: Turn the dough out onto a lightly floured surface and gently press it into a shaggy rectangle.
- Fold for flaky layers (don’t skip!): Fold the dough into thirds like a letter. Rotate, then gently flatten and repeat 1-2 more times. This simple step creates those bakery-style flaky layers.
- Chill: Shape into a disk, wrap tightly, and refrigerate for at least 45-60 minutes (or up to 3 days). Start Timer
- Prep the berries: If using strawberries, hull and slice them into bite-sized pieces.
- Toss everything together: In a large bowl, gently toss together the berries, sugar, cornstarch, lemon juice + zest, vanilla, pinch of salt, and ground cinnamon. Be careful when mixing since the raspberries are pretty fragile. Set aside while you roll out the dough.3 cups mixed berries, 1/4 – 1/3 cup granulated sugar, 1 ½ Tbsp cornstarch, 1 Tbsp fresh lemon juice, 1 tsp lemon zest, 1 tsp vanilla extract, Pinch of salt, Pinch of cinnamon
- Roll out the dough: Remove the dough from the fridge and let it sit at room temp for 5-10 minutes to make it a little easier to roll out and prevent cracking. Start Timer On a lightly floured surface, roll the dough into a 10-12 inch circle (it doesn’t have to be perfect, that’s the beauty of a galette, it’s OK if it looks a bit rustic!) Transfer to a parchment-lined baking sheet.1 batch galette dough
- Add the filling: Sprinkle the crushed cookies in an even layer on the center of the dough, where you’ll be placing the berries. Then, using a slotted spoon, spoon the berry mixture into the center of the dough, leaving about a 2-inch border around the edges. Leaving the excess juice from the bowl behind.3-4 Tbsp crushed graham crackers, Nilla wafers, or Biscoff cookies
- Fold the edges: Cut slits along the border of the dough, spacing them about 2-3 inches apart. Fold each segment of the dough over the berries, gently pinching the overlapping dough to secure, and repeat until all the dough is folded over the berries.
- Chill (don’t skip!): Place the assembled galette in the fridge for ~15-20 minutes. Start Timer (Make sure your fridge has enough space for the baking sheet).
- Bake: Preheat oven to 400°F. Brush the crust lightly with egg wash and sprinkle with coarse sugar. Bake for 35-45 minutes, or until the crust is deep golden brown and the filling is bubbly and thickened. Start Timer1 egg, 1 Tbsp coarse sugar
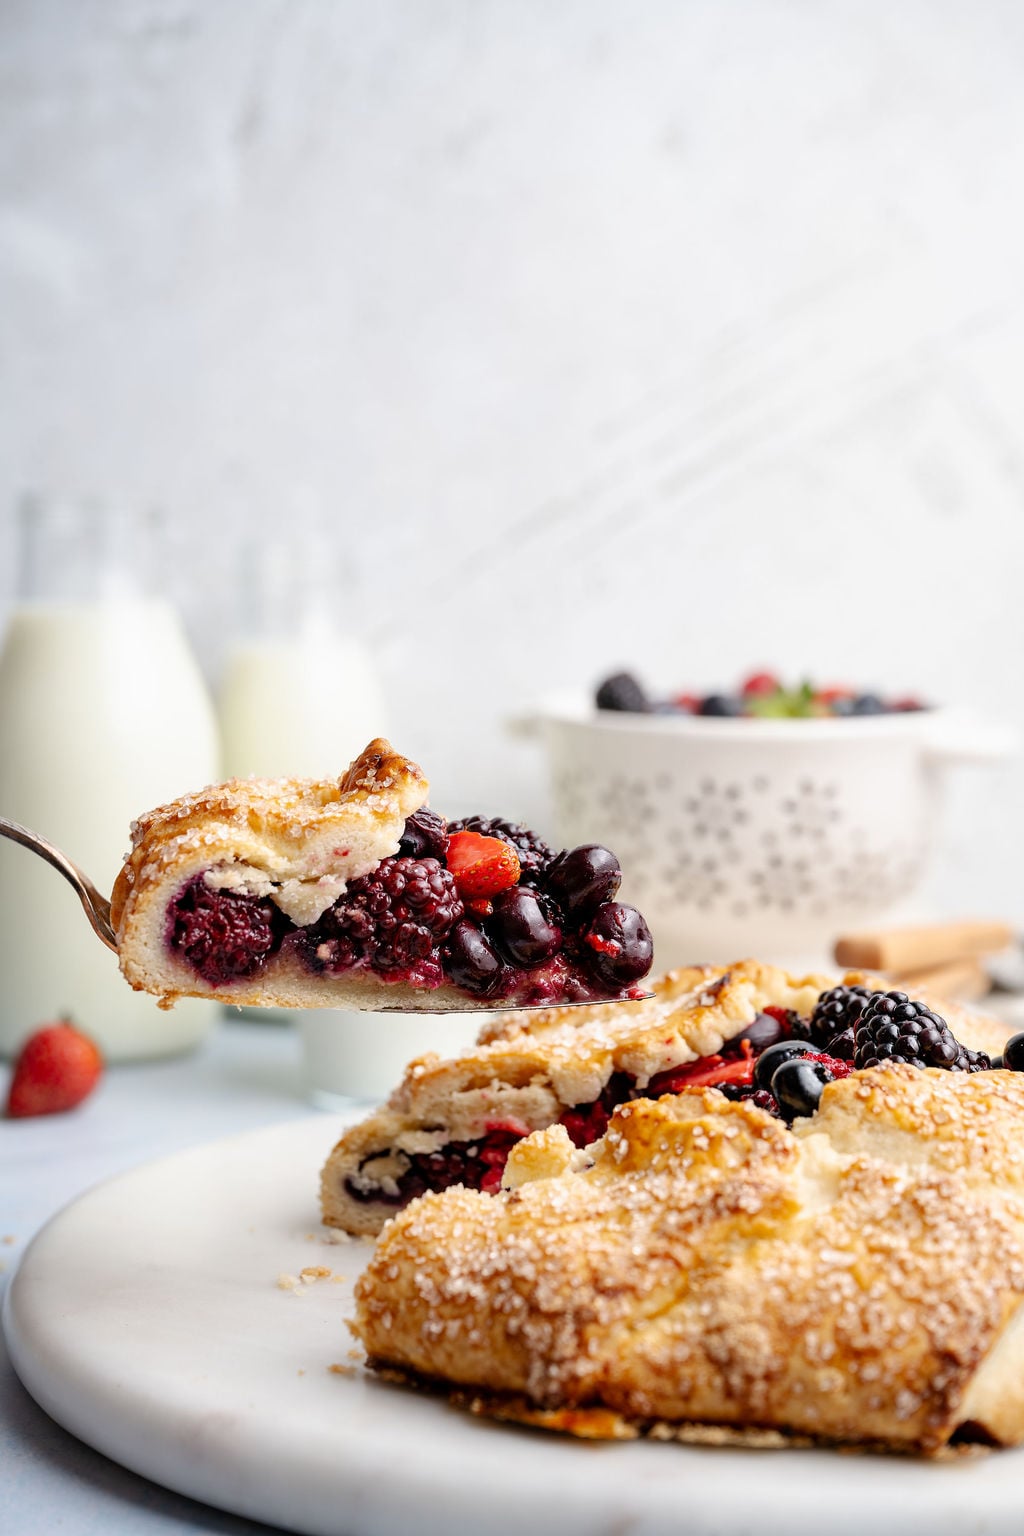
- Cool + serve: Let cool for at least 15-20 minutes before slicing. Start Timer The filling will set as it cools! Serve with vanilla ice cream or whipped cream if desired. SO GOOD! 🙂vanilla ice cream


Notes
- Store at room temp: Keep loosely covered at room temperature for up to 1 day.
- Refrigerate: Store in the fridge for up to 3–4 days. Reheat before serving for best texture.
- Reheat tips: Warm in a 350°F oven for 10–15 minutes to crisp up the crust again. Avoid microwaving, it can make the crust soft instead of flaky.
- Freezing: I haven’t tried freezing this galette, as I find the best quality is when it’s made fresh. I think if you want to try freezing, your best bet is probably to assemble the galette, freeze until solid, then wrap well. Then bake straight from frozen, adding a few extra minutes.
- Make Ahead: Instead of freezing the fully assembled galette, you can also consider making the dough in advance, wrapping it tightly, and freezing for up to 2–3 months. Then thaw in the fridge overnight before using and following the rest of the directions as written.
Nutrition Information
Nutritional information is provided as a courtesy and is automatically calculated. It should only be construed as an estimate rather than a guarantee. Ingredients can vary and Kroll’s Korner can’t make any guarantees to the accuracy of this information.
📸 Photography by Creating Kaitlin

So so so yummy! The graham crackers layer is a total game changer!! Loved it!
Thanks Madison!! so glad it was a hit and that you liked the graham cracker layer 🙂
I just love making galettes because they are easy and so delicious! I made mini versions this time for individual desserts and glazed the fruit with a little melted raspberry jam for some shine. They were great!
Sooo pretty!! Love the idea of mini versions!
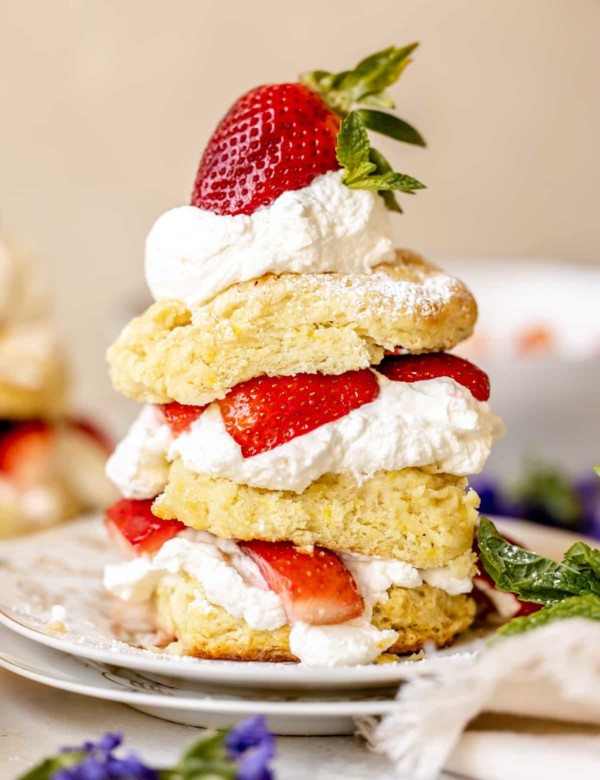
This was absolutely amazing! Loved how it came together ~ might’ve even got all giddy when it came out of the oven looking like it was supposed too, haha. I also used some of the homemade cream from the strawberry shortcakes ~ so wonderful! Thank you!
Oh my gosh its sooo pretty!! You did great 🙂 thank youu!!
We made the Galette! It was amazing, seeing all the flavors explode, from the berries to the lemon. We absolutely loved it! We added biscoff cookies in the center. Definitely not using frozen berries next time we do it, lesson learned. We added powdered sugar on top!
Looks delish!! So glad you enjoyed this one, Evelyn! 🫶🏻
Galette was delicious. Loved the addition of vanilla to the fruit. And the crumbs were perfect to keep the bottom from being soggy. Going to be a staple for next
Soooo happy to hear you loved this, Mary! And so glad that trick worked for you!!
Wow! This is delicious! Perfect for Memorial Day weekend! It’s so fresh and easy!
It’s gorgeous! Thank you. So glad you enjoyed it!
Can you use frozen fruit?
Another reader said she used frozen fruit and a lot of liquid came off/was a but messy. I would use fresh if you can but if using frozen just be sure not to let the fruit thaw first. 🙂
This recipe was really easy and I love the crust recipe. However, if I made this again I would definitely not use frozen berries. They held too much liquid and it was a little bit of a soggy mess. It tasted good though!
So sorry about the frozen berries, did you keep them frozen before using? If thawed, that can contribute to the issue. But still they probably gave off a lot of liquid, so sorry about that!
I made this for Mother’s Day and it was a big hit! It turned out so yummy. It was so easy to make but looks so fancy. I will definitely be making again. Thank you for all the delicious recipes!
Pretty!! Thank you soo much Vanessa! 🙂
I made this galette for Mother’s Day and it turned out so yummy! It was easy to make but looks so fancy! Everyone really enjoyed it. I will definitely be making it again! Thank you for being my go-to for delicious desserts!