Flourless Chocolate Cake
This post may contain affiliate links. Please read our disclosure policy.

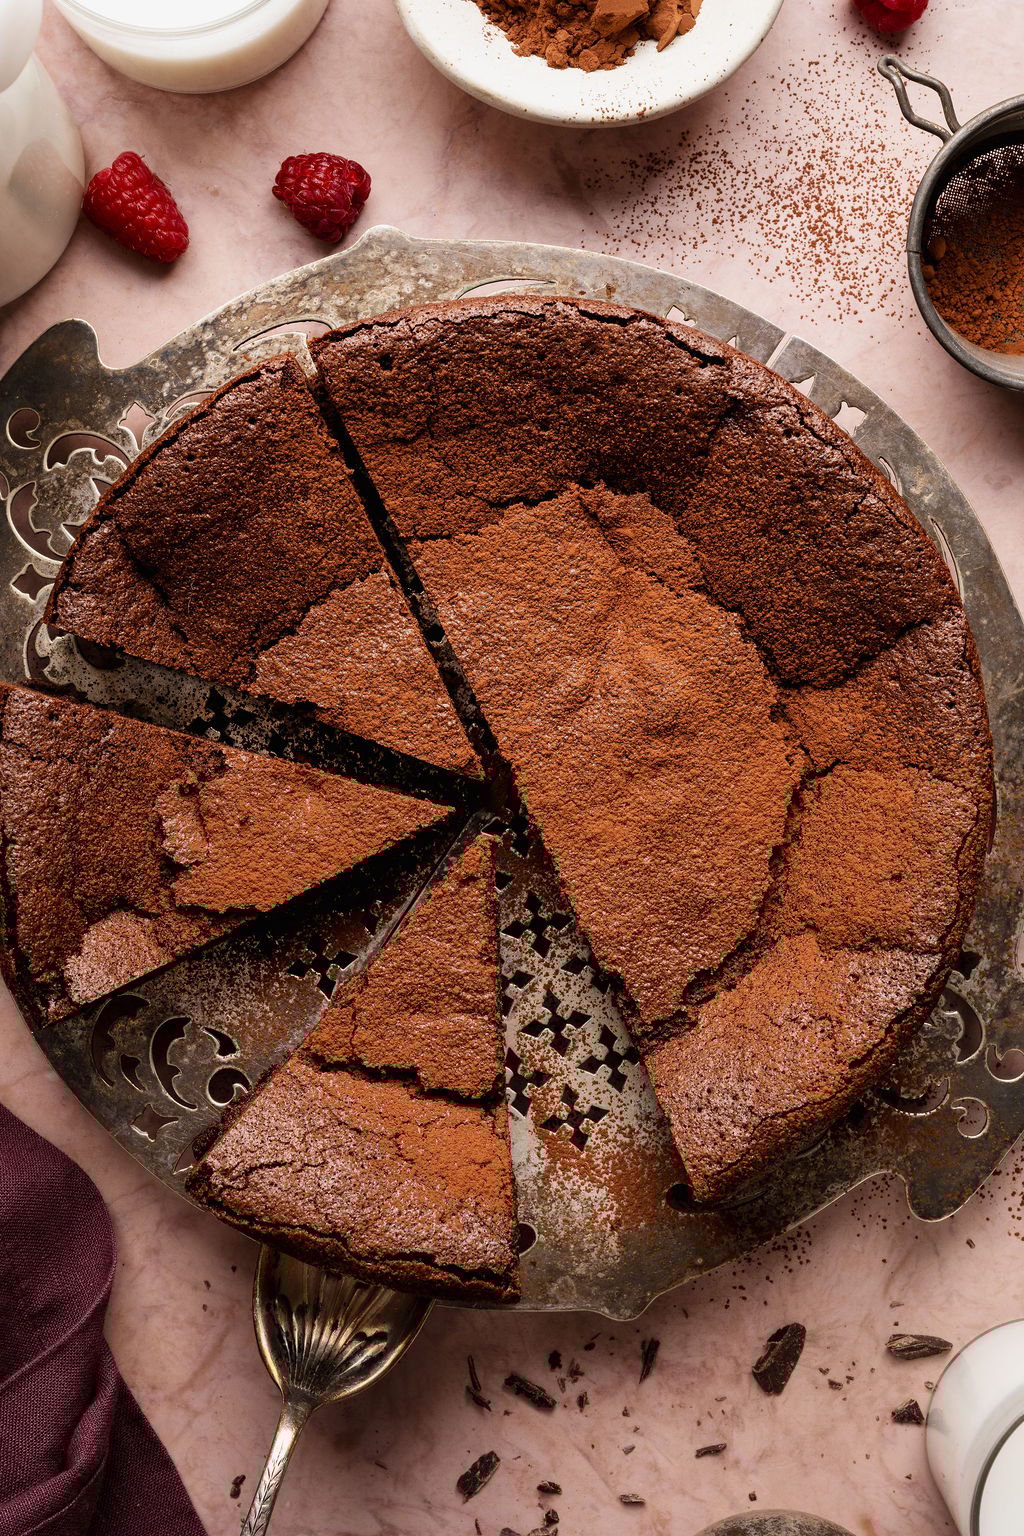
If you are craving a truly chocolate-forward dessert, this Flourless Chocolate Cake delivers. This is one of those elegant and impressive cakes that looks like it came straight from a bakery, but can easily be made at home when you have expert tips and tricks to follow.
The recipe testing process for this Flourless Chocolate Cake taught me so much. It may have a short ingredient list, but the small details matter, especially when it comes to the egg whites, the pan you use, and giving the cake time to chill.
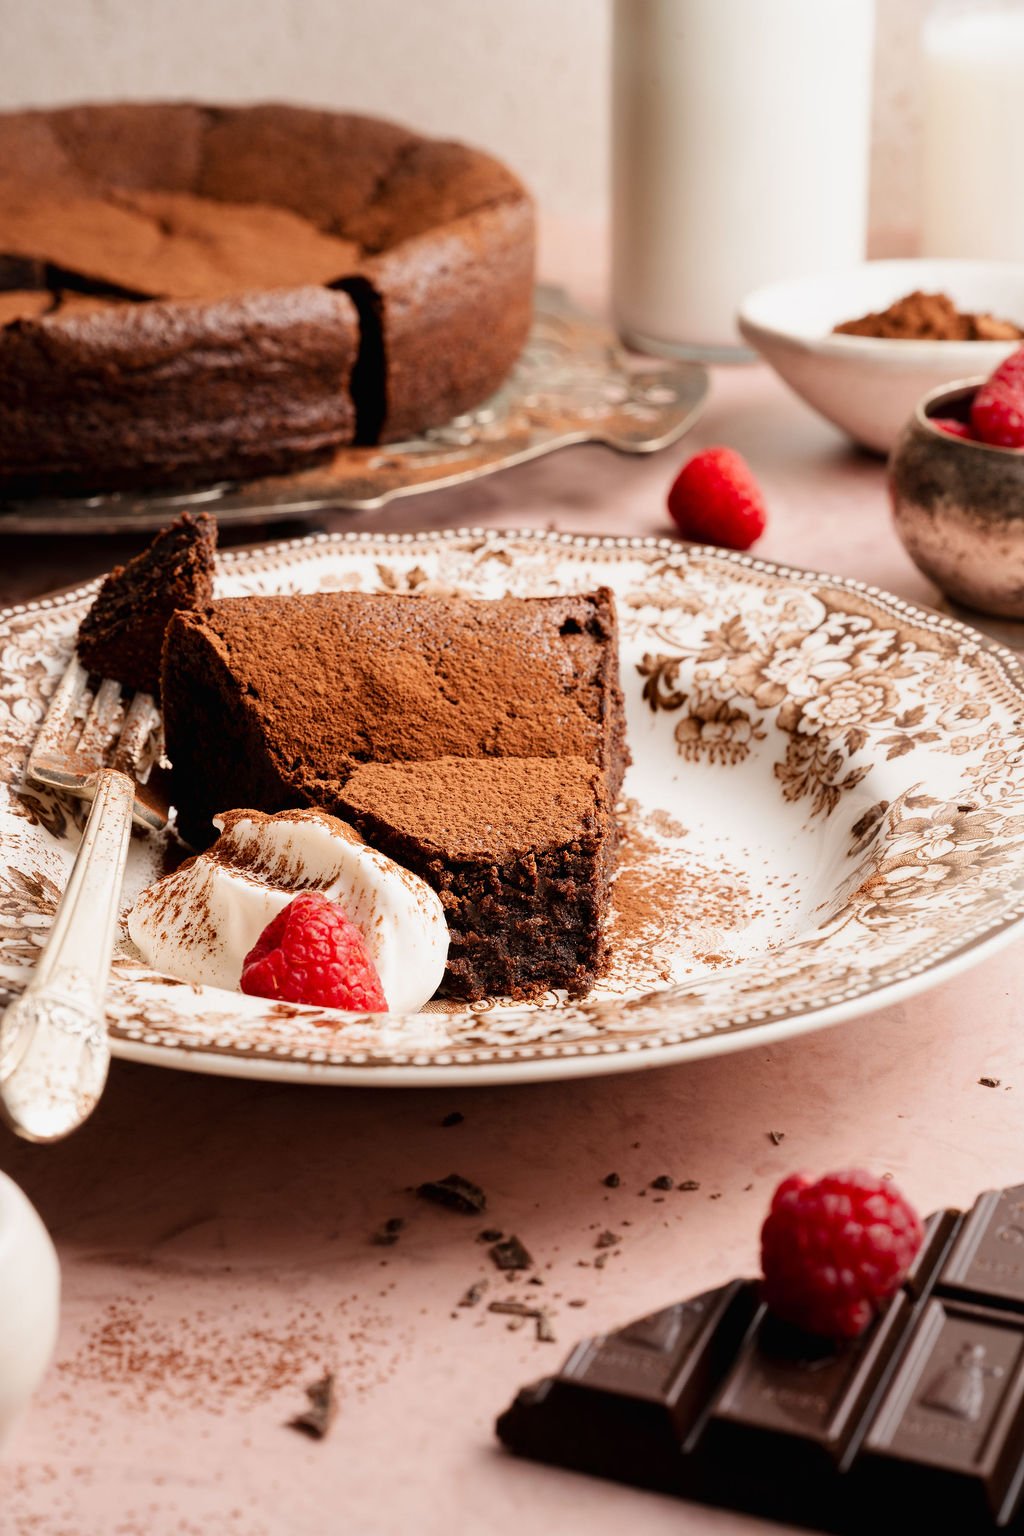
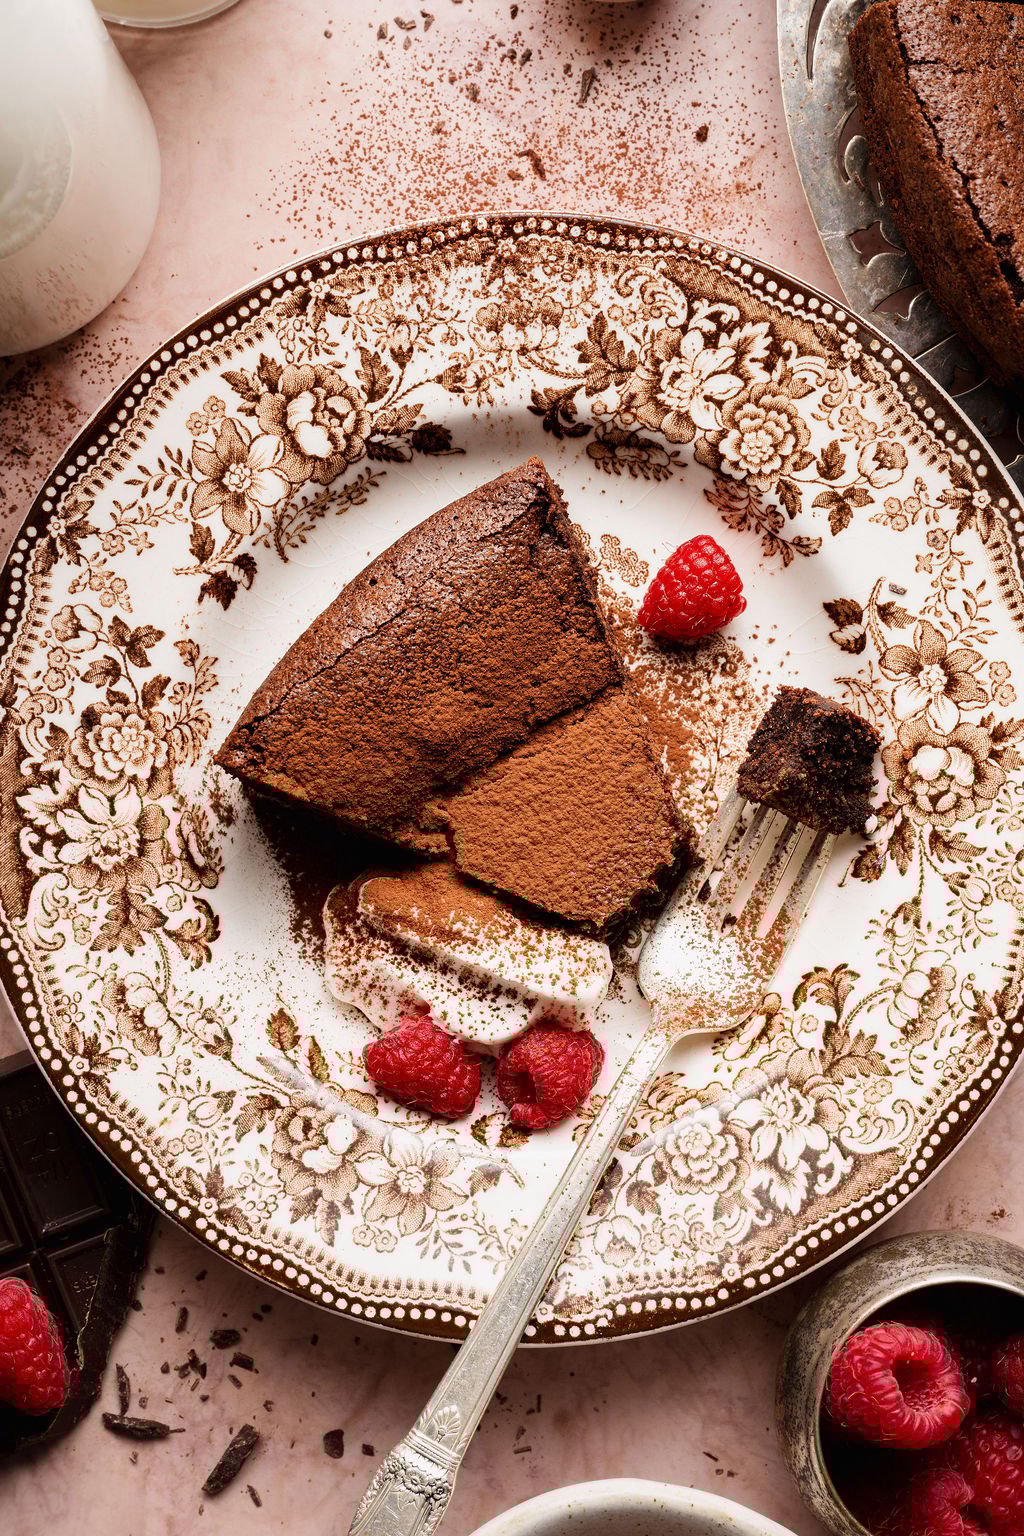
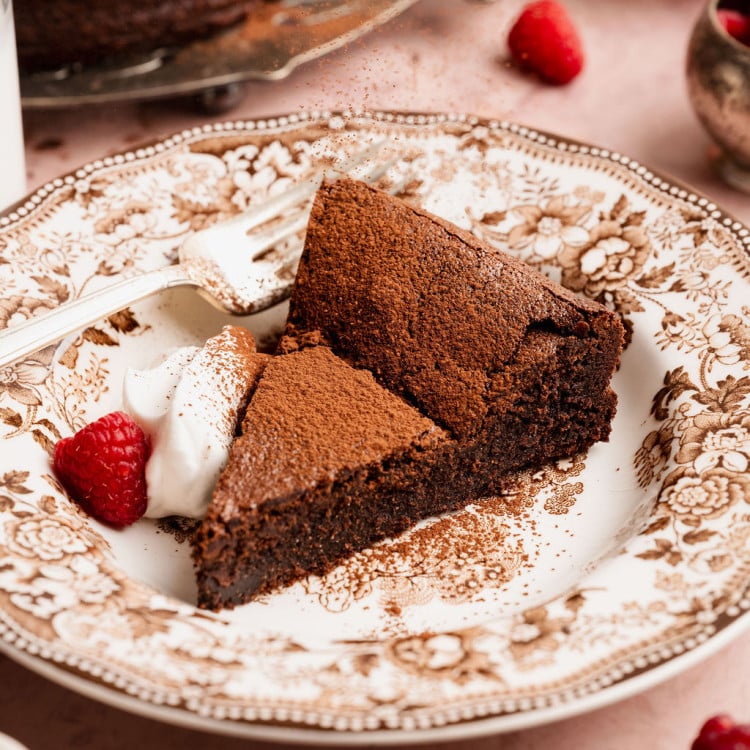
I love topping this Flourless Chocolate Cake with a sprinkle of cocoa powder and serving it with a dollop of whipped cream and fresh, vibrant berries.
This cake really has it all: incredible chocolate taste, perfect fudgy texture, and a beautiful, photo-worthy aesthetic. It’s perfect for a make-ahead dessert, annnnd is even gluten-free! I can’t wait for you to try it! 🥰
Can’t get enough chocolate? Don’t miss my Black and White Chocolate Chip Cookies (a Levain copycat!), Small Batch Brownies (perfect for when you just need a small dessert), and my Vegan Chocolate Mousse (soooo easy to make!).

 Table Talk with Tawnie

This Flourless Chocolate Cake recipe was a lot of fun to make, and also I learned a lot in the process of recipe testing! I like to think of it as this: I get to make the mistakes so you don’t have to because there is nothing worse than spending all your time on a cake and wasting precious time and ingredients! With that said, while this decadent cake has simple ingredients, your technique is important. I’m walking you through step by step how to make your cake look just like these gorgeous photos! 😊
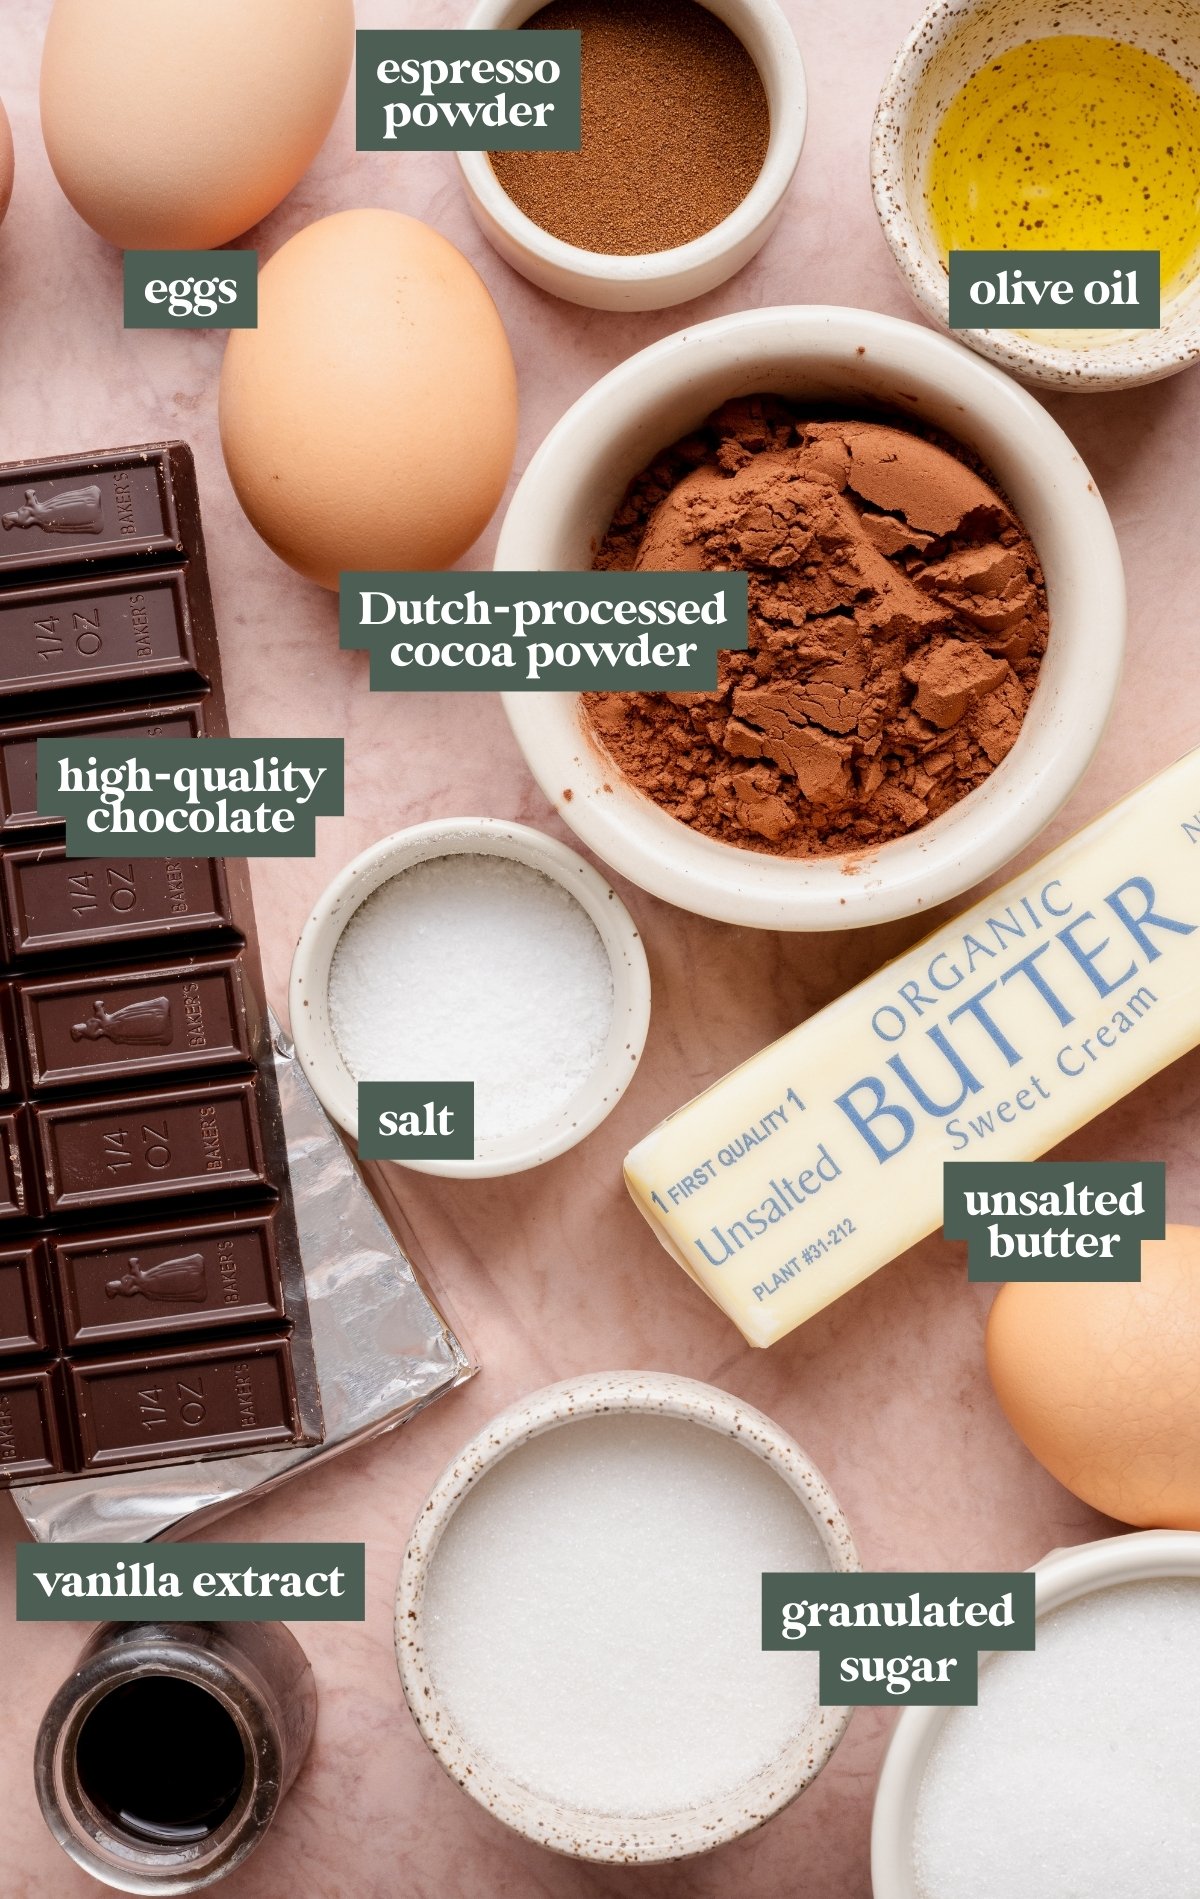
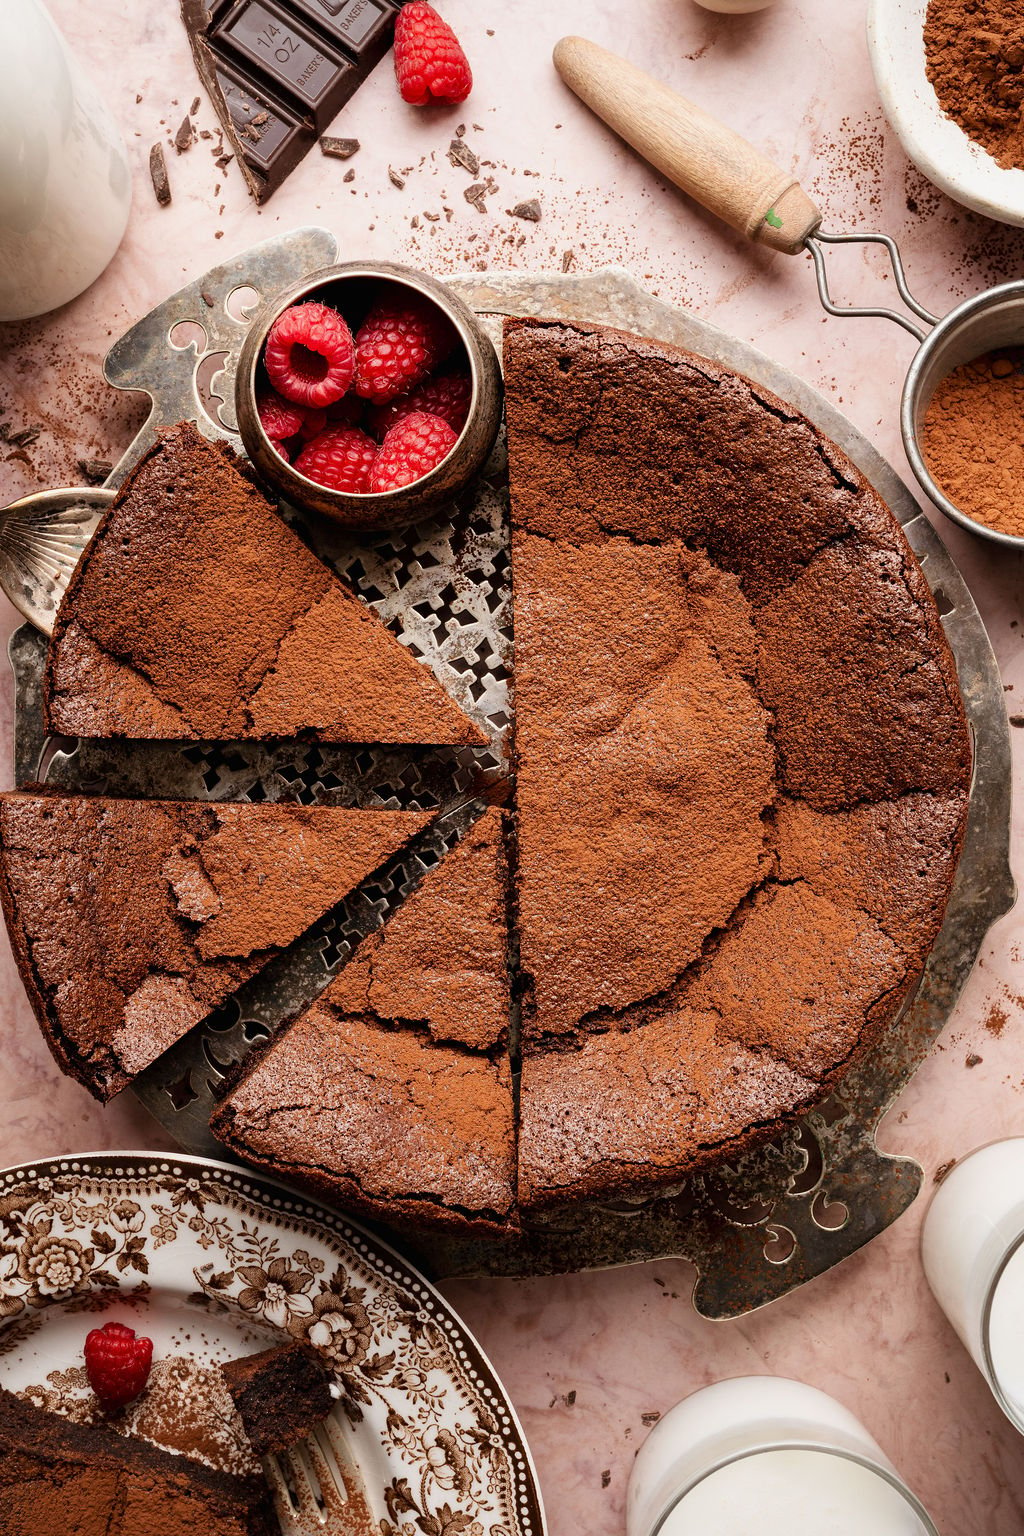
- Bittersweet or Semisweet Chocolate: It’s important to use a high-quality brand of chocolate here, since this ingredient is the star of the cake. Guittard, Ghirardelli, Scharffen Berger, Baker’s, and Lindt are all great options. Chop the chocolate bar into shards before melting (see step-by-step photos).
- Olive Oil: In my recipe testing, I found that adding olive oil gives the cake a smooth, silky mouthfeel and enhances the richness without making it feel heavy.
- Granulated Sugar: Granulated sugar is key for both structure and texture in this cake. You’ll add it in two stages, some to the egg whites to help them whip properly, and the rest to the chocolate mixture for balance and moisture.
- Eggs: This recipe uses 4 large eggs, which you’ll separate into yolks and whites before starting. The yolks add richness and structure to the batter, while the whites are whipped to give the cake lift. I’ve found it’s easiest to separate the eggs while they’re still cold, then let the yolks and whites come to room temperature before using.
- Dutch-Processed Cocoa Powder: Dutch-processed cocoa powder gives the cake a deep, smooth chocolate flavor without bitterness and helps create a rich, dark color and ultra-fudgy texture. It’s my top choice for this recipe, but if you only have natural cocoa powder, you can use it. The cake will just taste slightly sharper and look a bit lighter in color.
- Espresso Powder: This is optional, but I highly recommend using it. You won’t taste coffee in the finished cake. Instead, it subtly enhances and deepens the chocolate flavor, making it taste richer and more intense without overpowering it.
- Other Ingredients Needed: Vanilla extract, kosher salt, unsalted butter.
- Optional Garnish Ideas: Extra cocoa powder, whipped cream, fresh berries, flaky sea salt.
Recipe Testing Notes
- I had 4 different versions of this Flourless Chocolate Cake recipe that I tested. Most significantly, I tried one version where I whipped the egg whites and another version without whipping them.
- The version without beaten egg whites yielded a cake that was very rich and almost ganache-like, especially when chilled. While this wasn’t necessarily a bad thing, it wasn’t the texture I was hoping for.
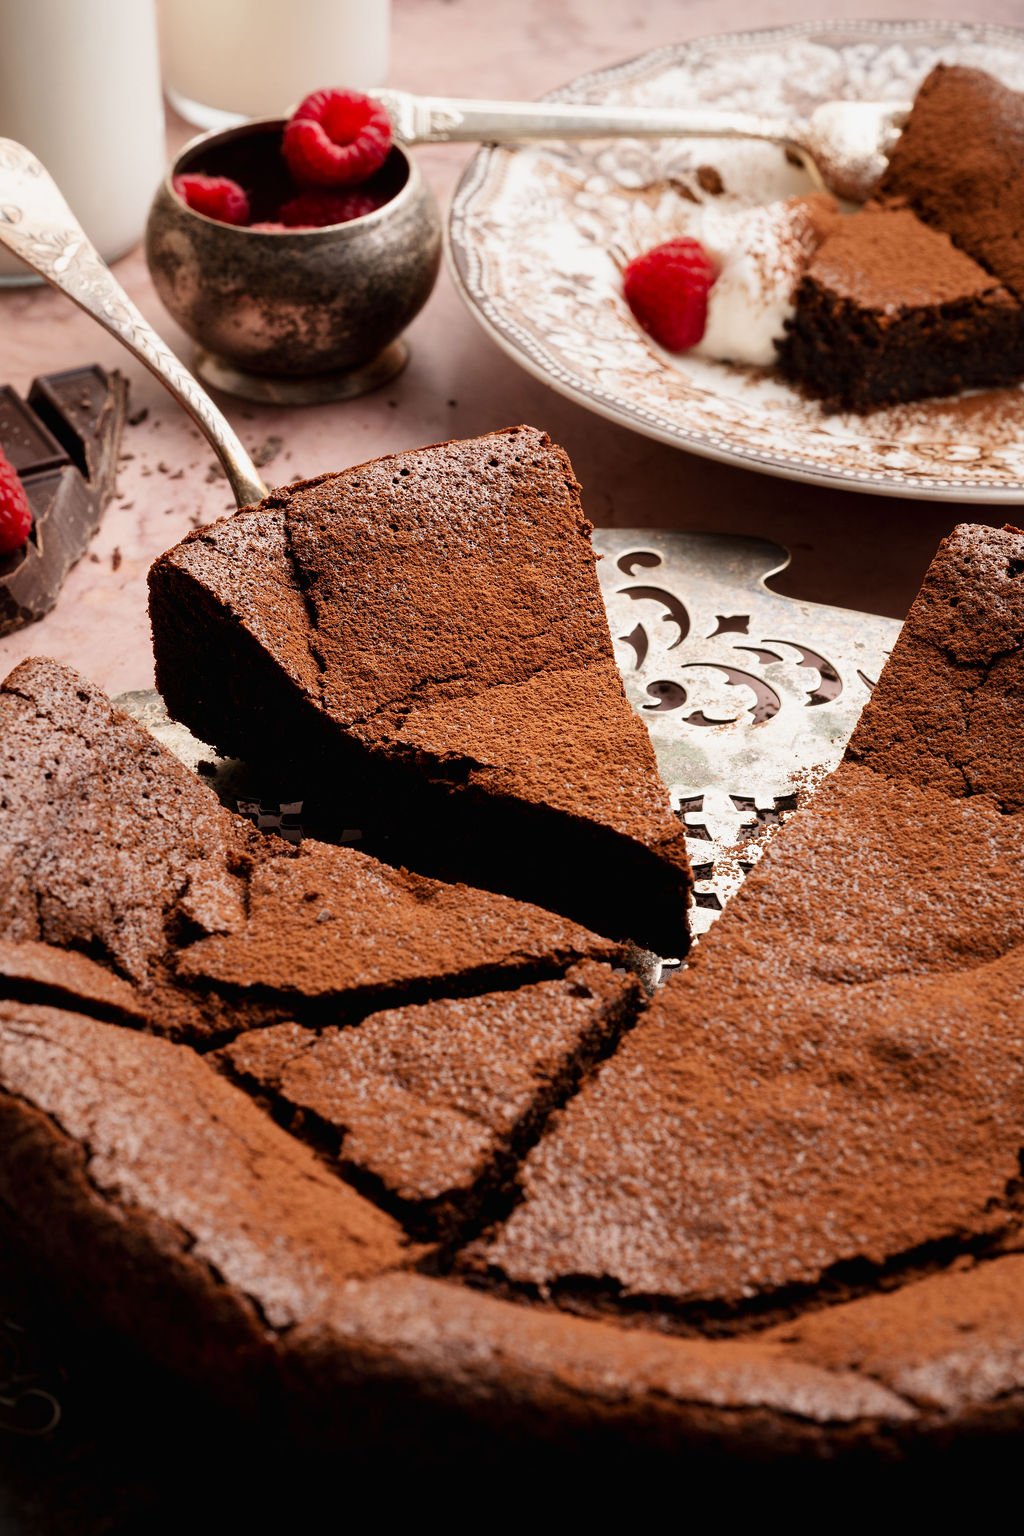
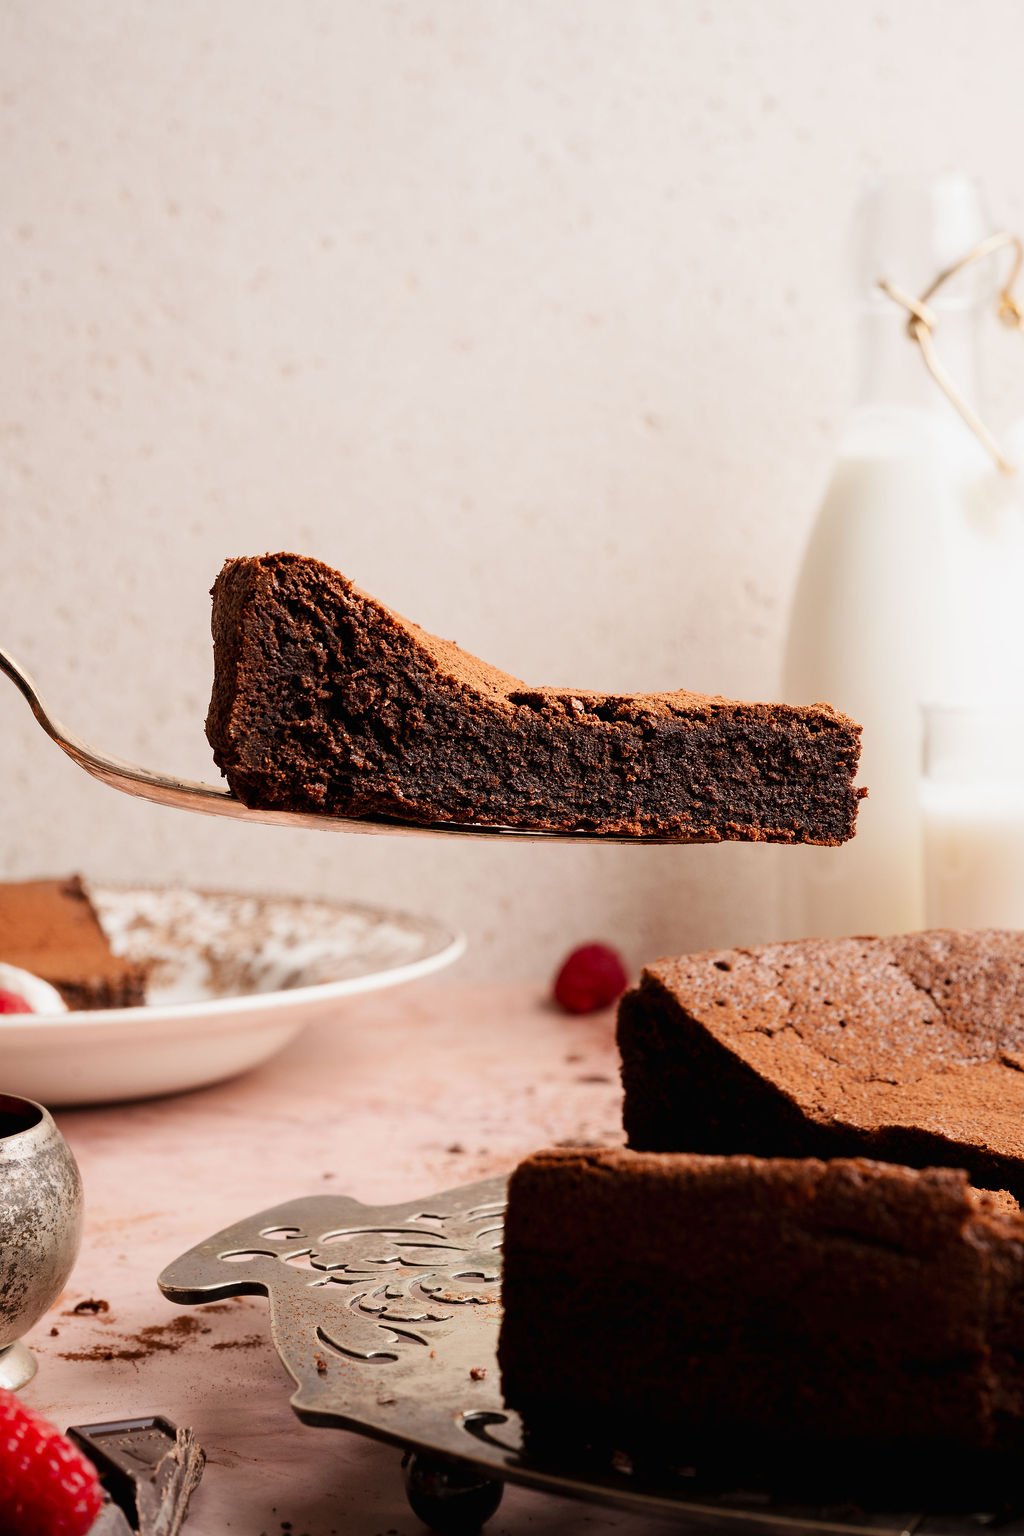
- The version where I did whip the egg whites yielded a thin, delicate crust and an interior that tasted like a cross between a dense brownie and chocolate mousse. It’s the version that consistently gave me the best results and is what I’ve written up here in this post.
Step by Step Directions
(For the full recipe, scroll down to the recipe card below)
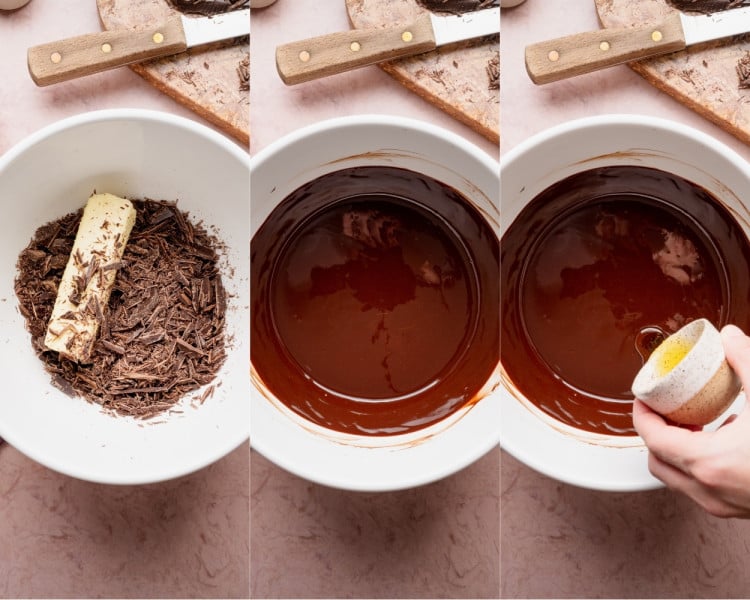
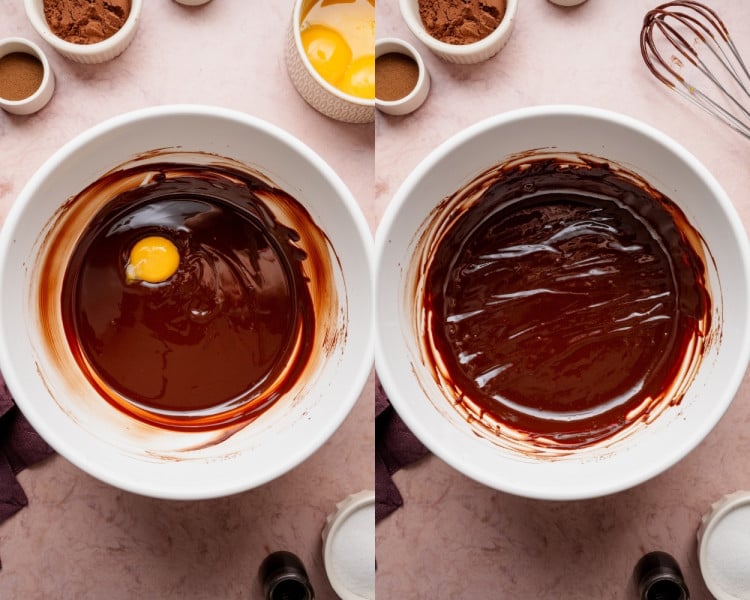
Melt the Chocolate
Melt the chocolate and butter together until completely smooth, then stir in the olive oil. Let the mixture cool slightly so it doesn’t scramble the eggs when they’re added later.
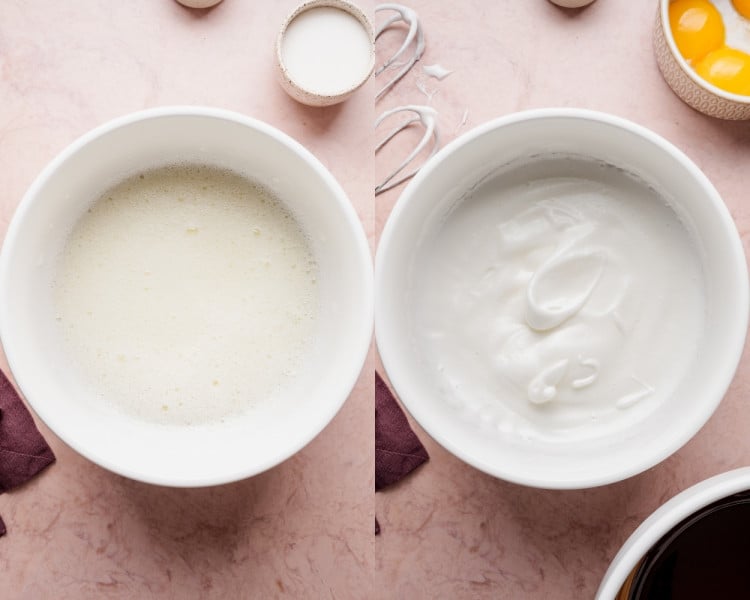
Whip the Egg Whites
Beat the egg whites until foamy, then slowly add the sugar and continue whipping until soft, glossy peaks form. The egg whites should hold their shape but still look smooth and pillowy, not stiff or dry.
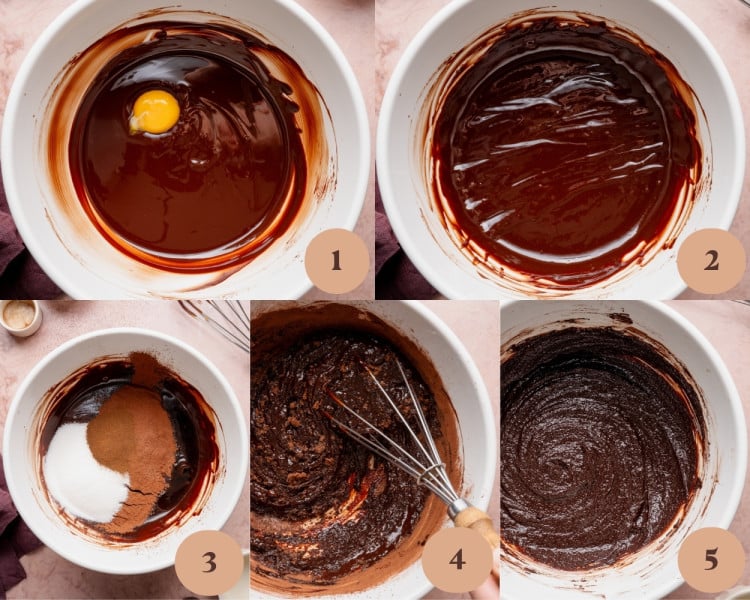
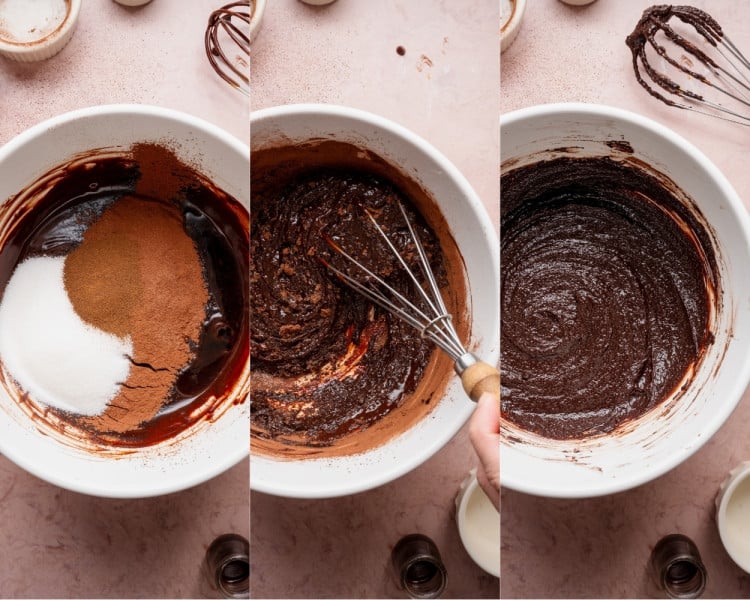
Build the Chocolate Batter
Whisk the egg yolks into the cooled chocolate mixture one at a time, then add the cocoa powder, sugar, vanilla, salt, and espresso (if using). The batter will look thick and slightly grainy at first, which is completely normal.
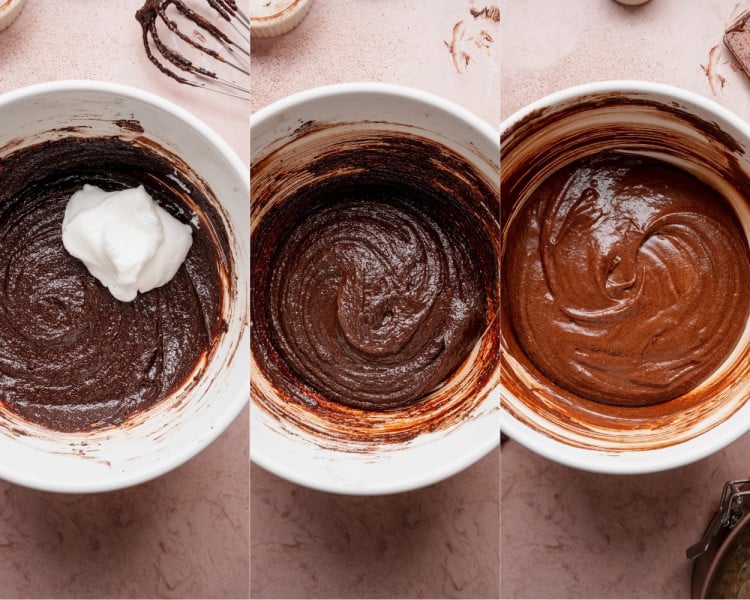
Fold in the Egg Whites
Start by stirring a small scoop of whipped egg whites into the batter to loosen it, then gently fold in the remaining whites in two to three additions. Use slow, gentle motions to keep as much air in the batter as possible.
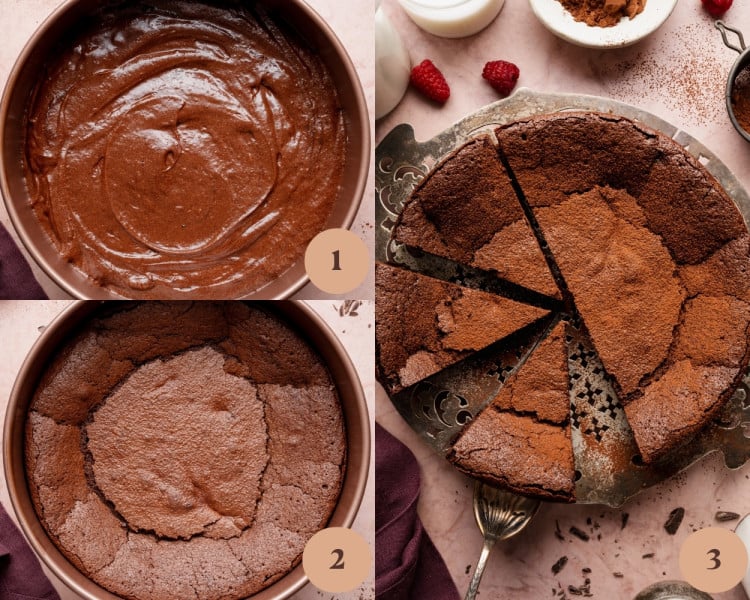
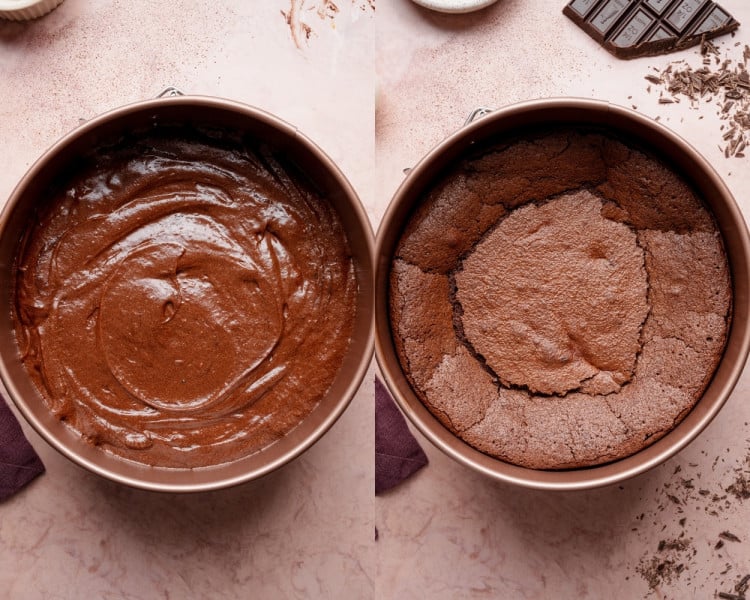
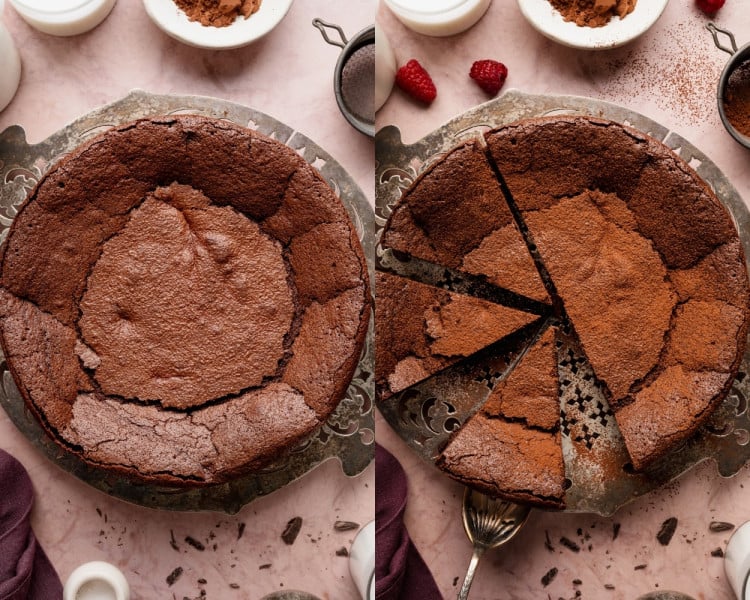
Bake, Cool, Serve
Bake until the edges are set and the center is just slightly soft, then let the cake cool completely — it will sink as it cools and that’s exactly what you want. Chill before slicing for the best texture, then serve with cocoa powder, whipped cream, or fresh berries.
Expert Tips
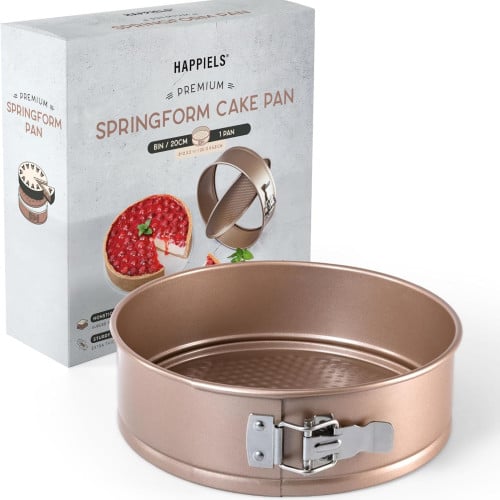
- Springform Pan: I recommend using a springform pan because the cake is delicate and dense so inverting can be tricky. When I used my 8-inch round cake pan, it was more challenging to invert. So I highly recommend an 8-inch springform pan instead.
- Use a High Quality Chocolate: It’s obvious that chocolate is the main flavor in this cake. Use a high-quality bittersweet or semisweet chocolate bar (not chocolate chips) for the smoothest melt and richest flavor. It makes a difference, I promise!
- Let Melted Chocolate Cool: If the melted chocolate mixture is too warm when you add the egg yolks, it can scramble them. Let it cool just until warm to the touch before whisking in the yolks.
- Proper Whip Time for Egg Whites: Do not over-whip the egg whites! You’re looking for soft to medium peaks that are glossy and smooth. If the egg whites are whipped too stiff or dry, they will be harder to fold in and can mess up the texture of the cake.
- Fold Gently: When folding the whipped egg whites into the chocolate batter, use slow, gentle motions and stop as soon as no white streaks remain. Overmixing will deflate the batter and affect the final texture.
- Bake Time: Bake until just set. The edges should be set, but the center should still look slightly soft. Overbaking will dry out the cake and take away that fudgy, melt-in-your-mouth texture.
- Expect the Cake to Sink: This cake will puff up in the oven and then sink as it cools. That’s normal and exactly what should happen with a Flourless Chocolate Cake. The sunken center is part of its signature look and texture, so don’t panic!
- Chill Time: Do not rush the chill time for this cake! Chilling is what gives you those clean, pretty slices and also transforms the texture into the desired texture. This is what I found:
- Warm, out of the oven → very soft, almost custard-like
- Room temperature → fudgy and sliceable
- Chilled in the fridge → dense, truffle-like classic Flourless Chocolate Cake that melts on your tongue
- Removing the Cake From Pan: Once the cake has cooled and chilled, run a thin knife around the edge of the pan before opening the springform. This helps release the cake cleanly and prevents cracks along the sides.
Storage / Freezing
- To store: Once the cake is fully cooled and chilled, cover it tightly and store it in the refrigerator for up to 4–5 days. Flourless Chocolate Cake actually improves in texture after chilling, becoming denser and more truffle-like over time.
- To freeze (whole cake): After the cake has cooled and chilled completely, wrap it tightly in plastic wrap, then a layer of foil. Freeze for up to 2 months. Thaw overnight in the refrigerator before serving.
- To freeze (slices): For easy make-ahead portions, slice the cake once chilled, then wrap individual slices tightly in plastic wrap and place in a freezer-safe container. Freeze for up to 2 months. Thaw slices in the refrigerator or at room temperature.
- Before serving: For the best flavor and texture, let the cake or slices sit at room temperature for about 15 minutes before serving. This softens the texture slightly and brings out the chocolate flavor.
FAQs
Can I make this cake ahead of time?
Yes. This cake is actually best made ahead since it needs time to chill. You can make it 1–2 days in advance and store it covered in the refrigerator until ready to serve.
Why did my cake sink in the middle?
No need to be disappointed… This is completely normal for flourless chocolate cake! The cake puffs up while baking and then sinks as it cools, creating that dense, fudgy interior it’s known for.
Can I bake this cake in a regular cake pan?
You can, but a springform pan is strongly recommended. This cake is delicate and dense, and inverting it from a regular pan can be tricky. A springform pan makes removal much easier and helps keep the cake intact. Trust me, I’m speaking from experience 😉
Will this cake taste like coffee if I use the espresso powder?
Nope! Espresso powder enhances and deepens the chocolate flavor without making the cake taste like coffee. It’s optional, but I highly recommend it.
Is this cake gluten-free?
You betcha! Since the recipe doesn’t use flour, it is naturally gluten-free. Just be sure to check that your chocolate and cocoa powder are certified gluten-free (if your allergy is severe).

Monthly Baking Challenge
This recipe was featured as the Kroll’s Korner Monthly Baking Challenge recipe in February 2026. For information on the current Monthly Baking Challenge recipe, click below!
shop this post
 Buy Now →
  Buy Now →
 More Decadent Date Night Desserts

Before You Begin! If you make this, please leave a review and rating letting us know how you liked this recipe! This helps our business thrive & continue providing free recipes.
Flourless Chocolate Cake
Ingredients
- 6 oz. high-quality bittersweet or semisweet chocolate (chopped)
- 1/2 cup unsalted butter
- 1 Tbsp. olive oil
- 3/4 cup granulated sugar
- 1/4 cup Dutch-processed cocoa powder (sifted)
- 2 tsp. espresso powder (optional, but highly recommend)
- 1 tsp vanilla extract
- 3/4 tsp. kosher salt (or ½ tsp fine salt)
- 4 large eggs, seperated (room temperature* see note below)
- additional cocoa powder (for garnish)
Optional Garnish Ideas
- whipped cream
- fresh berries
- flaky sea salt
Last step! If you make this, please leave a review and rating letting us know how you liked this recipe! This helps our business thrive & continue providing free recipes.
Instructions
- Preheat and prep the pan: Preheat oven to 325°F. Grease the bottom an 8 inch springform pan and then line the bottom with parchment and grease the parchment as well. Don’t butter or grease the sides of the pan, it will prevent the cake from rising properly.
- Melt chocolate & butter: In a heatproof bowl over gently simmering water (or microwave in short 20-30 second bursts, stirring in between), melt chocolate and butter together until smooth. Then stir in olive oil. Set aside and let cool slightly. (I usually do the microwave method!)6 oz. high-quality bittersweet or semisweet chocolate, 1/2 cup unsalted butter, 1 Tbsp. olive oil

- Whip egg whites: While the chocolate cools, you can whip the egg whites. In a clean bowl using a hand mixer, or in a bowl of a stand mixer fitted with the whisk attachment, beat the egg whites until foamy and have some structure. Then, gradually and slowly, add ¼ cup sugar and beat to soft-medium peaks. Set aside.Important note: Be sure there is no yolk at all in the egg whites or it won’t beat properly. You’re looking for glossy egg whites (not stiff peaks, very important to not beat them too long).4 large eggs, seperated, ¼ cup granulated sugar
- Add egg yolks: To the chocolate mixture, whisk in egg yolks one at a time until smooth.4 large eggs, seperated
- Add dry ingredients: Whisk in cocoa powder, vanilla, salt, espresso (if using), and remaining ½ cup sugar. Mixture will get a little grainy from the sugar at this step but it’s ok!½ cup granulated sugar, 1/4 cup Dutch-processed cocoa powder, 1 tsp vanilla extract, 3/4 tsp. kosher salt, 2 tsp. espresso powder
- Fold in egg whites gently: Stir about ⅓ of the whipped egg whites mixture into the chocolate mixture to loosen it. Gently fold in the remaining whites in 2-3 additions, continuing to stir very gently and not overmix. (Overmixing can deflate the batter.)
- Bake: Pour the batter into prepared pan and smooth the top. Bake for 40-50 minutes, until the edges are set and the center is just slightly soft. Start Timer It will appear very puffed and a toothpick inserted in the center can have a few moist crumbs but not appear overly wet or gooey. Careful not to over bake.
- Cool completely: Cool in the pan completely, about 45 minutes – 1 hour. It will sink into itself and that’s supposed to happen. Start Timer
- Chill: Chilling helps turn the cake into that classic cake that melts smoothly on the palate, and also is helpful for clean cuts. Chill for ~2-6 hours or overnight. Start Timer This is not optional in my opinion so this really makes for a great make ahead dessert option 😊
- Serve: When ready to serve allow to come to room temp for about 15 minutes. Start Timer Run a knife around edges and release from the springform pan. You can garnish the top of the cake with cocoa, serve with raspberries, flaky sea salt, whipped cream, powdered sugar, etc. Enjoy!
Notes
- *Tip for the eggs: You want the eggs to be room temperature when you are adding them in the recipe steps, but I found it’s easiest to separate the yolks from the whites when the eggs are still cold.
- Storage: Store tightly covered in the refrigerator for up to 4–5 days. The texture improves as it chills.
- Freezing: Freeze the whole cake or individual slices for up to 2 months. Thaw overnight in the refrigerator, then bring to room temperature before serving.
Nutrition Information
Nutritional information is provided as a courtesy and is automatically calculated. It should only be construed as an estimate rather than a guarantee. Ingredients can vary and Kroll’s Korner can’t make any guarantees to the accuracy of this information.
📸 Photography by Creating Kaitlin

This is delicious! It’s like a giant fudgey brownie. Even the top is nice and flaky! I will definitely make this again.
Thank you so much! 🙂
Made it into a 4 inch to share with 2 people and it was the perfect valentines dessert
How cute!! Thank you for making! 🙂
This cake is so easy to make and so decadent and fudgy! So delicious and just a perfect chocolate treat!
Yummm! I’m so happy you enjoyed this one, Adrienne! 🫶🏻
We really enjoyed this cake! This is an especially good option if you are avoiding gluten, but it’s still delicious if you’re not. I didn’t have a springform pan so I lined a regular 8-inch pan with parchment and it worked great! Definitely add the espresso, it added a nice depth to the flavor.
So glad the 8 inch pan worked well for you! It looks great 🙂 thank you!
I love this cake. I have been trying to eat more gluten free foods so this was fun to make. It was easy and delicious ♥️
So happy you liked this one! Thank you 🙂 looks great!!
Perfect for a family dessert!
Beautiful! thank you!
This was very easy to make. I served with dollop of whippped cream. I baked the minimum time but think I overbakec a little so check a couple of minutes early. Still fudgy and delicious.
So glad you enjoyed it! What kind of pan did you use? sorry about the bake time! thank you for making!
Made this for Valentine’s Day with my daughters yesterday and it was amazing! The best chocolate flavor.
Looks great! Thank you so much for making 🙂
This was such a fun and easy recipe to try! I only had a 10 inch spring pan instead of an 8 inch, so mine came out a bit thinner, but it was just as delicious! I think I actually prefer it thinner because it is as rich and fudgy as it looks! I paired it with some fresh whipped cream and strawberries. It was absolutely delightful!
It looks beautiful! Thanks so much for making Angie 🙂
I made this for my family’s Valentine’s Day dessert and it was well loved! I’d even say better than a brownie if that’s even possible! I made some simple whipped cream with it and dusted it with powdered sugar.
Looks so pretty Harley!! Thank you! 🙂