Our Favorite Sheet Pan Pizza
This post may contain affiliate links. Please read our disclosure policy.
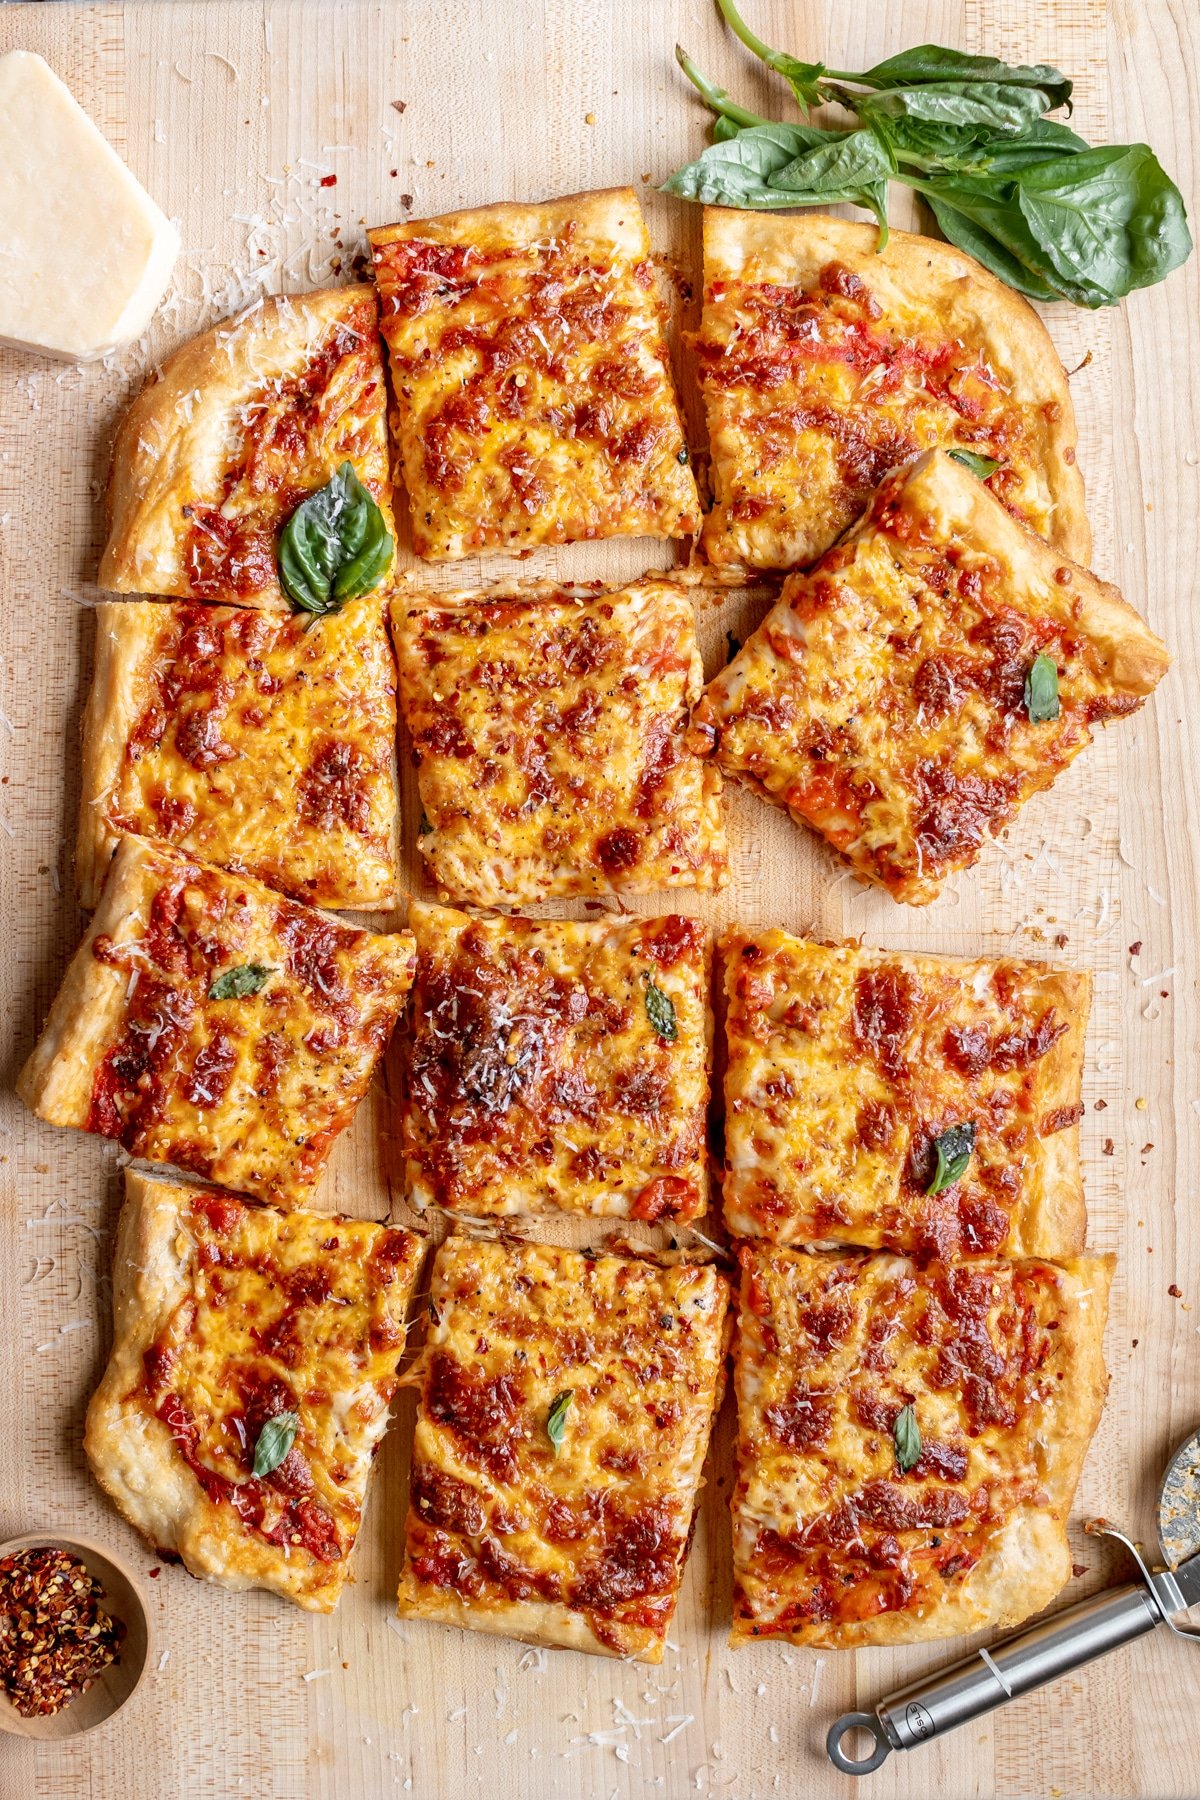
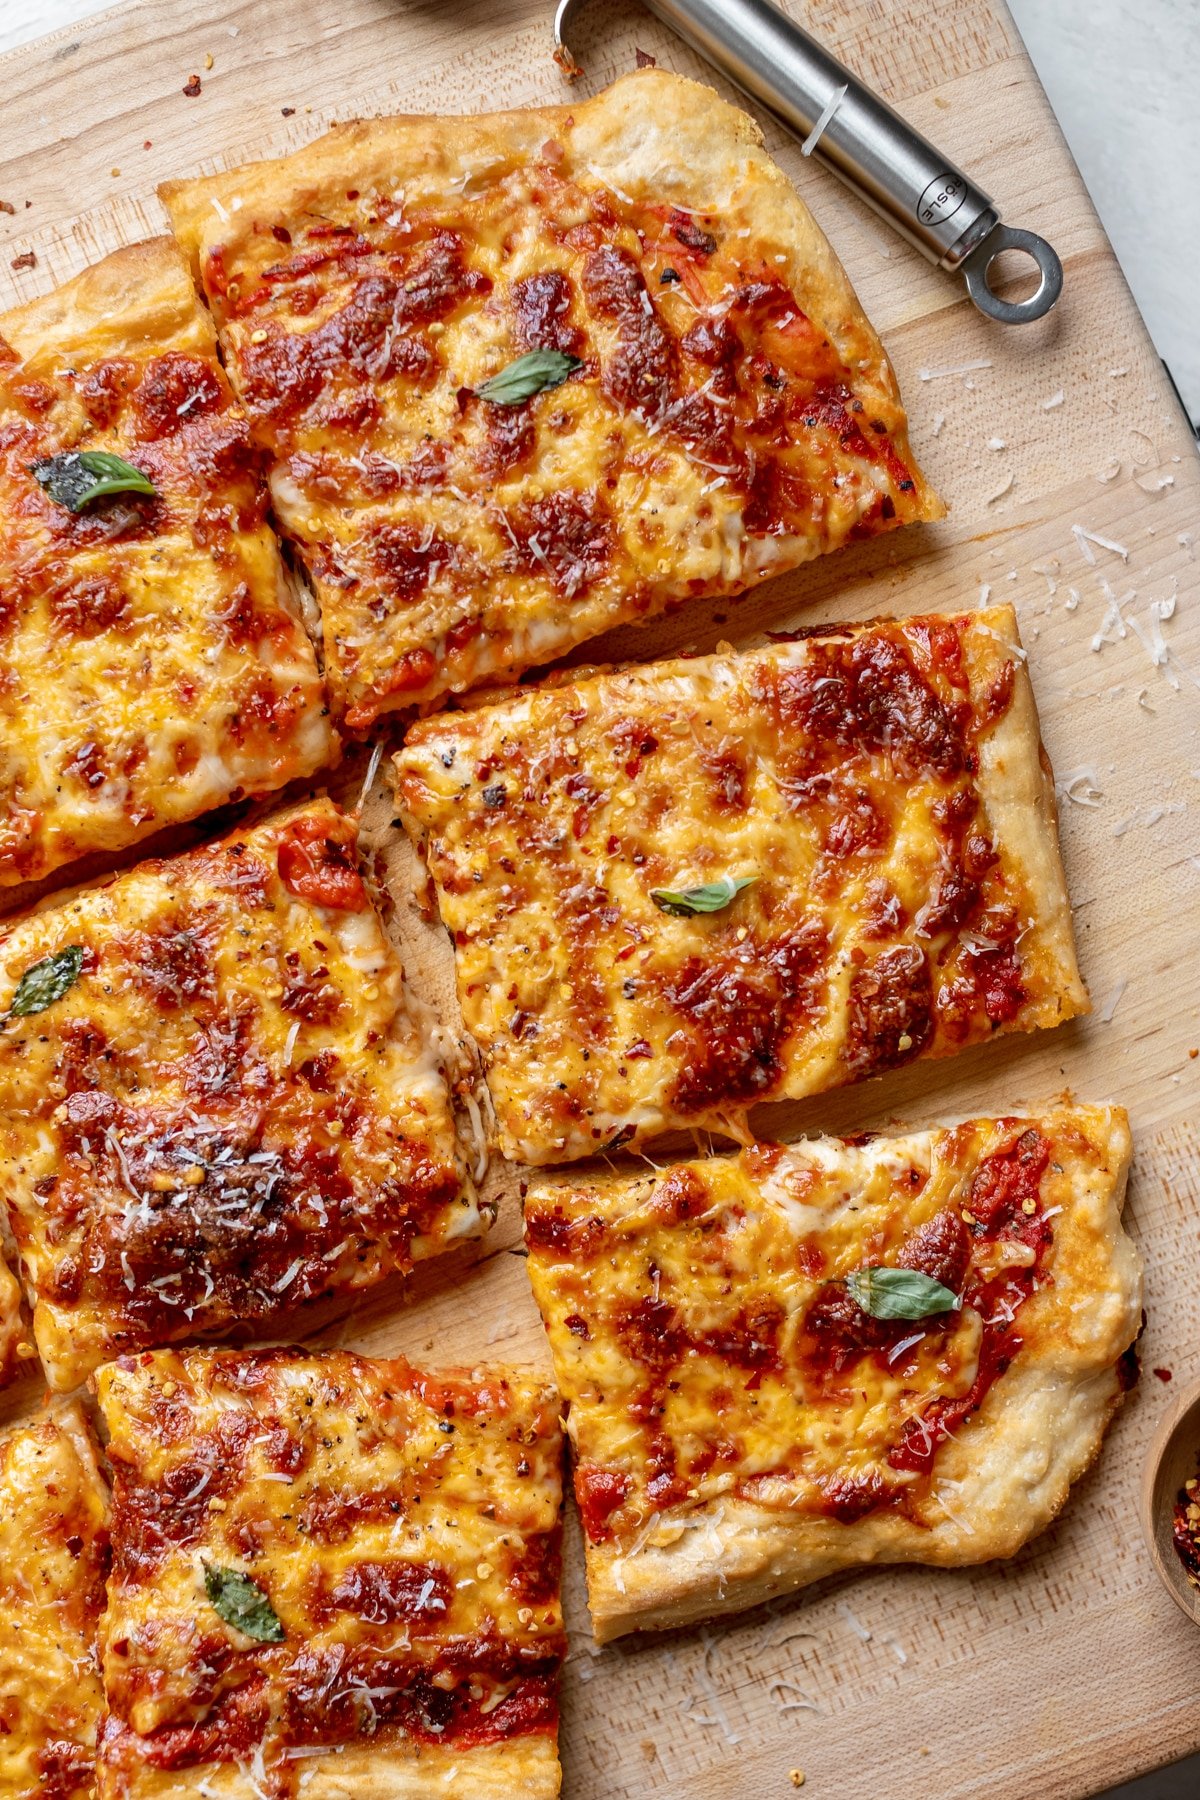
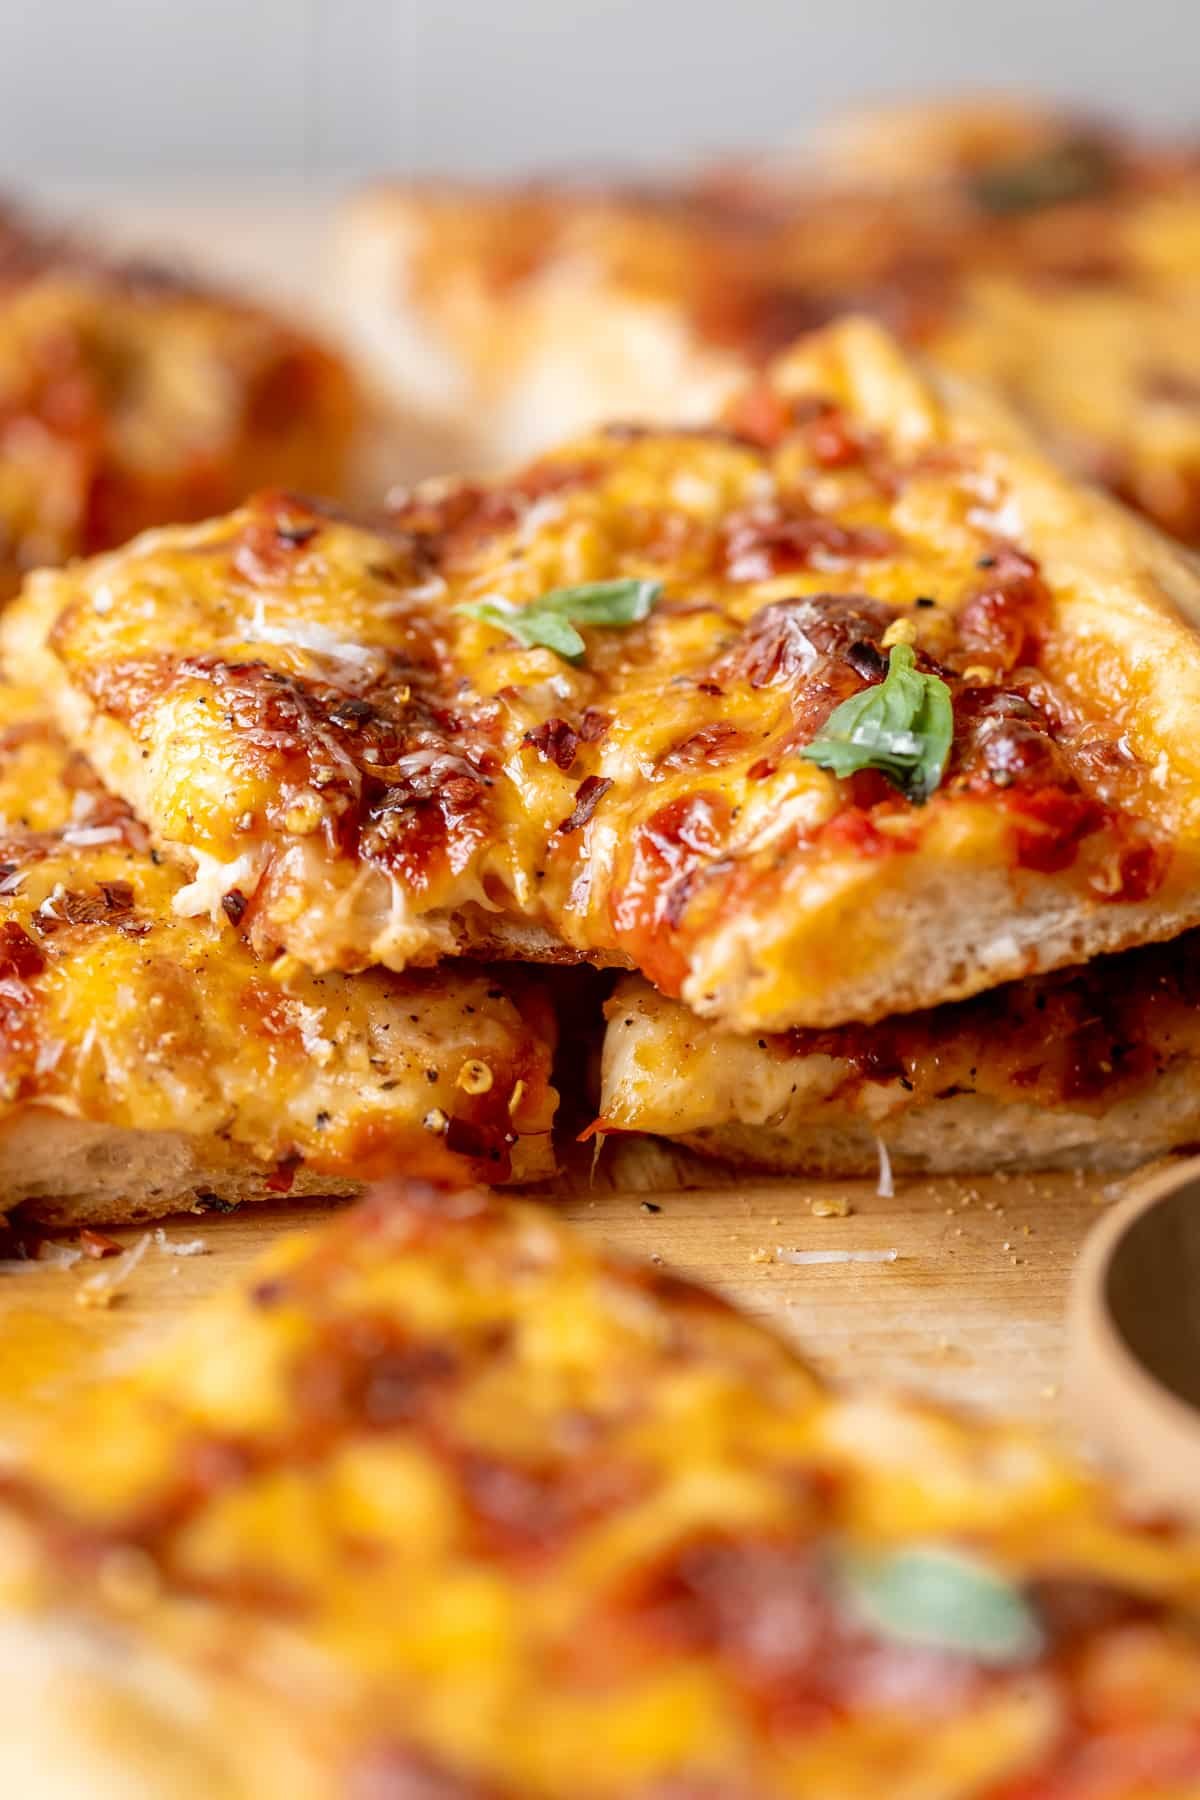
It’s always about the crust and if you’re a crust lover you’ll love my Sheet Pan Pizza.
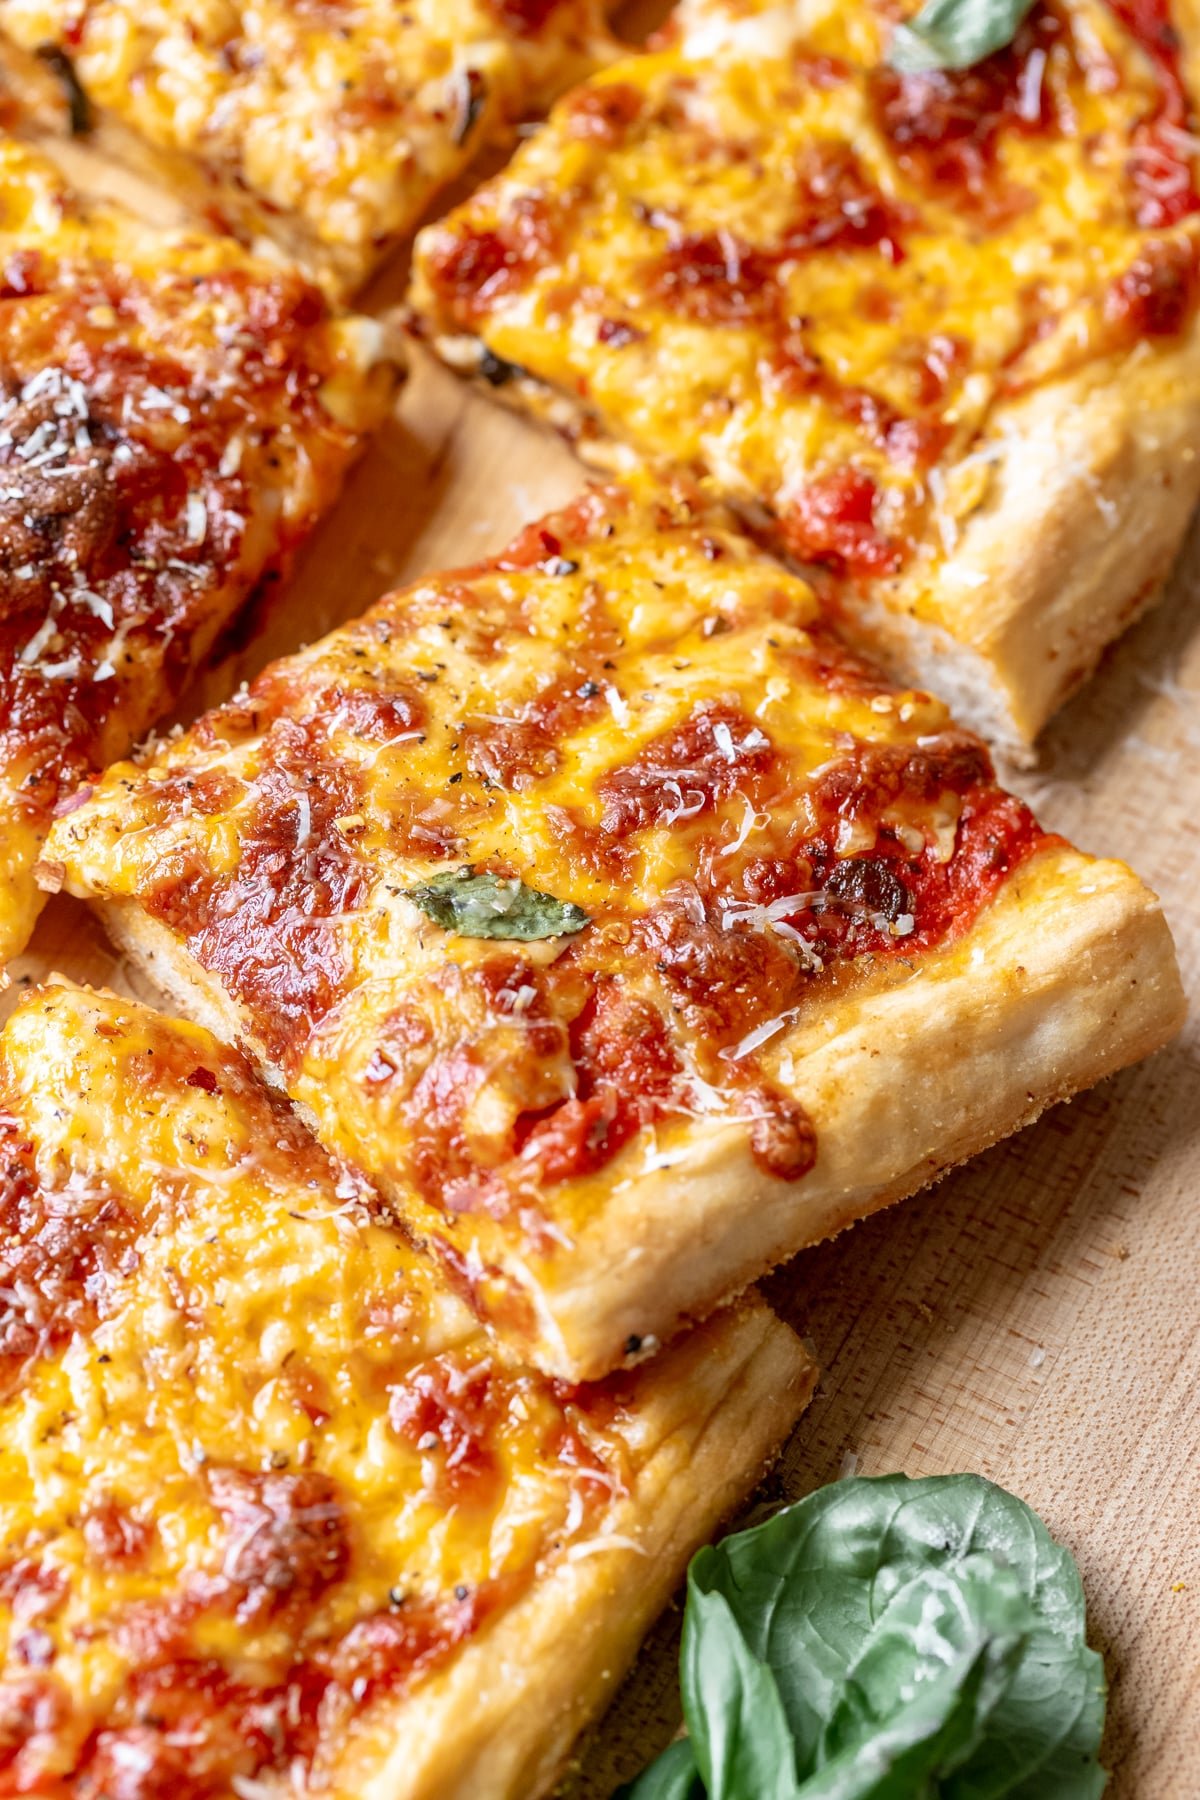
Particularly if you love a thick, chewy, slightly crisp crust with the perfect golden crunch. I love pizza and with 30 billion pizza’s a year being eaten, there is going to be excitement in your house when you put this sheet pan pizza on your table.
And if you’re wanting to go all out and make it a pasta and pizza night, try my Sausage Pasta, Shrimp Scampi, or my Spaghetti Carbonara.
Growing up my family definitely helped with that billion mark. We dined at our favorite pizza & pasta restaurant on just about a weekly basis. We also had our favorite pizza place we went to after sports games, too. Now that I am married, my husband and I still go every Friday night to the same original family owned pizza and pasta restaurant I went to growing up.
All of that to say, I have done my fair share of contributing to that 30 billion number! And now, with my Sheet Pan Pizza, we just might be eating pizza twice a week!
This recipe takes a little bit of time, since the crust is made from scratch, so you might want to make this Sheet Pan Pizza on a Saturday or Sunday when you have a little more time in the kitchen.
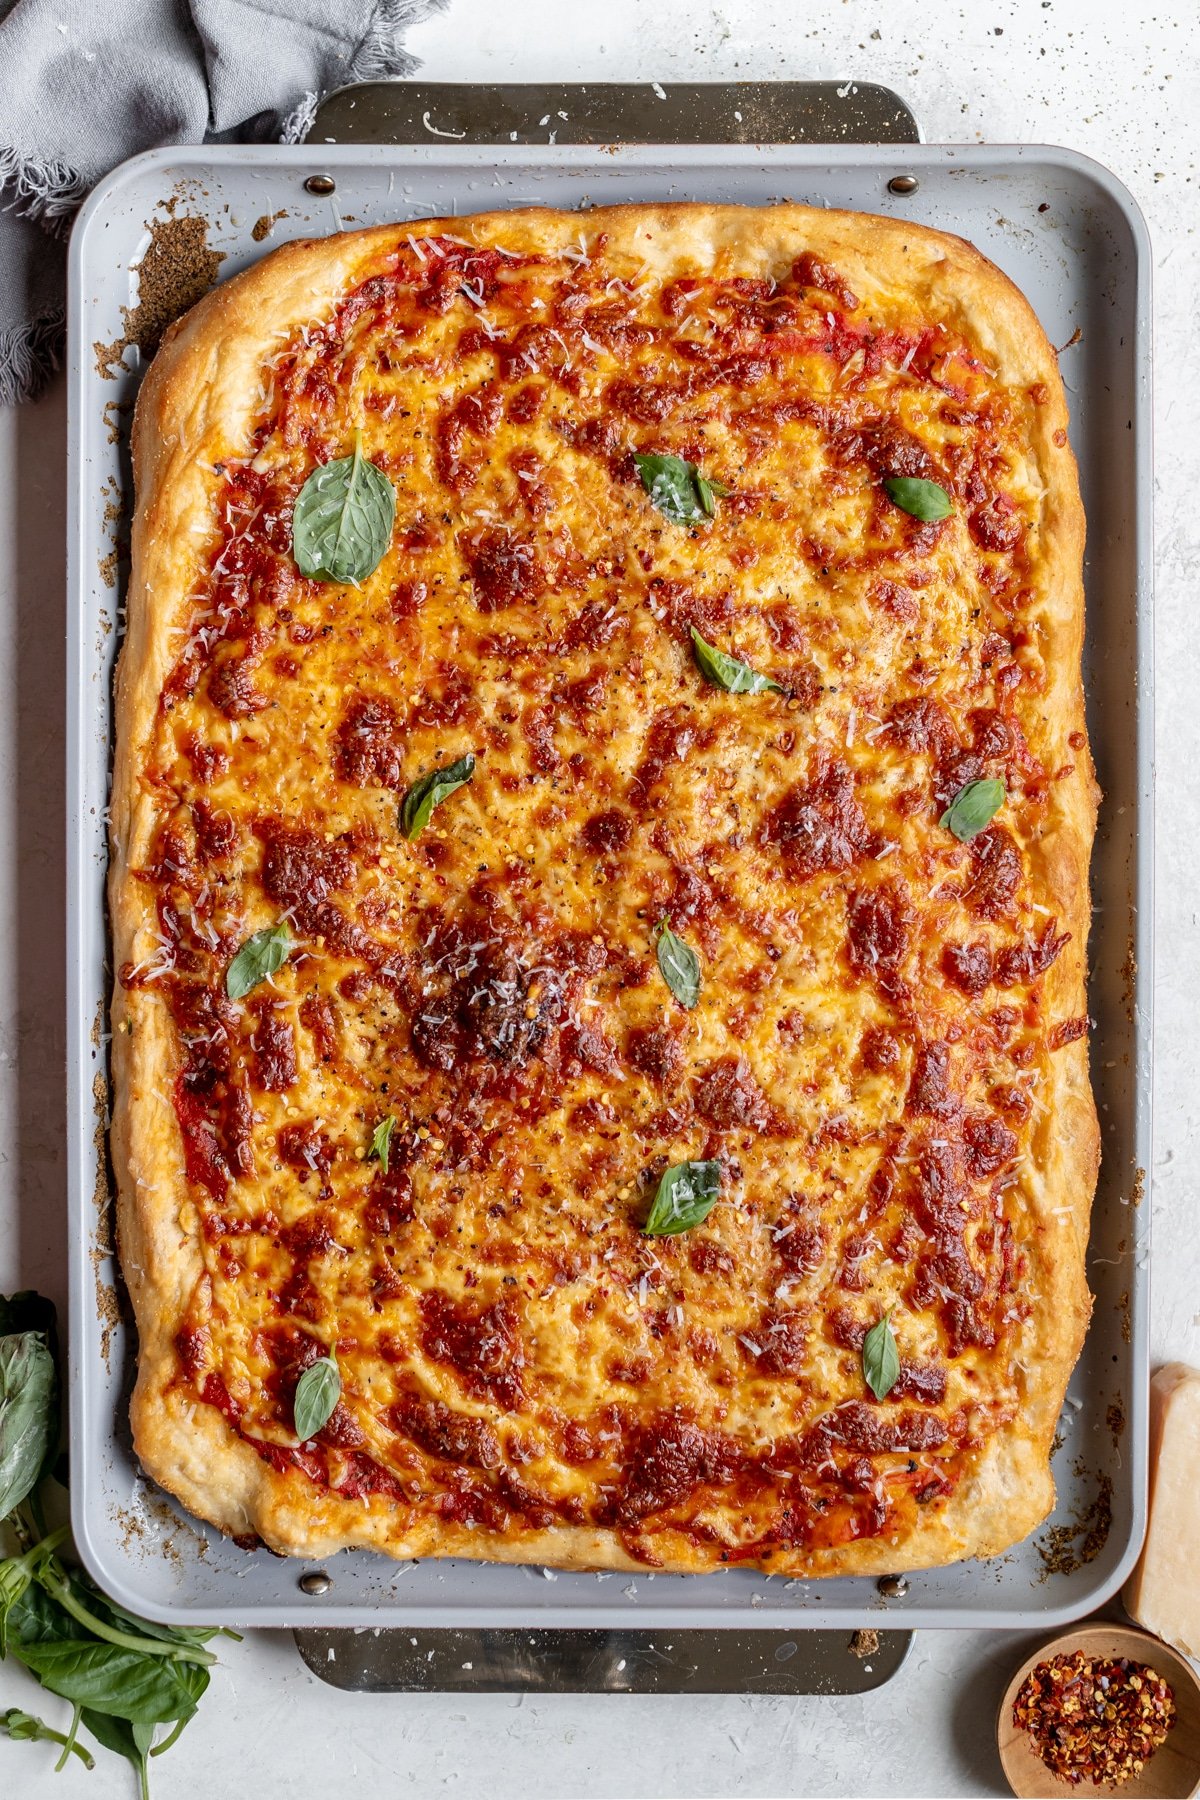
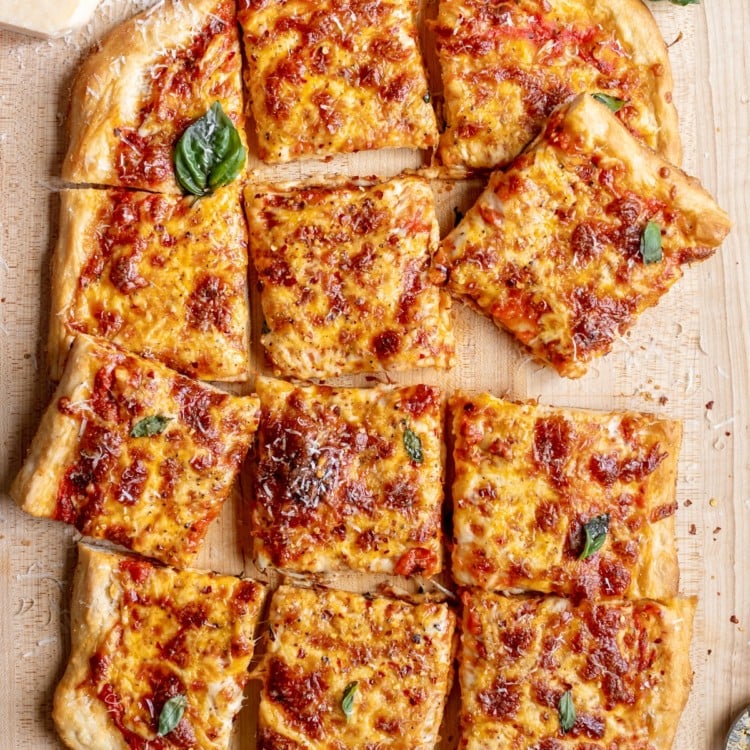
After the third time the dough rests, top it with just the right amount of pizza sauce and then pile on a combo of provolone, mozzarella and parmesan cheese, load up your favorite toppings, and pop the sheet pan in the oven. In just twenty-five minutes you will have the most golden brown, masterfully crafted pie to serve up to your family and friends!
Reasons Why You Will Love My Sheet Pan Pizza
- All you need is a sheet pan, no pizza stone needed.
- This Sheet Pan Pizza bakes right in the oven, so no fancy pizza makers necessary.
- It’s versatile! This is a meal that caters to every taste, from meat lover to vegetarian, so feel free be creative with your toppings.
- Sheet Pan Pizza is perfect for movie night with the family or feeding a hungry group of teenagers. It is the perfect meal for a crowd!
- What’s not to love about PIZZA?! ?
Ingredient Notes
- Bread flour: I love using bread flour when making homemade pizza dough because I find it creates a thick, soft, fluffy pizza dough but with crispy edges. It helps made each bite of this pizza chewy on the inside but with the perfect crisp crust on the outside. You can use all purpose flour if you don’t have any bread flour, just note you’ll have a thinner crust that what you see in the photos here.
- Active dry yeast: I have not tested this recipe with fast acting yeast or instant yeast. The warm water you’ll add will activate the yeast.
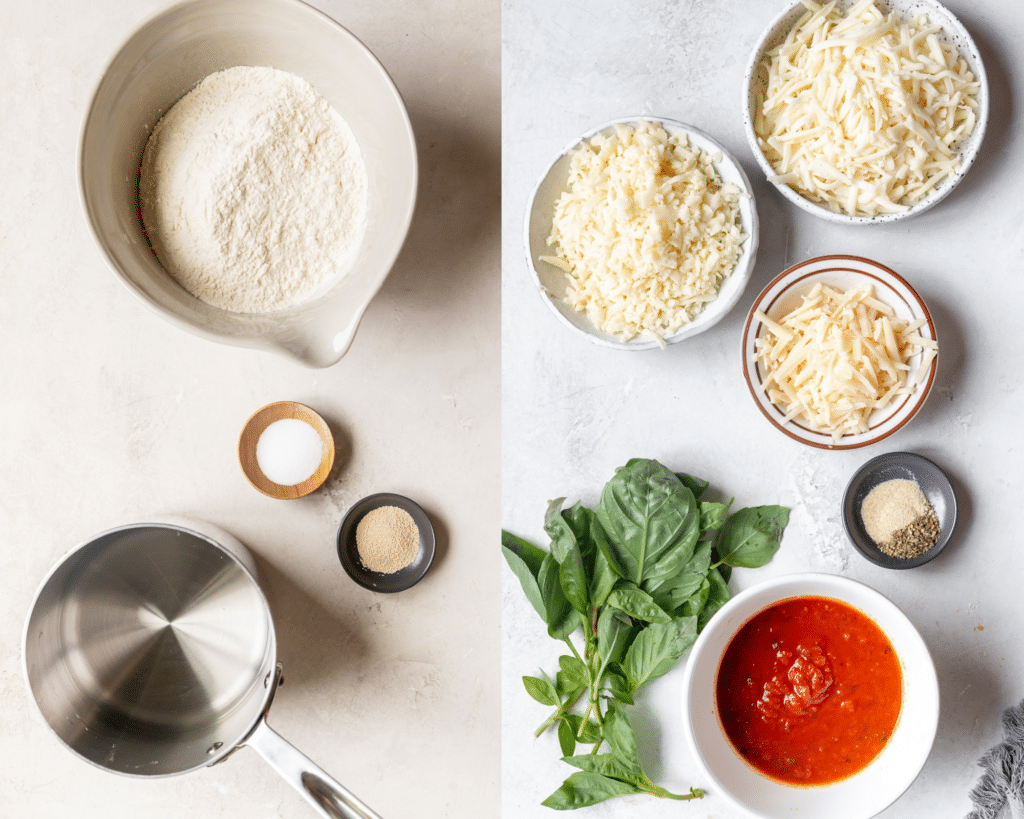
- Cheese: I love using a combination of mozzarella, provolone and Parmesan cheese to top on my cheese pizza. Feel free to use whatever cheese(s) you love best and don’t be shy on how much you add.
- Pizza sauce: use your favorite jarred pizza sauce or better yet if you have a favorite homemade sauce go ahead and use that! Rao’s has a great sauce we use and love.
- Corn meal: Using cornmeal on the bottom of your pizza dough is a love it or hate it thing. I love it. You just need a little to help the pizza not stick to the bottom of the pan. However, you can always just use the olive oil on the pan and it won’t stick.
- Toppings: I kept this recipe simple and just used cheese and fresh basil. Add all of your favorite pizza toppings you like, have fun with it!
Step by Step Directions
- Make the pizza dough (more detailed instructions on this below)
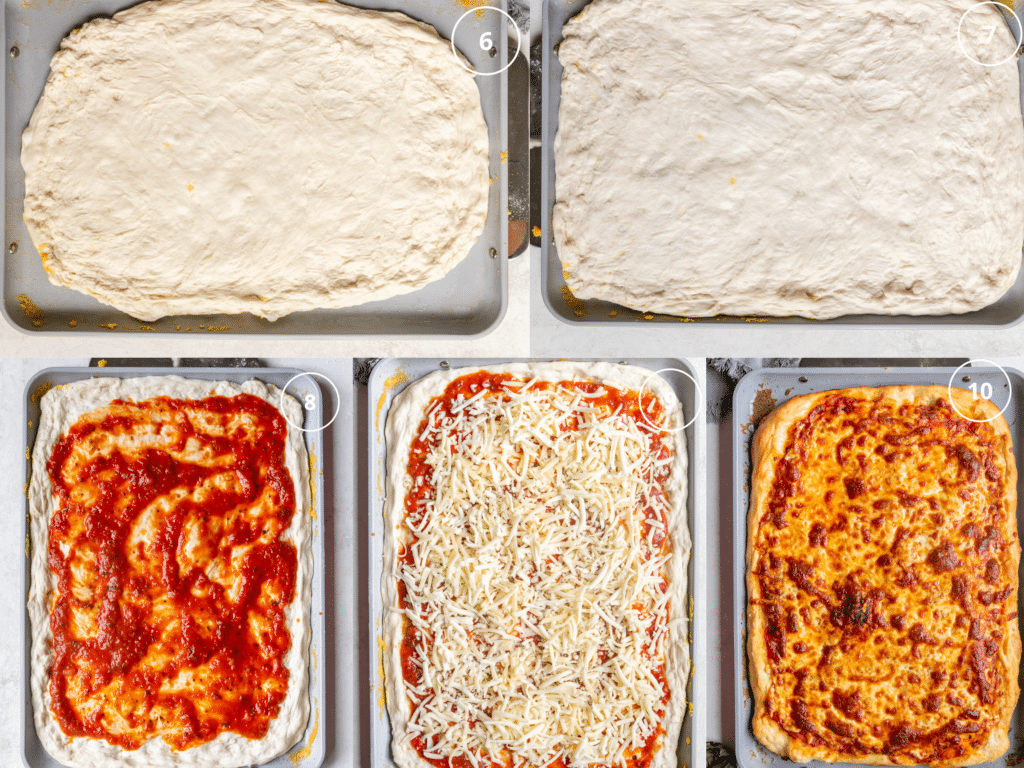
- Stretch the dough out on your sheet pan all the way to the edges.
- Poke holes in the pizza dough (this is referred to as “docking”)
- Spread the sauce on top, followed by the seasonings and cheese.
- Bake ~20-25 minutes.
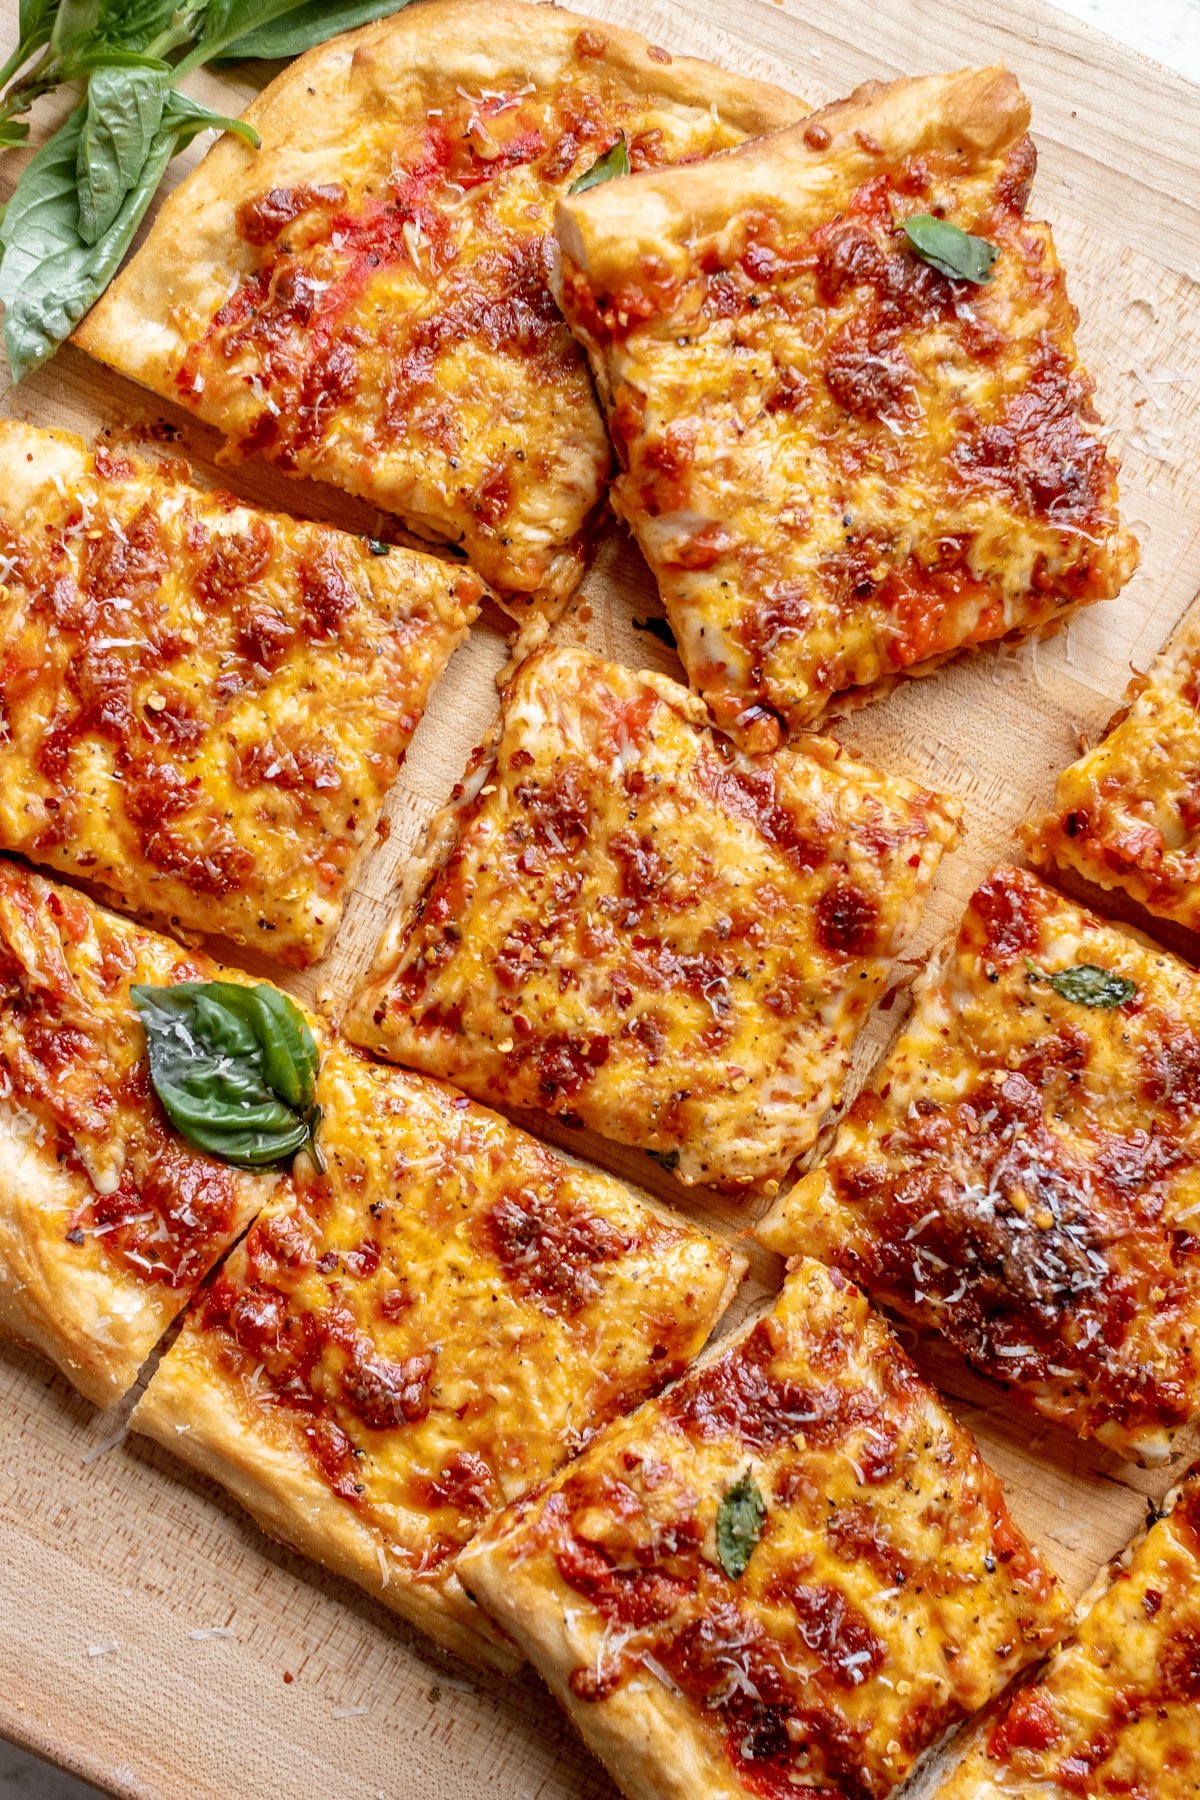
- Garnish with fresh basil, black pepper, red pepper chili flakes, Parmesan, etc.
Tips and Variations
- Before brushing on the sauce, brush the crust with olive oil. The olive oil seals the dough so that it prevents excess moisture from seeping into the crust. Plus the olive oil gives the crust additional flavor.
- To prevent uneven rising, and over rising of the crust, poke holes in the crust with a fork. This is called docking. The reason you “dock the dough” is to prevent air bubbles from developing during the baking process.
- To give your pizza dough extra flavor and that extra crunch we love, simply dust the sheet pan lightly with corn meal. Corse or medium grind cornmeal is fine.
- Shred cheese from a cheese block as opposed to using the pre-shredded stuff. Grating the cheese yourself will ensure the cheese melts better and will give you those cheese pulls we all know and love!
How do I make homemade pizza dough?
Pizza dough is actually really simple to make and only requires 4 ingredients. All you need is some time, about 3 1/2 hours for this dough to come together.
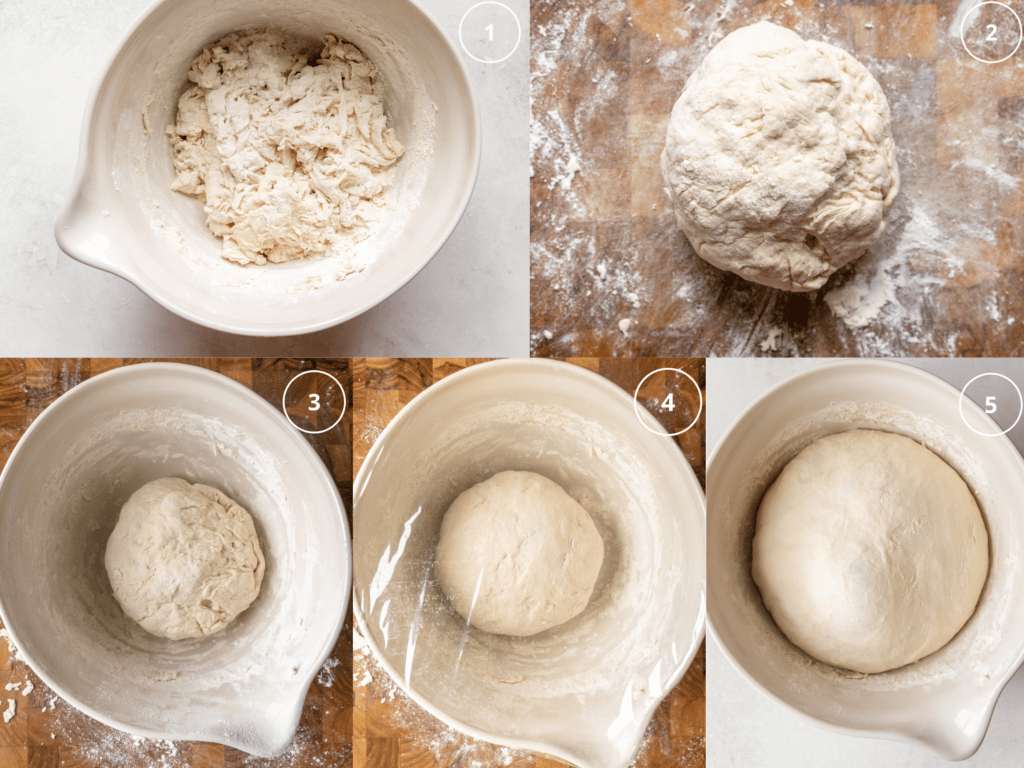
- Measure out all of your ingredients so everything is ready to go.
- Combine the bread flour, salt and yeast together.
- Add the warm water and mix until combined.
- Lightly dust a work surface and transfer the dough to the surface.
- Use a bench scraper to form dough together, knead for 2-3 minutes.
- Transfer to a bowl, cover with a towel or plastic wrap and let rest for 30 minutes. (Pro tip: pop it in the oven, with the oven off, but with the light on to give the dough just a little bit of heat).
- After 30 minutes, give the dough some more love and knead dough again for 2 minutes. Place it back in bowl, cover with plastic wrap and let proof for 2 hours, it will just about double in size after this point and be looking really good!
- Now you can stretch the dough out on baking sheet that’s greased with olive oil and a sprinkle of cornmeal. Press the dough all the way to the corners and let rest on the baking sheet for 1-2 more hours.
- The dough might be springing back at you because the gluten is still pretty strong, and that’s ok. After it rests for this last hour, you’ll be able to stretch it all the way to the sides of the sheet pan. Letting it rest allows the gluten to relax and proof one last time.
FAQ
Can I use store bought pizza dough?
Yes you can. Although, you will not get the same flavor and texture with a store bought dough, but it will save you time! I would use 2 lbs. of dough for a thicker crust. You most likely will need the dough to let rest on the counter for an hour. When you stretch it on the sheet pan, and the dough bounces back, it means it needs more time to rest. If you use a store bought dough, let me know how it turned out in the comments below!
Do I have to grease the sheet pan?
Yes you do. It will prevent the dough from sticking to the sheet pan. Just a little olive oil and cornmeal does the trick!
How long can I freeze homemade sheet pan pizza?
As long as you wrap it tightly, and seal it in an air time container you can freeze the cooked and cooled pizza for 1 to 2 months.
At what temperature can I reheat cooked pizza?
Reheat in an oven at 375°F, or in a toaster oven.
shop this post
 Buy Now →
  Buy Now →
 Before You Begin! If you make this, please leave a review and rating letting us know how you liked this recipe! This helps our business thrive & continue providing free recipes.
Our Favorite Sheet Pan Pizza
Ingredients
For the homemade pizza dough
- 4 cups bread flour
- 1 Tbsp. fine sea salt
- 1 tsp. active dry yeast
- 1 3/4 cup warm water (105°F)
For the pizza
- olive oil for the crust and the pan
- 1 Tbsp. cornmeal
- 14 oz. jar store bought pizza sauce
- 1/2 tsp. dried oregano
- 1/2 tsp. garlic powder
- 2 cups mozzarella cheese, shredded
- 1 cup provolone cheese, shredded
- 1/2 cup Parmesan cheese, shredded, plus more for serving
- Toppings: use your favorites! Pepperoni, sausage, mushrooms, garlic, tomatoes, prosciutto, bell peppers, jalapenos, etc.
Last step! If you make this, please leave a review and rating letting us know how you liked this recipe! This helps our business thrive & continue providing free recipes.
Instructions
- Make the crust first: Combine the bread flour, salt and yeast together in a medium sized mixing bowl.4 cups bread flour, 1 Tbsp. fine sea salt, 1 tsp. active dry yeast
- Add the warm water (105°F) and mix until combined, the dough will be shaggy. Lightly dust a clean work surface and transfer the dough to the surface.1 3/4 cup warm water (105°F)
- Use a bench scraper to form dough together, kneading for 2-3 minutes. Transfer to a bowl, cover with a towel or plastic wrap and let rest for 30 minutes. (Pro tip: pop it in the oven, with the oven off, but with the light on to give the dough just a little bit of heat).
- After 30 minutes, give the dough some more love and knead the dough again for 2 minutes. Place it back in the bowl, cover with plastic wrap and let proof for 2 hours. It will just about double in size after this point and be looking really good!
- Grab a baking sheet (This recipe uses a standard half-sheet pan, 18×13. I have not tested this recipe using other-sized pans). Brush with a light coating of olive oil and a sprinkle of cornmeal. Transfer the dough to the baking sheet and begin to flatten and stretch the dough to the sides of the sheet pan. Cover with plastic wrap and allow to rest for 1 more hour. The dough might be springing back at you because the gluten is still pretty strong, and that's ok. After it rests for this last hour, you'll be able to stretch it all the way to the sides of the sheet pan. Letting it rest allows the gluten to relax and proof one last time.olive oil for the crust and the pan, 1 Tbsp. cornmeal
- Preheat the oven to 450°F.
- When ready to make pizza, press the dough to the corners of the pan and pinch the edges of the dough to form a crust. Poke holes all around the pizza dough with a fork. Spread the pizza sauce on top, sprinkle with oregano and garlic powder. Then, top with cheeses. Brush the crust with olive oil.14 oz. jar store bought pizza sauce, 1/2 tsp. dried oregano, 1/2 tsp. garlic powder, 2 cups mozzarella cheese, shredded, 1 cup provolone cheese, shredded, 1/2 cup Parmesan cheese, shredded, plus more for serving, Toppings: use your favorites! Pepperoni, sausage, mushrooms, garlic, tomatoes, prosciutto, bell peppers, jalapenos, etc.
- Bake for 20-25 minutes, rotating the pan half way through baking.
- Remove from the oven and let cool for a couple minutes before slicing. Add fresh basil, more Parmesan cheese, chili flakes, etc. and enjoy!
Notes
- Store bought pizza dough: I haven’t tested this with a store bought dough, but it can be done. I would use 2 lbs. of dough for a thicker crust. You most likely will need the dough to let rest on the counter for an hour, or whatever the package directs you to do. When you stretch it on the sheet pan, and the dough bounces back, it means it needs more time to rest. If you use a store bought dough, let me know how it turned out in the comments below!
- Shred cheeses from a cheese block as opposed to using the pre-shredded stuff. Grating the cheese yourself will ensure the cheese melts better and will give you those cheese pulls we all know and love!
- Store in the fridge for up to 3 days.
- Dough recipe is from my friend Andris over at The Baking Steel.
Nutrition Information
Nutritional information is provided as a courtesy and is automatically calculated. It should only be construed as an estimate rather than a guarantee. Ingredients can vary and Kroll’s Korner can’t make any guarantees to the accuracy of this information.

Omg our go to pizza delish
Yummm! So happy to hear you love it, Cindy! 🥰
I make this once a week with homemade pizza sauce
I made two double recipes of this last weekend for 4 adults and 16 kids, 6 of which were hungry teenagers! It was a hit and not difficult at all to make (although I do have a lot of experience with homemade pizza, especially the “lazy” recipe from Smitten Kitchen). The dough was very wet and sticky, and I did weigh the flour, but not unmanageable. I wonder if it was because I used kosher salt instead of fine sea salt as called for. Anyway, thanks for the recipe and I can’t wait to make it again!
Hey Amanda!! Thank you sooo much for making! I am thinking of making this for a little dinner party I am having with friends this week and I am so excited. I’ll see if my dough turns out wet too and revisit the recipe if needed. Once again thank you! 🙂 xo, Tawnie
I love love love your recipes! I always refer your website when I bring baked goods or dishes to my friends house. My boyfriend and I had a date night last weekend and made this recipe! It was so much fun. I will say the dough recipe did need more flour. It was wayyy to sticky to be dough. We made our dough and placed it on a small pizza pan thinking it would fit…. holy moly we had a lot of dough. We decided to try it as is and the pizzas honestly still turned out great and were very delicious. I would use this recipe again.. just maybe cut the dough in half if we do our pizza pans again!
Hi Georgia! Thanks so much for making it 🙂 I am sorry you had to add more flour. Some others have mentioned the same thing, but then again a lot of people have had success. Did you measure 500grams? The dough was recipe tested to fit a 18×13 sheet pan so that makes sense why you had a lot on your small pizza pan! Glad it still turned out delicious – thank you again for making it!
The best pizza!! The dough is a little time consuming but worth it times a million, you won’t regret it!
I agree!! Thank you soo much Alyssa!! 🙂
I made this for my family and a recipe club I started. Everyone loved it! About to make it for the second time.
I am so glad, thank you Jess! 🙂
The first page of this recipe doesn’t print. Please fix. Thanks.
It printed well for me? Maybe check your printer settings? I am not sure, I am sorry!
The ratio was WAY off. I’m not a super experienced dough maker so I thought maybe I should just trust the process. I didnt see that there was a visual/video until after the 2 hour dough proofing. Was way too wet and sticky had to add in so much flour in the end. It was edible but the crust was tougher I assume because of having to add more flour after the first mixing and kneading and over kneading it.
Hello! I am so sorry to hear that. 500 grams of flour is the perfect amount. I am terribly sorry you had troubles! This really is one of our favorites pizzas!
The recipe for the dough when converted to metric is off… I found the dough to be too wet as written and need to add quite a bit more flour (maybe 3/4-1 cup more!) in order to go from batter to a soft dough. It is not the same as the recipe for the dough from The Baking Steel which you credited for the dough recipe. Even with that flaw it did make for a tasty crust!
Hello! I wonder if he changed the recipe since I published this sheet pan pizza. But in any case, I will re-test, and re-measure so I can make it right. Thank you for catching that, and thank you for making it!
Volume based measurements for dough, and a recipe including “store bought pizza sauce” as an ingredient? Come on. What is the point?
I have the metric measurements in the recipe card. Feel free to use whatever sauce you like. Sometimes I blend up a can of san marzanos and add salt and some seasonings to it and just use that.
Here’s a thought….Then don’t make it!! Or make your own sauce! Both of which are common sense so you really just wanted to be nasty! That shows more about your character than anything about the author of this recipe!
This is so good and easy to make on a busy weeknight! Plenty for next day lunches! It’s in our weekly rotation now!
i am so glad Shannon! thank you!