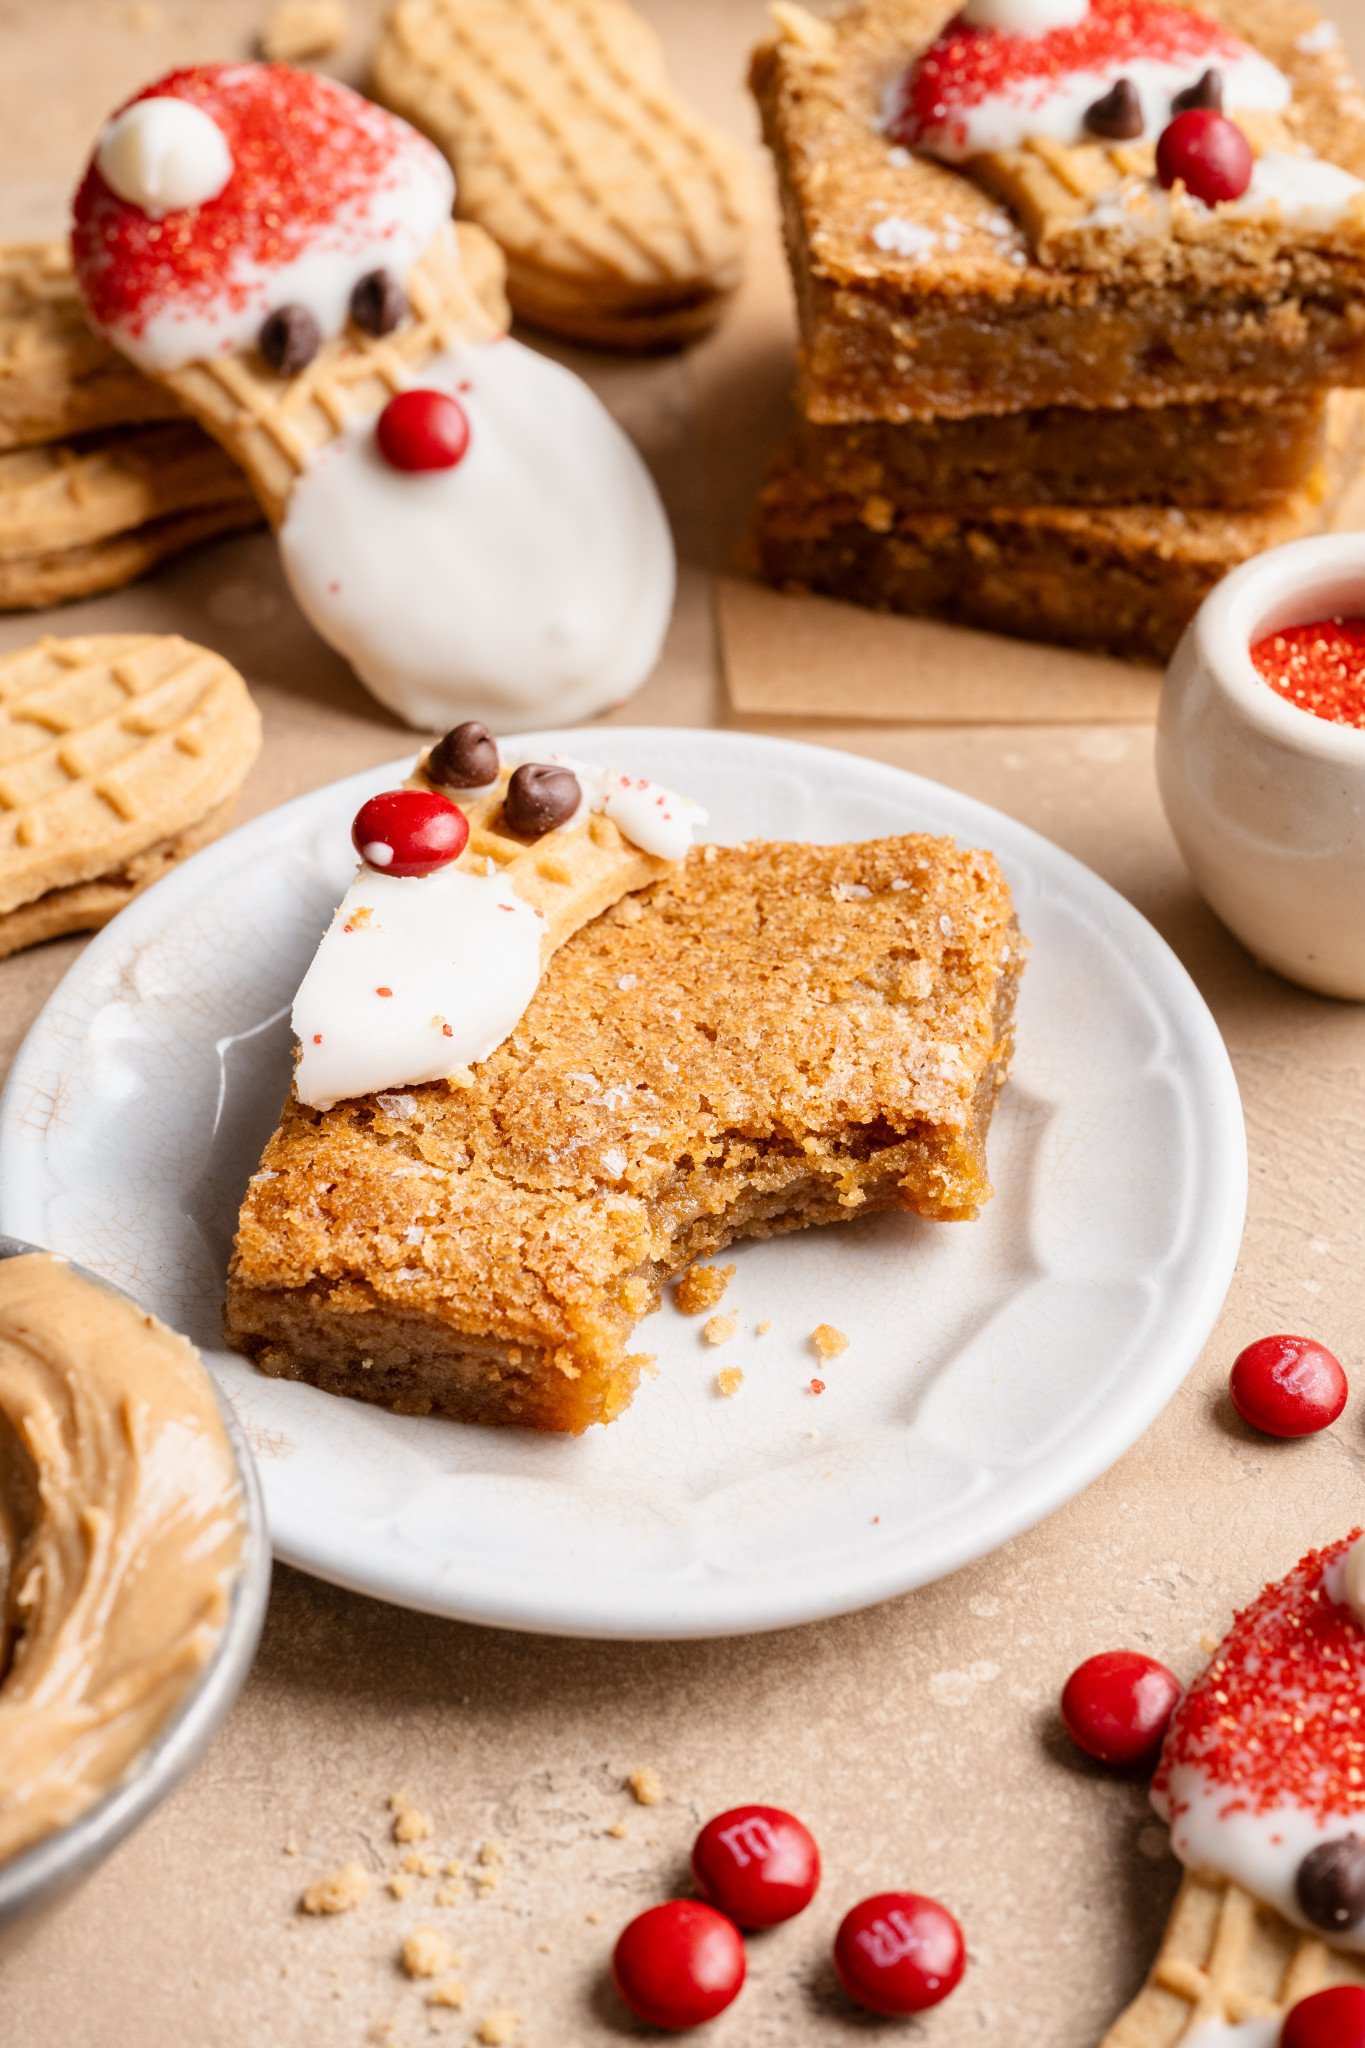
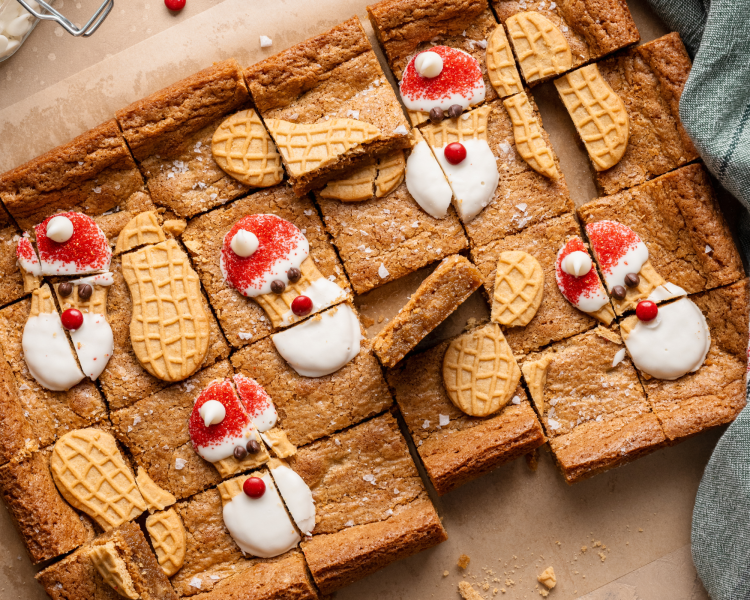
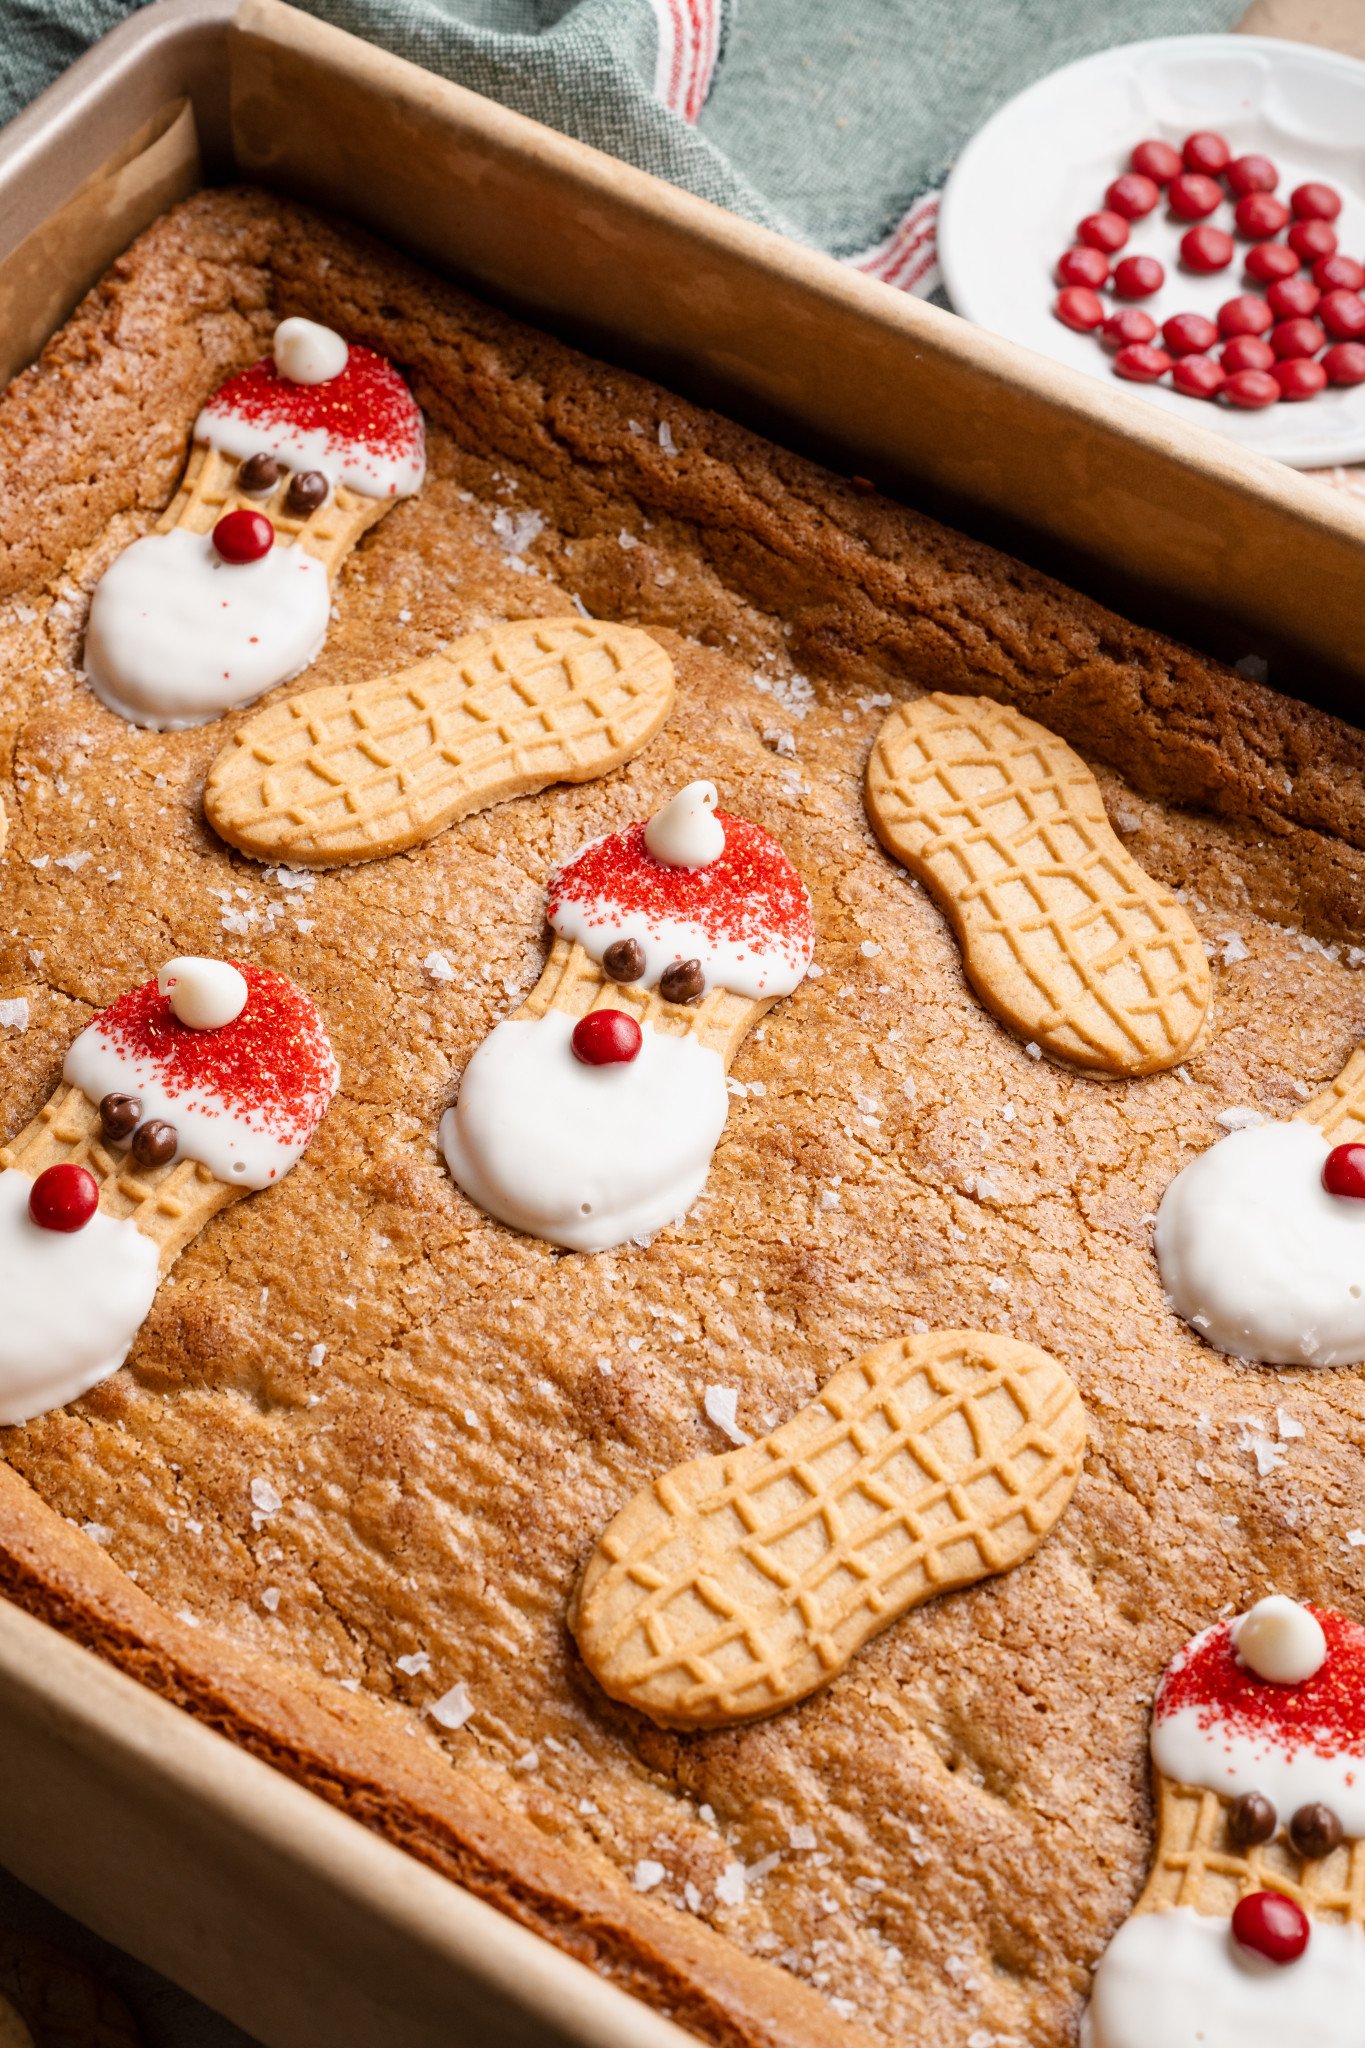
Santa Nutter Butter Cookie Bars
This post may contain affiliate links. Please read our disclosure policy.
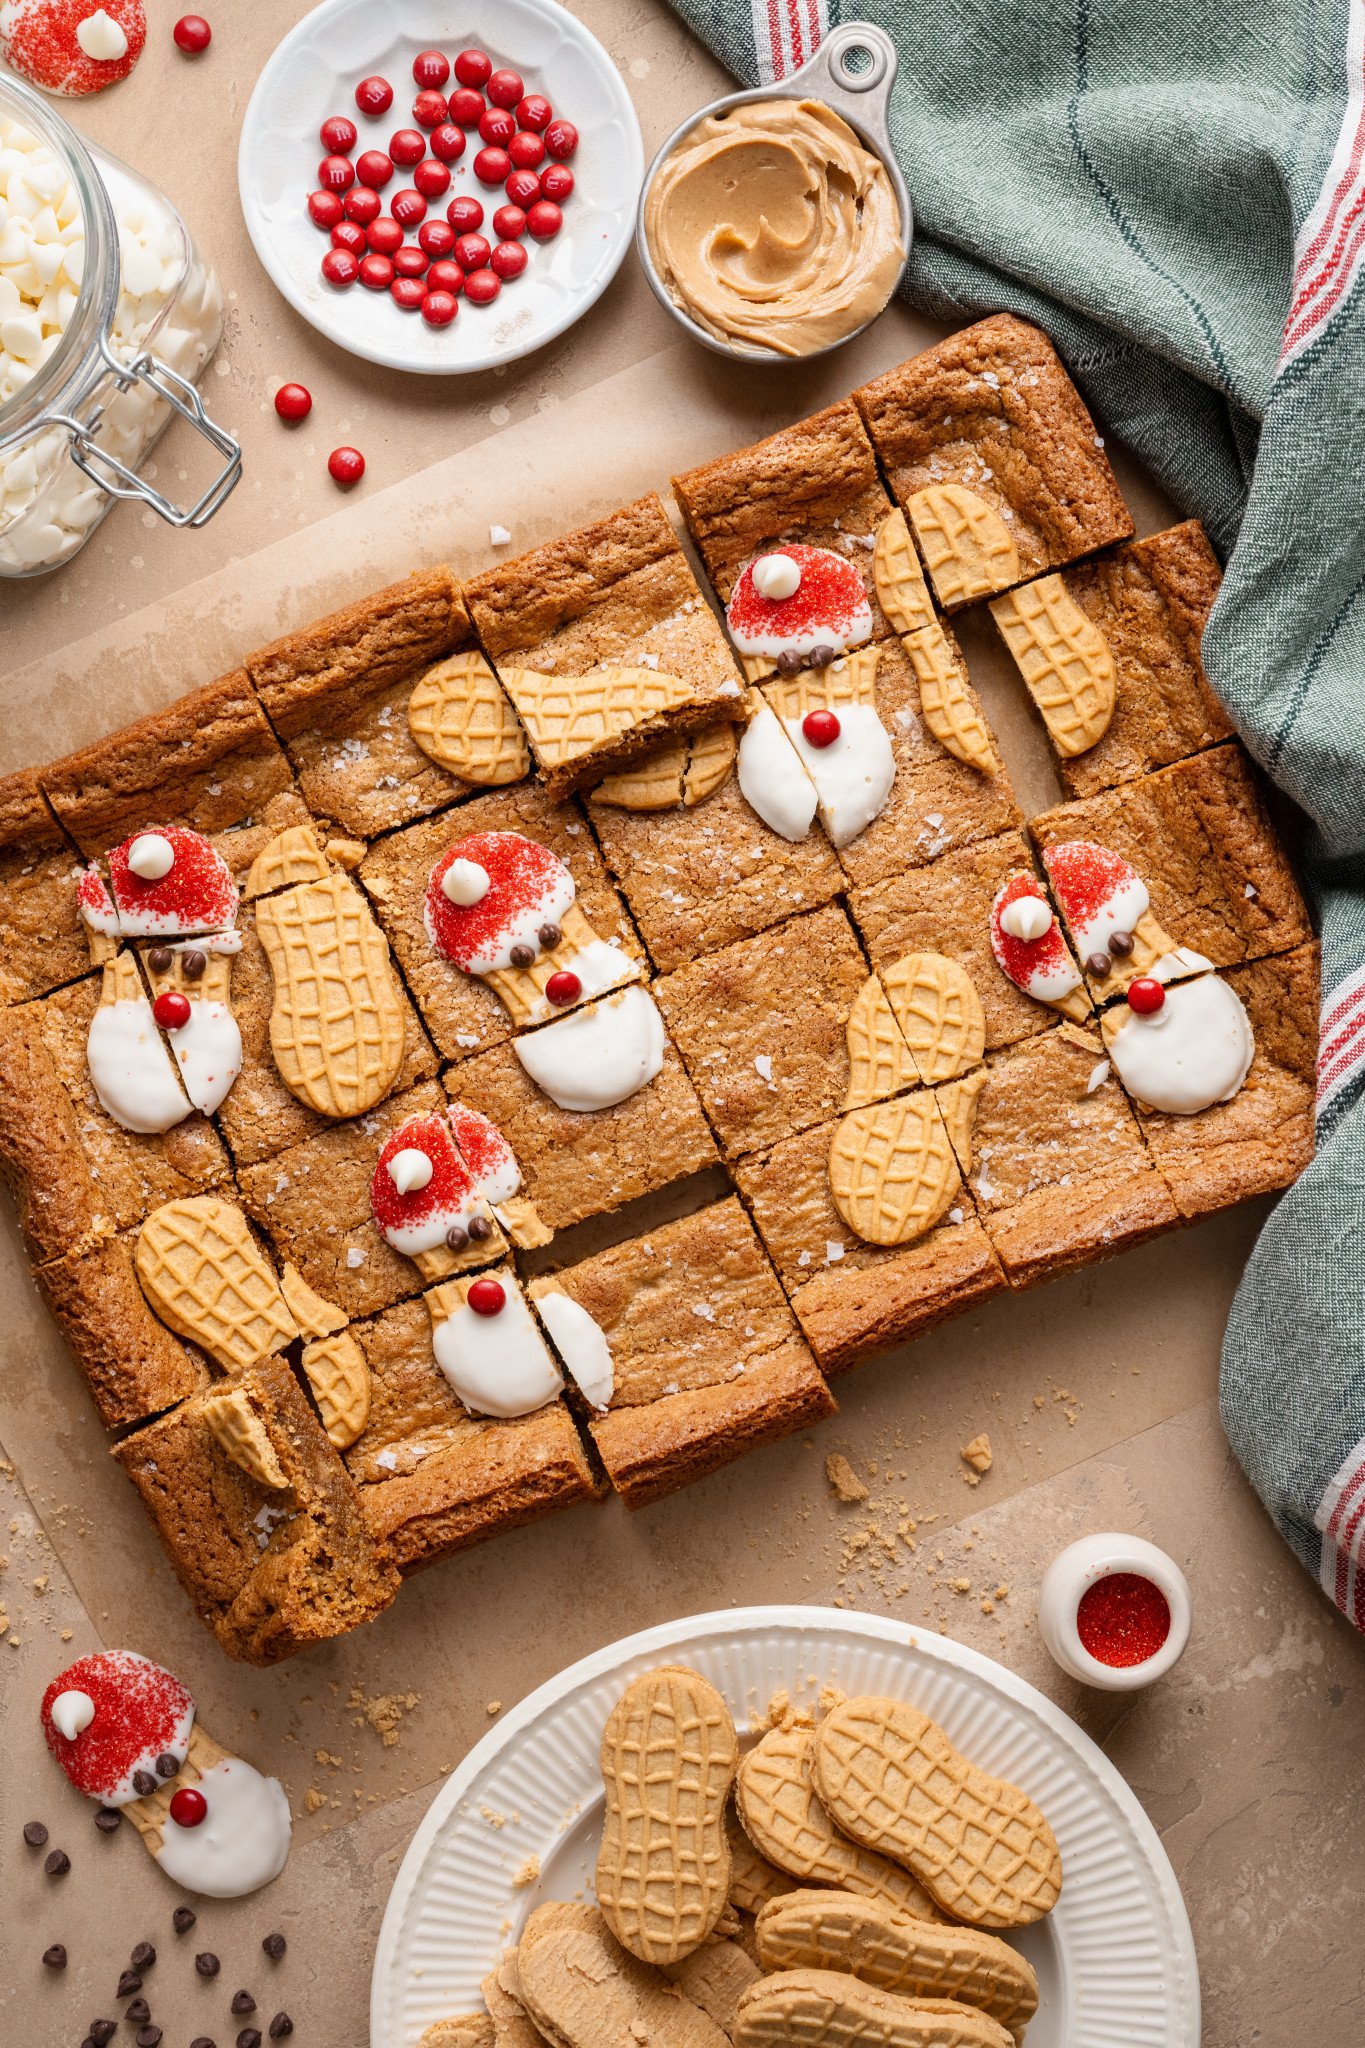
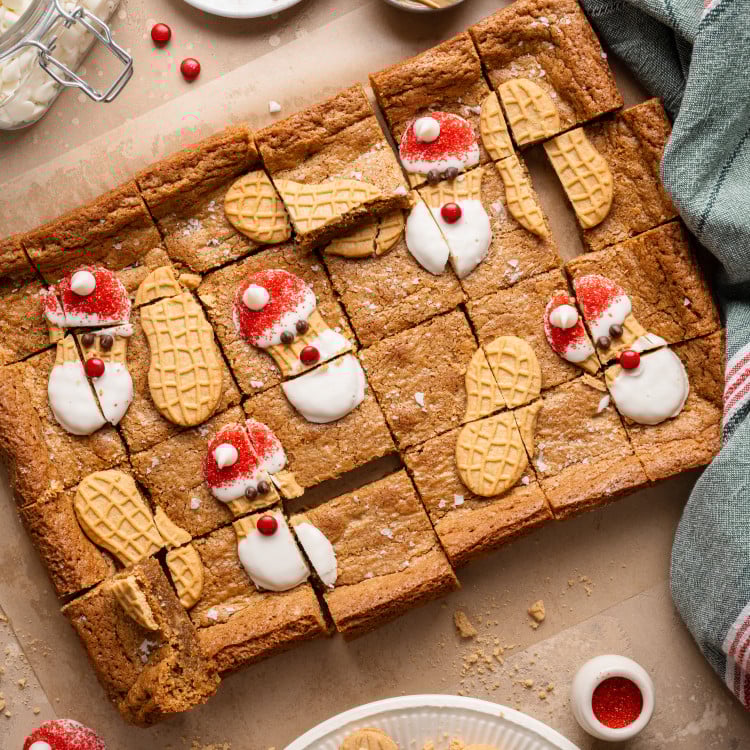
Looking for a holiday treat that’s as adorable as it is delicious? These Santa Nutter Butter Cookie Bars are the perfect festive bake! They start with a soft, chewy peanut butter cookie bar base and get topped with the cutest little Nutter Butter Santas for a fun, eye-catching finish.
And not only are they delicious, but they’re incredibly easy, too. No mixer, no chill time, and no fuss, making them ideal for holiday parties, gifting, or a fun activity with the kids.
Don’t want to decorate the Santas? No problem! Just top these bars with plain Nutter Butters, and they’ll still be just as delicious!!
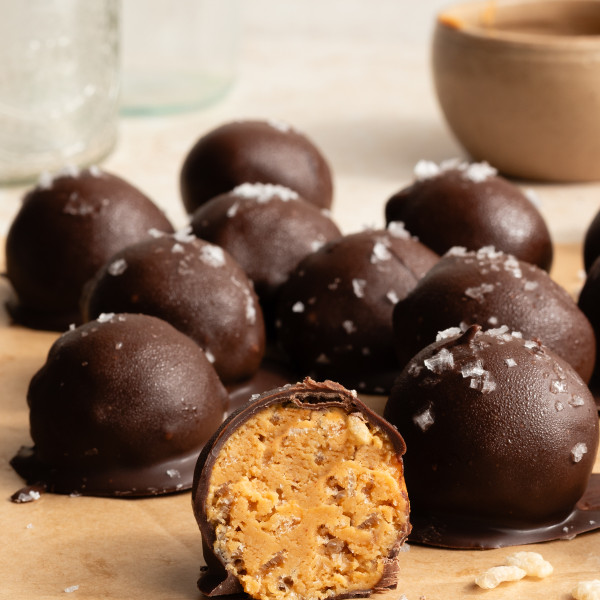
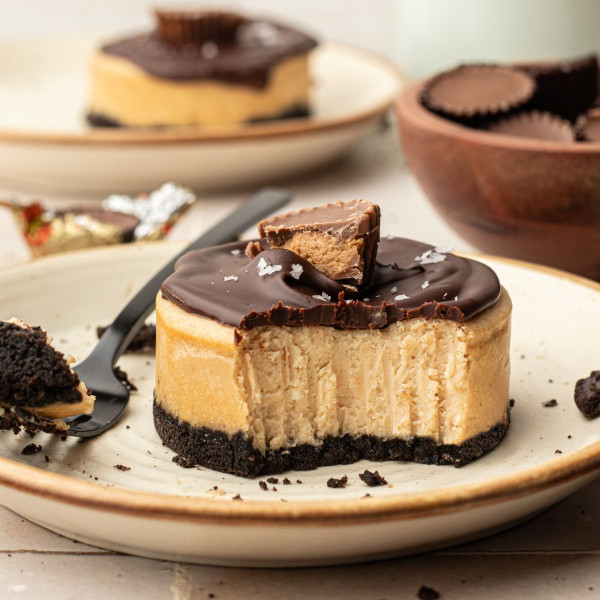
These cookie bars are perfect for any peanut butter lover! Speaking of peanut butter, be sure to try my Peanut Butter Cup Cookies, Chocolate Peanut Butter Blossoms, Peanut Butter Chip Cookies, Peanut Butter Dark Chocolate Chip Cookies, or Chocolate Dipped Chewy Peanut Butter Cookies, if you haven’t already!
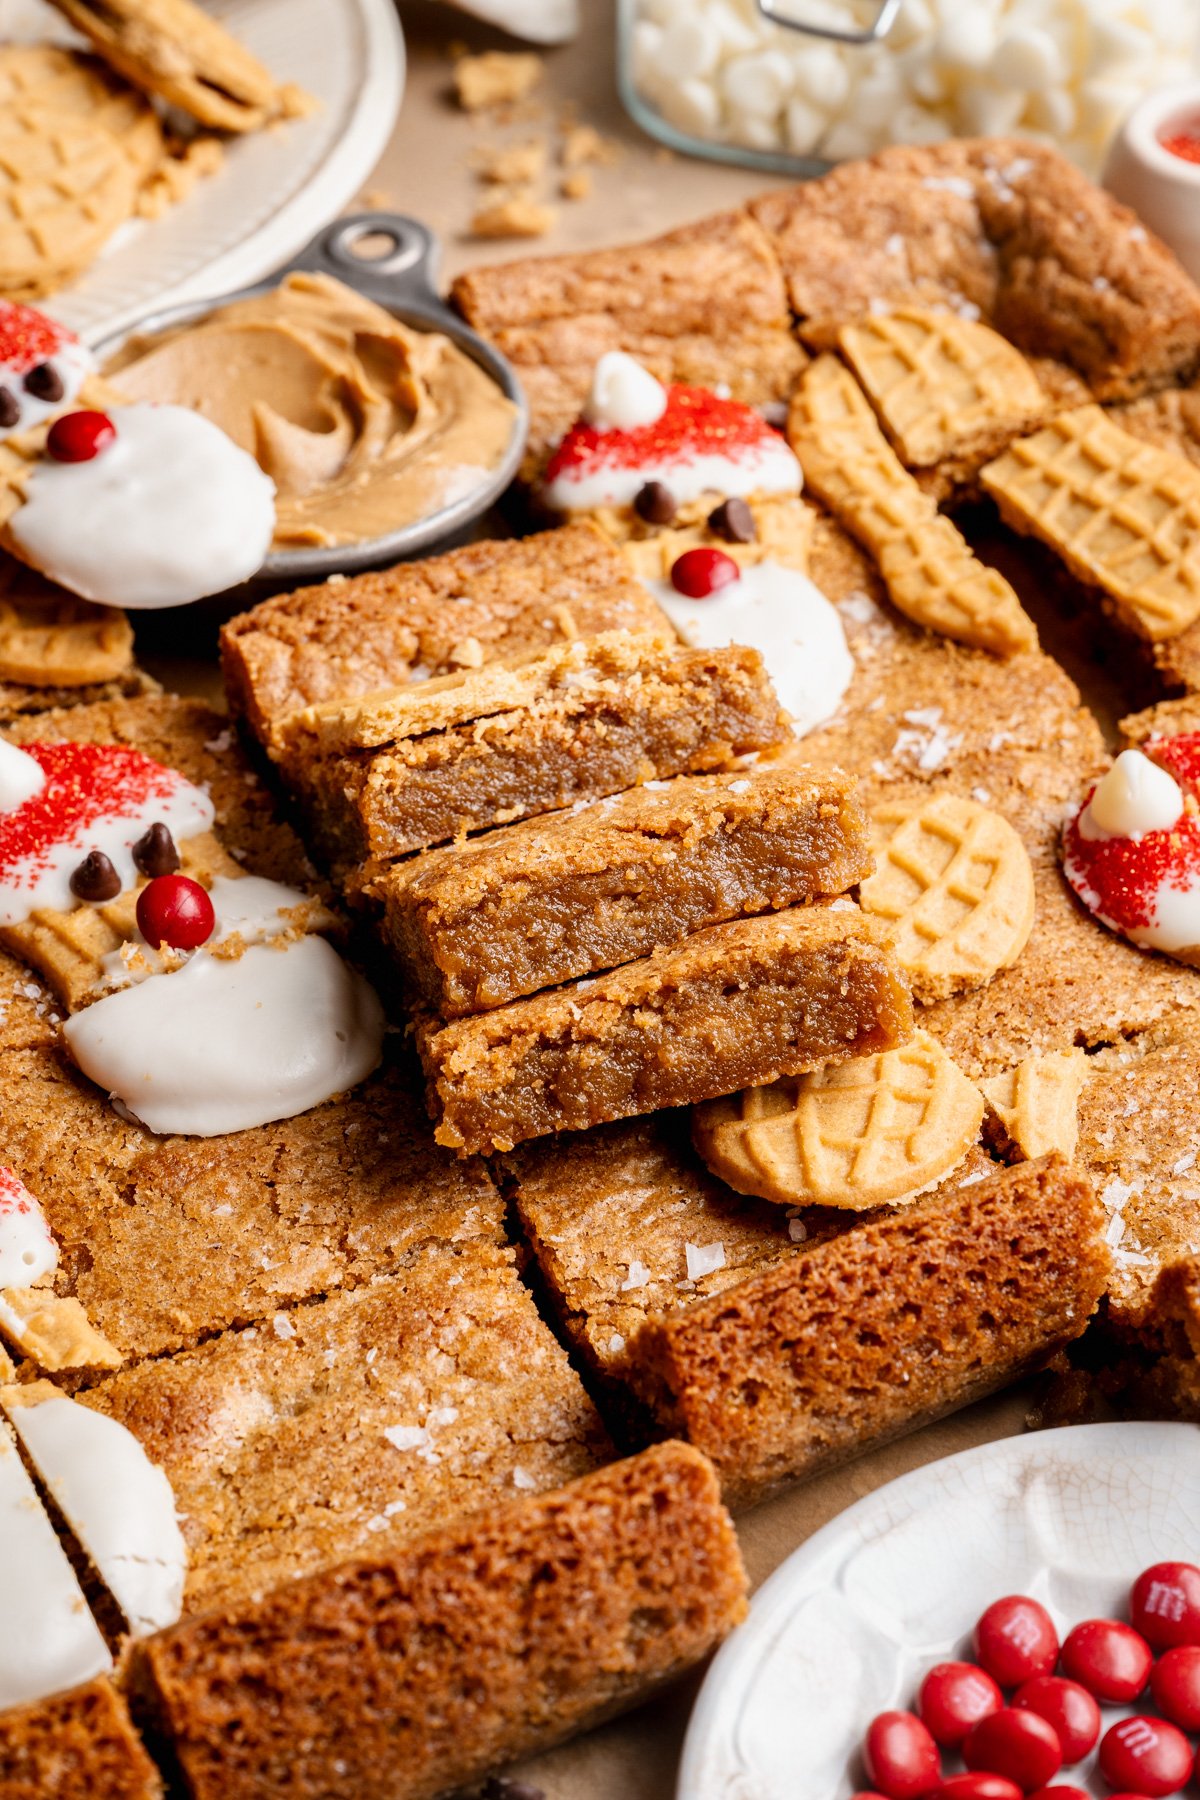

 Table Talk with Tawnie

If you want a cute, Pinterest-worthy holiday treat without doing a ton of work, these Santa Nutter Butter Cookie Bars are it. They look adorable enough to impress anyone, but they’re honestly so easy that the kids can help without turning the kitchen into a full-blown Christmas disaster. Simple, sweet, and totally doable, which is pretty much the exact kind of holiday magic I need as a busy mom of three.😅
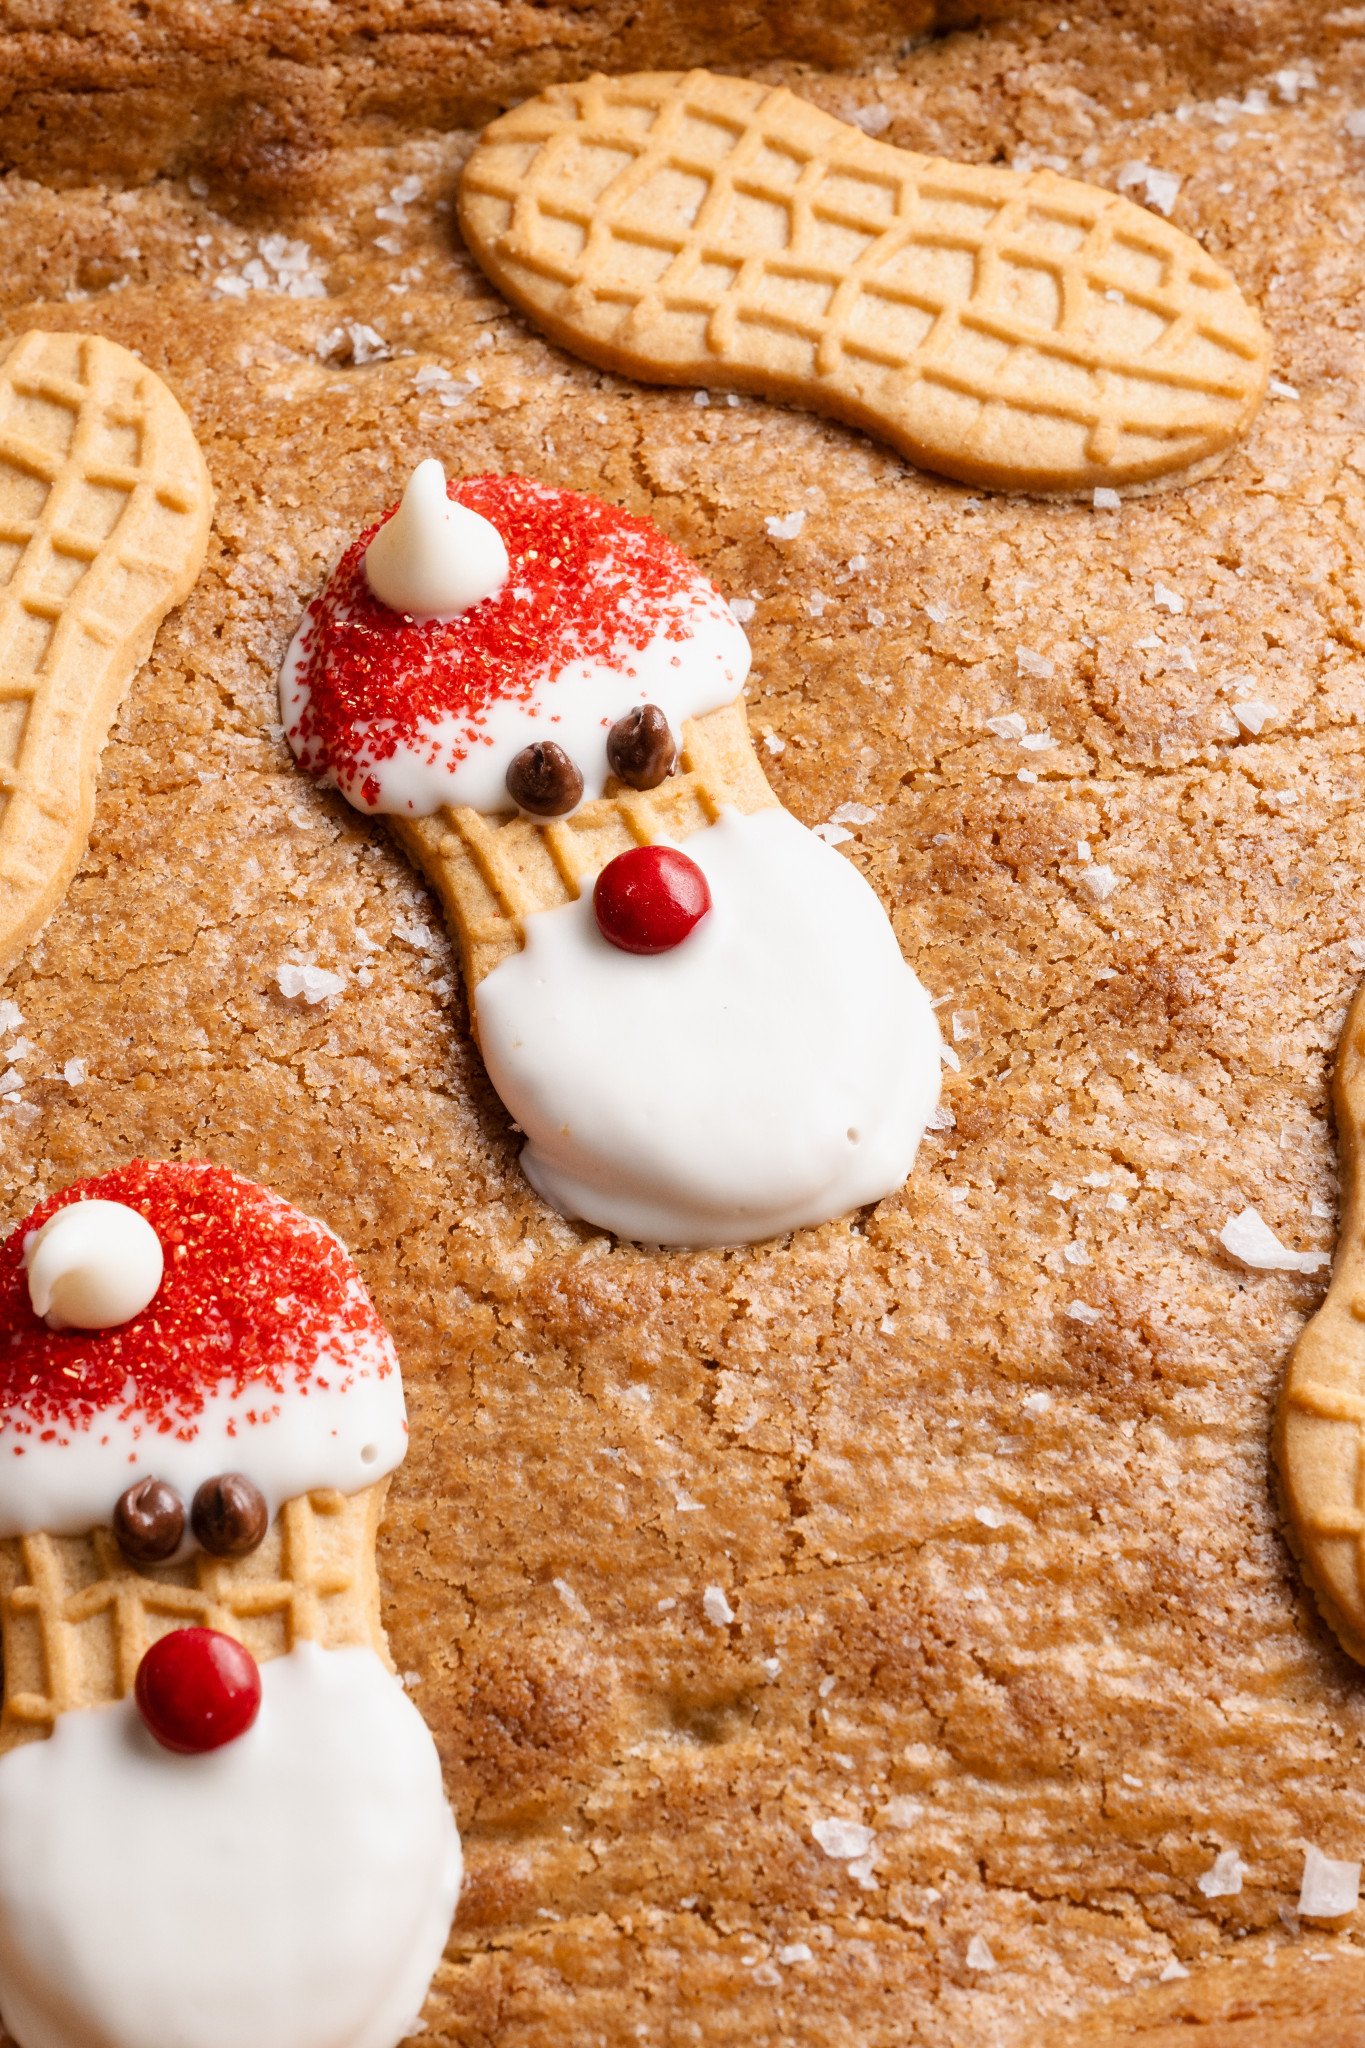
How To Decorate Santa Nutter Butters
To decorate the Nutter Butter’s to look like Santas, I used this post from Taste of Home as a reference but here’s how I did mine:
- Melt white chocolate (I love using Ghirardelli melting wafers. They melt smoothly and set up with a nice, glossy finish).
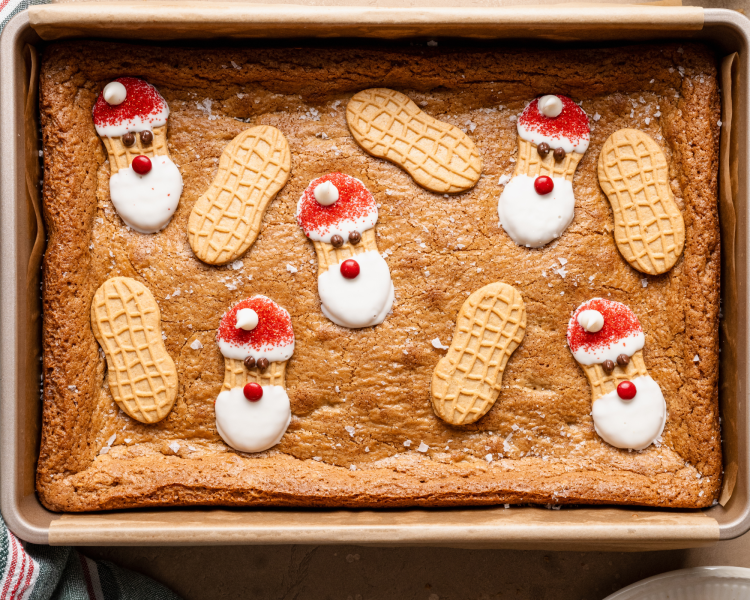
- Dip one end of each cookie into melted chocolate and allow the excess to drip off. Then place the cookies on a wire rack and sprinkle red sugar on the top part (for Santa’s hat). Then press a white chocolate chip as the pom pom for the hat.
- Next, dip the other end of each cookie into melted chocolate for the beard (leave the center of the cookie uncovered for the body). Then, finally, attach two mini chocolate chips for the eyes and a red mini M&M for the nose.
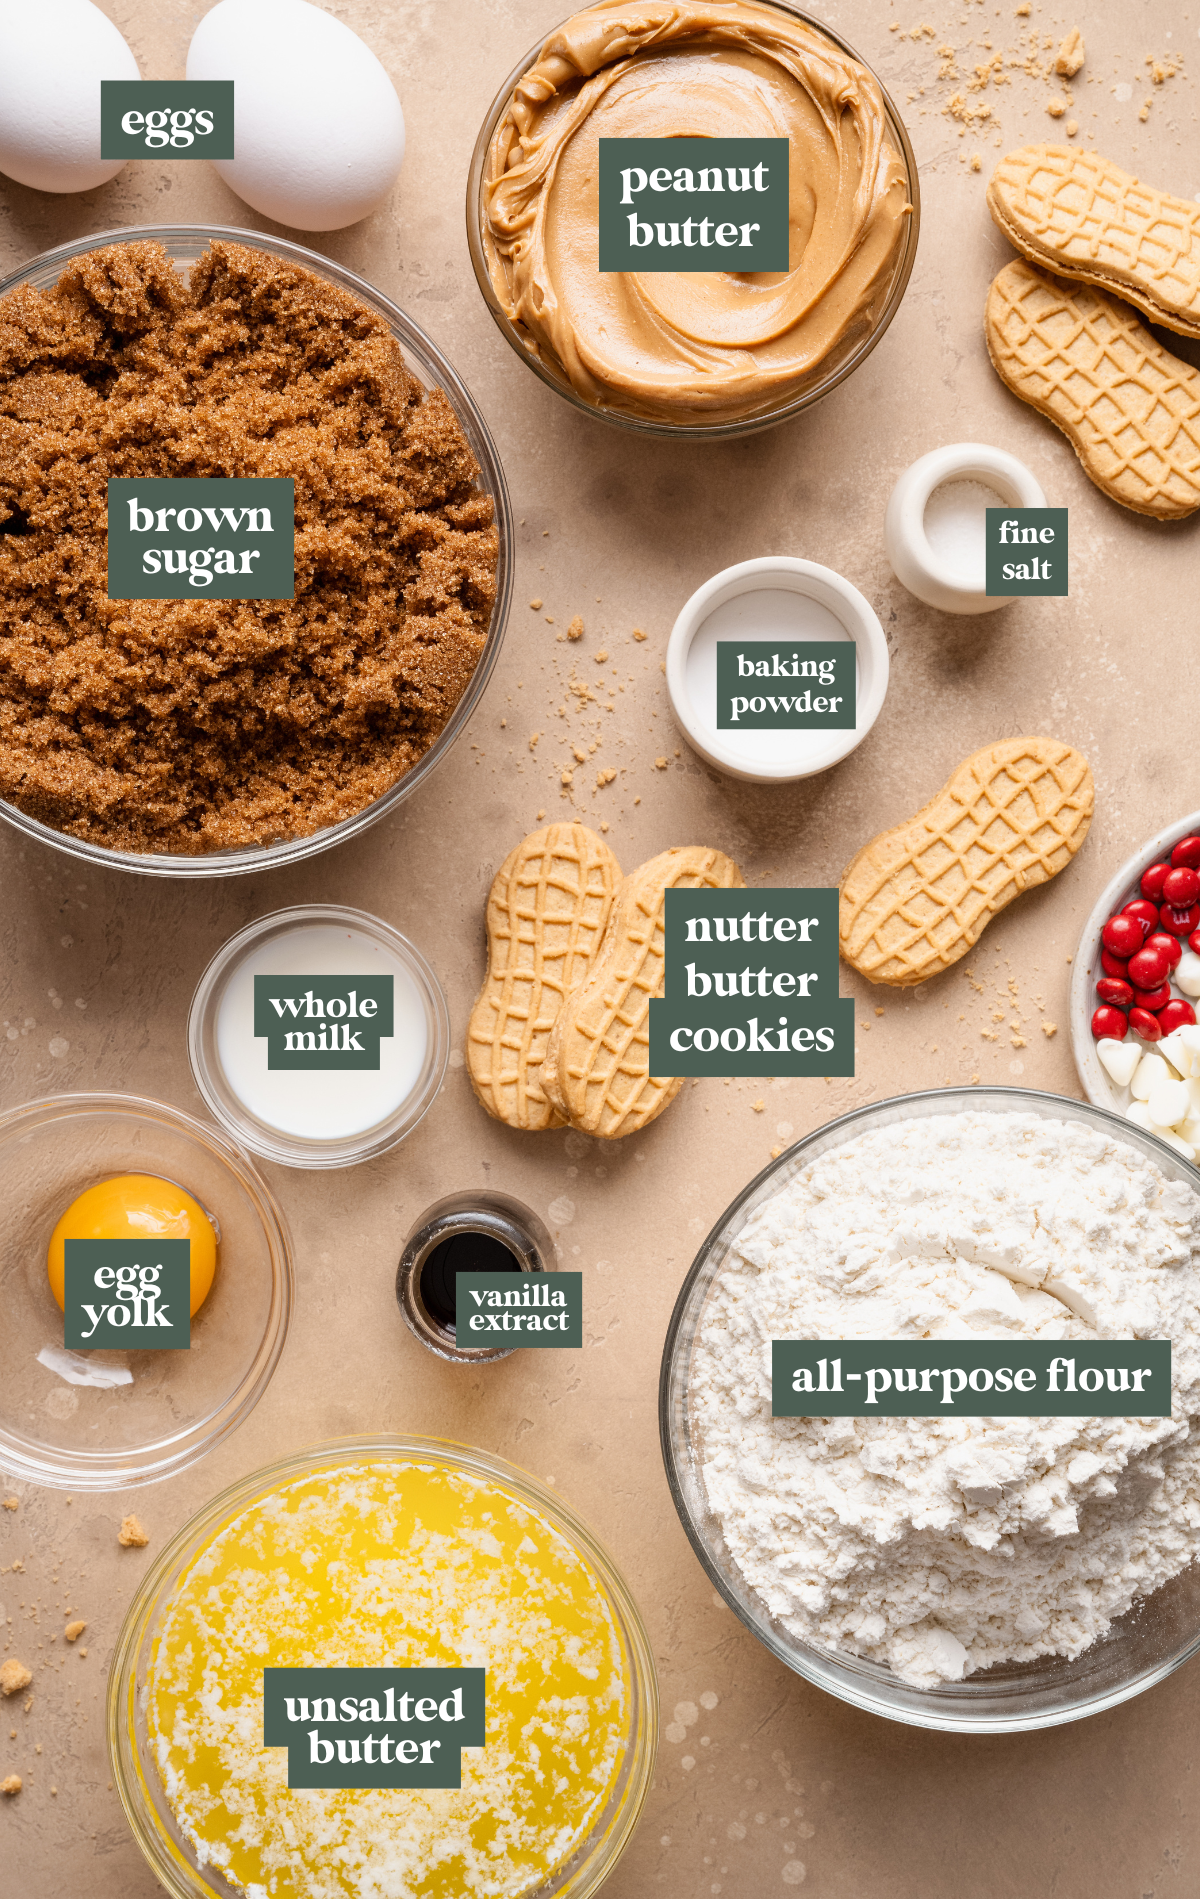
- All-purpose flour: As always, it’s essential to make sure you’re using the spoon and level method to measure your flour when baking (you can also use a kitchen scale to weigh your ingredients).
- Peanut butter: Make sure to use a peanut butter like Skippy or Jif for the right consistency. Don’t use a natural peanut butter.
- Unsalted butter: Melt the butter, then let it cool slightly before mixing it in. This helps keep the eggs from cooking and gives your cookie bars the perfect, chewy thickness.
- Eggs + egg yolk: The extra egg yolk adds additional richness and helps to make these cookie bars super soft. Make sure both your egg and egg yolk are at room temperature.
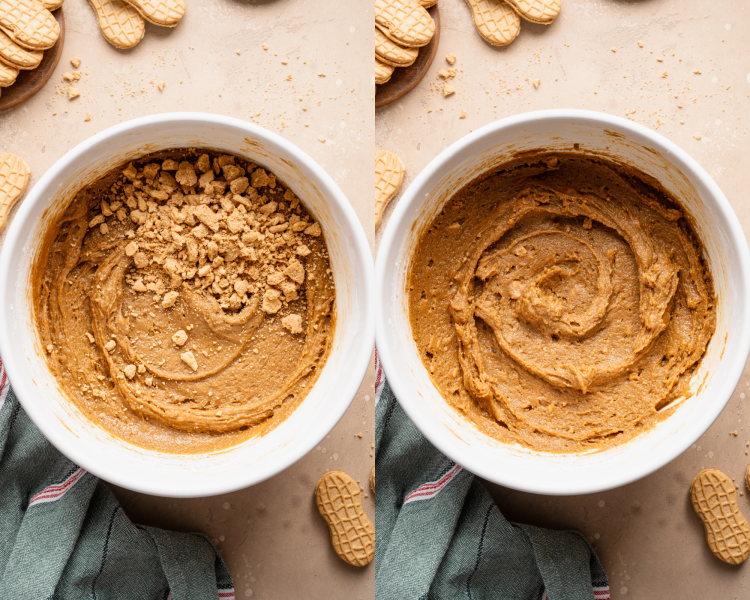
- Nutter Butters: You’ll use 5 Nutter Butters to fold into the dough (I like to place them in a plastic zip-top baggie and chop them into small pieces), then use the rest to decorate into Santas to top the bars with!
Step by Step Directions
(For the full recipe, scroll down to the recipe card below)

Make Santa Nutter Butters
Go ahead and decorate the extra Nutter Butters to make them look like Santas. I used this Taste of Home post for reference!
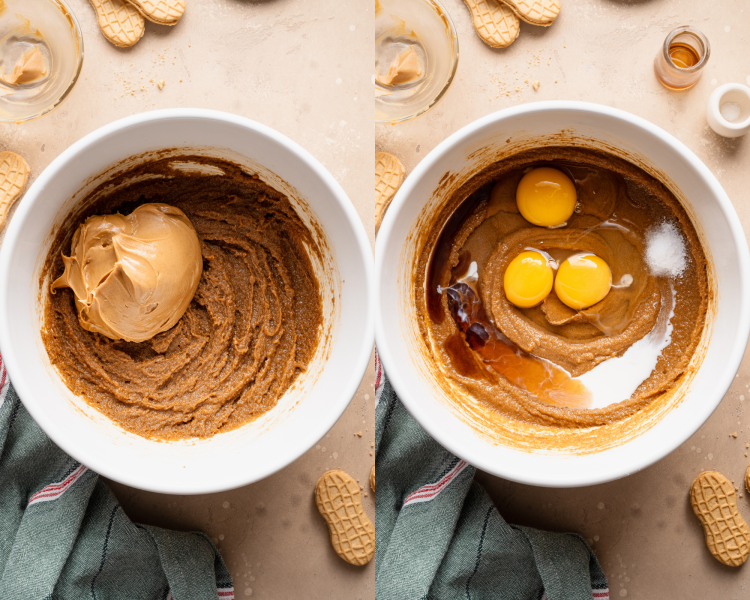
Mix wet ingredients
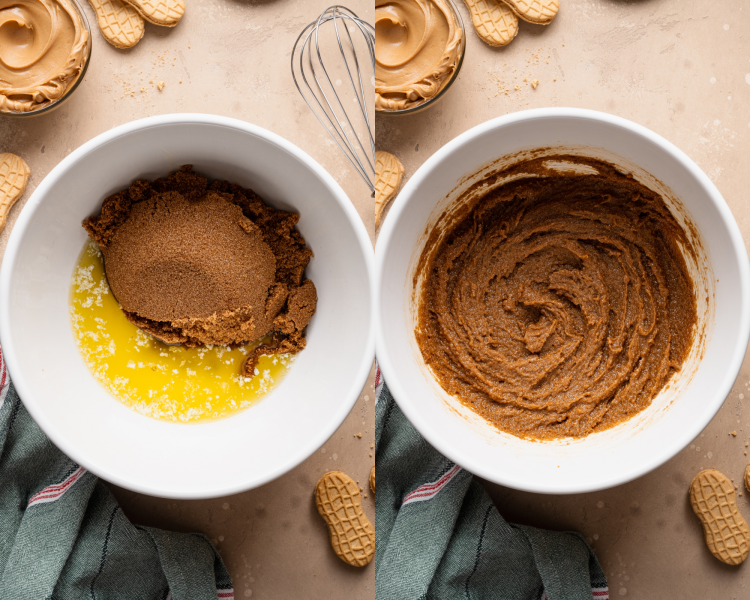
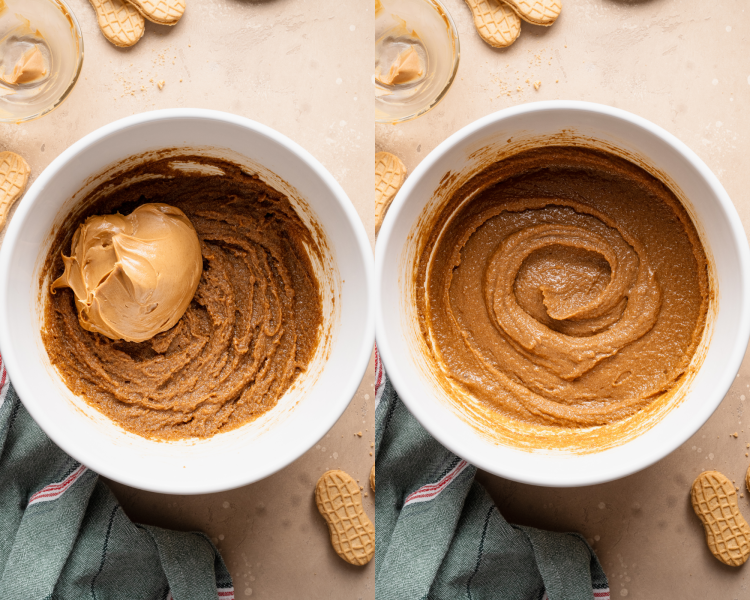
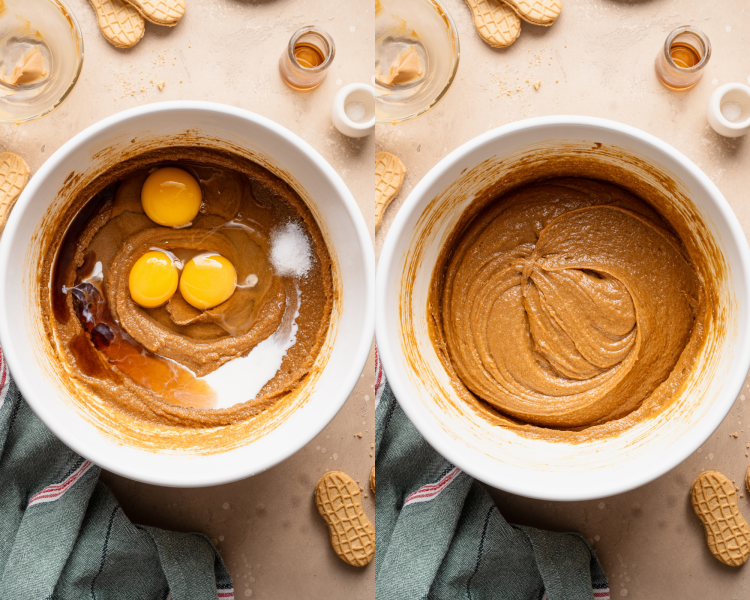
In a large mixing bowl, whisk together the butter and sugar. Then stir in the peanut butter, followed by the rest of the wet ingredients (plus salt).
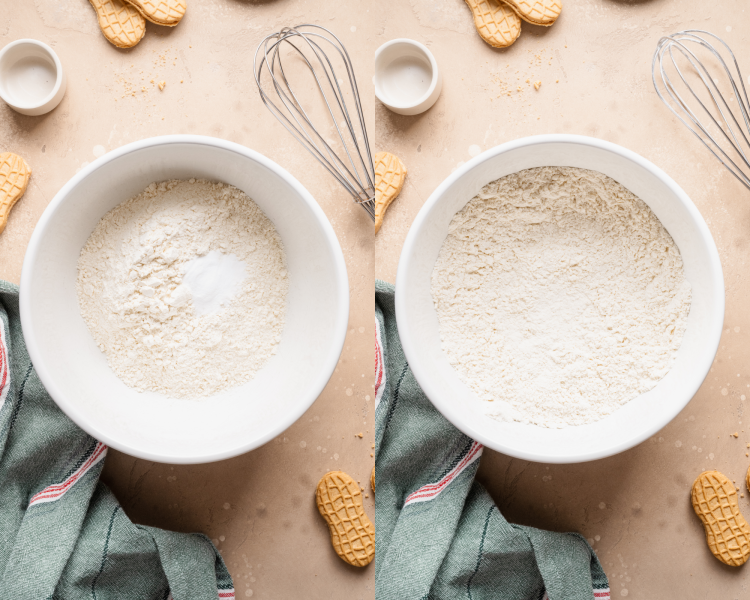
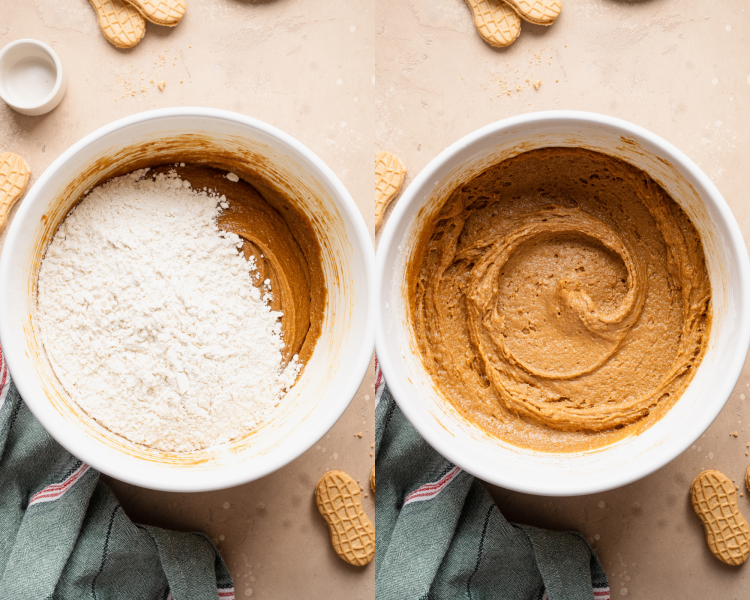
Whisk dry ingredients
In a separate bowl, whisk together the baking powder and flour.
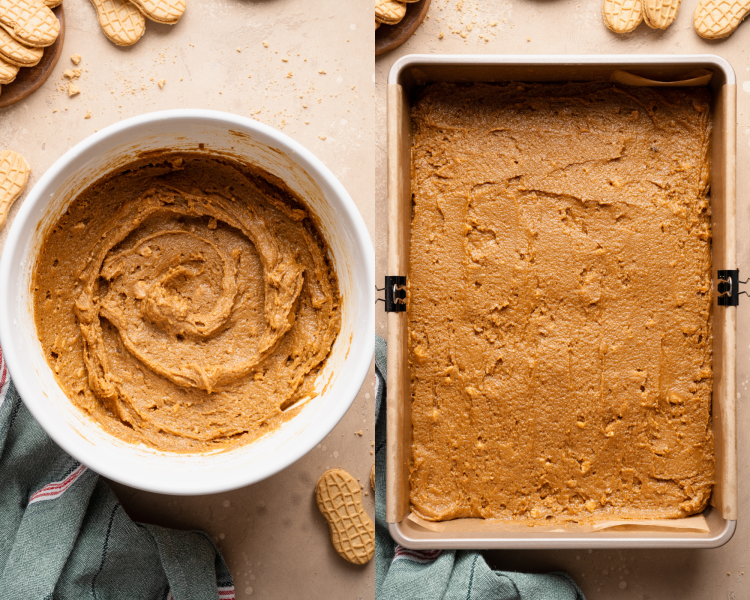
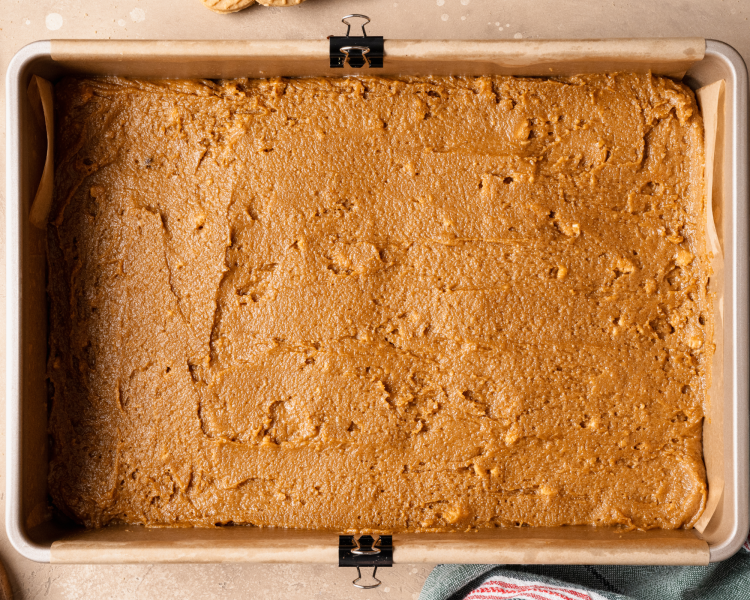
Combine & bake!
Combine the wet and dry ingredients, then stir in the chopped Nutter Butters. Spread dough into the prepared pan and bake for 20-25 minutes.
Bake & decorate!
Once done, gently press the Santa Nutter Butters on top of the bars. Allow cookie bars to cool completely, remove from pan, slice, and ENJOY!!🎅
Expert Tips
- Prepare your pan: I like to spray my 9×13 baking pan with nonstick spray, then line it with parchment paper, so when you spread the batter onto the parchment paper, it’s stable in the pan and doesn’t slide around everywhere.
- Use the proper peanut butter: Make sure to use a peanut butter like Skippy or Jif for the right consistency. Don’t use a natural peanut butter. The creamy texture of the peanut butter helps to keep these cookie bars soft and chewy.
- Properly measure the flour: As with any baking recipe, make sure to spoon the flour into your measuring cup and use the back of a knife to level off the top. Do not scoop the flour out of the container/bag with your measuring cup because you could end up with 50% more than you need. See this baking tip video for an easy tutorial.
- Allow the melted butter to cool: Allow the melted butter mixture to cool before adding it to the eggs (or it will cook the eggs and we don’t want that!).
- Do not over-mix: Gently fold the dry ingredients into the wet. You want to mix just until a soft dough forms, and there are no streaks of flour left. Over-mixing can lead to tough coffee bars.
- Don’t over-bake: Make sure to pull the bars from the oven when the edges look lightly golden but the center still looks a tiny bit underdone. They’ll finish setting as they cool in the warm pan.
- For the cleanest cuts: If you want really nice, clean cuts, pop the bars into the refrigerator to chill for a bit. Then run your knife under hot water, wipe dry, slice, and repeat. It makes every bar look bakery-perfect.
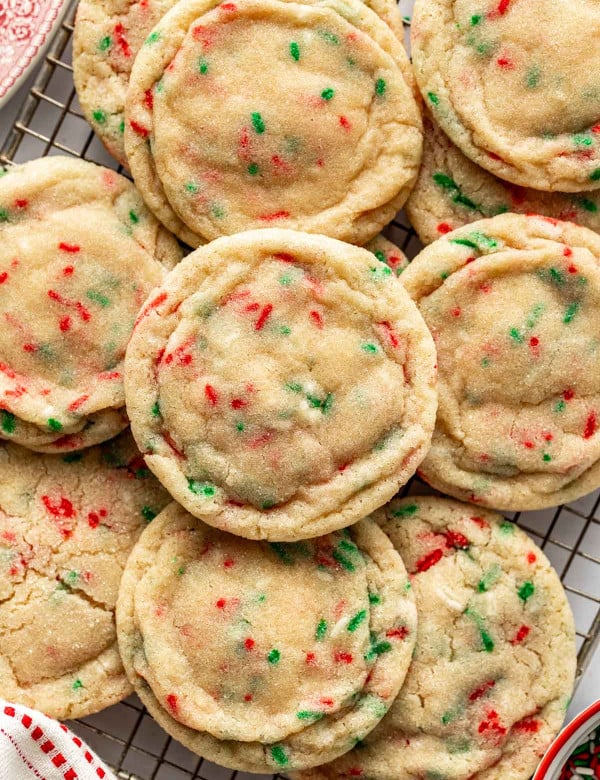
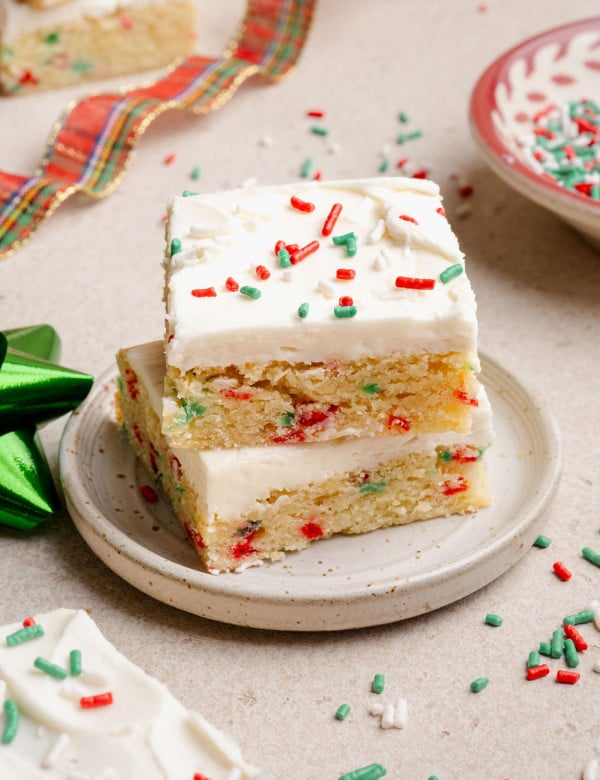
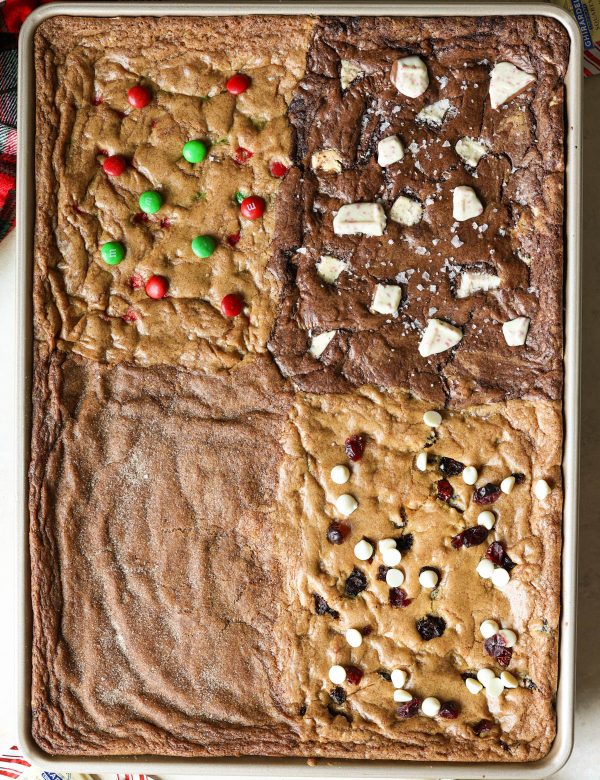
The Holiday Cookie Series is back for the 2025 holiday season and full of festive, delicious ideas! From espresso martini cookies to iced oatmeal gingerbread cookies, there’s something for everyone!
Variations / Substitutions
- Chocolate chips: Throw in some extra chocolate chips into your cookie bar batter for extra chocolatey-goodness!
- More Christmas variations: You can also totally decorate your Nutter Butters as snowmen or reindeer instead of Santa’s if that’s more your vibe☃️🦌
- Different holidays: Use this recipe for any holiday, like Easter or Thanksgiving, by decorating your Nutter Butters into Easter chicks or turkeys! You can also skip the decorations completely for delicious Nutter Butter cookie bars year-round! 🐣🦃
- Gluten-free: To make these bars gluten-free, use swap the all-purpose flour for Bob’s Red Mill Gluten Free 1-to-1 Baking Flour and substitute the Nutter Butter for peanut butter baking chips in the cookie dough.
Storage / Freezing
- Store these cookie bars in a sealed container at room temperature for up to 5 days. Try to store the bars in a single layer to avoid smudging or flattening the decorated Santas on top.
- Freeze (undecorated bars): For best results, freeze the bars without the decorated Santa Nutter Butters on top. Bake and cool completely, then wrap the whole slab tightly in plastic wrap and a layer of foil. Freeze for up to 3 months. Thaw overnight in the fridge, then add the decorated Santa Nutter Butters on top when ready to eat.
- Freeze (decorated bars): Place the bars on a sheet pan and freeze uncovered for 1–2 hours to set the decorations. Once frozen solid, wrap each bar individually and store in a freezer-safe bag. Thaw in the refrigerator overnight or at room temperature for 1-2 hours. Just be aware that the decorated Santas may soften slightly as they thaw.
FAQs
Of course! Feel free to totally skip decorating the Santas (I just think it adds a cute touch) and place plain Nutter Butters on top of the baked cookie bars. Or you can skip the extra Nutter Butters completely and just include the chopped ones inside the cookie dough.
Can I bake these bars in a smaller pan?
Yes. A 9×9-inch pan will make thicker bars. Add 5–10 extra minutes of bake time.
How do I keep the Santa decorations from smearing?
I recommend storing/transporting the bars in a single layer so the faces stay neat.
shop this post
 Buy Now →
 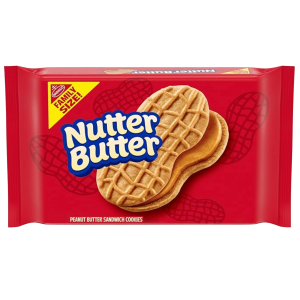 Buy Now →
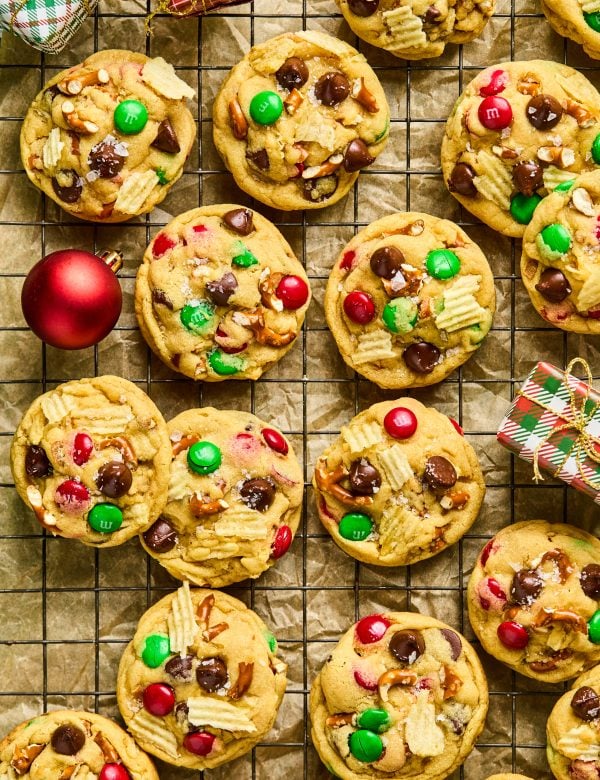
Before You Begin! If you make this, please leave a review and rating letting us know how you liked this recipe! This helps our business thrive & continue providing free recipes.
Ingredients
- 1 cup unsalted butter (melted and slightly cooled)
- 2 cups dark brown sugar (packed)
- 3/4 cup creamy peanut butter (Skippy or Jif recommended)
- 2 large eggs + 1 egg yolk (room temperature)
- 1/2 tsp. fine salt
- 1 Tbsp. whole milk
- 2 tsp. vanilla extract
- 1¾ cups all-purpose flour (spooned and leveled)
- 3/4 tsp. baking powder
- 5 Nutter Butter cookies (chopped, for folding into dough)
- Additional Nutter Butter cookies for decorating as “Santas”
- Flaky maldon sea salt (optional)
Last step! If you make this, please leave a review and rating letting us know how you liked this recipe! This helps our business thrive & continue providing free recipes.
Instructions
- Make Santa Nutter Butters: Gently separate the nutter butters for the Santas because you’ll only use 1/2 of each cookie to press on top of the bars. Use melted white chocolate, red-colored sugar or sprinkles, mini chocolate chips, and mini red M&M's to create Santa hats, beards, and eyes. I used this Taste of Home post for reference.Additional Nutter Butter cookies for decorating as “Santas”

- Prep: Preheat your oven to 350°F. Line a 9×13-inch baking pan with parchment paper, leaving an overhang for easy removal. (I like to spray the pan with nonstick spray, then line it with parchment, so when you spread the batter on the parchment, it’s stable in the pan). Set aside.
- Whisk butter and sugar: In a large mixing bowl, whisk together the melted butter and dark brown sugar until smooth and glossy.2 cups dark brown sugar, 1 cup unsalted butter
- Add peanut butter: Add the peanut butter and whisk to combine.3/4 cup creamy peanut butter
- Whisk remaining wet ingredients: Mix in the eggs, yolk, salt, milk, and vanilla until fully incorporated.
- Whisk dry ingredients: In a separate bowl, whisk together the flour and baking powder.1¾ cups all-purpose flour, 3/4 tsp. baking powder
- Combine wet and dry ingredients: Add the dry mixture to the wet ingredients and gently fold until just combined. Do not over-mix.
- Fold in cookies: Stir in the 5 chopped Nutter Butters. I like to place them in a plastic zip-top baggie and chop them into small pieces.
- Bake: Spread the dough evenly into the prepared 9×13 pan. Bake for ~20-25 minutes, or until the edges are set and the center looks slightly underbaked. Do not overbake because the bars will continue to set as they cool. Start Timer
- Cool & decorate: Once out of the oven, gently press the Santa Nutter Butter on top of the bars. Allow bars to cool completely in the pan, 1-2 hours. Start TimerFlaky maldon sea salt
- Slice and enjoy: Remove from the pan and slice into squares. Garnish with flaky sea salt if desired. (You can chill bars prior if you want really nice clean cuts). Enjoy!
Notes
- Prepare your pan: I like to spray my 9×13 baking pan with nonstick spray, then line it with parchment paper, so when you spread the batter onto the parchment paper, it’s stable in the pan and doesn’t slide around everywhere.
- Allow the melted butter to cool: Allow the melted butter mixture to cool before adding it to the eggs (or it will cook the eggs and we don’t want that!).
- For the cleanest cuts: If you want really nice, clean cuts, pop the bars into the refrigerator to chill for a bit. Then run your knife under hot water, wipe dry, slice, and repeat. It makes every bar look bakery-perfect.
- Store: Store these cookie bars in a sealed container at room temperature for up to 5 days. Try to store the bars in a single layer to avoid smudging or flattening the decorated Santas on top.
- Freeze (undecorated bars): For best results, freeze the bars without the decorated Santa Nutter Butters on top. Bake and cool completely, then wrap the whole slab tightly in plastic wrap and a layer of foil. Freeze for up to 3 months. Thaw overnight in the fridge, then add the decorated Santa Nutter Butters on top when ready to eat.
Nutrition Information
Nutritional information is provided as a courtesy and is automatically calculated. It should only be construed as an estimate rather than a guarantee. Ingredients can vary and Kroll’s Korner can’t make any guarantees to the accuracy of this information.
📸 Photography by Creating Kaitlin
