1-Hour Dinner Rolls
This post may contain affiliate links. Please read our disclosure policy.
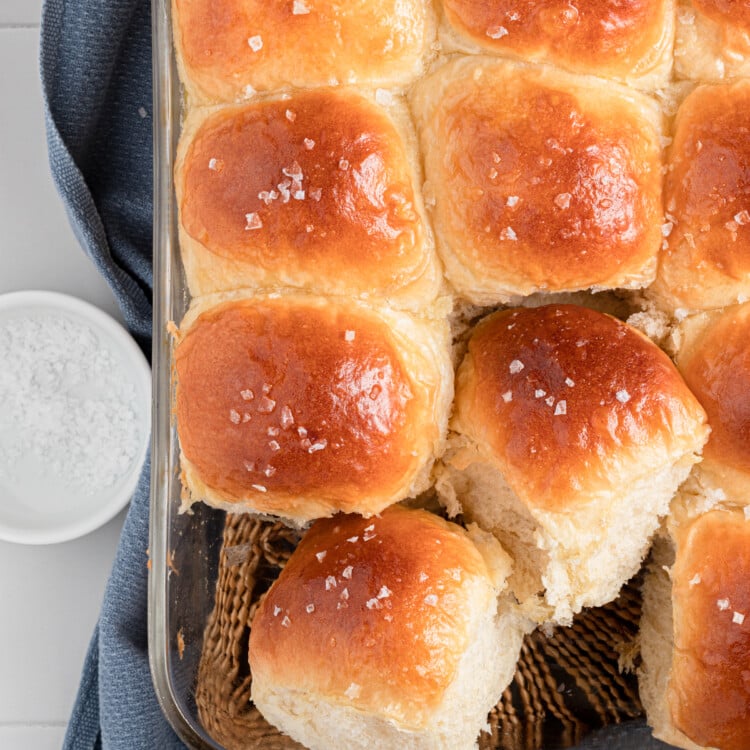
Hello, 1-Hour Dinner Rolls! Can you believe you can make soft, fluffy, warm dinner rolls in just 1 hour? I know, I couldn’t believe it either at first. But it’s true. You can do it!
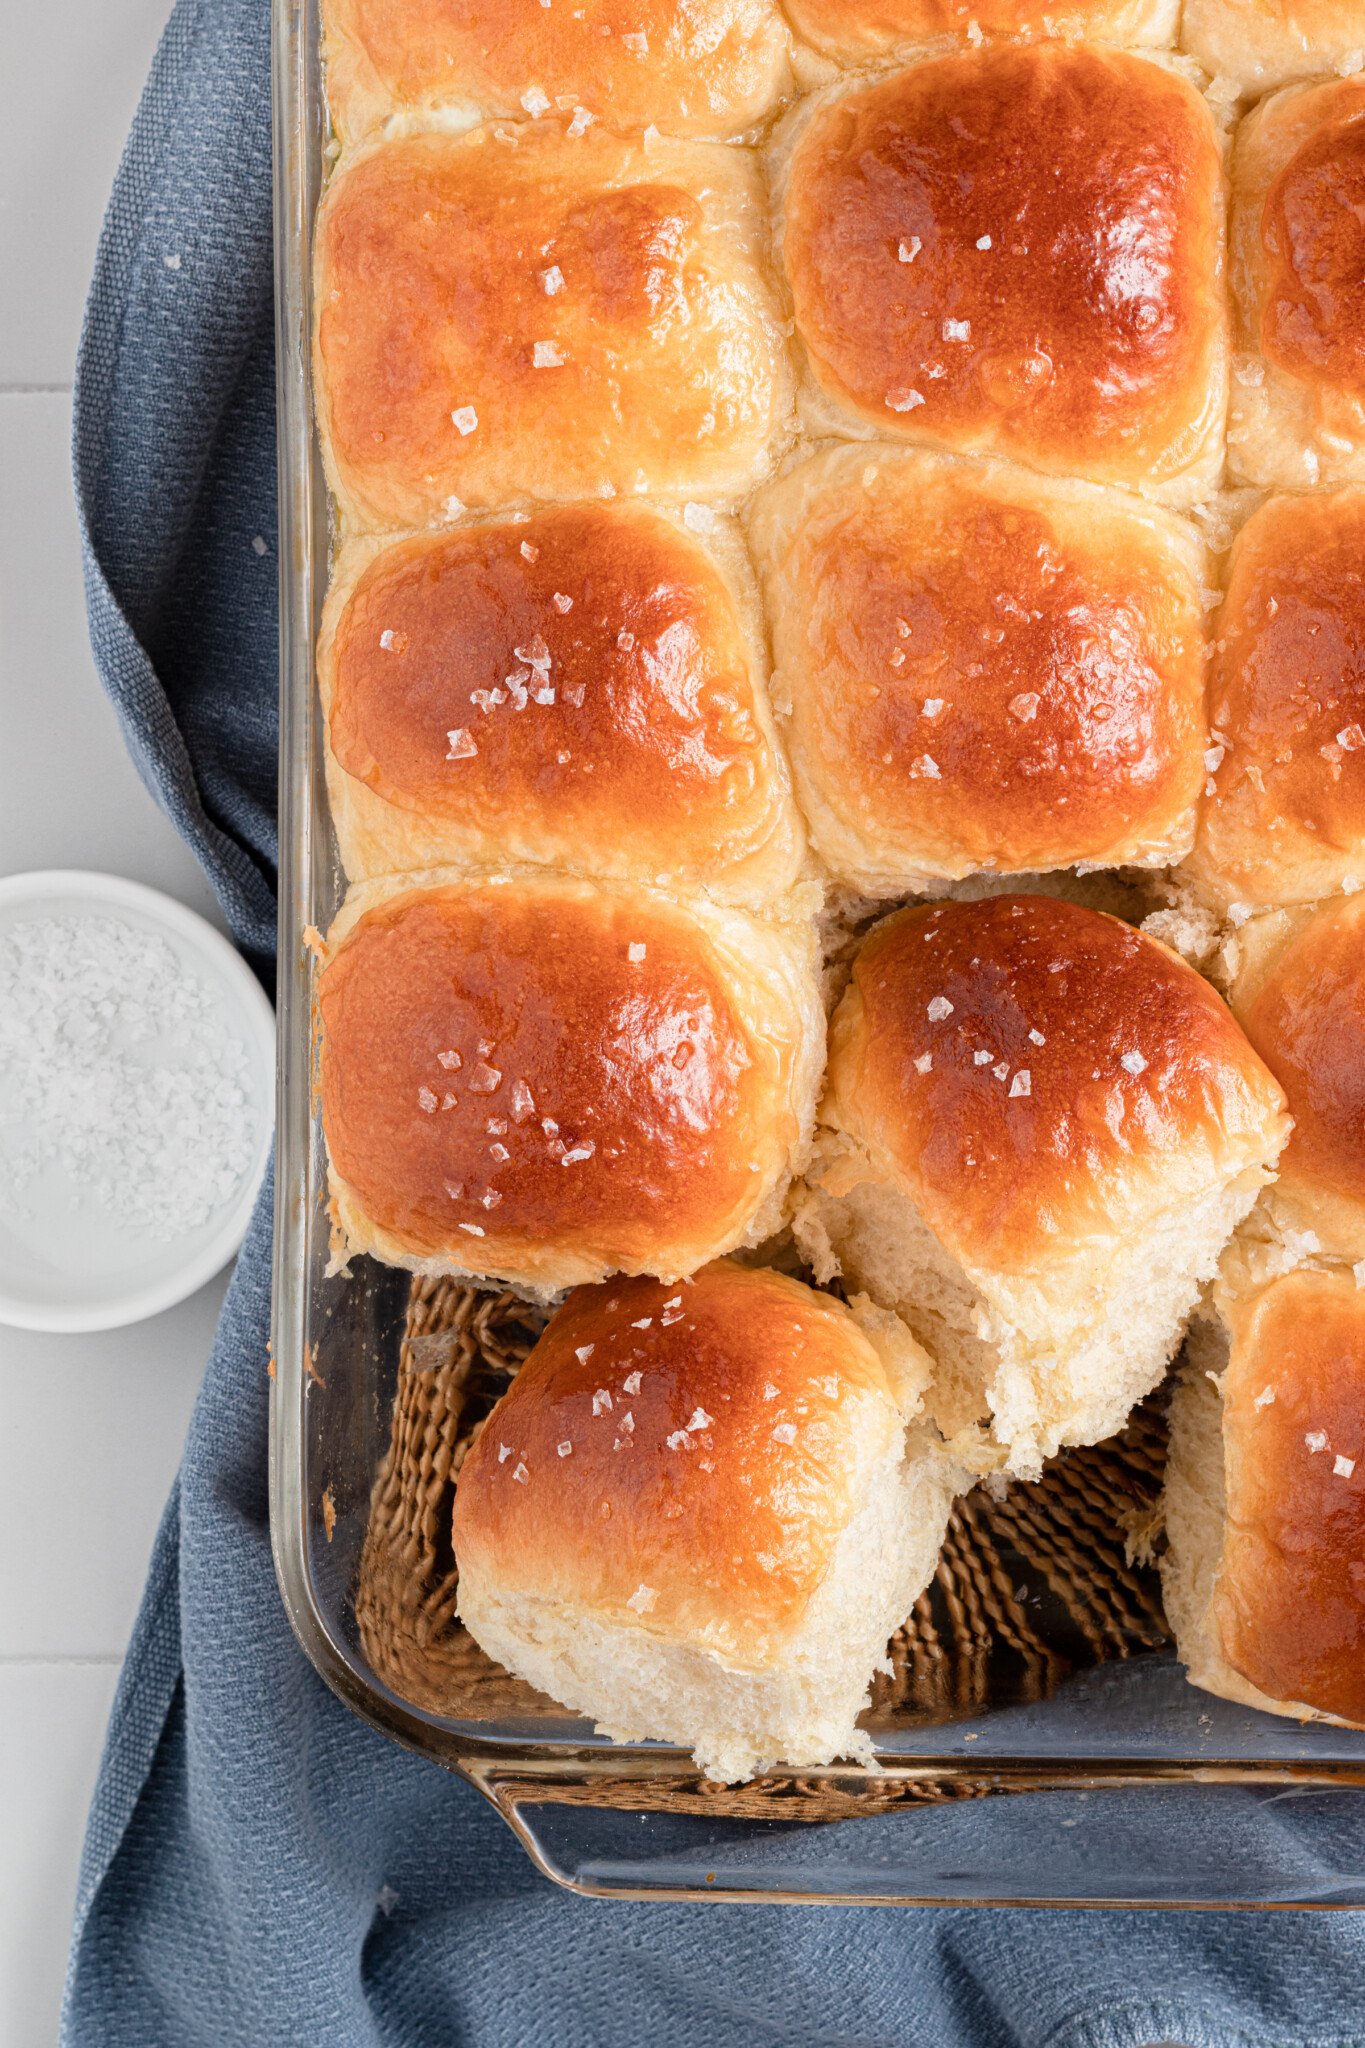
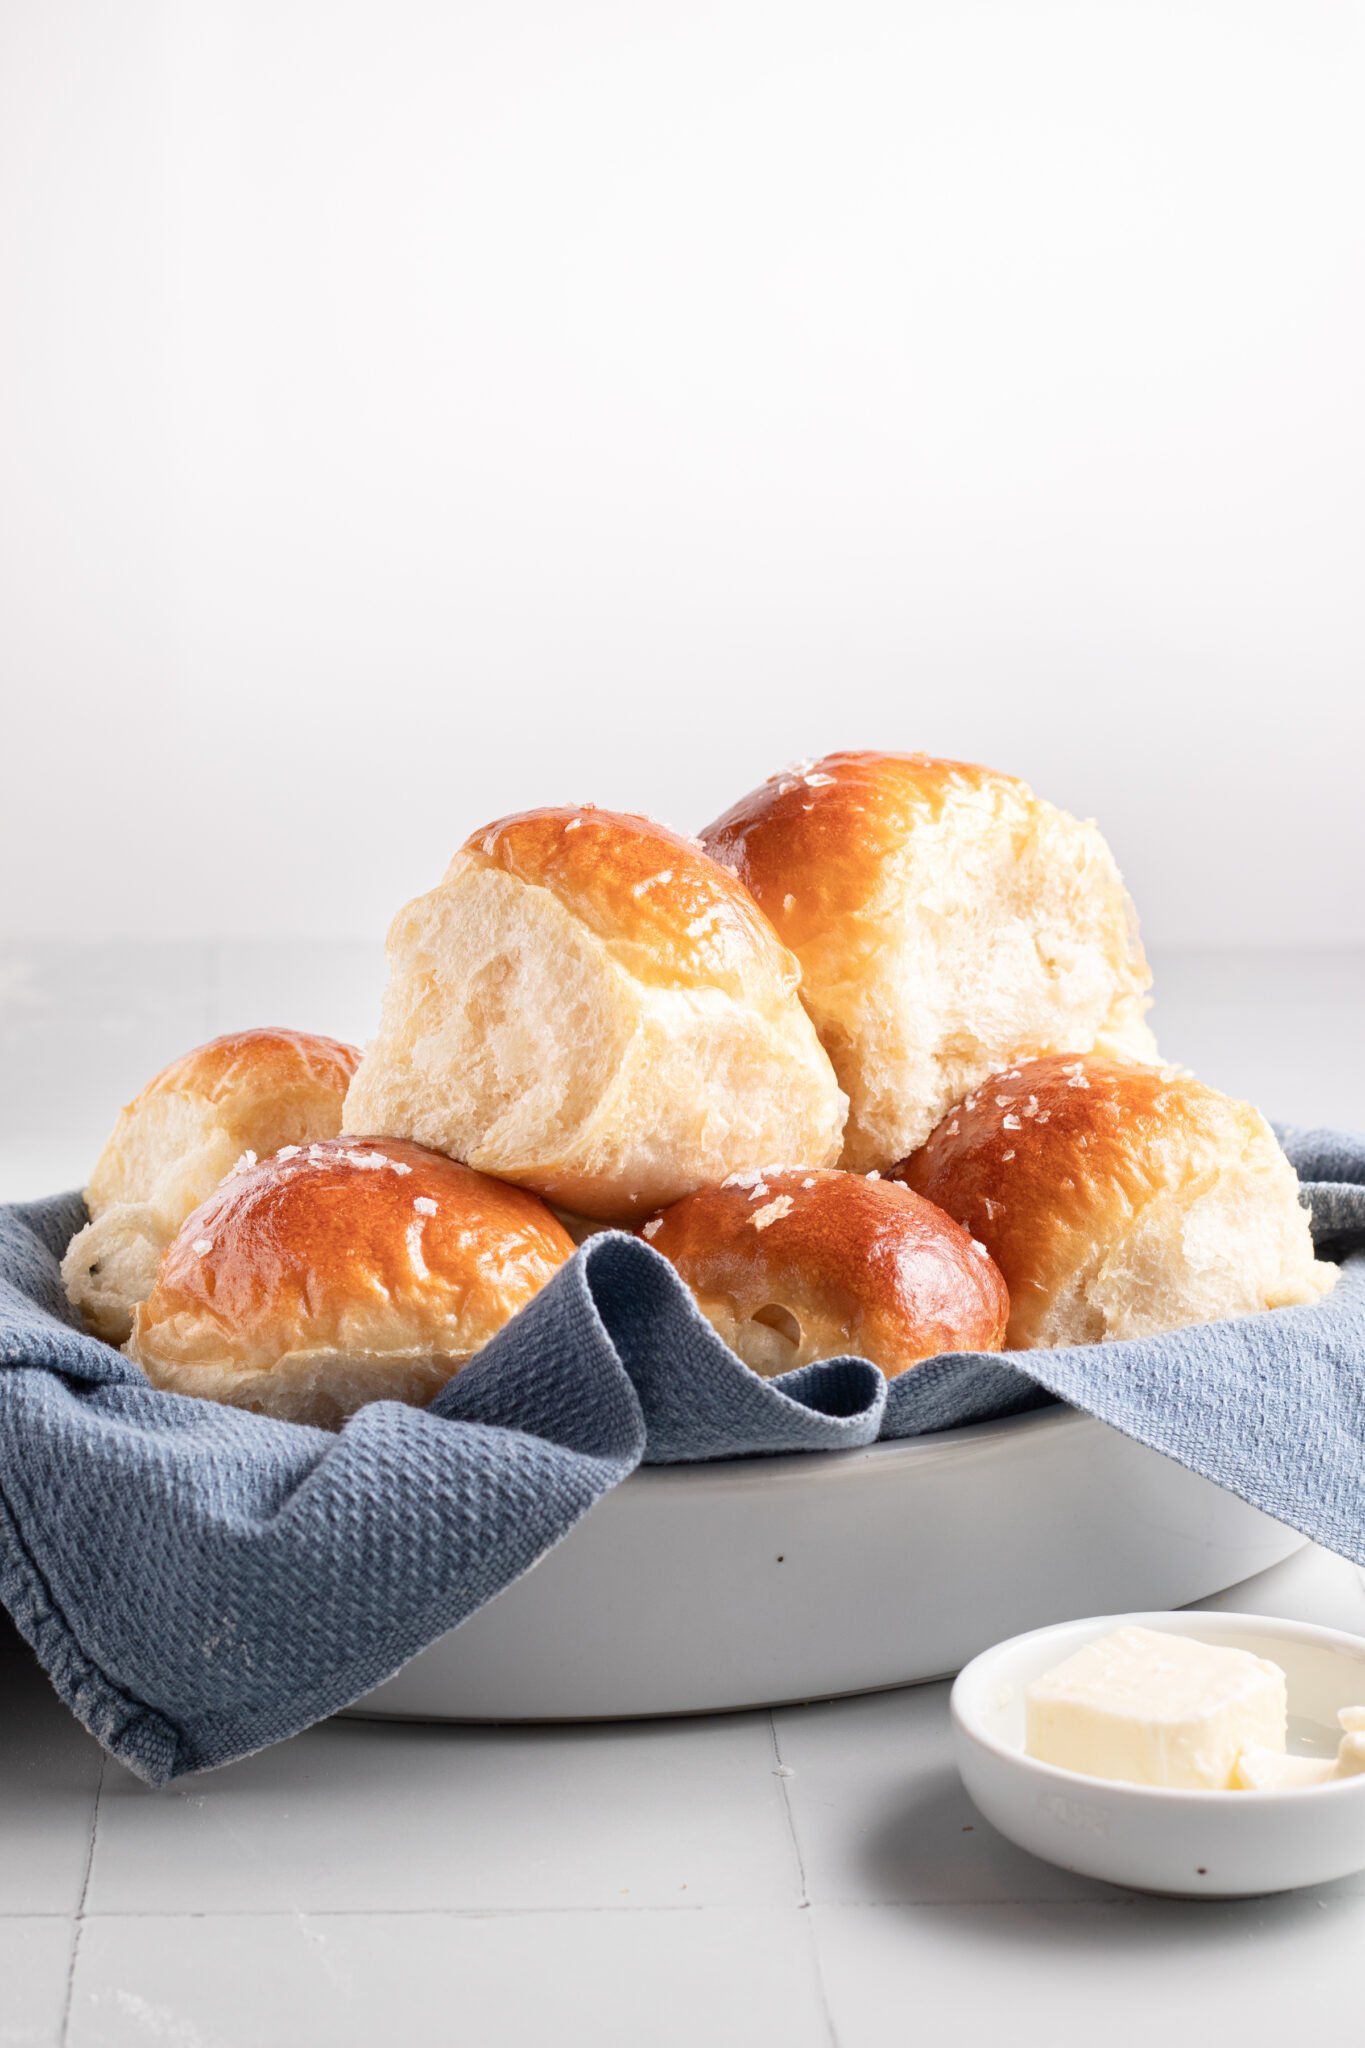
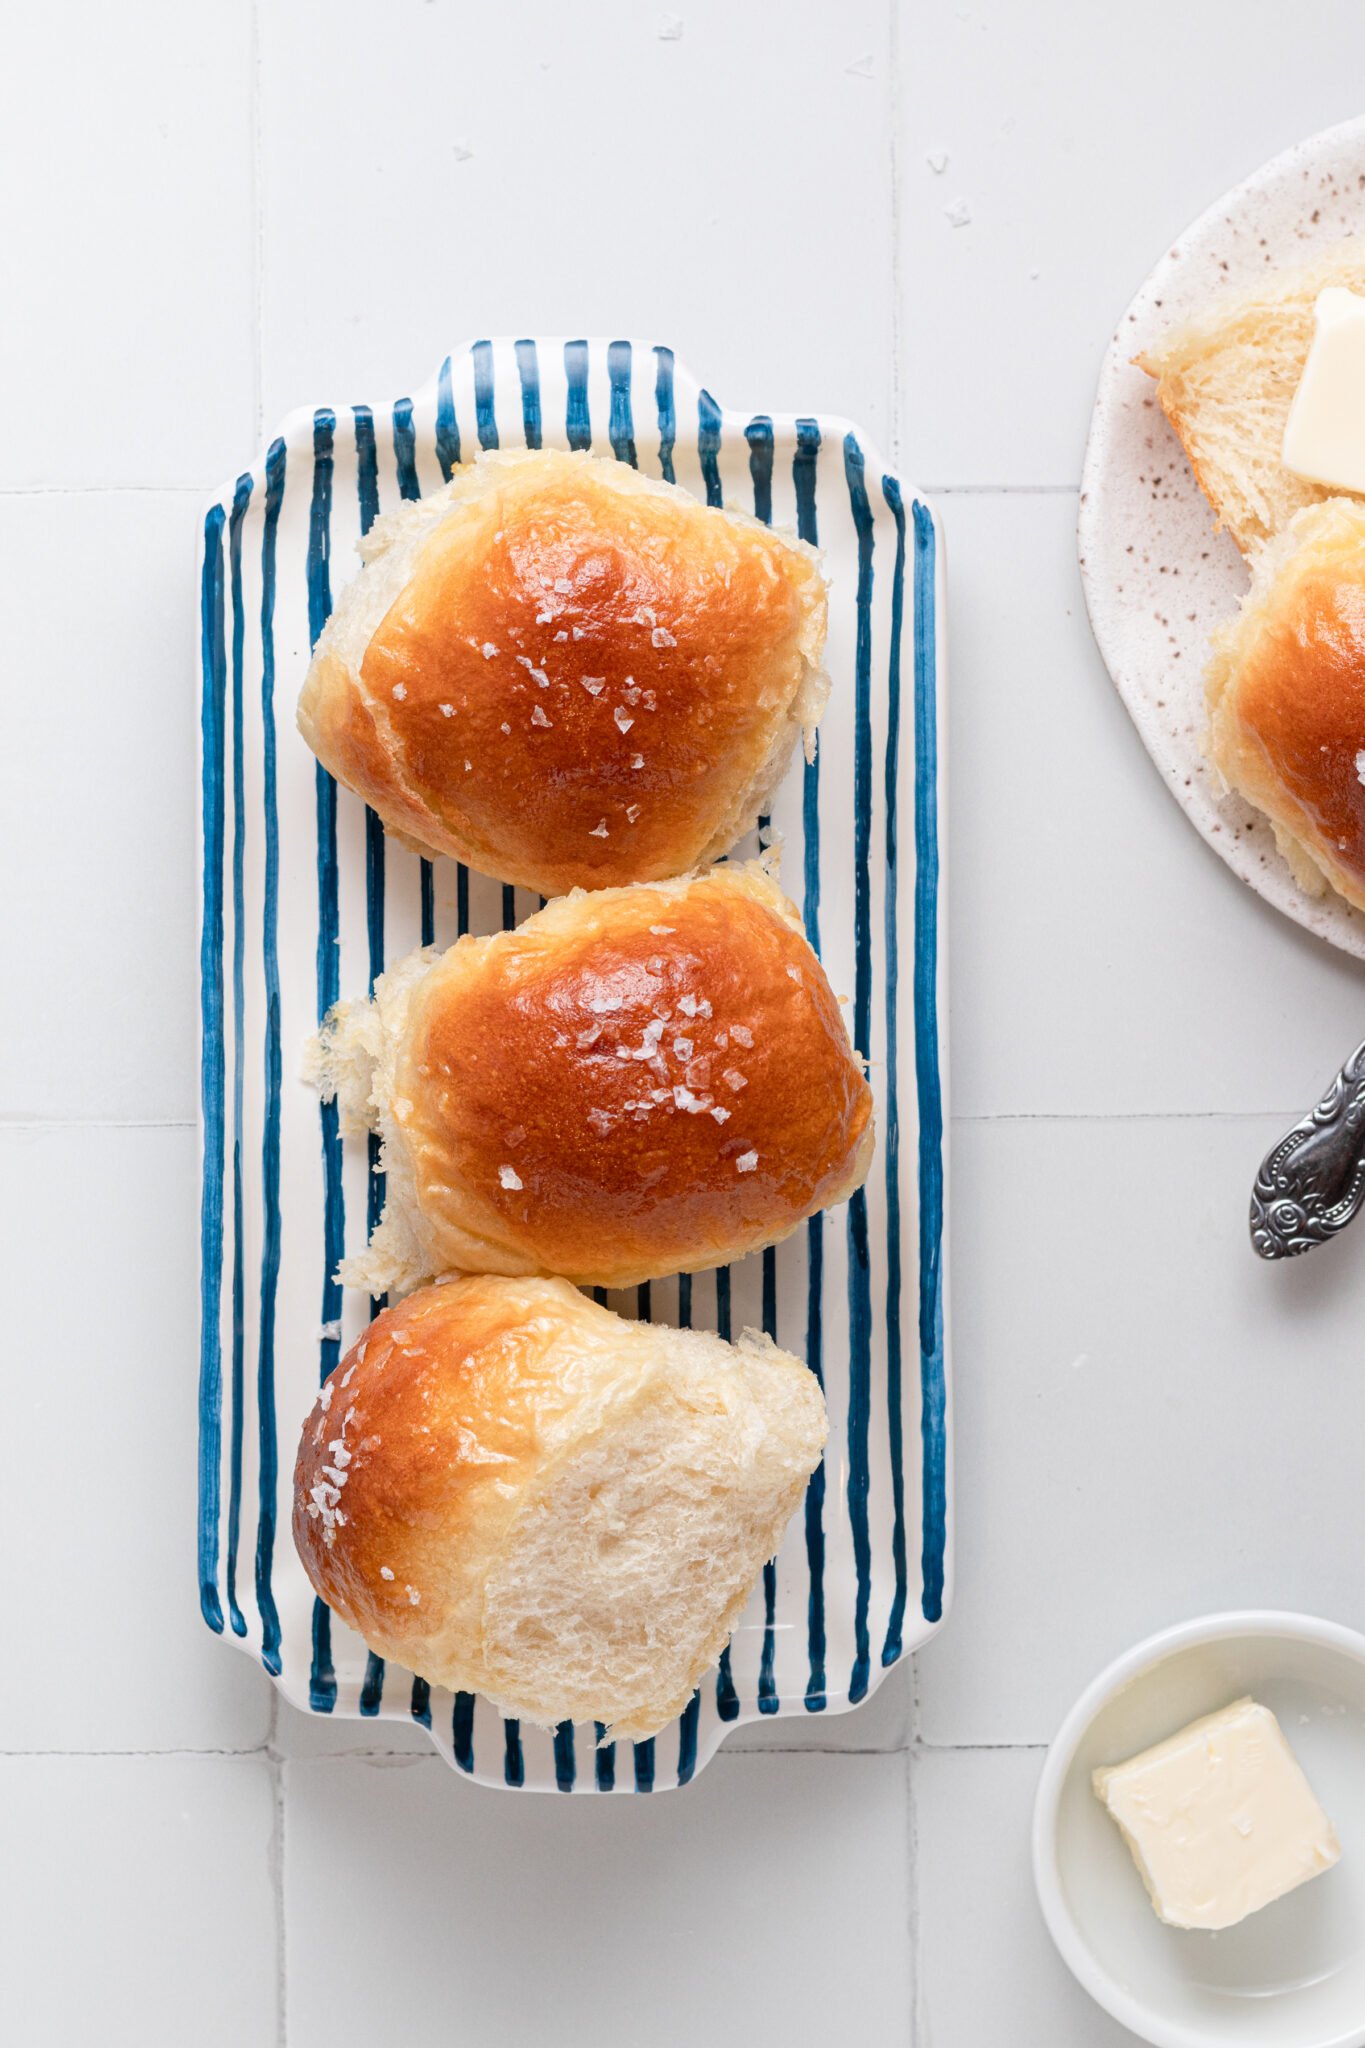
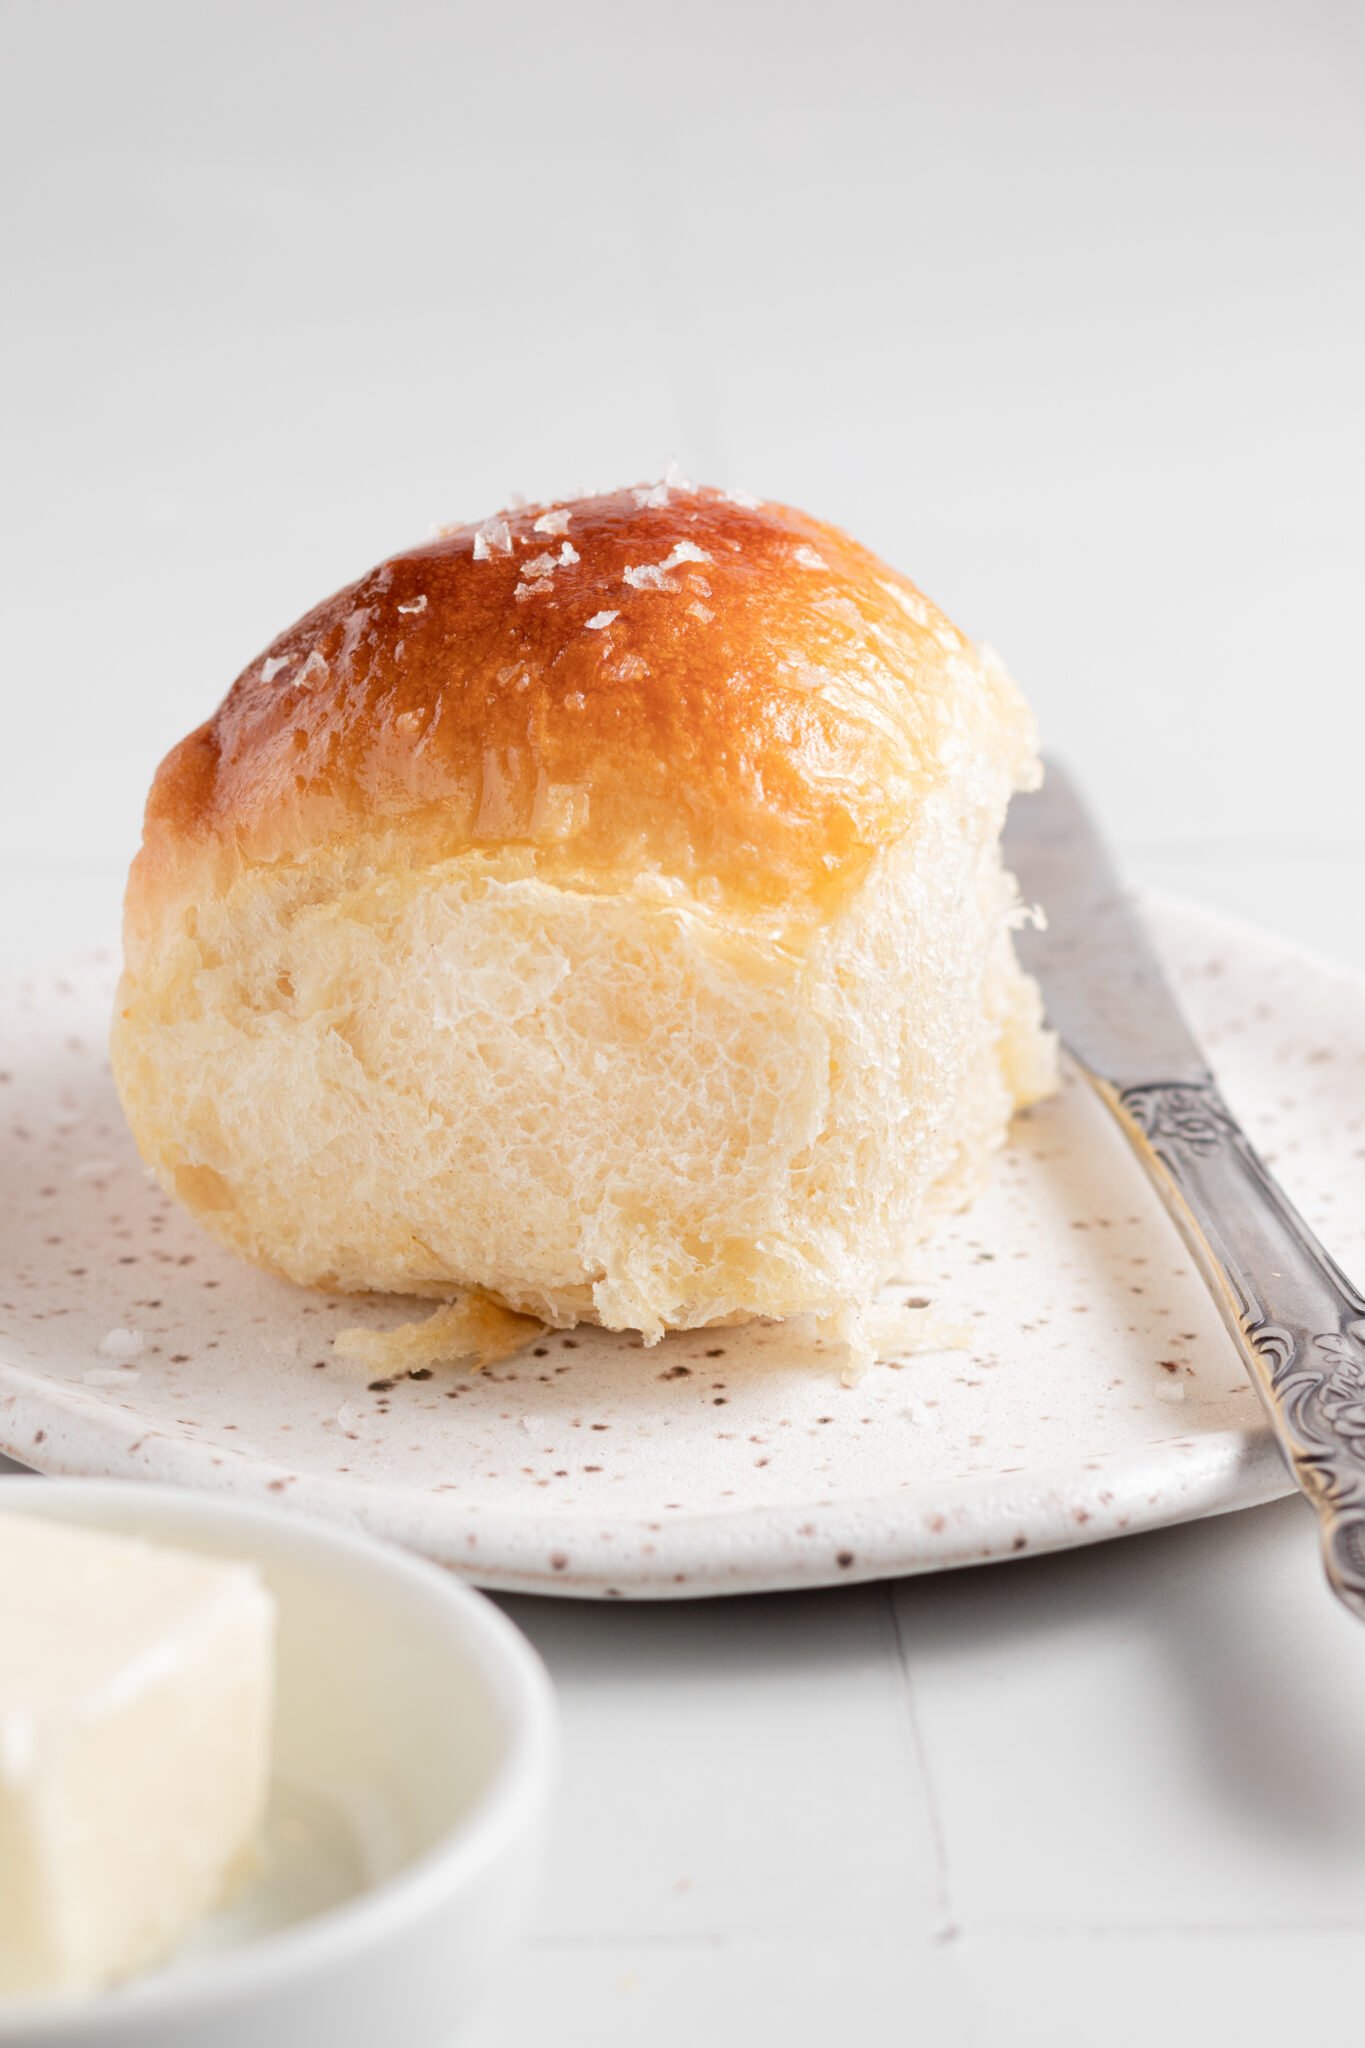
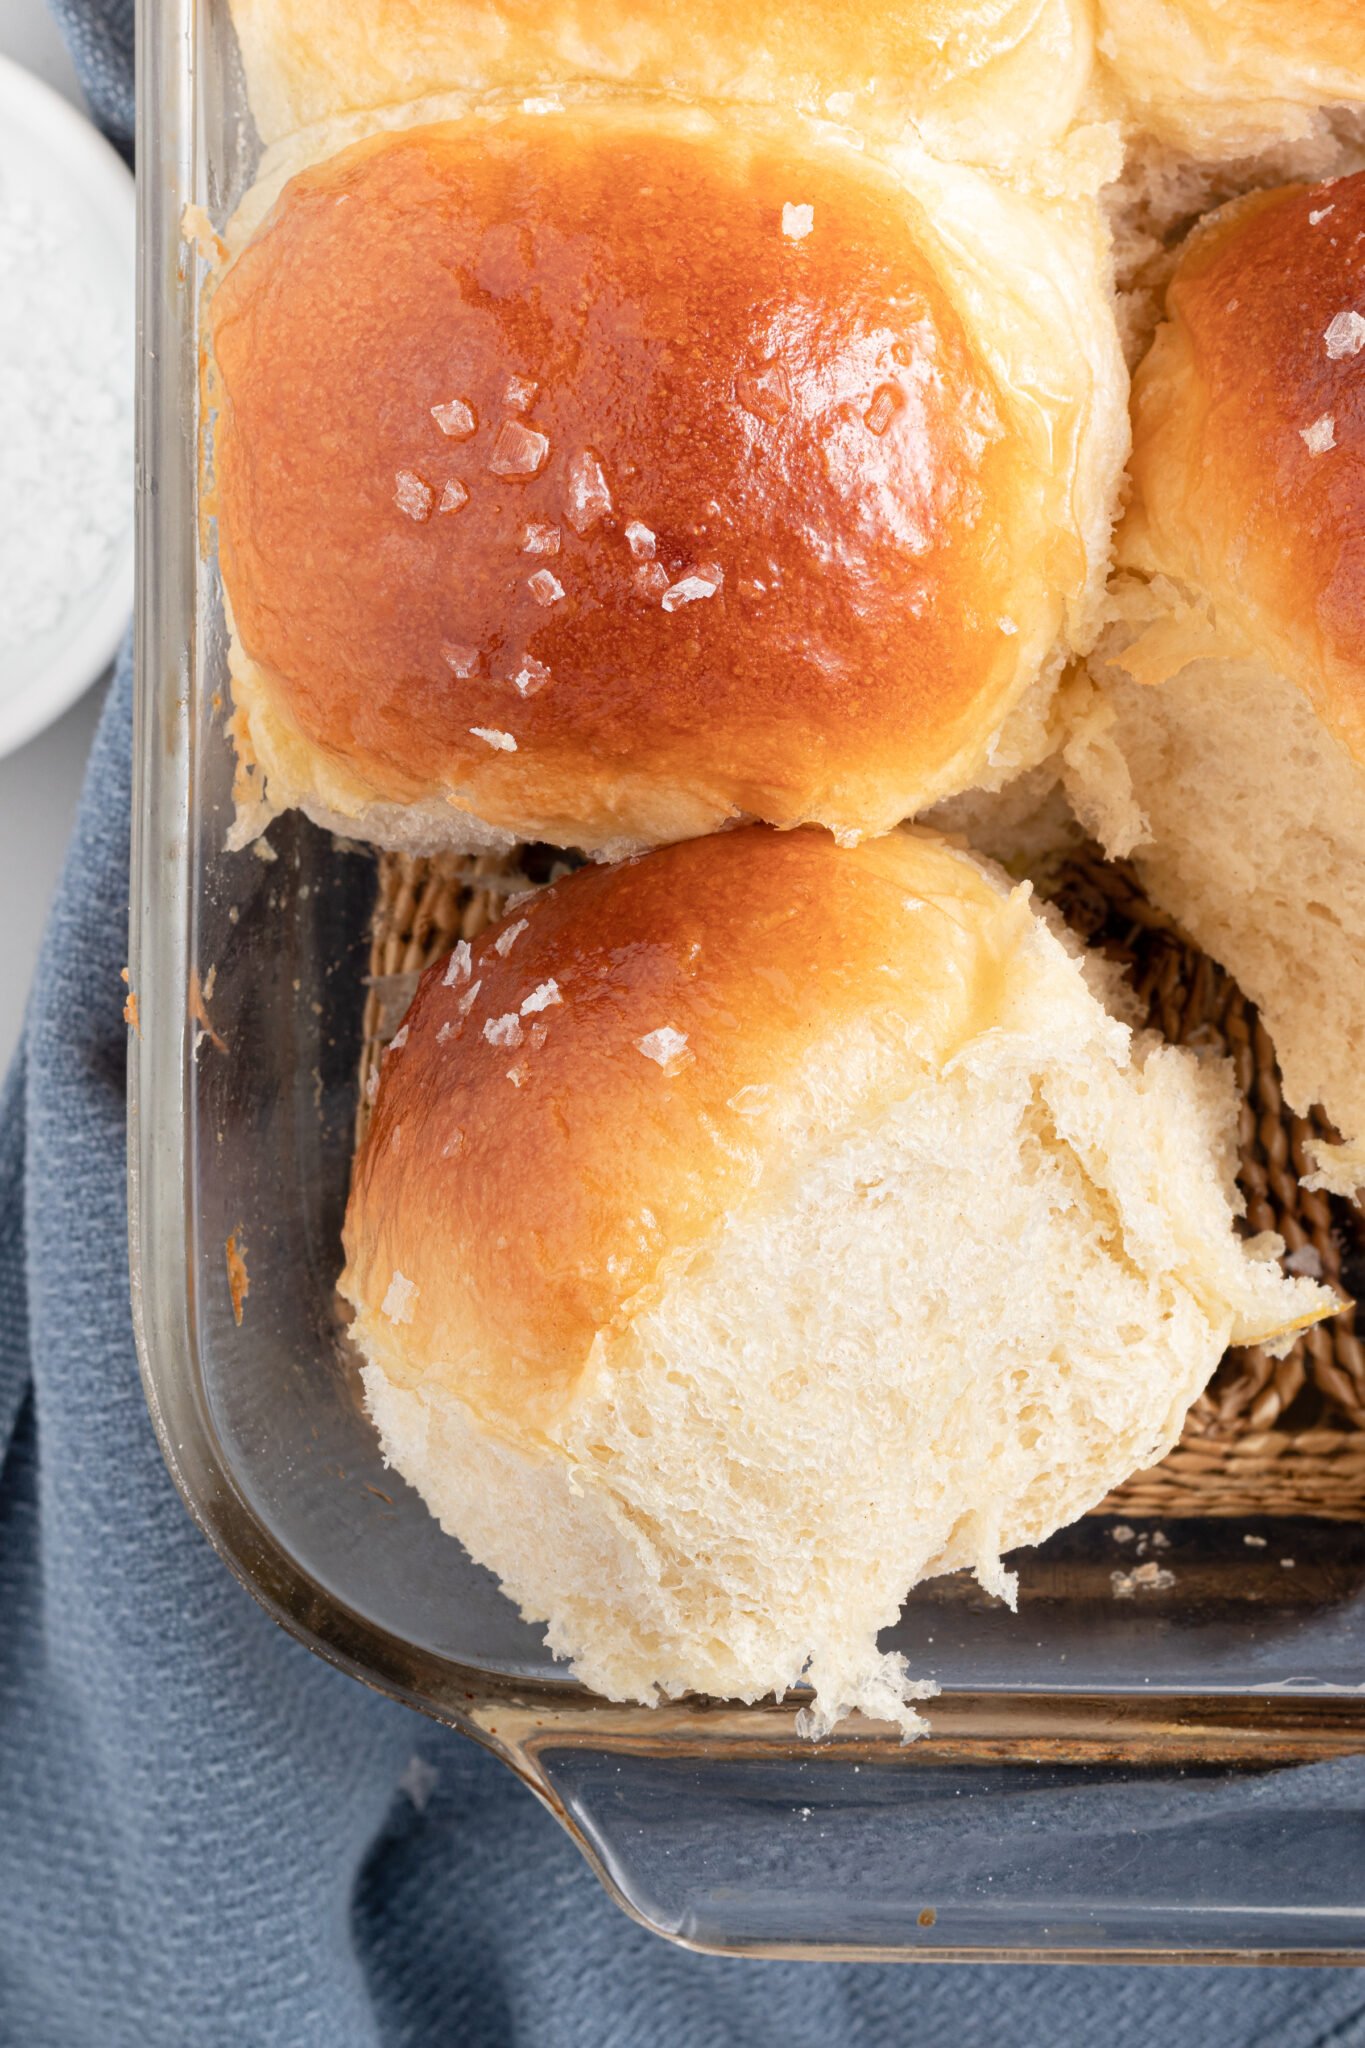
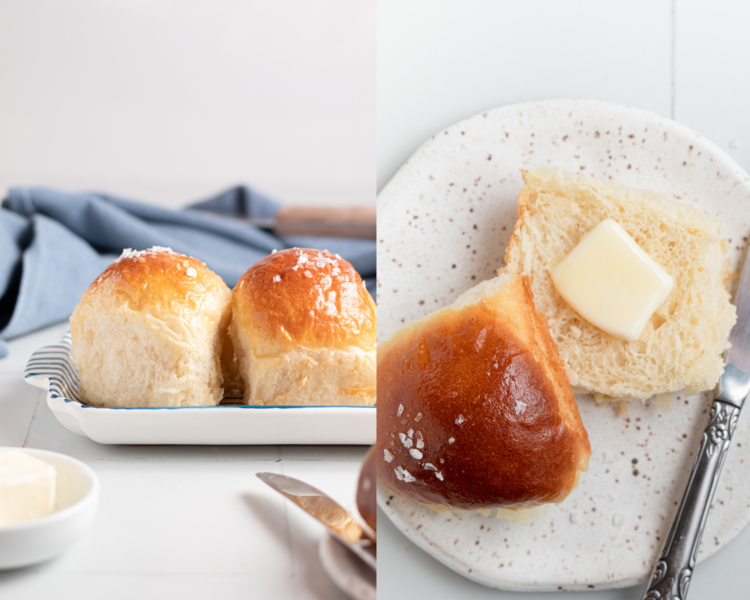
They stay soft for days, and the recipe turns out perfect every single time. They have a slightly sweet taste and a tender crumb that melts in your mouth. And that melted butter and flaky sea salt on top make them totally irresistible! Despite their speedy preparation, these rolls rise beautifully and bake to perfection, making them ideal for weeknight dinners.
I love that they’re a quick recipe but seem like you spent all day in the kitchen. They’re perfect with a cozy, hearty soup like my Broccoli Cheddar Soup, to make as part of your holiday spread, or just with some softened butter. Whatever you serve them, these one-hour dinner rolls will leave everyone asking for more!
Why this recipe works
- Optimized Rising Time: By using a slightly warmer oven environment for rising, the dough can double in size in just 15 minutes instead of the usual 1-2 hours. This is possible because the activated yeast is already in high gear, and the warm environment further accelerates the process.
- Double Rise: The recipe includes two short rises—a first rise for the entire dough and a second rise after shaping the rolls. This double-rise technique lets the dough develop flavor and structure quickly, ensuring the rolls are airy and light.
- Simple Ingredients: The recipe is straightforward because it uses basic, readily available ingredients like bread flour (or all-purpose flour), sugar, milk, and butter. There’s no need for long fermentation or specialty flours, which makes the process faster without sacrificing flavor.
Ingredient Notes
Scroll down to the recipe card for the complete list of ingredients and measurements.
- Bread flour: I love using bread flour because it gives the rolls a bakery-style texture. But if you don’t have it, all-purpose flour works well, too.
- Sugar: even though we’re using instant yeast, the sugar is still like food for the yeast, which feeds off the sugar. It also gives the rolls a slightly sweet flavor.
- Rapid Rise Yeast: Since we’re using rapid rise or instant yeast, the yeast is mixed right into the dry ingredients.
- Whole milk: The milk needs to be ~115-120°F. If the milk is too hot, it can kill the yeast; if it is too cold, the yeast may not activate properly. I like to use milk instead of water for a richer flavor and better crumb.
- Egg: You’ll need an egg for the dough and the egg wash. The egg wash gives the rolls a shiny, golden crust on top.
- Salt: essential for flavor!
Step by Step Directions
Be sure to scroll down to the recipe card for the full recipe instructions.
Warm the milk
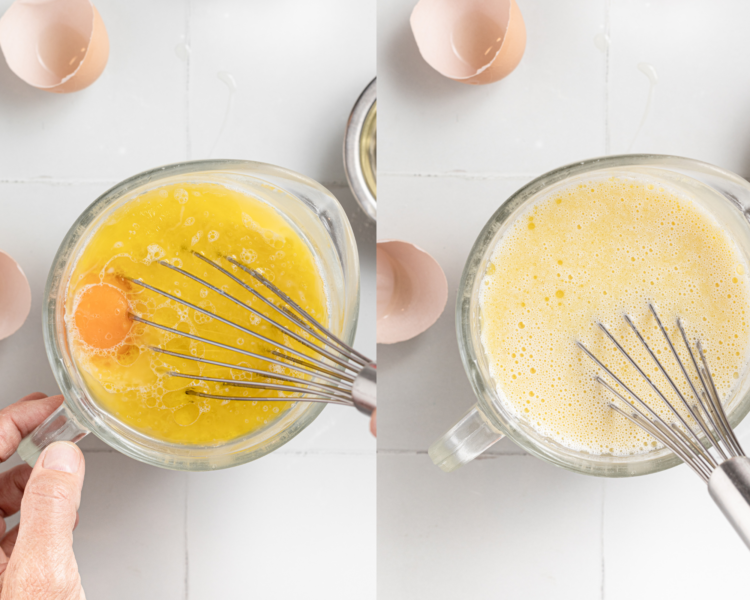
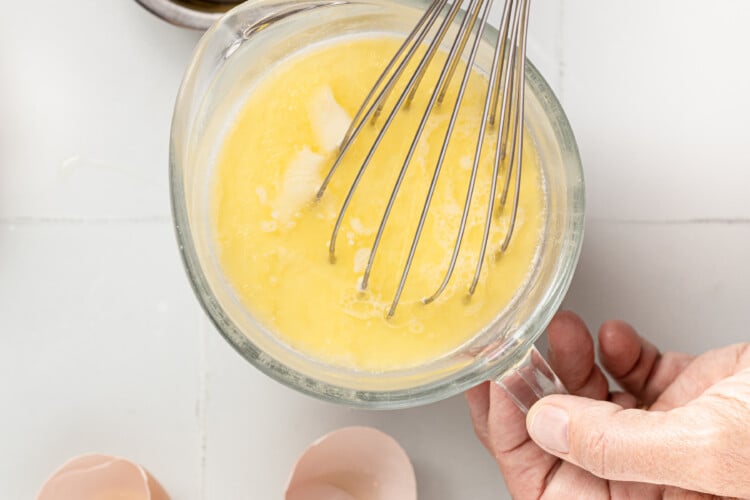
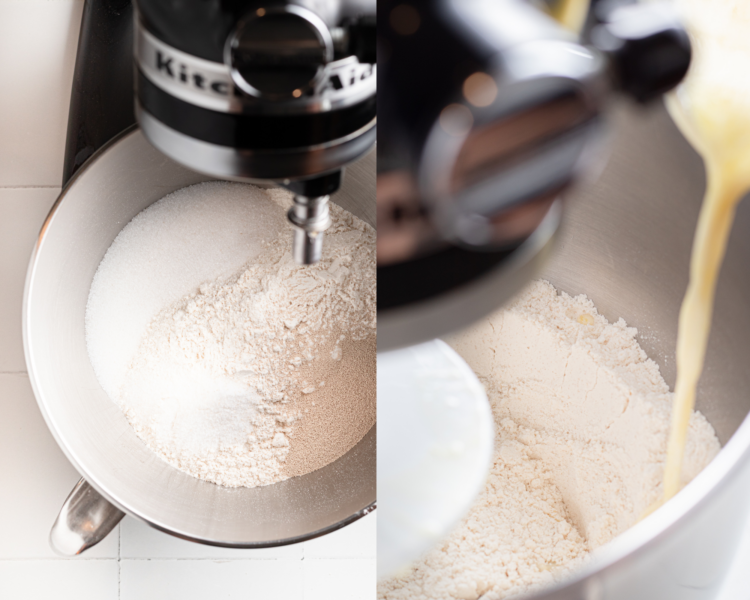
Heat the milk and butter in a microwave-safe bowl or measuring cup for about 1 minute or until warm, ~115-120°F is perfect. Then whisk in the egg and oil.
Make the dough
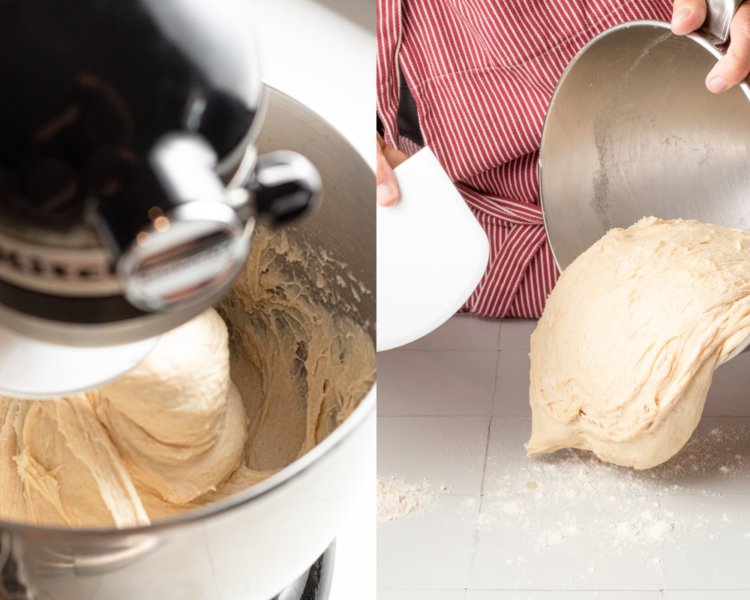
Using the stand mixer, whisk together the dry ingredients, add the milk mixture, and then knead for 6-8 minutes.
5-10 minute proof, then shape
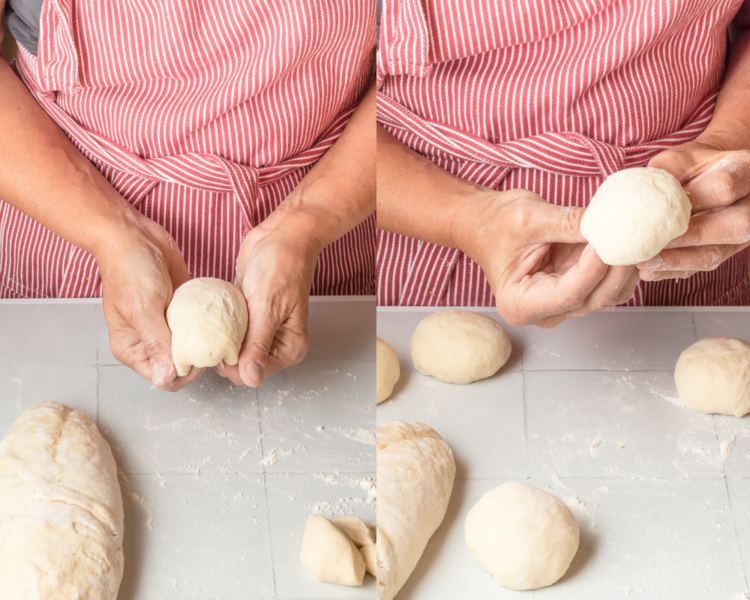
Cover dough with plastic wrap and rest for just 5-10 minutes. Shape the dough into ~65g portions.
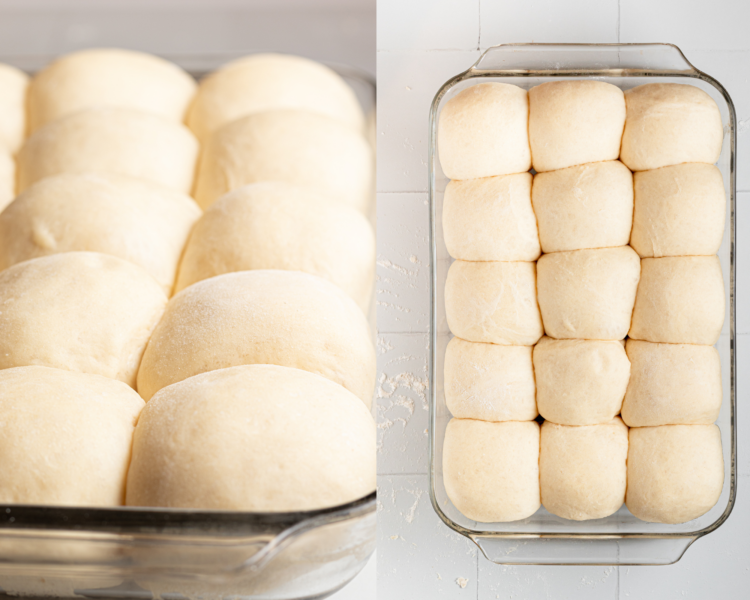
Proof #2 (20 minutes) then bake!
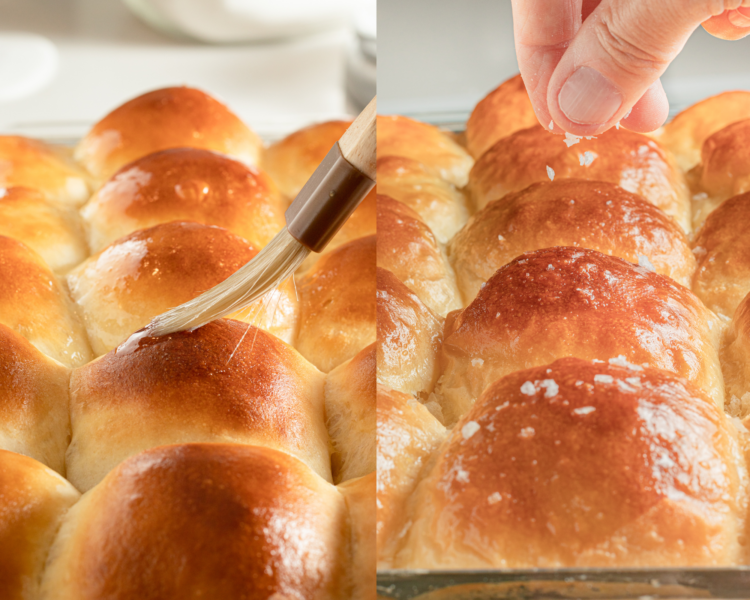
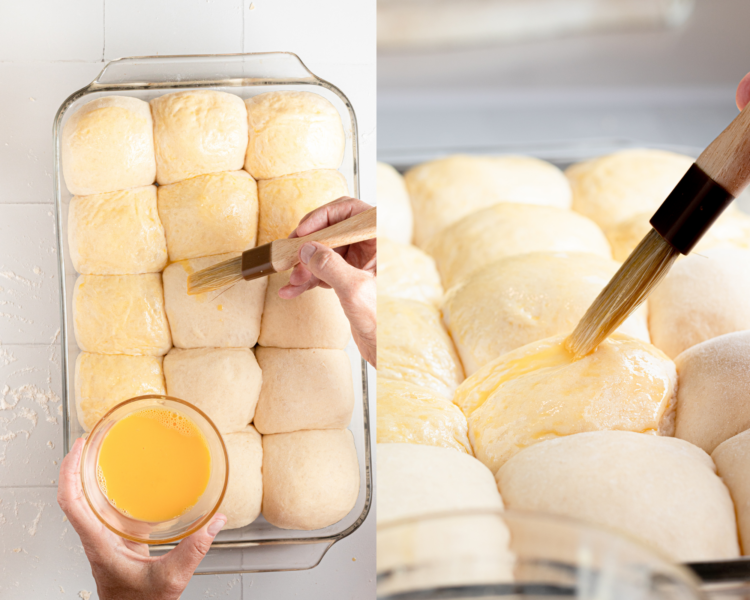
Brush with an egg wash over the top, and bake until golden.
Enjoy!
Brush tops with melted butter and sprinkle with salt and enjoy warm!
Success Tips
- Don’t over knead: Kneading is essential, but overdoing it can result in tough rolls. Just knead until the dough is smooth and elastic, 6-8 minutes using the stand mixer is perfect.
- Adjust Flour as Needed: The dough should be soft and slightly sticky but still manageable. If it feels super sticky, add 1 Tbsp. at a time and knead it again.
- Flavor Variations: For a garlic twist, mix in a teaspoon of garlic powder into the dough, add in herbs, or sprinkle some grated Parmesan cheese on top before baking. You can also top the rolls with sesame seeds or poppy seeds for added texture and taste.
- Prevent Overbaking: Keep an eye on the rolls as they bake. They can go from perfectly golden to overbaked quickly. Bake them until they are just golden brown and sound hollow when tapped on the bottom.
Make Ahead
- You can prepare the dough ahead of time. Yay! After shaping the rolls, cover and refrigerate them overnight. The next day, let them rise at room temperature for 30 minutes before baking.
Storage
- Room temp: Once completely cooled, store them at room temperature in an air-tight baggie for up to 2 days. I don’t like putting them in the fridge because they can dry out.
- Freezing: For longer storage, you can freeze the baked rolls. Place the cooled rolls in a resealable freezer bag or wrap them individually in plastic wrap and then in aluminum foil to prevent freezer burn. Label the bag with the date.
- To Reheat from Frozen: When ready to use, thaw the rolls at room temperature or reheat them directly from frozen. To reheat, wrap the rolls in foil and warm them in a preheated oven at 300°F (150°C) for 10-15 minutes or until heated through.
- Microwave Reheat: You can also reheat rolls in the microwave by wrapping them in a damp paper towel and microwaving for 10-20 seconds. This method is quicker but may not yield as good results as oven reheating.

Before You Begin! If you make this, please leave a review and rating letting us know how you liked this recipe! This helps our business thrive & continue providing free recipes.
1-Hour Dinner Rolls
Ingredients
- 1 1/2 cups whole milk
- 2 Tbsp. unsalted butter
- 1 large egg, room temperature
- 2 Tbsp. vegetable oil
- 3 3/4 – 4 cups bread flour, spooned and leveled, plus more for dusting
- 1/4 cup granulated sugar
- 2 standard packets (4 1/2 tsp.) rapid rise yeast/fast acting yeast
- 1 tsp. salt
Egg wash and finishing
- 1 egg, lightly beaten with a splash of water
- 2-4 Tbsp. softened butter, for brushed on baked rolls
- flaky sea salt, I use Maldon
Last step! If you make this, please leave a review and rating letting us know how you liked this recipe! This helps our business thrive & continue providing free recipes.
Instructions
- Preheat the oven to 170°-180°F. Or whatever your oven will go to at the lowest, mine is 175°F. Spray a 9×13-inch oven-safe baking dish with nonstick spray or spread with softened butter. Set aside.
- Heat the milk and butter in a microwave-safe bowl or measuring cup for about 1 minute or until warm, ~115-120°F is perfect. Be sure to use a thermometer to ensure it’s not too hot or too cold. The butter doesn’t need to be completely melted, just softened.1 1/2 cups whole milk, 2 Tbsp. unsalted butter

- Whisk in the room-temperature egg and oil. If this step significantly drops the temperature, microwave just for another few seconds to bring it up to that sweet spot range.1 large egg, room temperature, 2 Tbsp. vegetable oil

- Whisk together the flour (start with 3 ¾ cup), sugar, yeast, and salt in the bowl of a stand mixer. Add the dough hook. Slowly add the milk mixture on low speed.3 3/4 – 4 cups bread flour, spooned and leveled, plus more for dusting, 1/4 cup granulated sugar, 2 standard packets (4 1/2 tsp.) rapid rise yeast/fast acting yeast, 1 tsp. salt
- Increase the speed to medium-low and knead for 6-8 minutes. The dough will be smooth, and a little sticky is OK. If it still feels very sticky, add 1 tbsp. Flour at a time and knead again. Cover tightly with plastic wrap and rest for 5-10 minutes.
- Turn the dough out onto a lightly floured surface. Flour your hands and using a bench scraper, divide the dough into 2 logs and then cut into 15 equal portions. I like to use a kitchen scale to make sure they’re measured perfectly, each roll will weigh ~60-65 grams.
- To shape each roll, pinch the dough at the bottom, roll it on the counter under the palm of your hand with a gently touch until it comes together in a smooth ball (see video for more guidance).
- Place dough balls in the prepared 9×13 pan. Cover with a clean kitchen towel. Transfer the rolls to the oven, but turn the oven OFF and all the rolls to rise again for 20 minutes. They should double in size.
- Remove the rolls from oven. Turn the oven to 375°F. Once preheated, brush the tops of the rolls with the egg wash.1 egg, lightly beaten with a splash of water
- Bake the rolls for ~16-18 minutes, keeping an eye on them so the tops don’t brown too fast. If they are, you can tent a piece of foil over the tops. They should have golden brown tops, and an internal temperature of 190°F-200°F is perfect. Remove from the oven and brush with softened butter. Sprinkle flaky sea salt on top.2-4 Tbsp. softened butter, for brushed on baked rolls, flaky sea salt, I use Maldon
- ENJOY!

Notes
- Room temp: Once completely cooled, store them at room temperature in an air-tight baggie for up to 2 days. I don’t like putting them in the fridge because they can dry out.
- Freezing: For longer storage, you can freeze the baked rolls. Place the cooled rolls in a resealable freezer bag or wrap them individually in plastic wrap and then in aluminum foil to prevent freezer burn. Label the bag with the date.
Nutrition Information
Nutritional information is provided as a courtesy and is automatically calculated. It should only be construed as an estimate rather than a guarantee. Ingredients can vary and Kroll’s Korner can’t make any guarantees to the accuracy of this information.

I have always wanted to make dinner rolls and this recipe grabbed my attention! I made them for Super Bowl Sunday because my party was serving soup and Chili and I volunteered to bake. I also made an Artisan loaf and some Kroll’s Cookies! The rolls were AMAZING! I had a few snafu moments with the second one being the 2nd proof in the oven. They weren’t rising as fast as the recipe indicated, but I left them in for some additional time and WHEW, they finished the rise. I keep my house on the cool side so perhaps that impacted the rise. Nonetheless, the end result was perfect. WILL MAKE AGAIN! PS I didn’t do the last step of butter brush and salt and I must say it would have made them even better. So next time!
Thanks so much Sue, they turned out beautifully! 🙂
I have a question. I have made these rolls 3 times now, and the finished product tastes delicious, however, my dough is incredibly wet and sticky. I end up leaving a ton of dough in my bowl. I’ve even added extra flour. Any thoughts on what I might be doing incorrectly? Your recipes are a big part of my every day life. Please keep creating new ones. Thank you and Happy New Year.
Hi Nadine! Thank you so much for making these & for your kind words. The dough should be soft and slightly sticky but still manageable. If it feels super sticky, add 1 Tbsp. at a time and knead it again. 🙂
These dinner rolls are not only easy to make but absolutely delicious and look pretty too! Highly recommend if you aren’t a confident baker. Your family and friends will love these rolls. I did have an extra piece of dough so I squeezed it in the pan. Next time I will make it so I get 3 across and 5 down, then it will be more picture perfect. The taste is amazing! I was wondering if this dough could be used for cinnamon rolls as well?
They are beautiful Lori, thank you! I am not sure about the cinnamon rolls. But I have these recipes: https://krollskorner.com/recipes/breakfast/small-batch-cinnamon-rolls/ or https://krollskorner.com/recipes/desserts/sheet-pan-cinnamon-rolls/
Incredible! Melt in your mouth and calls you back for another one and another one!
woo hoo!! I am so glad Mary. Thank you for making them and leaving a positive review!
I’ve made this recipe with both bread and AP flour and they came out perfect each time. So fast and easy!
We cut the leftovers in half, smear a little butter, sprinkle with cinnamon sugar and pop them in the air fryer for a few minutes. My kids love them!
oh that sounds soo good with the cinnamon and sugar!! Thanks so much Erin! 🙂
These rolls were amazing and easy to make. The only thing that I did different was using 2% milk only because I did not have whole milk. Since this was my first time making them I don’t know if it made a difference. The rolls taste delicious and my grandson loved them (which is a big compliment)!
I have made some of your recipes and they are all good and easy!
Awww I’m so glad these were a hit for you, Martha! Thank you for loving my recipes 🫶🏻 It makes me so happy to hear that!!
Your recipes are amazing!! Have you by chance tried these with 1-1 gluten free flour??
Aw thank you so much Beth! I haven’t personally, but I believe someone on Instagram did and said they turned out well!
Hi, this recipe looks great! Would it still turn out well if I replace the butter with more oil?
Hi! I think so but I haven’t tested, I think the butter gives them more of a yummy buttery flavor, oil is more neutral, so I am not sure how the overall flavor would be!
I have a favorite dinner roll recipe I generally use. This one caught my eye well, because I was indeed short on time. Absolutely AMAZING! I made two batches and there were very few leftover. Went perfect with our Easter ham and roast. Thank you for sharing.
Aw I am so glad, thank you for making them!! 🙂 hope you had a great Easter!
So good and easy! Haven’t made a bad recipe yet from Krolls Korner.
This makes me so happy, I am glad to hear it! Thank you Megan!