Instant Pot Mac and Cheese
This post may contain affiliate links. Please read our disclosure policy.

This Instant Pot Mac and Cheese makes the creamiest mac and cheese with minimal effort. It’s classic comfort food, quick and easy to make, suitable for busy weeknight dinners or lazy weekends.
It pairs deliciously with my crock pot bbq chicken thighs, shaved brussels sprouts salad, chicken tenders, or meatloaf!
Making mac and cheese from scratch can take a bit of time and effort, especially if making a roux-based sauce. This recipe is such a game changer because the magic of the Instant Pot takes away all the hands-on time and ensures the macaroni is cooked perfectly every single time. I love that for us!
Perfect for weeknight dinners, potlucks, or anytime you need a comforting meal.

Why this recipe works
- The Instant Pot helps create the best al dente and tender but not overcooked macaroni every single time!
- One pot – no need to boil the water separately!
- Speedy dinner option: get dinner on the table in 20 minutes or less!
- Evaporated milk and cornstarch tossed in with the cheese are 2 tricks for a gooey, creamy, cheesy bowl of Mac and cheese!

What are the best cheese choices for mac and cheese?
- I love using a combination of cheddar and American cheese. Mixing and matching different cheeses helps create a complex, rich flavor.
- American cheese is great for its meltability and creaminess, and its mild flavor compliments the cheddar cheese without overpowering it.
- Cheddar is the quintessential cheese for mac and cheese. It provides a bold, classic taste and melts well, creating a creamy sauce.
- Other great choices to mix and match include Gruyère, Parmesan, Fontina, Gouda, Pecorino Romano, or even Monterey Jack cheese. Mozzarella adds a lot of stretch, but it’s a good choice if you don’t mind that gooey factor!
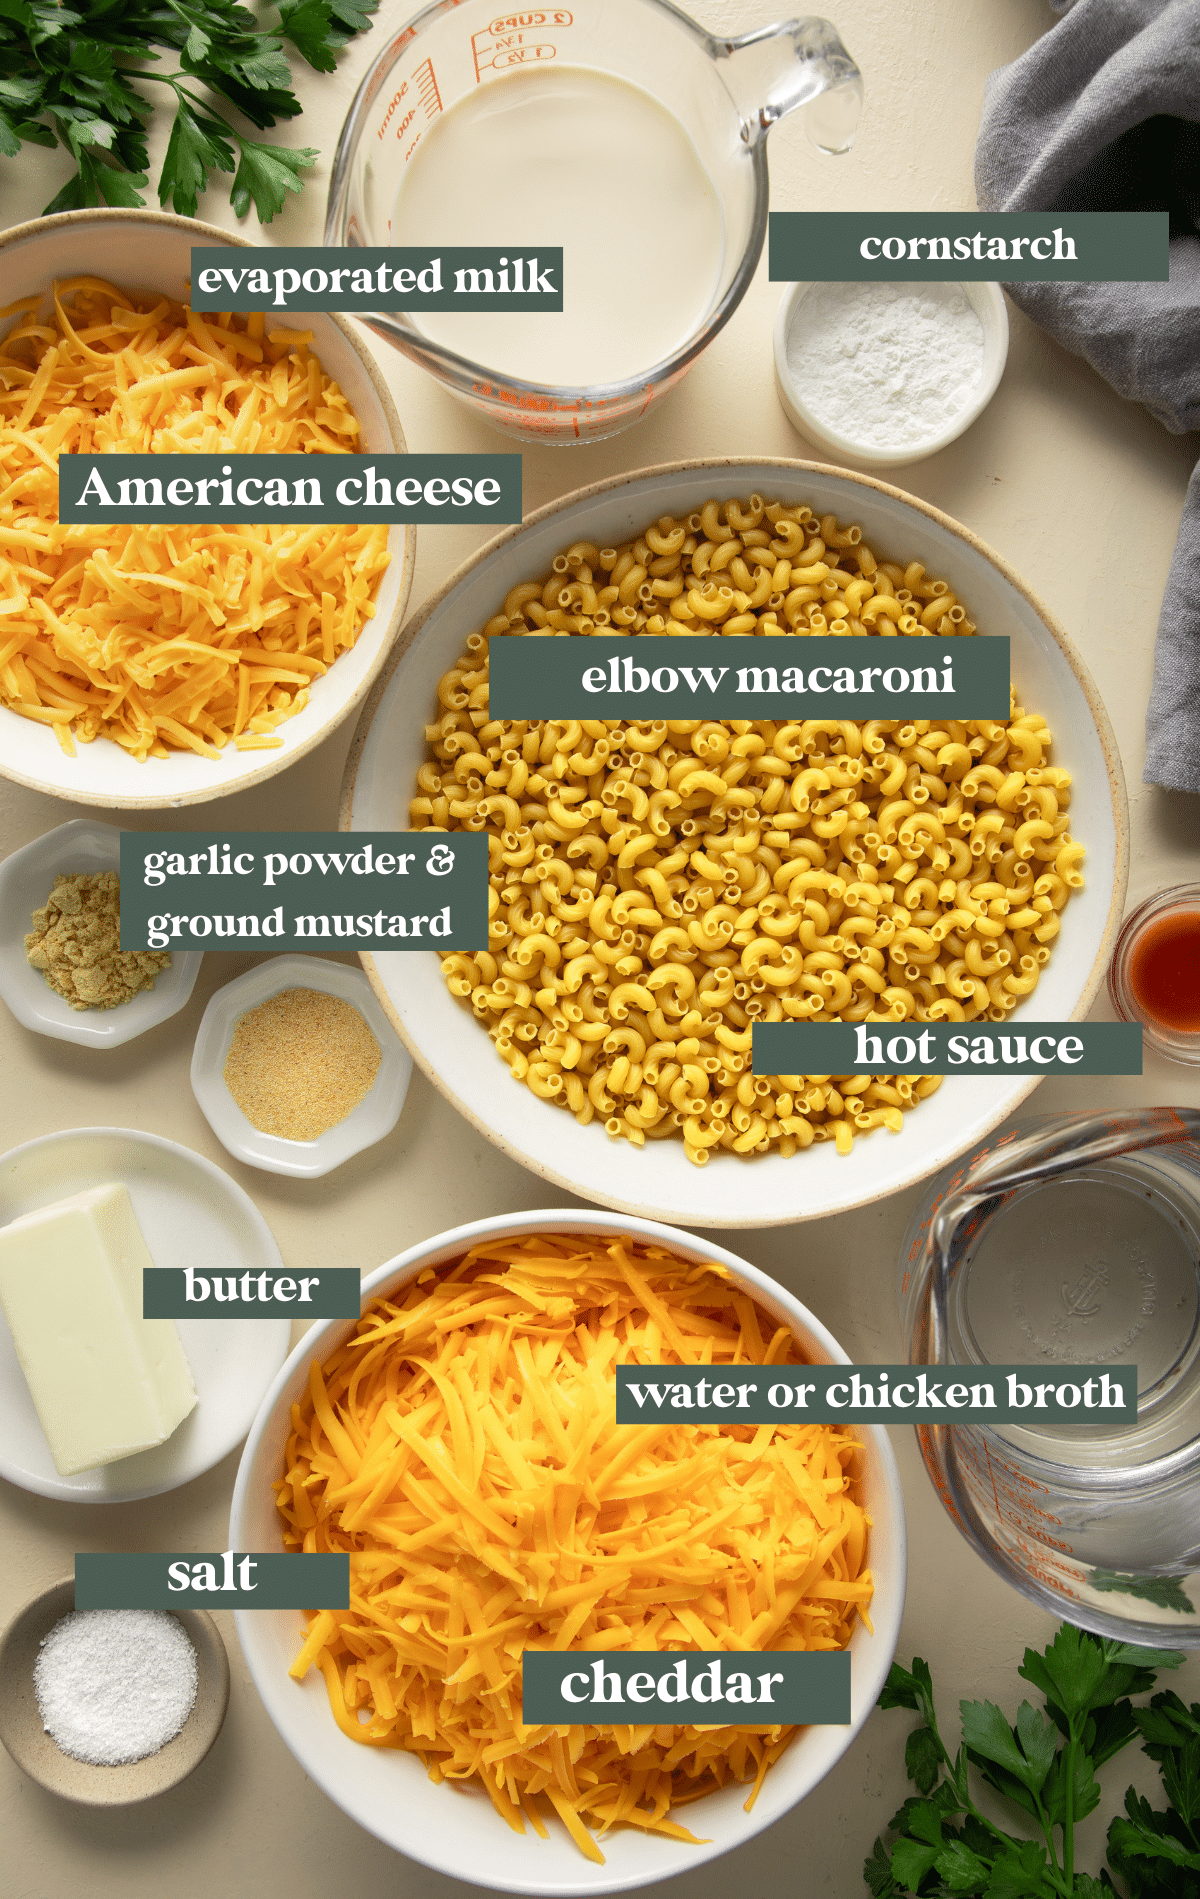
Ingredients
(For the full recipe, scroll down to the recipe card below)
- Elbow macaroni: Elbow macaroni is the classic pasta choice for mac and cheese. I love how its shape hold the creamy sauce!
- Chicken broth (or water): I recommend cooking the pasta in broth to infuse it with extra flavor. You can opt for low-sodium broth to control the saltiness of your mac and cheese!
- Butter: butter adds richness and a creamy texture to the mac and cheese. You can probably get by with using less than my recipe calls for, but I love an indulgent, satisfying mac and cheese!
- Cornstarch: makes a smooth and velvety cheese sauce and helps prevent it from becoming grainy.
- Cheese: I love the combination of mild or medium cheddar cheese and American cheese.
- Evaporated milk: adds a luxurious and rich texture to the sauce. Whole milk will work fine too but evaporated milk preferred!
Step by Step Directions
(For the full recipe, scroll down to the recipe card below)
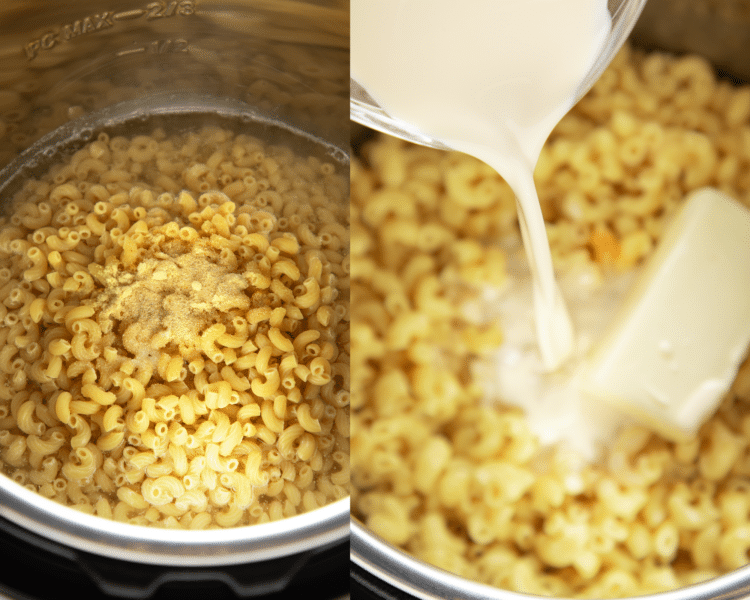
Let’s cook!
Add the elbow noodles, broth/water, and seasonings. Cook on high pressure for 4 minutes. Then stir in the evaporated milk, butter, and hot sauce.

Stir in cheese, that’s it!
Gradually add in the cheese, stirring in between additions. Taste and adjust and seasonings and voila! Creamy mac and cheese perfection.
Stove top directions
- Cook elbow noodles according to package directions & drain.
- Toss the shredded cheese with cornstarch.
- Add the butter to the cooked pasta and stir until melted.
- Add the evaporated milk, ground mustard, garlic powder, and hot sauce.
- Add the cheese in increments. Let it sit for a few minutes to set up. If it is too thick, add more milk.
- Taste and adjust seasonings, adding more salt or hot sauce.

Expert Tips
- Creaminess: If you prefer an even creamier mac and cheese, you can add more milk, heavy cream, or even a dollop of sour cream.
- Cheese Choices: Feel free to mix and match cheeses. See above for cheese options!
Variations
- Different pasta shapes: I also love making this recipe with shell pasta! I have not tried yet with rotini, fusilli, or cavatappi but I bet they would all work well.
- Bacon Mac and Cheese: Cook some bacon until crispy, crumble, and stir it in before serving.
- Buffalo Mac and Cheese: Add some shredded rotisserie chicken and a splash of buffalo sauce.
- Veggie Mac and Cheese: Stir in some steamed broccoli or peas for a veggie-packed version.

Storage
- Storing: Store leftovers in an airtight container in the refrigerator for up to 3 days. To freeze, cool completely and portion into smaller freezer safe containers and freeze for up to 3 months.
- Reheating: Reheat in the microwave or on the stove with a splash of milk to restore creaminess. Stir frequently to prevent burning. When reheating from frozen, thaw the mac and cheese in the refrigerator overnight. This ensures even reheating and prevents the cheese from separating.
shop this post
 Buy Now →
  Buy Now →
 Before You Begin! If you make this, please leave a review and rating letting us know how you liked this recipe! This helps our business thrive & continue providing free recipes.

Instant Pot Mac and Cheese
Ingredients
- 1 lb. (16 oz.) elbow macaroni, dried/uncooked
- 4 cups chicken broth or water (chicken broth for best flavor)
- 1 tsp. kosher salt, plus more to taste
- 1 tsp. ground mustard
- 1/2 tsp. garlic powder
- 12 oz. can evaporated milk (or whole milk)
- 1/2 cup butter, unsalted
- 1 tsp. of your favorite hot sauce
- 8 oz. mild or medium cheddar cheese, shredded (not from a bag, buy a block & shred yourself)
- 8 oz. American cheese, shredded (not from a bag, buy a block & shred yourself )
- 1 Tbsp. cornstarch
Last step! If you make this, please leave a review and rating letting us know how you liked this recipe! This helps our business thrive & continue providing free recipes.
Instructions
- Add the uncooked elbow noodles, broth/water, kosher salt, ground mustard, and garlic powder to the Instant Pot. Stir gently to combine.1 lb. (16 oz.) elbow macaroni, dried/uncooked, 4 cups chicken broth or water, 1 tsp. kosher salt, plus more to taste, 1 tsp. ground mustard, 1/2 tsp. garlic powder
- Place the lid on, being sure to set the valve to seal. Cook on high pressure for 4 minutes.
- Perform a quick release. When releasing the steam, the Instant Pot can sputter a bit due to the pasta's starchy content so be sure to use a kitchen towel or oven mitt for safety when performing this step.
- Remove the lid. Add the evaporated milk, butter, and hot sauce. Stir to combine.12 oz. can evaporated milk, 1/2 cup butter, unsalted, 1 tsp. of your favorite hot sauce
- In a bowl, toss the cheese with the cornstarch & then begin to add the cheese a little at a time, stirring in between additions. Don't add in all the cheese at once.8 oz. mild or medium cheddar cheese, shredded, 8 oz. American cheese, shredded, 1 Tbsp. cornstarch
- Allow to rest a few minutes to thicken up.
- Taste and adjust seasonings. Serve immediately and enjoy!
Notes
- Avoid Pre-Shredded Cheese: Pre-shredded cheeses contain anti-caking agents that can make your sauce grainy. I recommend shredding your own cheese to ensure a smoother sauce.
- Storage and reheating: Store leftovers in an airtight container in the refrigerator for up to 3 days. To freeze, cool completely and portion into smaller freezer-safe containers and freeze for up to 3 months. Reheat in the microwave or on the stove with a splash of milk to restore creaminess. Stir frequently to prevent burning.
- Stovetop directions:
- Cook elbow noodles according to package directions & drain.
- Toss the shredded cheese with cornstarch.
- Add the butter to the cooked pasta and stir until melted.
- Add the evaporated milk, ground mustard, garlic powder, and hot sauce.
- Add the cheese in increments, stirring in between. Let it sit for a few minutes to set up. If it is too thick, add more milk.
- Taste and adjust seasonings, adding more salt or hot sauce.
Nutrition Information
Nutritional information is provided as a courtesy and is automatically calculated. It should only be construed as an estimate rather than a guarantee. Ingredients can vary and Kroll’s Korner can’t make any guarantees to the accuracy of this information.




This Mac n cheese recipe is a keeper! Super easy and delicious for any day of the week. I only had Colby cheese on hand and it came out great. Can’t wait to try again with my favorite fontina cheese. Thanks for sharing this with us!
Thanks so much Jen! I am glad it worked well with the Colby jack I need to try that next time! 🙂
This is our favorite mac & cheese recipe! It’s creamy, flavorful, and the convenience of making it in the Instant Pot is unbeatable. Perfect for busy nights when you want comfort food without the hassle.
Hi Michele, so happy to hear that!! Thank you 🙂
This recipe is delicious and couldn’t be easier. Homemade Mac n cheese is so satisfying. I made it with time for it to sit and thicken as I completed the other parts of our meal, it came together nicely! Will make again & again!!
Thank you so much Jen! Glad it was yummy and easy!! 🙂
Wow! So easy to make and insanely delicious. I got home from work at 3:15pm and it was ready for my daughter getting off the bus by 3:45! I used shell pasta, a block of mild cheddar, a block of Colby jack and skipped the hot sauce. Everything else followed to a T. Will definitely keep this on rotation! 🙂
Love that you used the shell pasta – it looks amazing and I am so glad it was ready so quickly 🙂 win-win! Thank you!
I can’t believe I waited this long to make Mac-n-cheese in the instapot!! It was absolutely delicious and I may never buy the box stuff again. I did add an extra step and baked the Mac-n-cheese once I finished it because I just love having the top with a little crust. I’m really blown away at how creamy and delicious this recipe turned out. Tawnie, I just love your recipes, your website is my go-to anytime I’m looking for a recipe. I will also be making your chocolate chip cookies for our Easter celebration! Thank you for sharing your recipes!!
You are so kind, thank you! Baking it sounds soo yummy 🙂 Happy Easter, thank you!
Love this recipe – I’ve made it at least 20 times since discovering it – so effortless with such great results
I am so glad you love it! I made it for thanksgiving for the kids table, but secretly was really excited about it for myself too hahaha, thank you!! 🙂
This is amazing and quick. We’ll have Mac and cheese for days after making this! The sauce thicken up nicely after sitting on the warmer setting for a while!
WHOA. This is sooo good! My husband literally said, “This is a problem. I can’t stop eating it.” Lol! Thanks for such a great and easy recipe! Will definitely be making again!
lol I love it, thank you soo much!
My husband always makes the best homemade mac and cheese. I was excited to find this recipe because I love so many from Krolls Korner. I decided on the stovetop version and WOW!! So easy and straightforward! My husband even said “Whoa, this is better than anything I’ve made!” He also said it tasted like the amazing mac dishes at high class restaurants. This was SO yummy! Can’t wait to make it again and again.
What a compliment! So glad it was enjoyed & the stovetop version worked well for you, thank you 🙂
I was a little skeptical making mac & cheese in the Instapot. Let’s just say I no longer am. This was a delicious, creamy, easy, & quick mac & cheese!!
Thank you so much!!