Homemade Strawberry Pop Tarts
This post may contain affiliate links. Please read our disclosure policy.
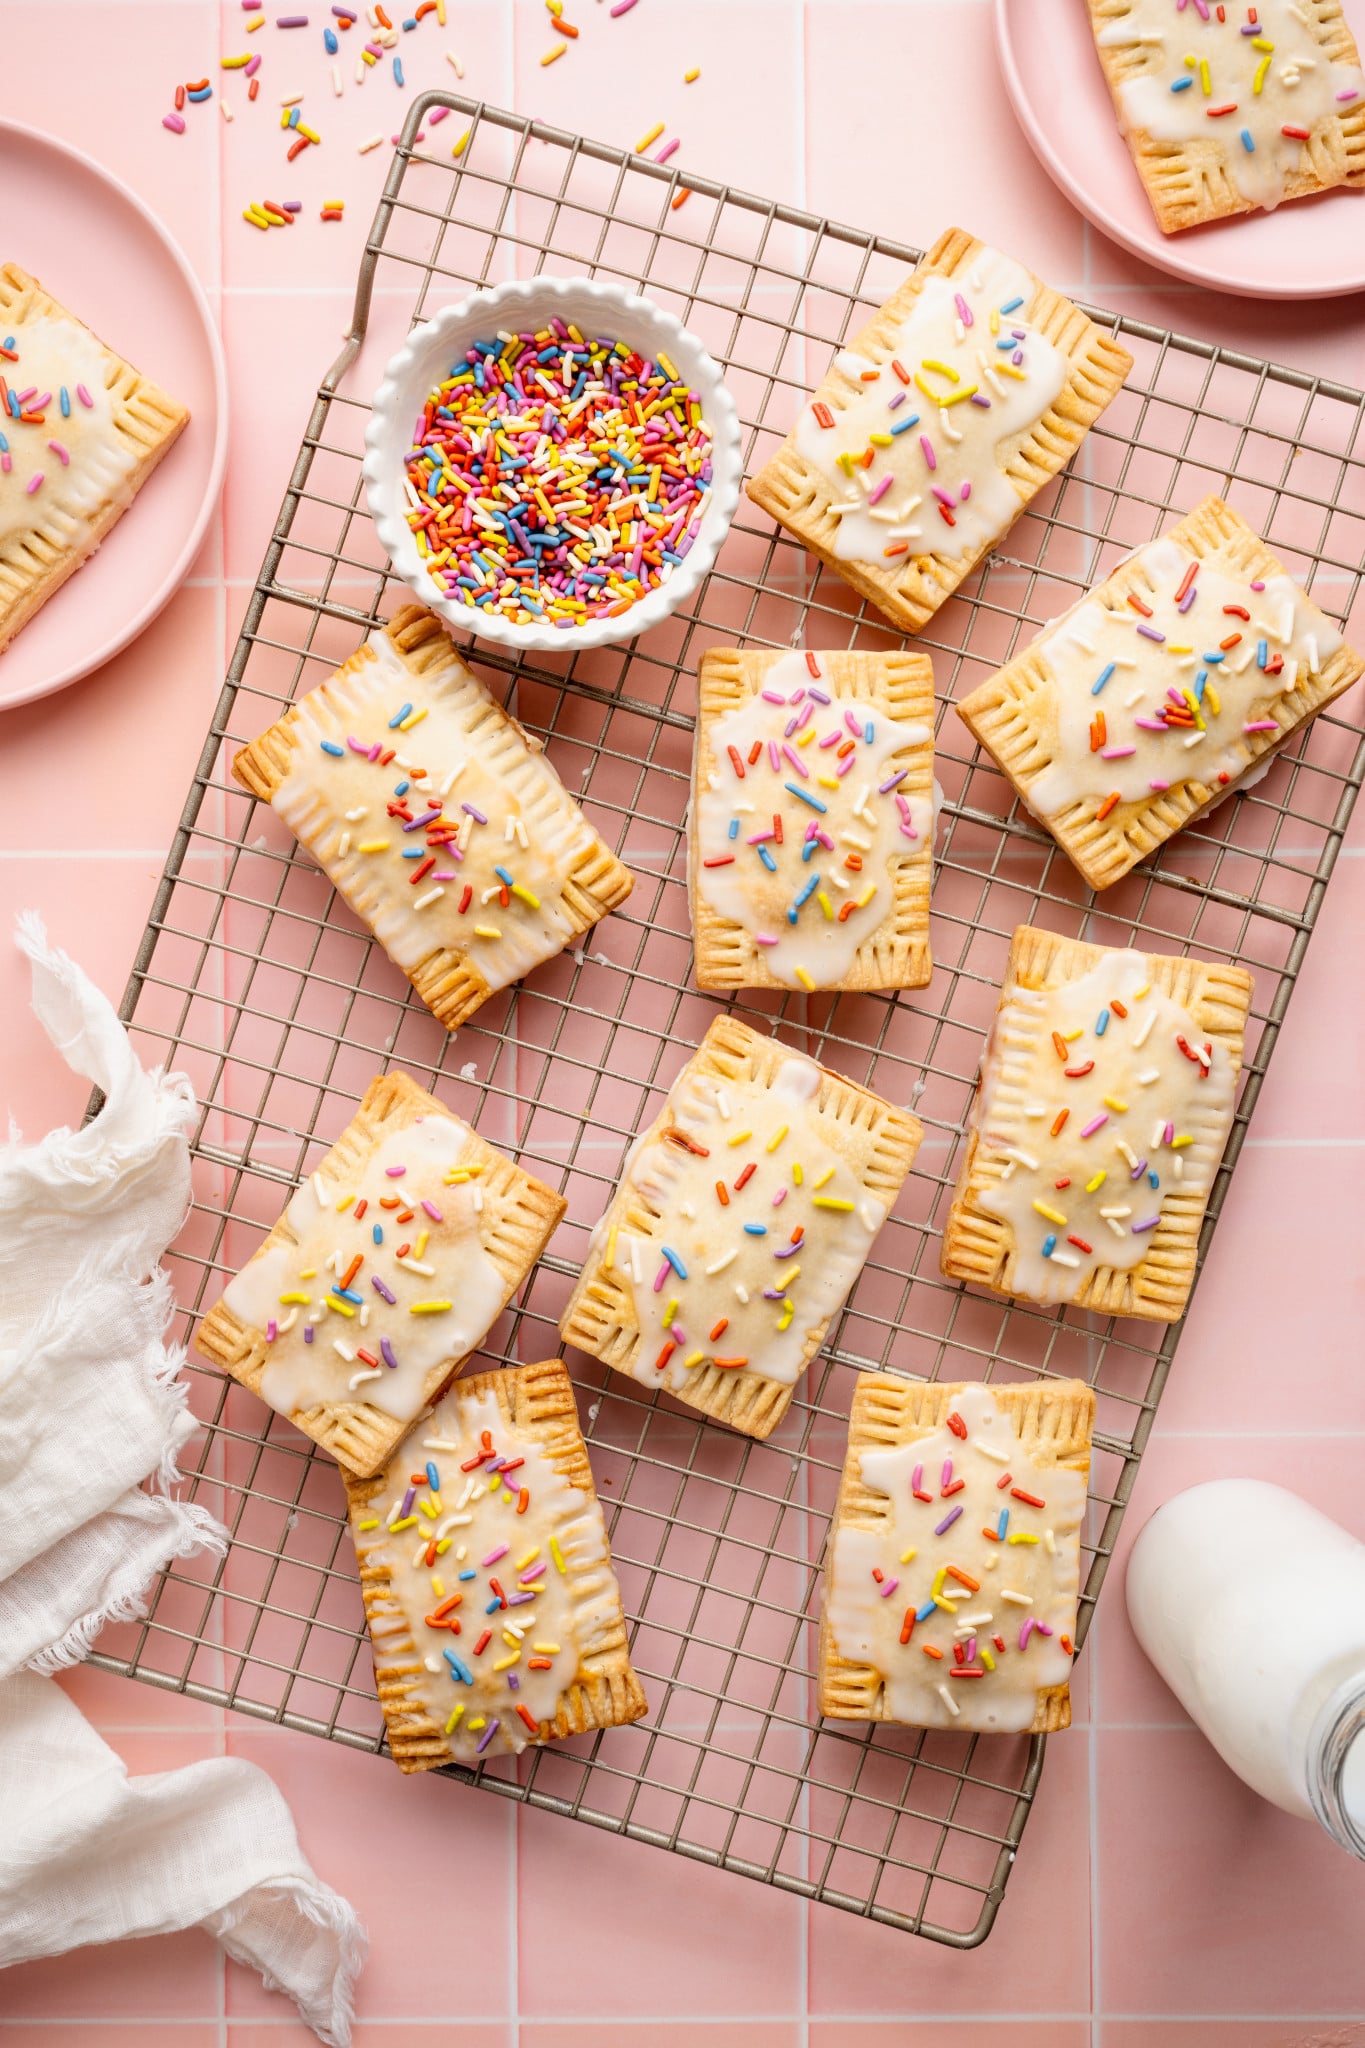
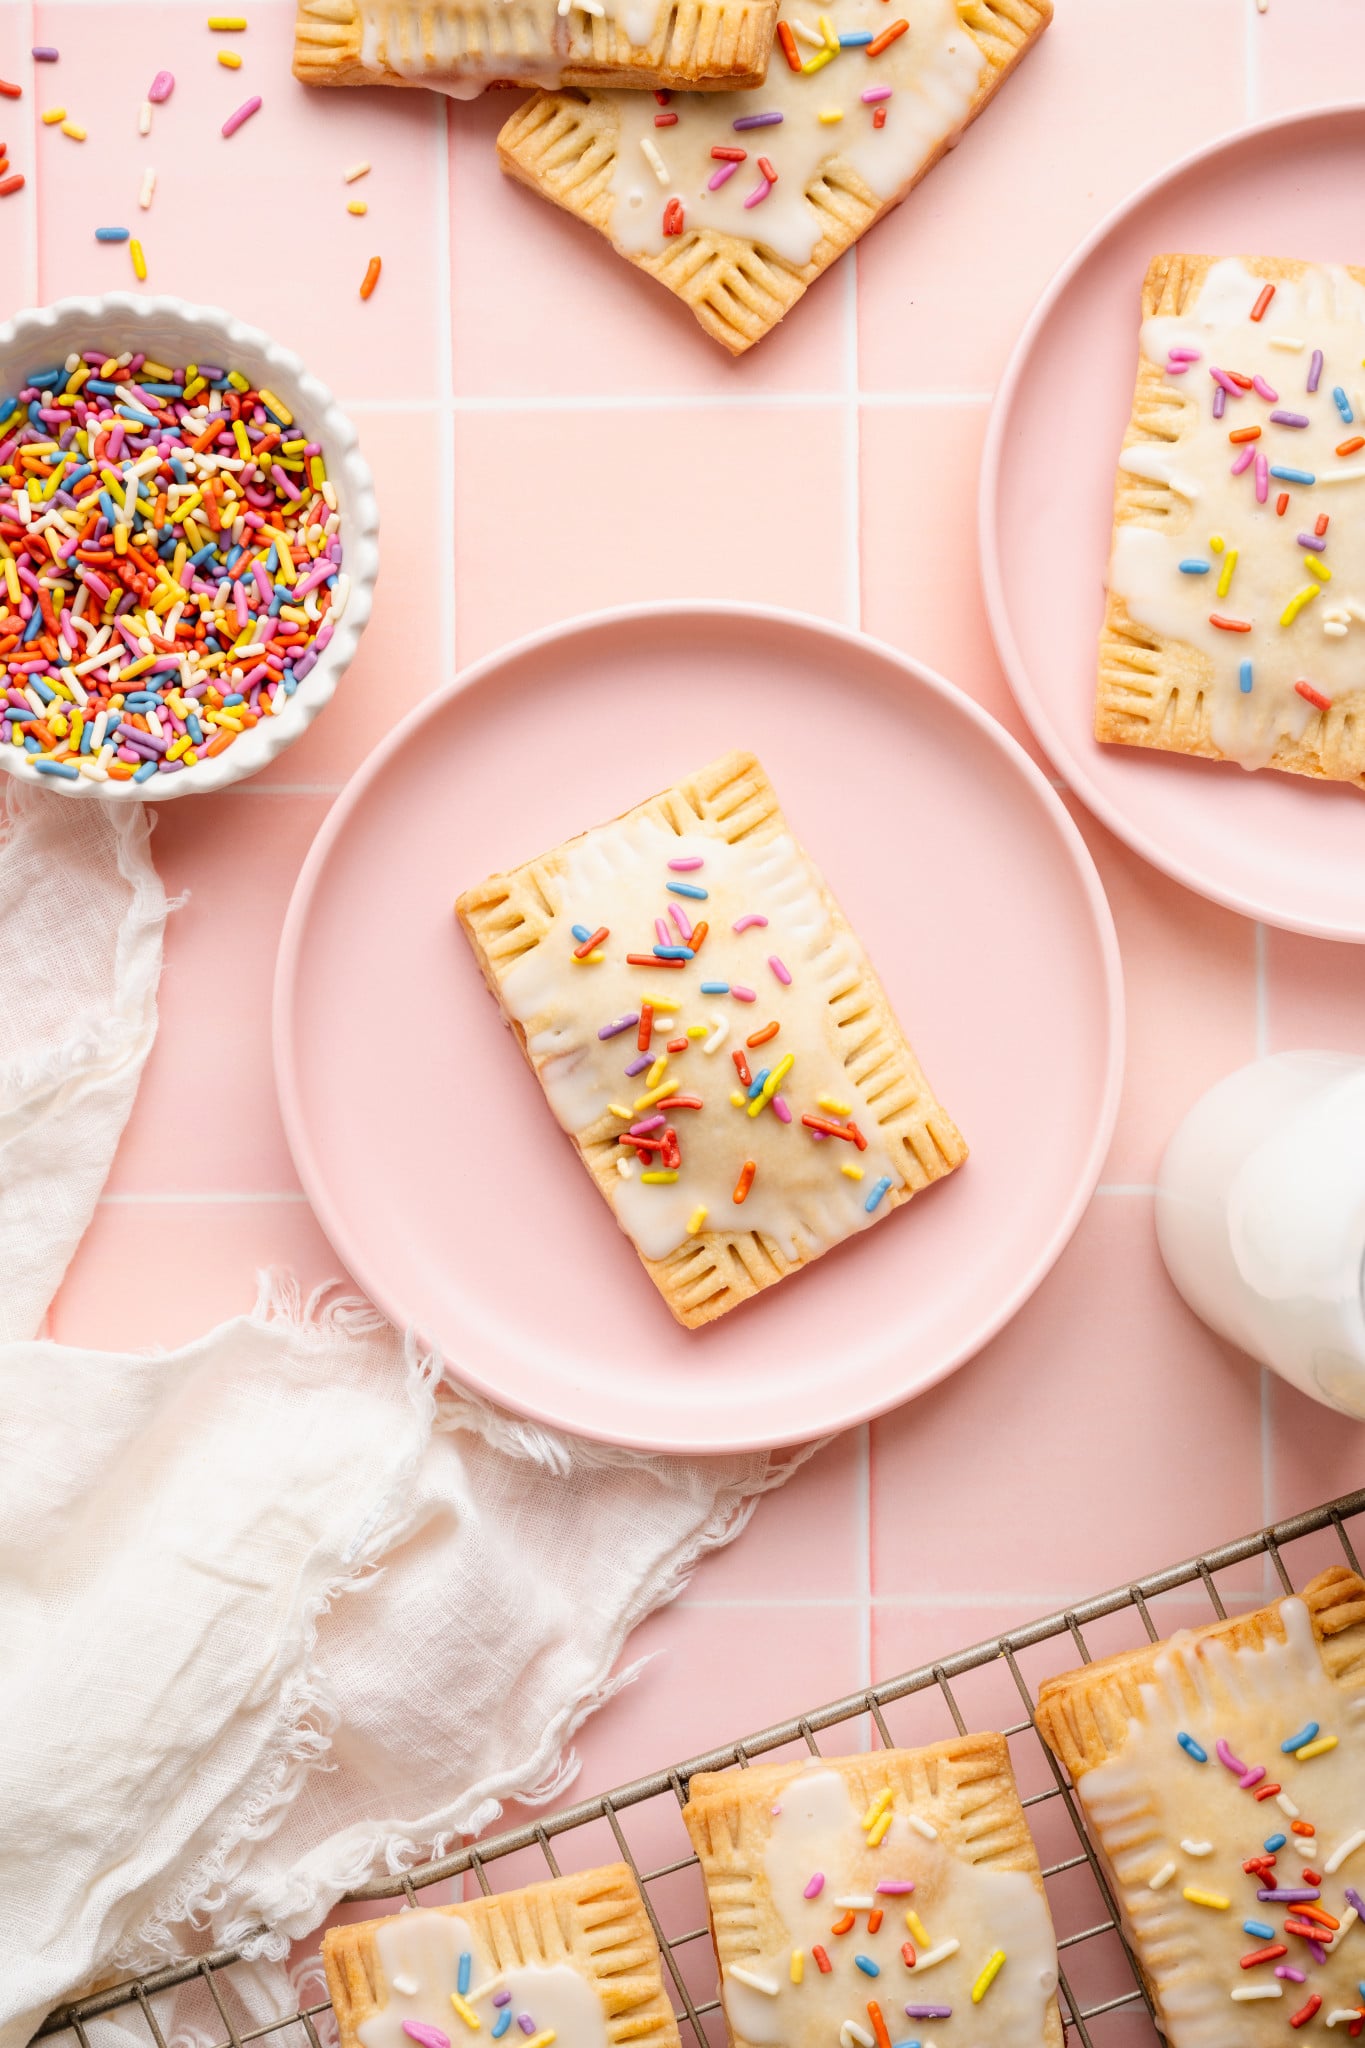
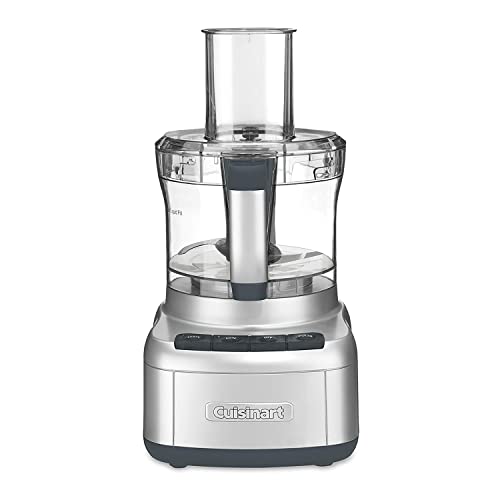
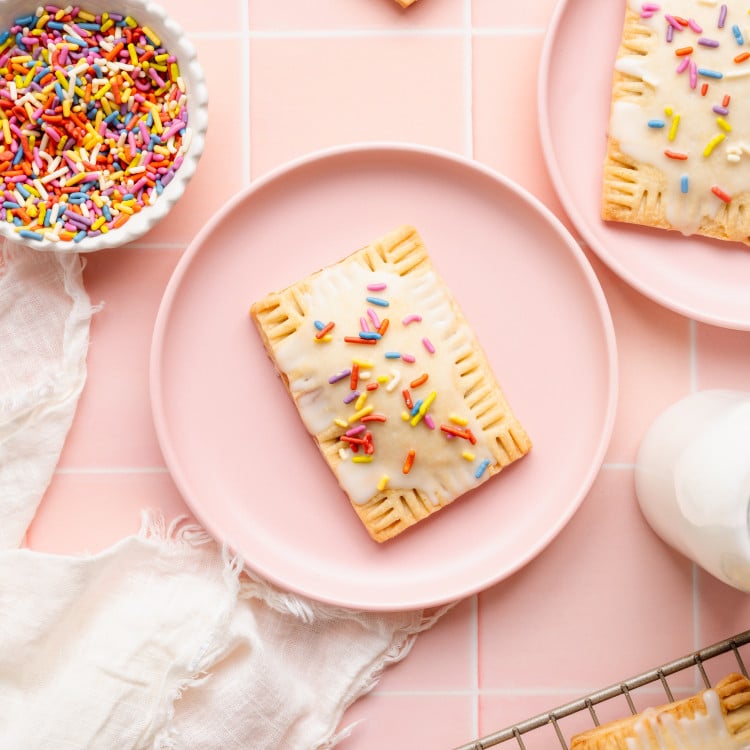
These Homemade Strawberry Pop Tarts are buttery, flaky, and so much better than anything you’ll find in the store. Made with a simple pastry dough that comes together in minutes (in the food processor!), they’re surprisingly easy and totally worth it.
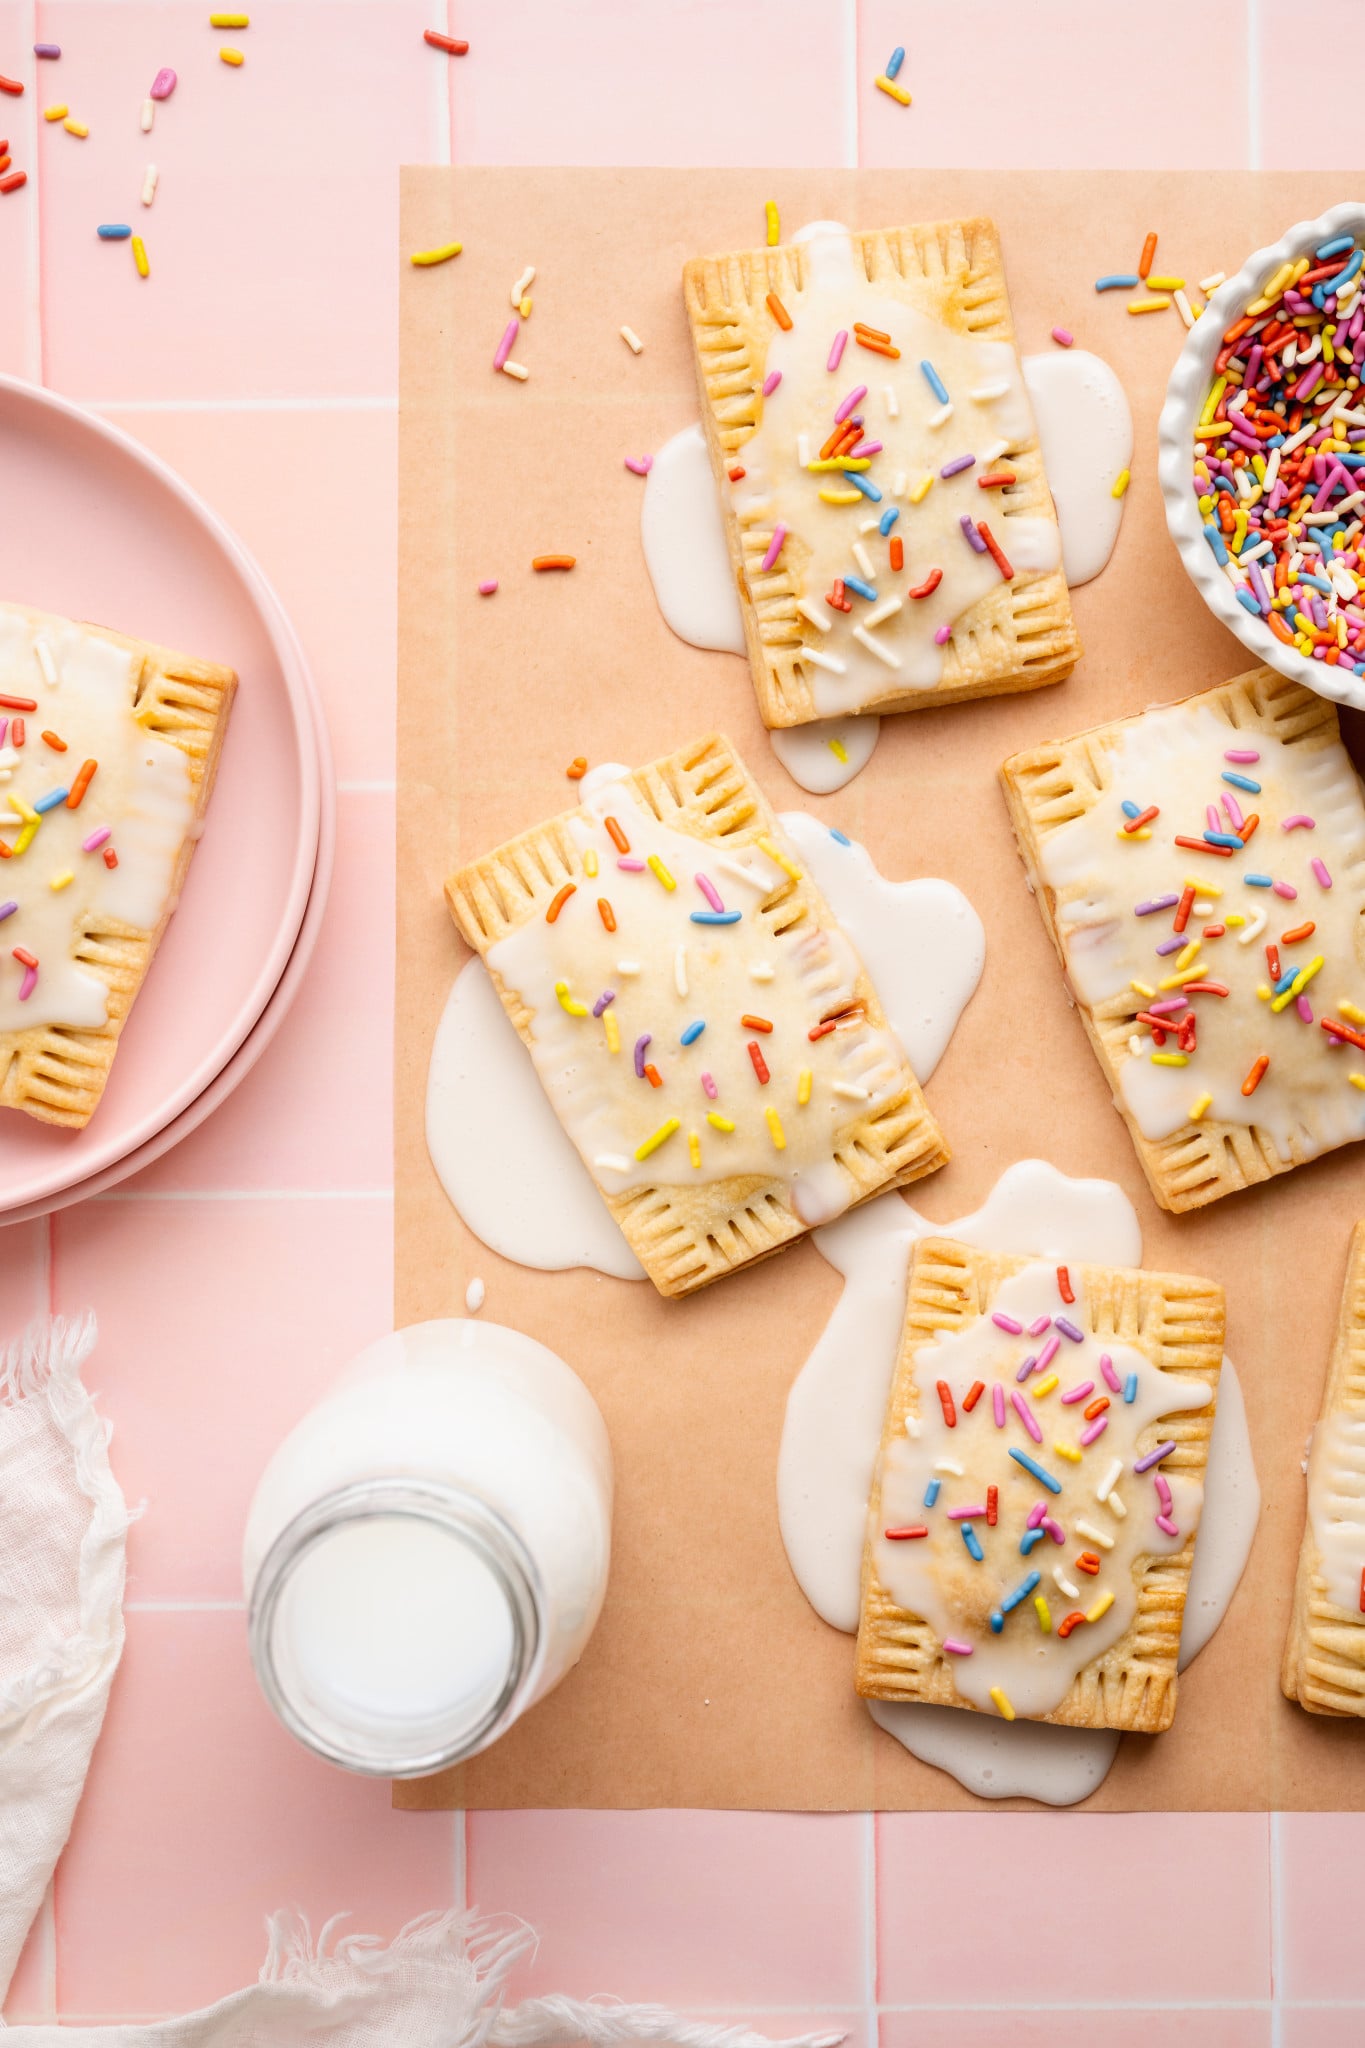
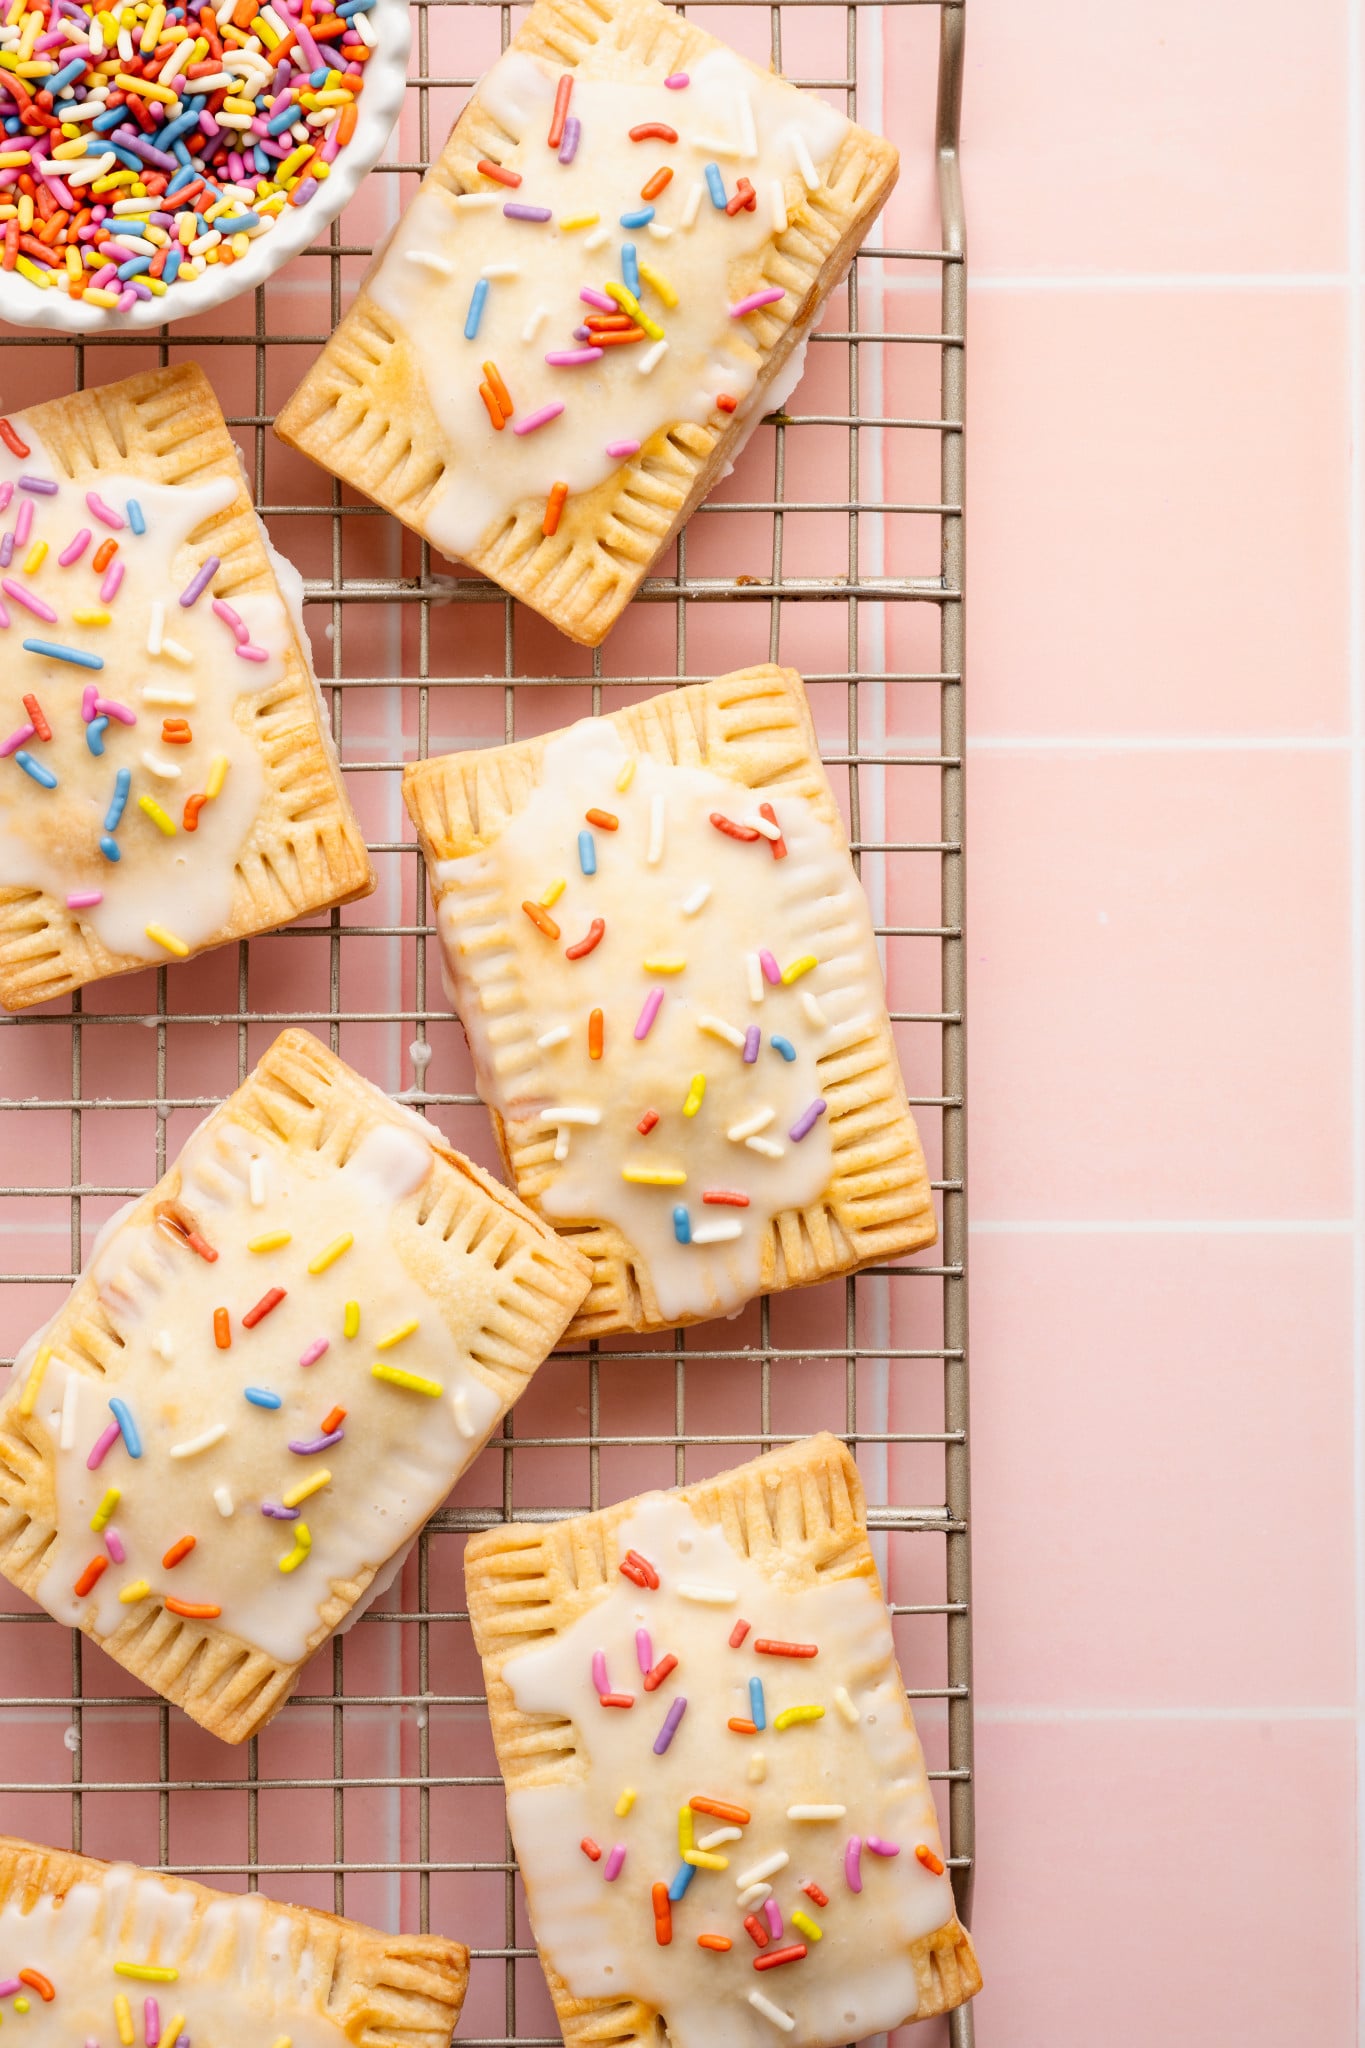
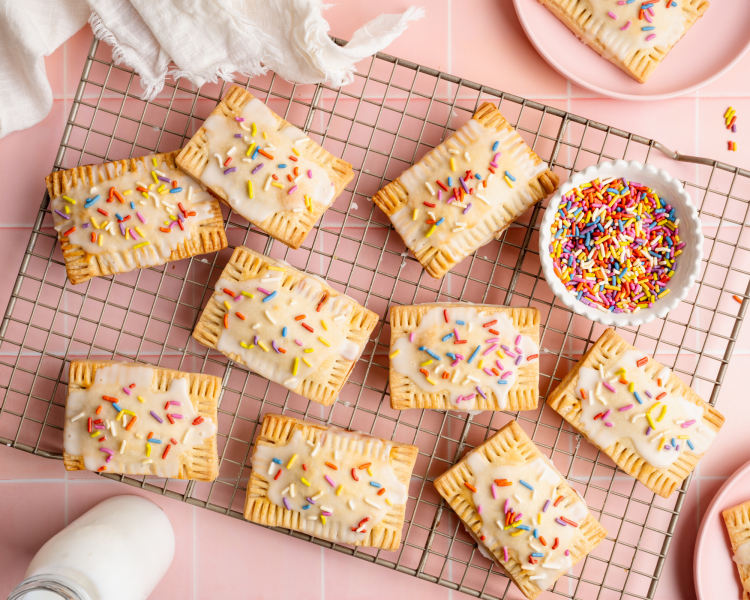
Each pop tart is filled with sweet strawberry preserves, baked until golden, then finished with a quick vanilla glaze that sets into that classic pop tart-style icing. And of course, they’re topped with rainbow sprinkles for that nostalgic, bakery-style look.
They’re perfect for a fun weekend baking project or a sweet breakfast you’ll actually look forward to.
For more fun, nostalgic-inspired treats, try my Brown Sugar Pop Tarts, Fruity Pebble Rice Krispie Treats, Cinnamon Toast Crunch Cookies, or Funfetti Sheet Cake.
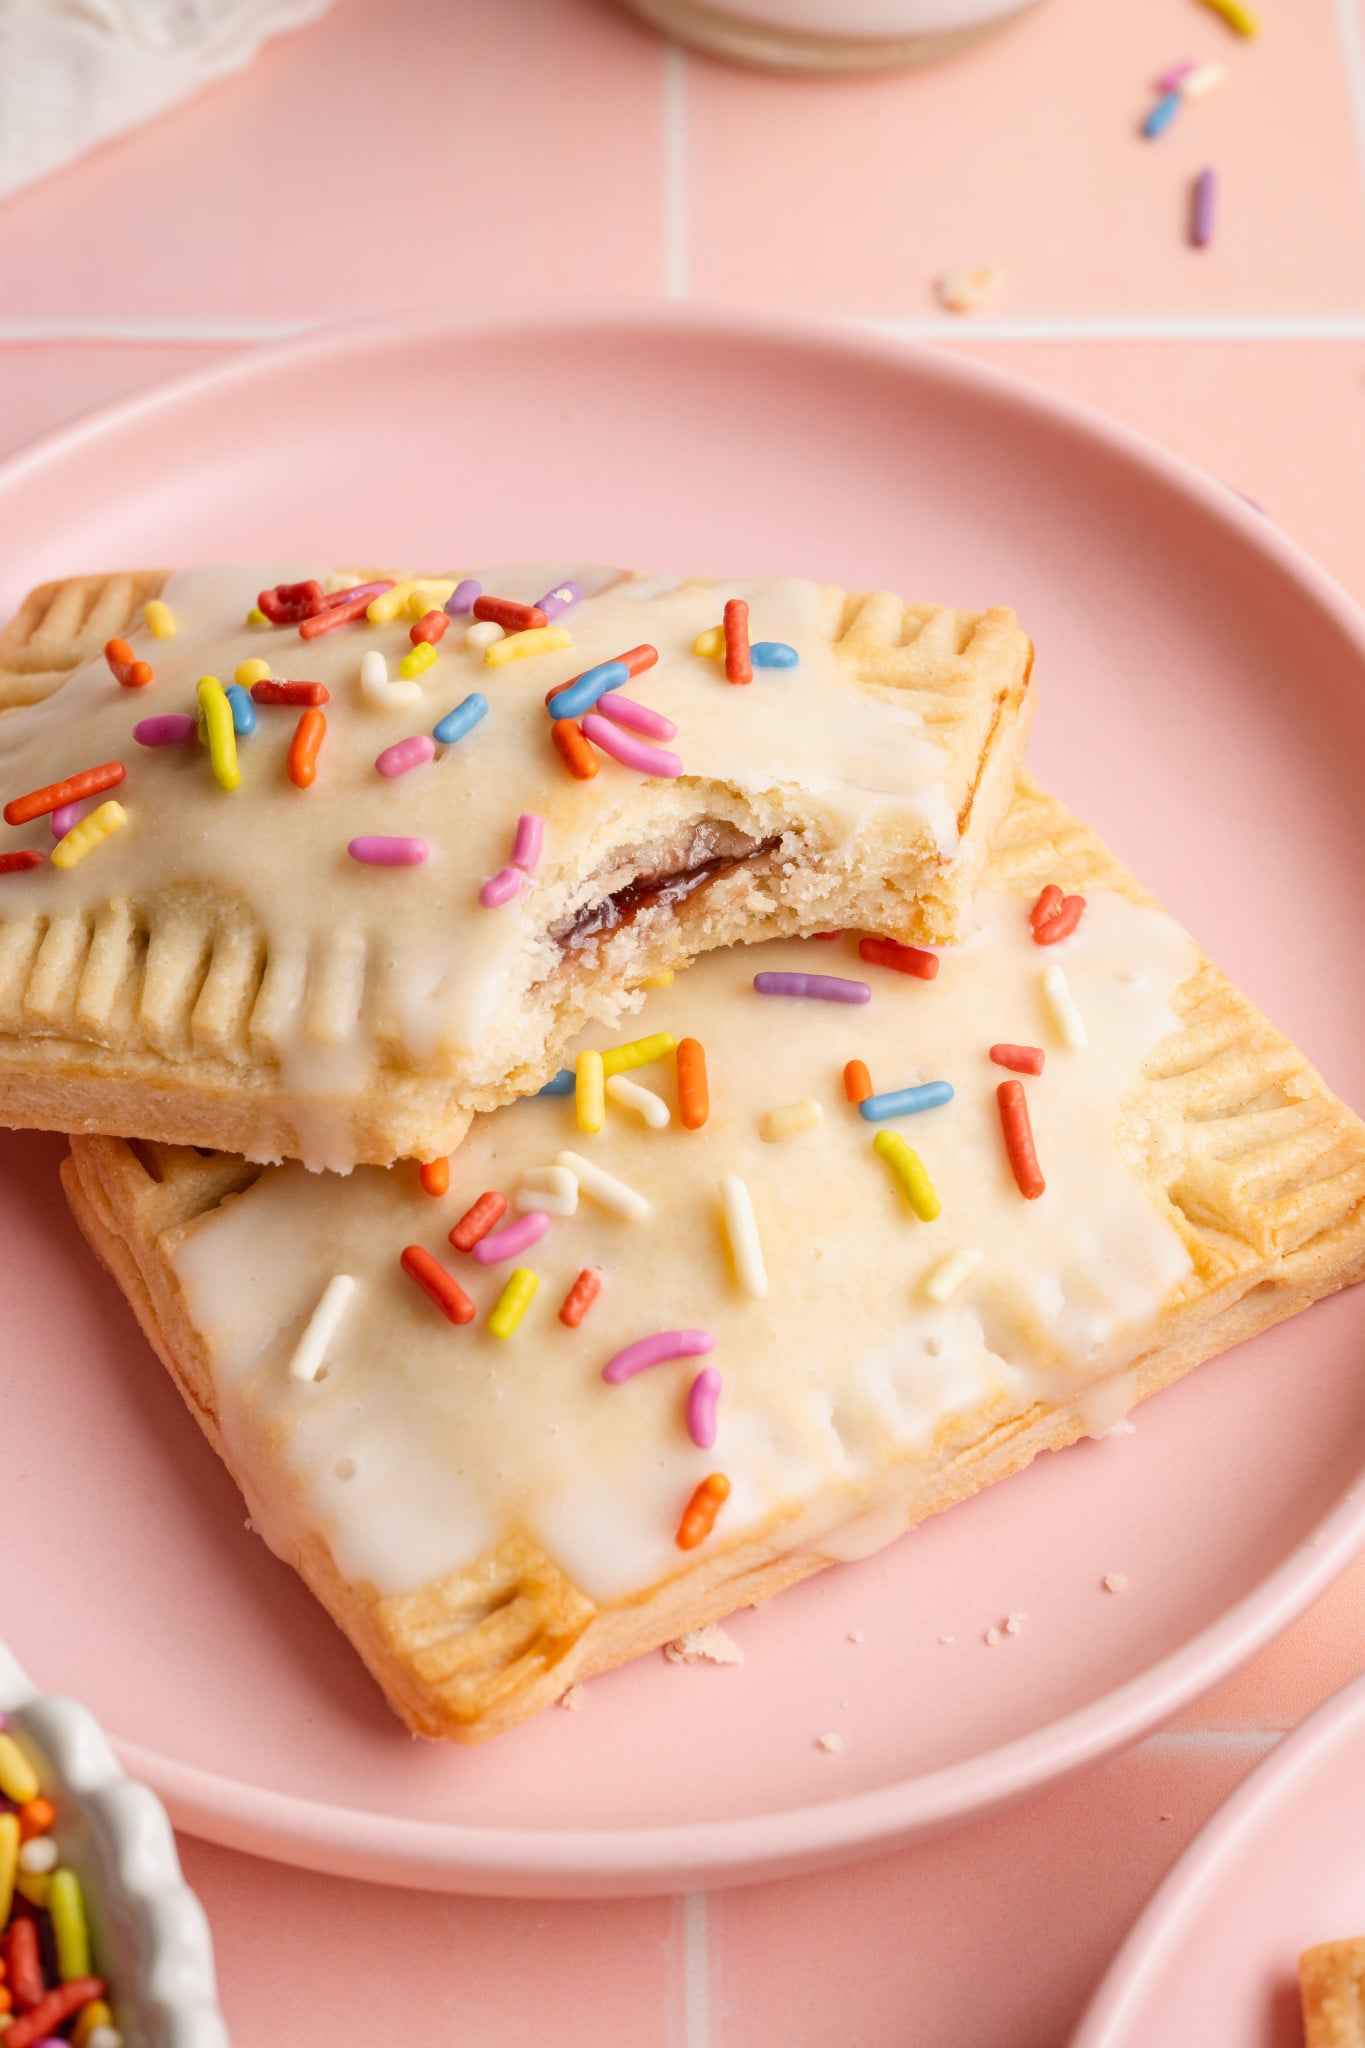

 Table Talk with Tawnie

After making my Brown Sugar Pop Tarts and seeing how much you all loved them, I figured another version was necessary (and aren’t these ones so cute and fun?!) I ate my fair share of pop tarts growing up, but nothing comes close to a homemade version. They’re so much more flavorful and while the process is of course longer than opening up the box from the store, the reward is worth the wait! 😍
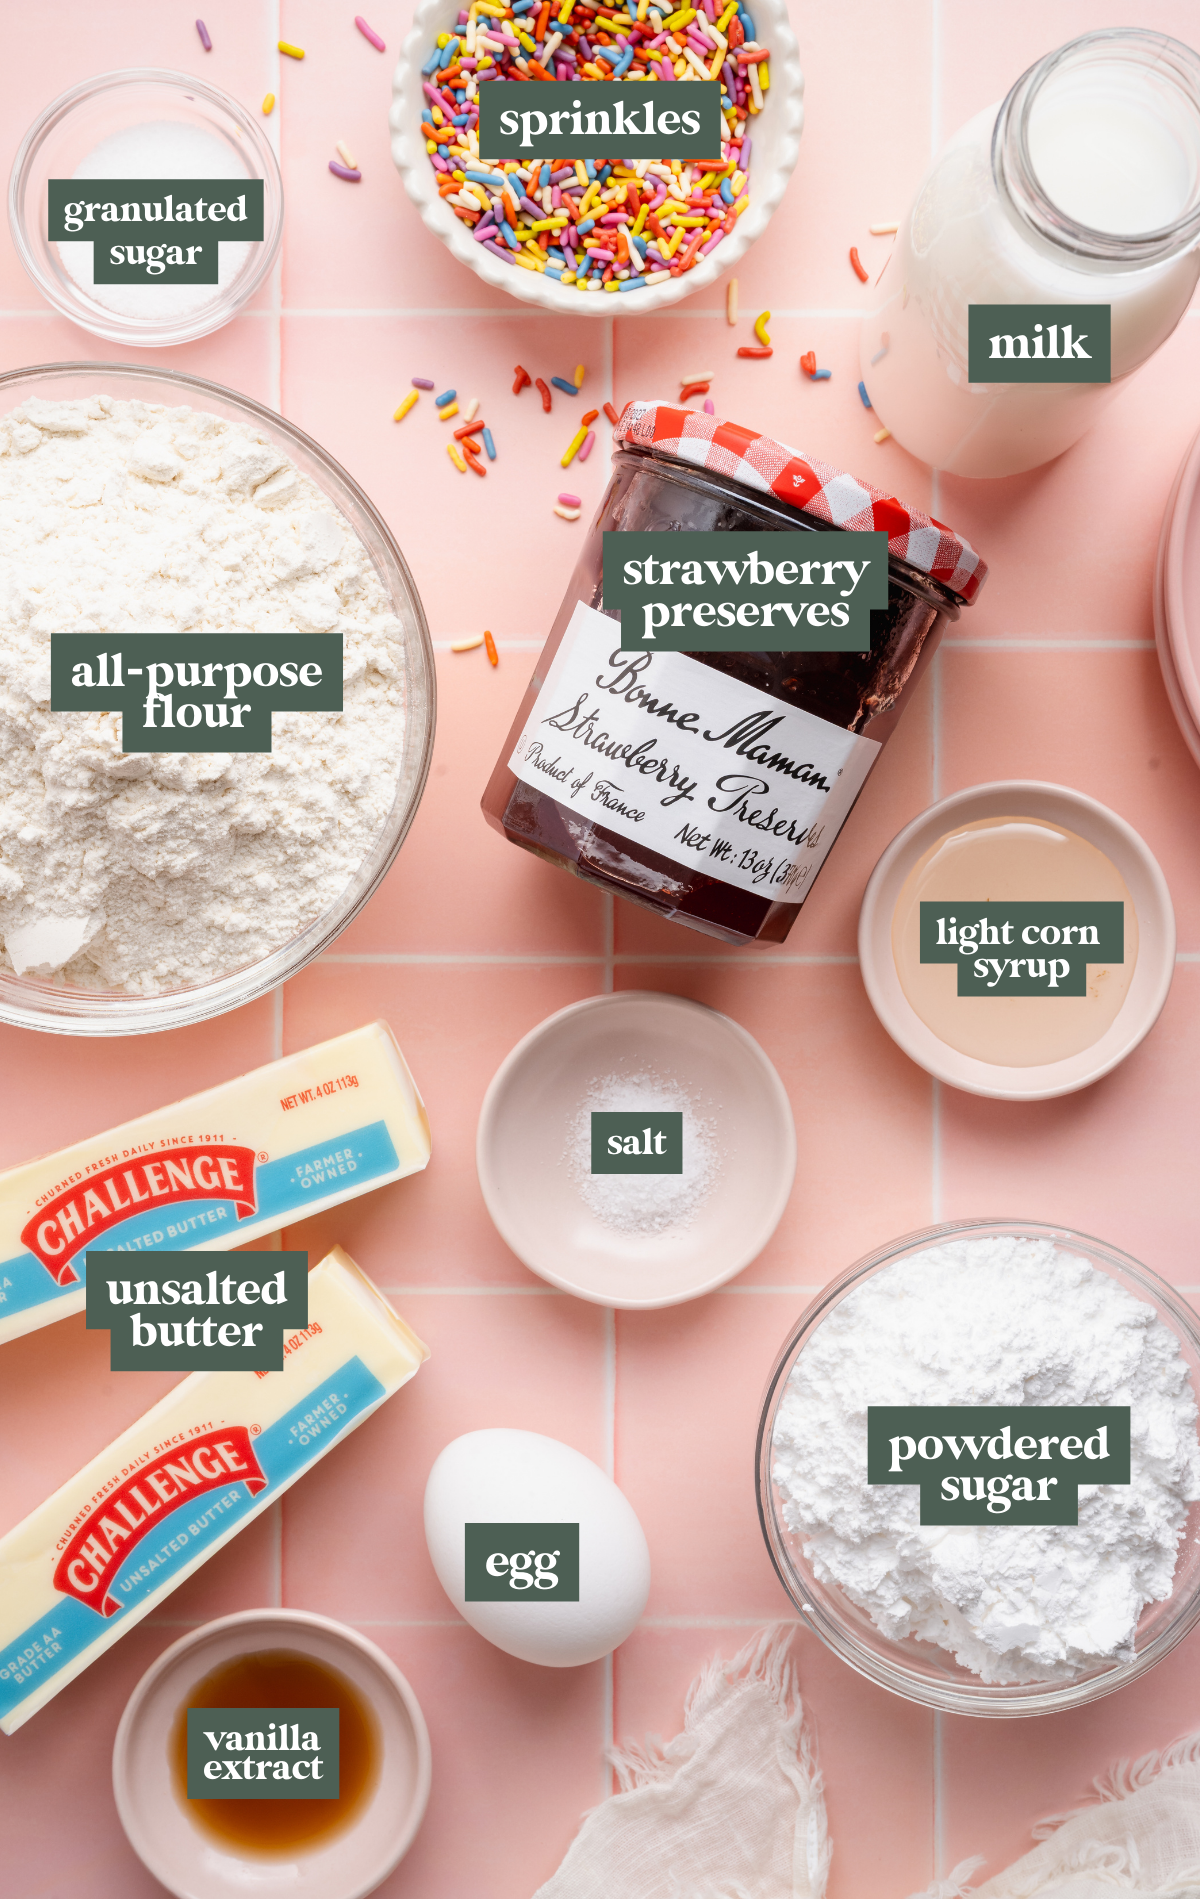
- Pastry dough: The base of this recipe is essentially pie dough. I am using all-purpose flour, cold, unsalted butter, a little sugar, salt, and milk. That’s it!
- Strawberry preserves: I highly recommend using something that’s high-quality. Homemade strawberry jam or preserves would also be delicious! Feel free to also use any other fruit spread flavor you love!
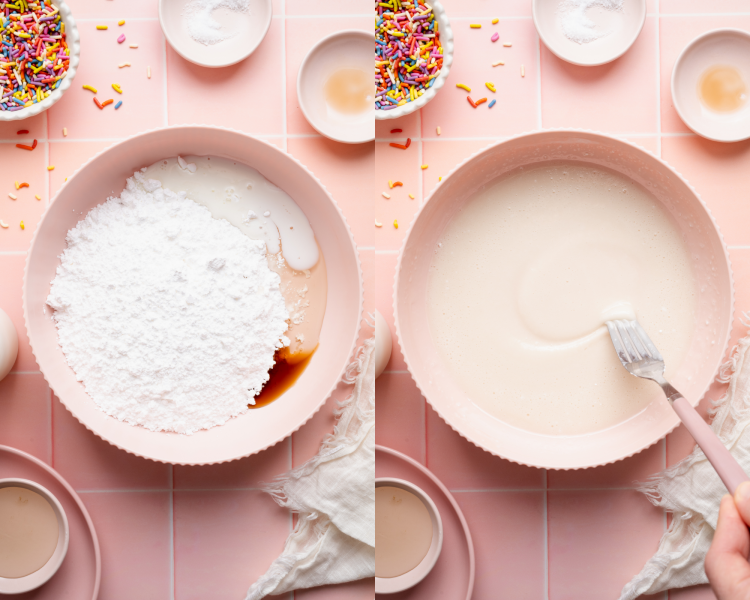
- Glaze: Whisk up a quick and easy glaze with powdered sugar, milk, vanilla extract, and light corn syrup. The light corn syrup will help to set the glaze.
- Sprinkles: Use your favorite rainbow jimmies or nonpareils to decorate!
Step by Step Directions
(For the full recipe, scroll down to the recipe card below)
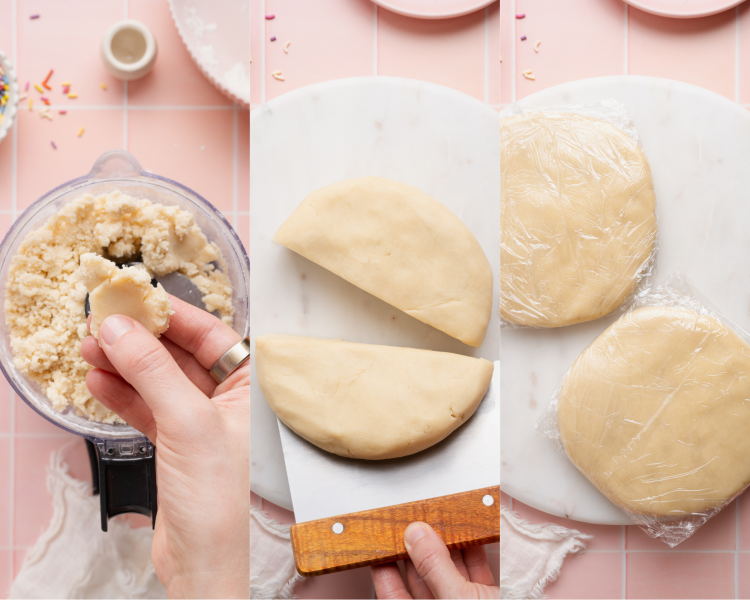
Make the pastry
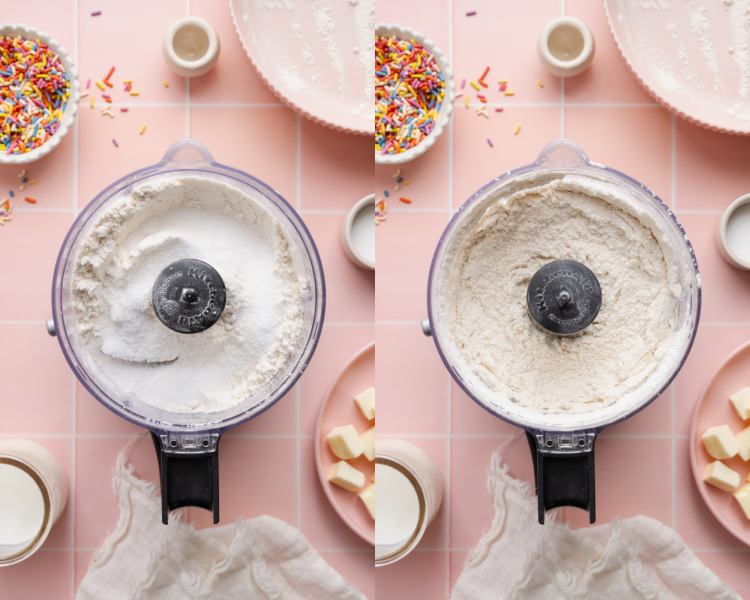
Use a food processor to combine the pastry dough ingredients. Then turn the dough out and form it into a disc. Divide in half and wrap each flat disc with plastic wrap. Let chill for at least one hour (or up to 2 days).
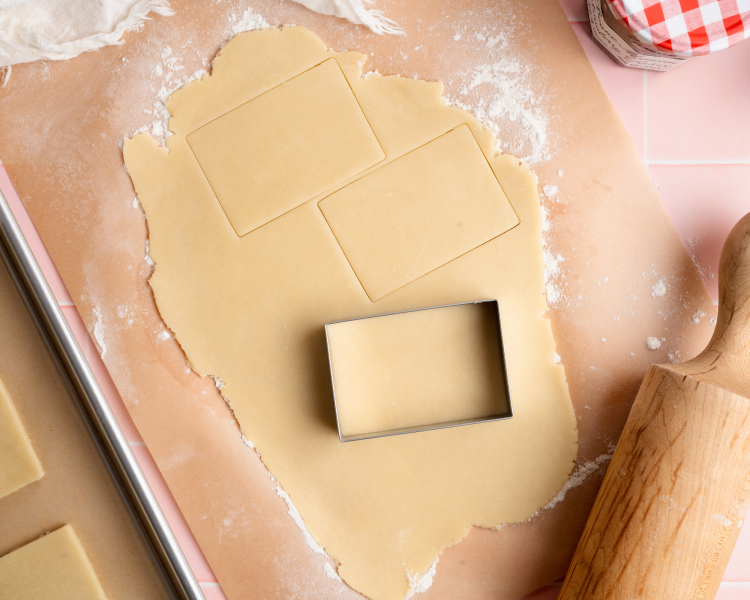
Roll and cut dough
Remove the disc from the fridge and let it sit at room temperature for a few minutes. Then roll out into a large rectangle and cut smaller rectangles (I like to use this cookie cutter). Place cut dough back in the fridge while you cut the second disc.
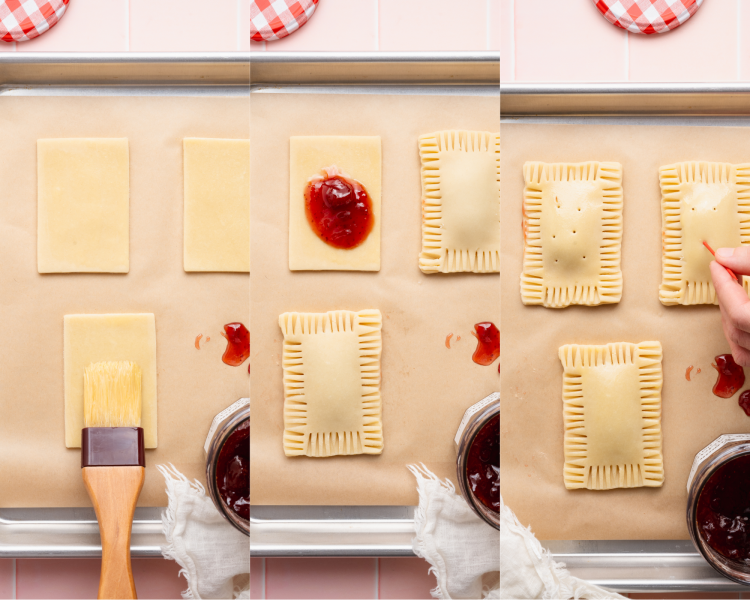
Fill and assemble
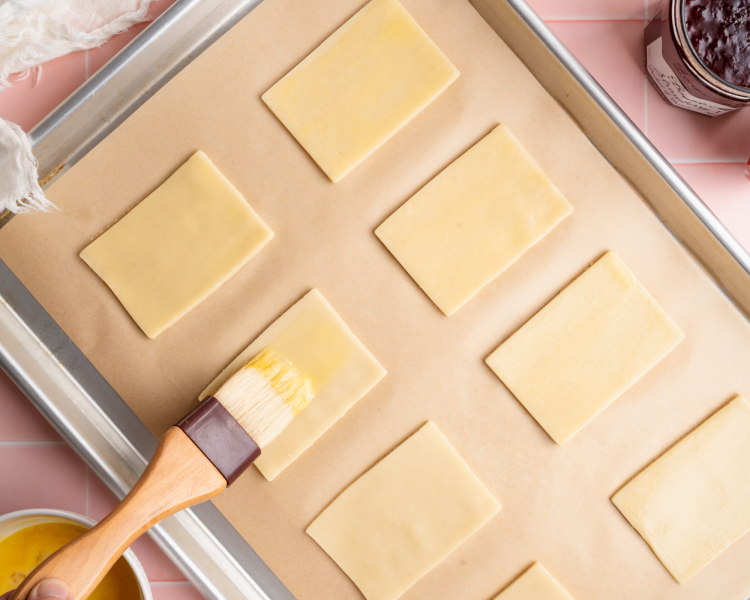
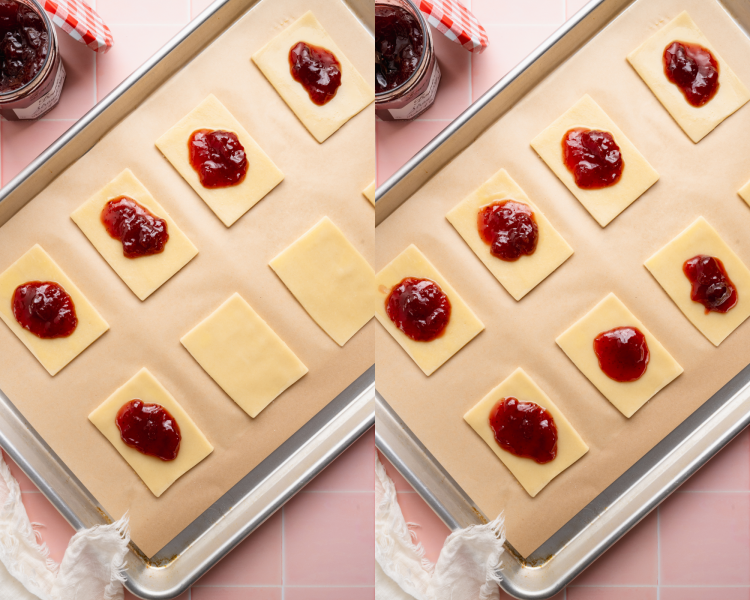
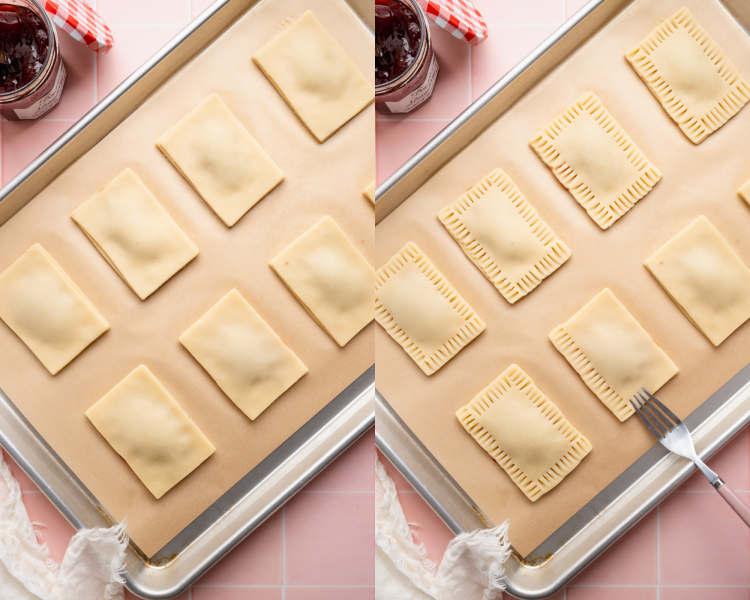
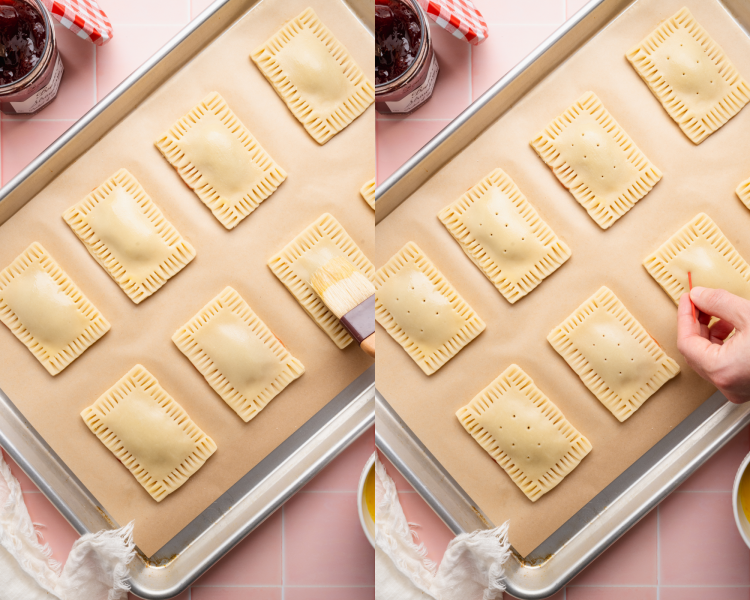
Brush each triangle with egg wash, then spoon 1 tablespoon of strawberry preserves into the center of the rectangles (make sure to leave a border around the egg). Top with a second rectangle of dough, then press the edges together and use a fork to crimp and seal all the sides. Brush the tops with egg wash and use a toothpick to poke 6-8 small holes in the top.
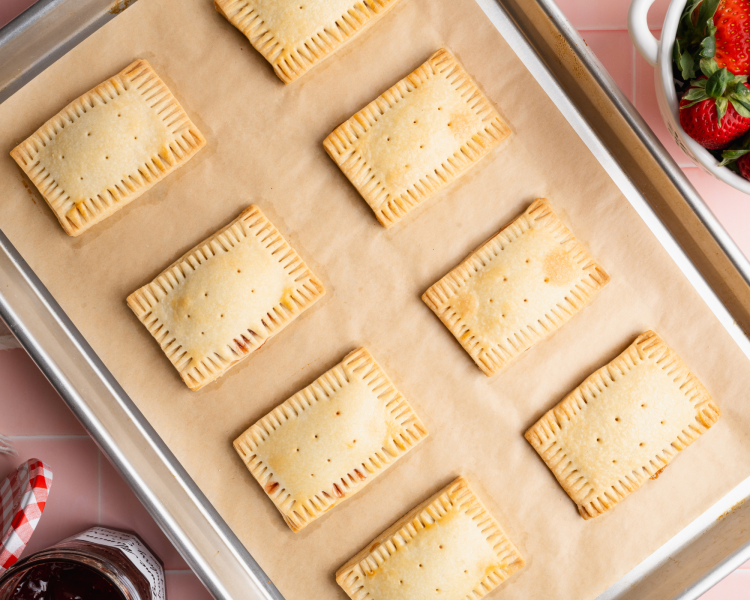
Bake
Bake for 15-18 minutes at 400°F. Then allow the pop tarts to cool completely before glazing.
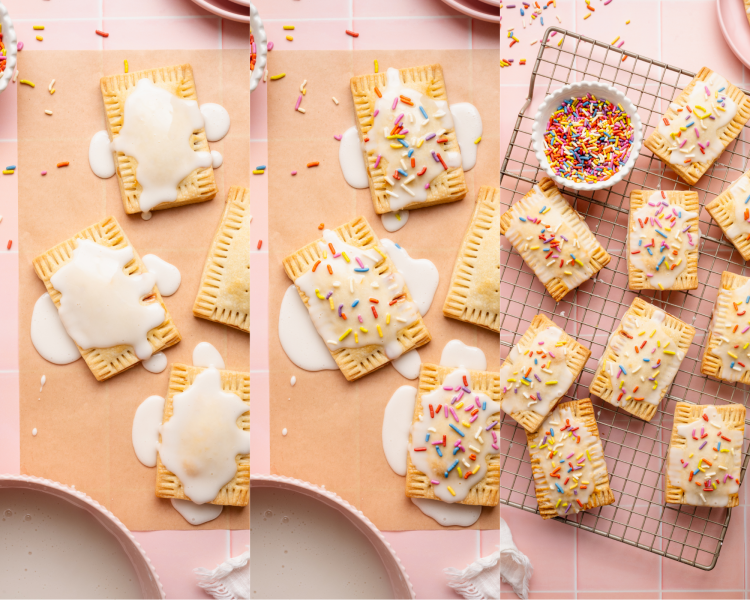
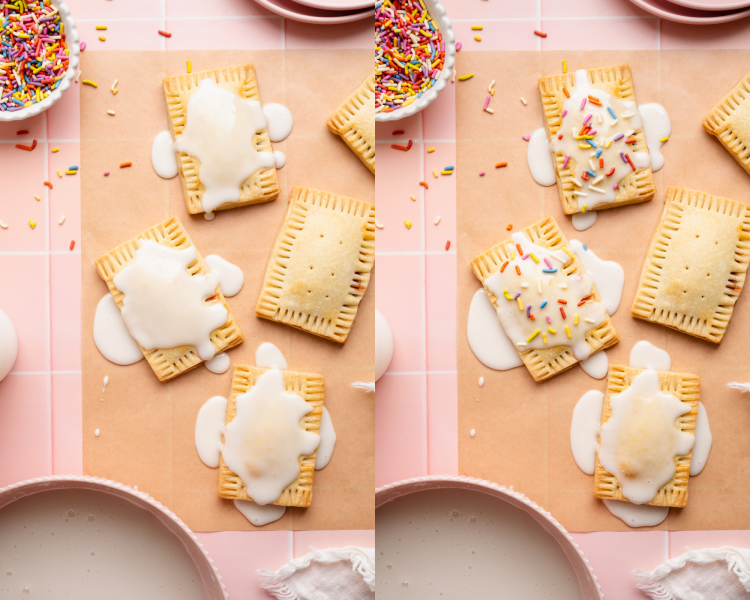
Glaze & enjoy!
Whisk together the ingredients for the glaze. Spread over the cooled pop tarts and decorate with sprinkles. Allow the glaze and sprinkles to set, then ENJOY!!
Expert Tips
- Cookie cutter: Use this rectangle cookie cutter for perfect, clean cuts in the dough (and it makes the process much easier!)
- Keep it cold: When making the dough, keep the butter very cold before you use it. It’s key for a flaky dough.
- Seal the edges: The filling can ooze out if the edges aren’t sealed properly. Use the egg wash as a binder and then the fork along the edges to not only make the design but to seal the top and bottom together.
- Chill before baking: Once the pop tarts are assembled, chill them again before baking to help the pop tarts maintain their shape as they bake.
- Don’t overfill: I have this strong urge to add a lot of filling in my pop tarts 🤪 but this can cause the filling to ooze out and the pastry to crack. About 1 Tbsp. of strawberry preserves is plenty.
- Leave a border: To prevent the filling from oozing out, be sure to leave a border between the filling and the edge of the pie dough.
- Poke holes in the top: Poking holes in the top of the pop tarts before baking allows steam to escape and prevents the pop tarts but blowing up like a balloon in the oven.
Variations / Substitutions
- Different jams: Fill with different flavors of jams or preserves (raspberry, apricot, blueberry, etc.) Just make sure it’s thick to avoid it running/oozing during baking.
- Chocolate flavored: Or fill with chocolate, hazelnut spread, lemon curd, or chocolate ganache.
- Gluten-free: Swap the all-purpose flour for Bob’s Red Mill Gluten Free 1-to-1 Baking Flour.
Storage / Freezing
- Store at room temperature for up to 2 days in a airtight container, refrigerate for up to a week, or freeze for 2-3 months.
- For reheating, if the pop tarts are glazed, you’ll need to be careful so the glaze doesn’t melt. The oven just briefly. For unglazed pop tarts, I like to use the toaster oven or microwave.

Copycat Recipes
Full of your favorite restaurant or store-bought favorites but made better right at home!
FAQs
Can I use a packaged pie crust?
Yes, if you’re short on time you can use a packaged pie crust but the homemade taste SO much better (and it’s super easy to make)!
Can I make the pastry dough without a food processor?
Yes, to make the pastry dough without a food processor, just follow the instructions for my Homemade Pie Crust recipe through step 7.
What type of strawberry preserves should I use?
I recommend using something high-quality like Bonne Maman Strawberry Preserves. Avoid anything too runny, as it can leak out during baking. If your preserves are thin, you can simmer them for a few minutes to thicken. Using anything homemade or from your local farmer’s market would also be delicious!
How do I keep the filling from leaking out?
Be sure to leave a border around the edges, don’t overfill, and press the edges firmly with a fork. Chilling the assembled pop tarts before baking also helps them hold their shape.
Why do I need to poke holes on the top?
Poking 6-8 small holes in the tops allows steam to escape and helps prevent the pastries from puffing up too much or bursting.
Monthly Baking Challenge
This recipe was featured as the Kroll’s Korner Monthly Baking Challenge recipe in April 2026. For information on the current Monthly Baking Challenge recipe, click below!
shop this post
 Buy Now →
 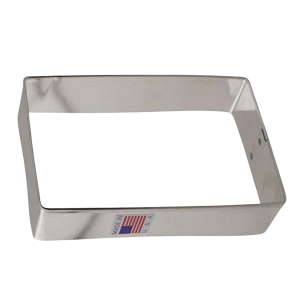 Buy Now →
  Buy Now →
 More Strawberry Dessert Recipes You’ll Love
Before You Begin! If you make this, please leave a review and rating letting us know how you liked this recipe! This helps our business thrive & continue providing free recipes.
Homemade Strawberry Pop Tarts
Ingredients
For the Pastry
- 2½ cups all-purpose flour (spooned and leveled)
- 1 Tbsp. granulated sugar
- 1 tsp. salt
- 1 cup cold unsalted butter (cubed)
- 1/3 cup cold whole milk (plus 1-2 Tbsp. extra as needed)
Filling
- Strawberry preserves (go for something high-quality)
Egg Wash
- 1 egg
- 1 Tbsp. milk or water
Vanilla Glaze
- 1 cup powdered sugar
- 1-2 Tbsp. milk
- 2 tsp. light corn syrup
- 1/2 tsp. vanilla extract
- Pinch of salt
- Rainbow jimmies or nonpareils (to decorate)
Last step! If you make this, please leave a review and rating letting us know how you liked this recipe! This helps our business thrive & continue providing free recipes.
Instructions
Make the pastry
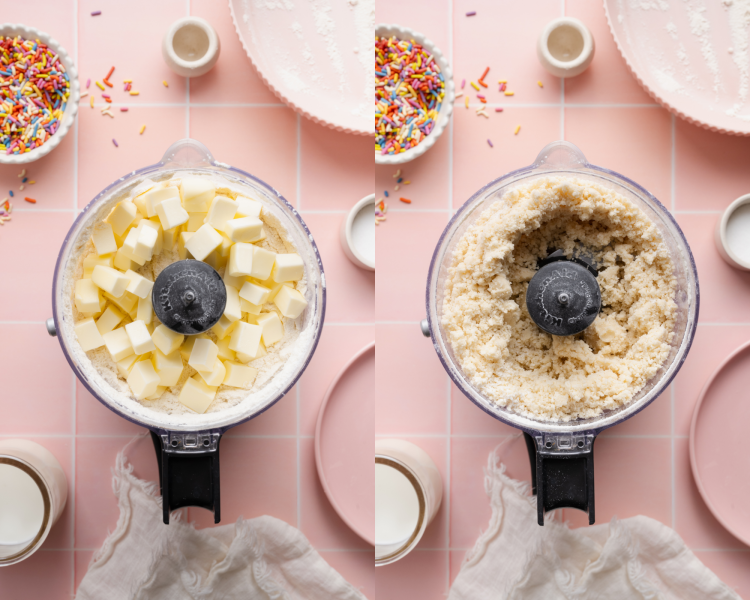
- Combine dry ingredients: In a food processor, pulse together the flour, sugar, and salt until combined.2½ cups all-purpose flour, 1 Tbsp. granulated sugar, 1 tsp. salt

- Add butter: Add the cold butter cubes and pulse until the mixture resembles coarse crumbs with some larger pea-sized pieces of butter remaining. If needed, use your fingers to gently flatten any large butter chunks.1 cup cold unsalted butter
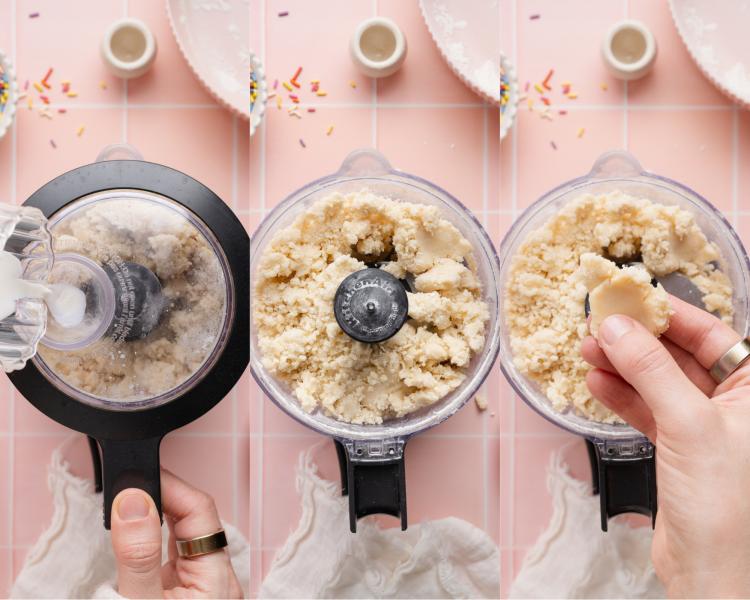
- Drizzle in milk: With the processor running, slowly drizzle in the cold milk. The dough should look slightly crumbly but hold together when pressed between your fingers. It will not form into a smooth ball in the processor, we don’t want that!1/3 cup cold whole milk
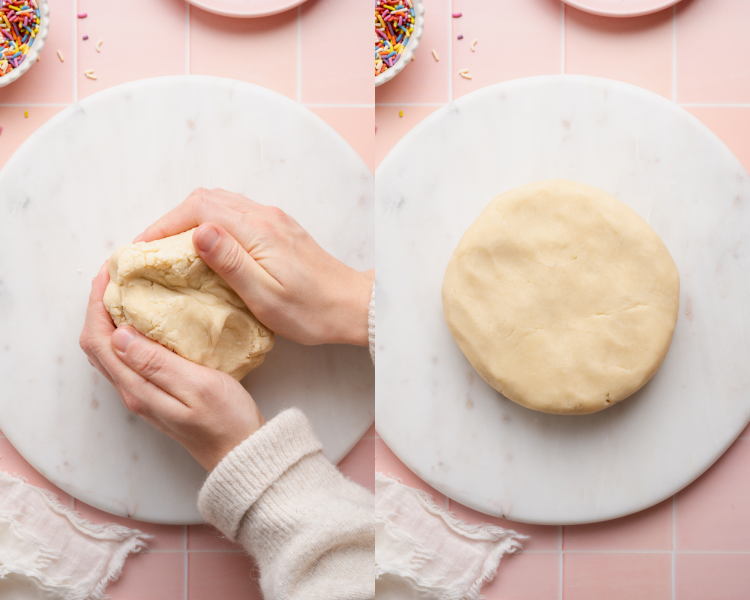
- Form dough: Turn the dough out onto a clean work surface and gently bring it together into a cohesive disc.
- Divide and chill: Divide in half and shape into two flat discs. Wrap tightly in plastic wrap and refrigerate for at least 1 hour, or up to 2 days. Start Timer

Roll and cut the dough
- Remove dough from fridge: When ready to assemble, remove one disc from the refrigerator and let it sit at room temperature for 5-10 minutes, just so it’s easier to work with. Start Timer
- Roll and cut: On a lightly floured surface, roll the dough into a rectangle about ¼-inch thick. Cut into approximately 3½ x 4¾ inch rectangles using a rectangular cookie cutter or a 3×5 index card works well as a guide.) Transfer rectangles to a parchment-lined baking sheet and refrigerate.
- Repeat with all of the dough: Gather scraps, reroll, and cut more rectangles. Repeat with the second disc of dough, and chilling those rectangles on a separate baking sheet.
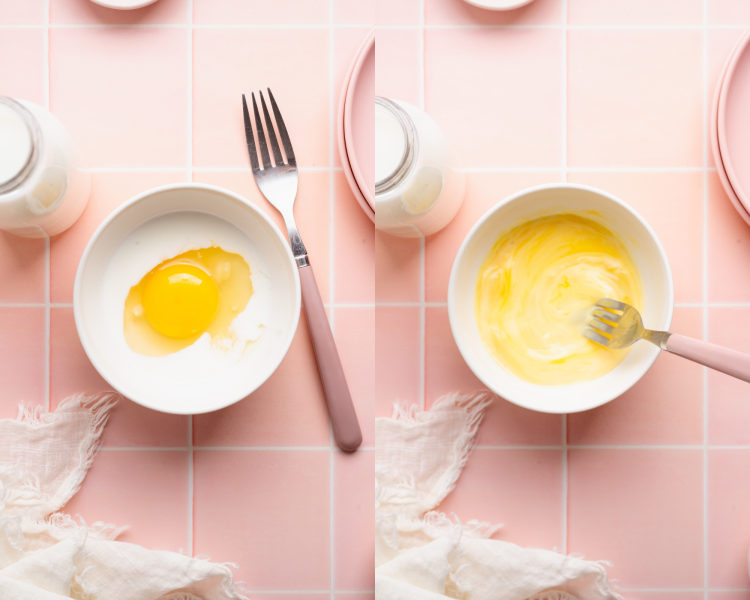
- Prepare the egg wash: Whisk together the egg and milk (or water) until smooth.1 egg, 1 Tbsp. milk or water
Fill and assemble
- Brush with egg wash: Remove one baking sheet of chilled rectangles from the refrigerator. Lightly brush each rectangle with egg wash.
- Fill with preserves: Spoon about 1 tablespoon of strawberry preserves into the center of half the rectangles, leaving a border around the edges.Strawberry preserves
- Top with second rectangle of dough: Top each with a second rectangle of dough. Press the edges together gently, then use a fork to crimp and seal all sides.
- Brush tops with egg wash: Lightly brush the tops with egg wash. Using a toothpick or skewer, poke 6-8 small holes in the tops to allow steam to escape.
- Chill and repeat: Return the assembled pop tarts to the refrigerator while you repeat with the remaining dough. You should have about 8–10 pop tarts total.
- Bake: Preheat the oven to 400°F. Bake for 15-18 minutes Start Timer, or until the tops are lightly golden brown. Allow the pop tarts to cool completely before glazing.
- Make the glaze: Whisk together the powdered sugar, milk, corn syrup, vanilla, and salt until smooth.1 cup powdered sugar, 1-2 Tbsp. milk, 2 tsp. light corn syrup, 1/2 tsp. vanilla extract, Pinch of salt
- Glaze pop tarts: Spread glaze over cooled pop tarts and decorate with sprinkles.Rainbow jimmies or nonpareils
- Let cool and enjoy: Allow the glaze to set before serving.
Notes
- Store-bought pie crust: You can use store-bought pie crust for convenience but I promise the homemade tastes better (and is super easy to make).
- No food processor? If you don’t have a food processor, you can still make this dough. Just follow the instructions for my homemade pie crust through step 7.
- Don’t overfill: Be sure NOT to overfill these pop tarts! About 1 tablespoon of preserves is perfect. That way you can still fully close and crimp the edges to keep everything inside.
- Store: Store at pop tarts at room temperature for up to 2 days in an airtight container, refrigerate for up to a week, or freeze for 2-3 months.
- To reheat: For reheating, if the pop tarts are glazed, you’ll need to be careful so the glaze doesn’t melt. The oven just briefly. For unglazed pop tarts, I like to use the toaster oven or microwave.
Nutrition Information
Nutritional information is provided as a courtesy and is automatically calculated. It should only be construed as an estimate rather than a guarantee. Ingredients can vary and Kroll’s Korner can’t make any guarantees to the accuracy of this information.
📸 Photography by Creating Kaitlin

What a fun treat to make! A little thicker than they probably should be but still tasted delish! Thank you!
They turned out great!! Thank you 🙂
I love these! So so much better than anything you can buy! I didn’t have strawberry jam on hand but I had raspberry and they turned out delicious!
amazing!! Thank you! 🙂
My kids and I loved them!
The dough was super easy to make and fast. We made a list of different flavors we want to make.
Awww I love this!! Thank you!! 🙂 I’m sure you’ll love these ones, too! https://krollskorner.com/recipes/desserts/brown-sugar-pop-tarts/
They look delicious! We are definitely going to try them.
This is what was left after about 20 minutes. The grandson wanted to cut them like pizza, the dough is easy to work with so no problem there. They were easy and a big hit.
The pizza triangle shape is too cute!! So happy you enjoyed them 🙂 thank you!
These were such joyful and delicious little treats! We filled them with raspberry jam, only used milk for the wash and omitted the corn syrup in the frosting.
Beautiful Dana! Thank you so much!:)
These were fun, easy, and tasty. Thanks for the recipe that we tried out this morning. Need to work on my crimping and need to get more jimmies that aren’t so Christmas 😂🤍
hahah I still have a lot of Christmas sprinkles to use up as well. They look great 🙂 thank you Debbie!
We loved this recipe! I did hearts instead of the classic rectangle for obvious reasons🤣 enjoyed with sausage balls for my 12 year old sisters birthday breakfast!
Too cute!! Thank you!!
These brought me back to my childhood but soo much better. My whole family loved them!!! Will definitely be making them again!
They look so perfect! Happy they were enjoyed 🙂 thank you!!
These were so good! My daughter helped make them, and all the kids thoroughly enjoyed them!
Yummmm, those look so good, Monica!! Love that your daughter helped make them 🥰
Wow, these are so simple to make and absolutely DELICIOUS 😋 My kids deemed these ‘Wayyyyyyy better than Pop-Tarts’, and my girls already asked if I’d make them for their birthday breakfast!! Loved everything about these from the dough to the frosting-yum!!!
Oh my gosh, yours look sooooo cute and tasty!! I’m so glad your kids loved these. Makes me so so soooo happy!! 🥰