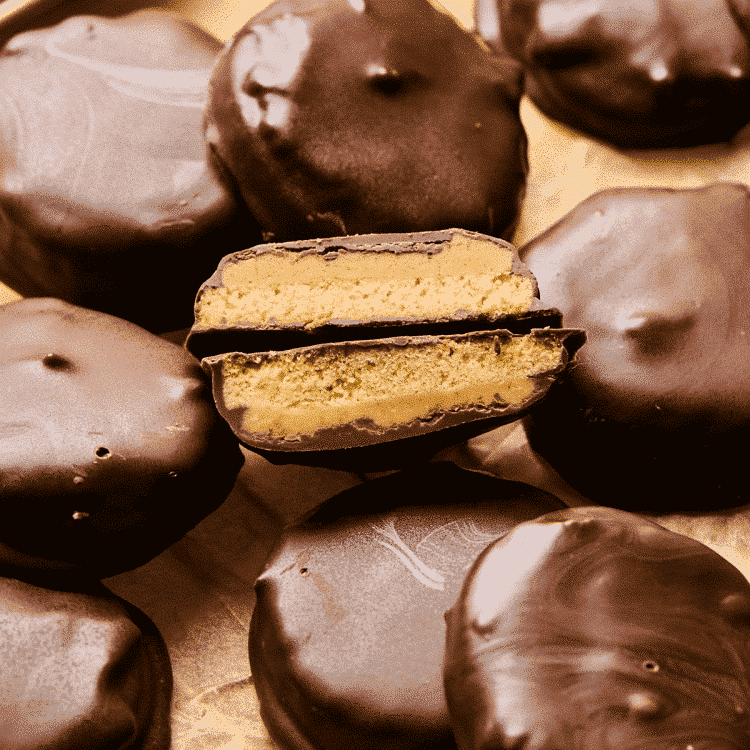
Copycat Tagalong Girl Scout Cookies
This post may contain affiliate links. Please read our disclosure policy.
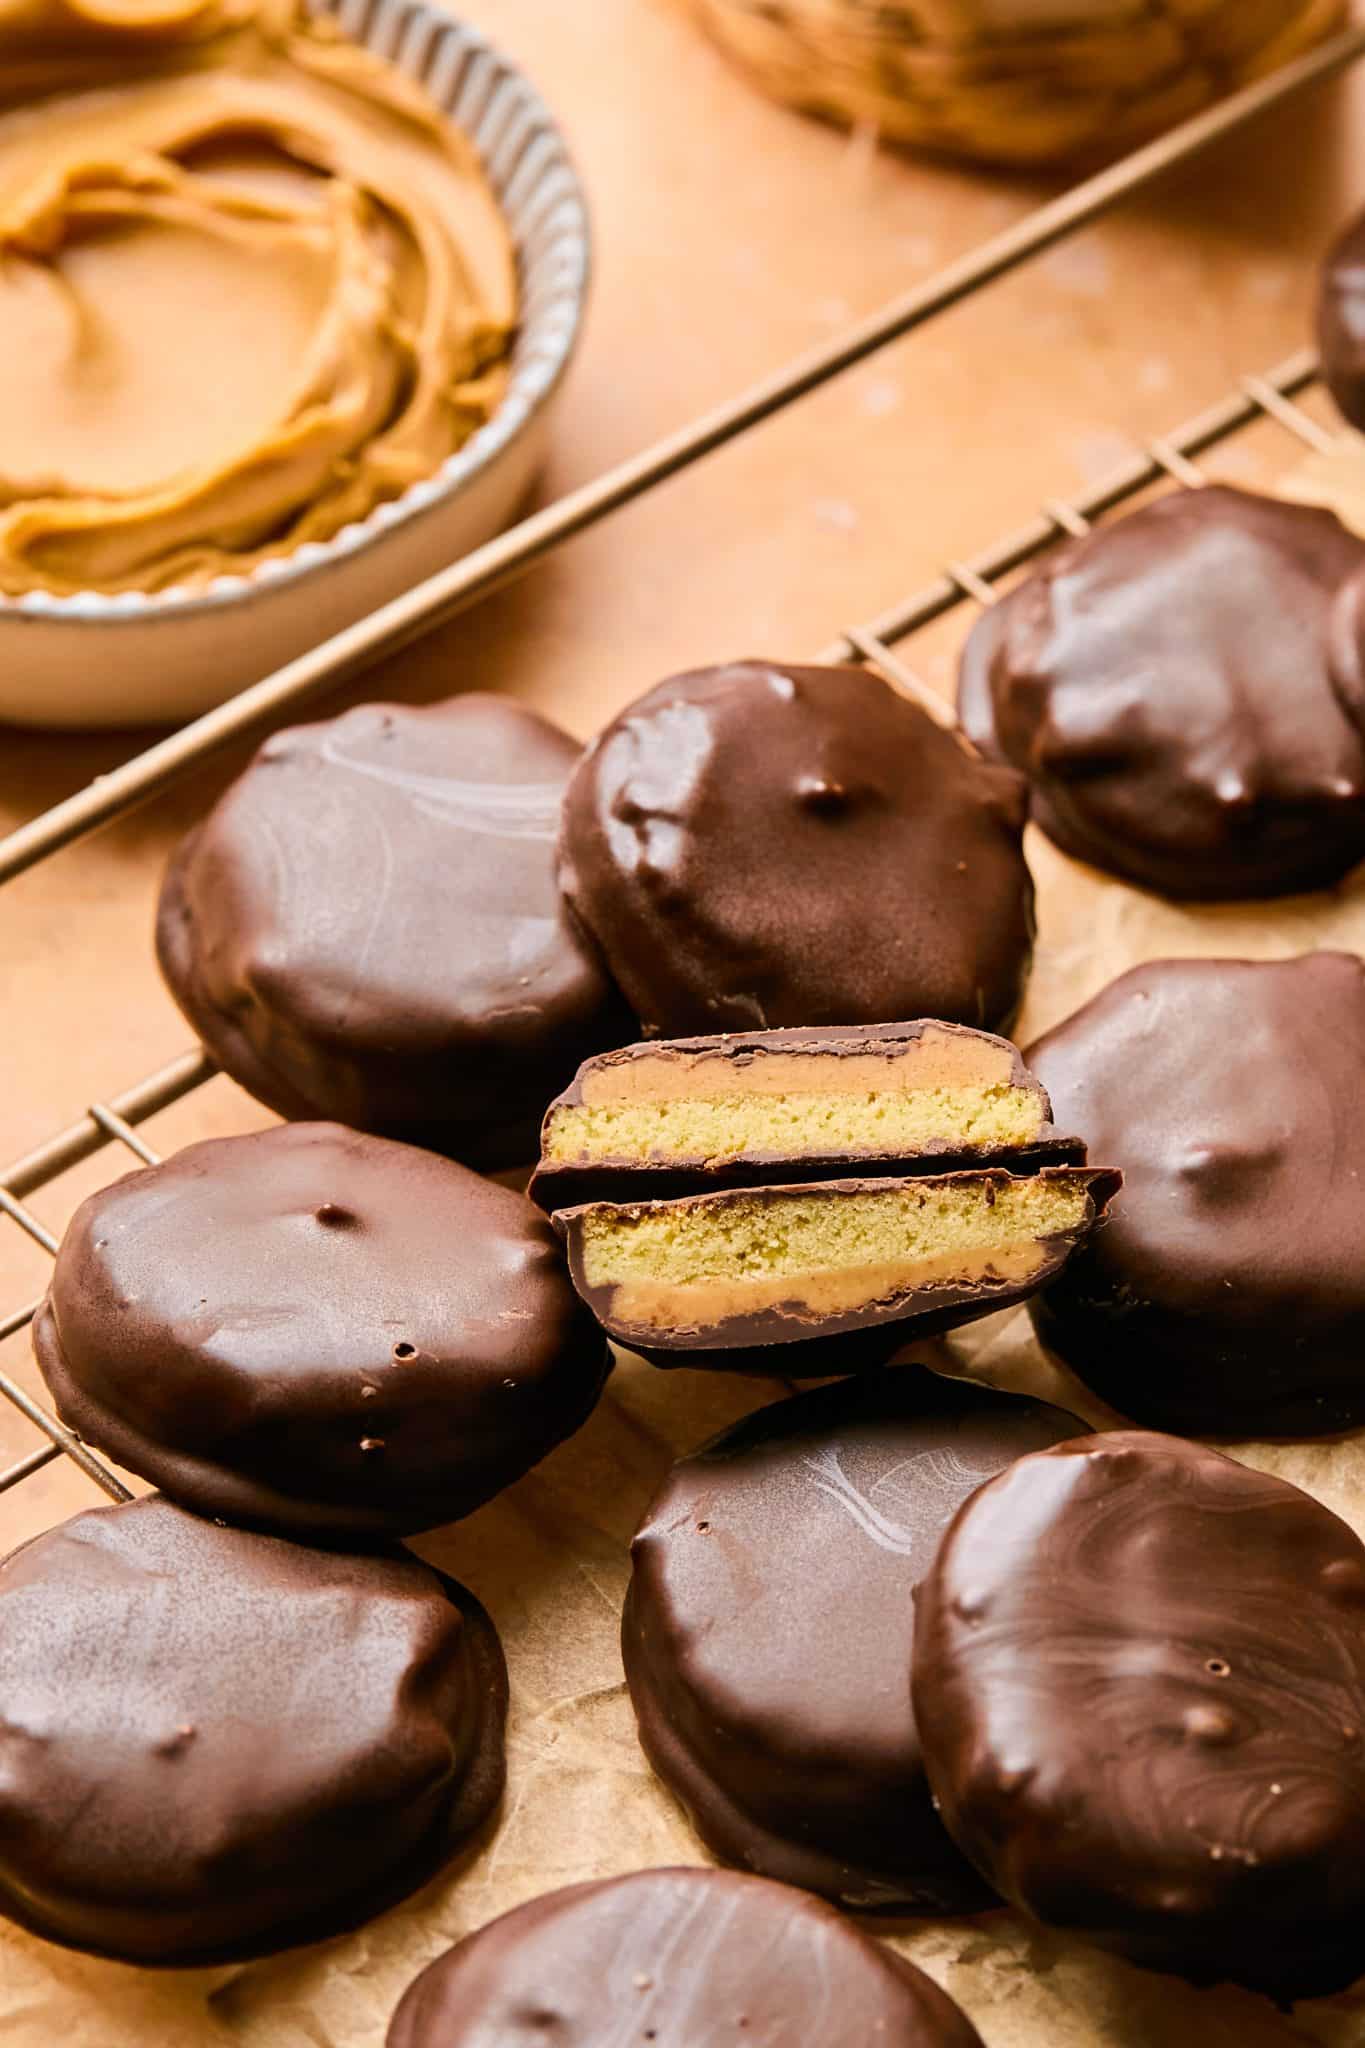
Time to get a taste of nostalgia with my Copycat Tagalong Girl Scout Cookies!
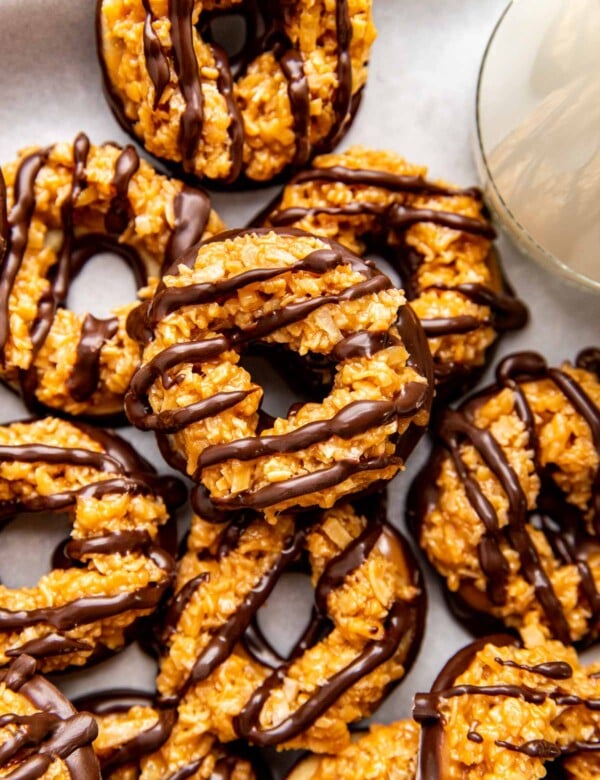
I am so excited to add this tagalong cookie to my Copycat Series! I’ve already made Copycat Girl Scout Thin Mints, and Copycat Girl Scout Samoas, too, and they’ve been such a hit! Just in case you need an excuse and want to explore other Girl Scout cookie favorites!
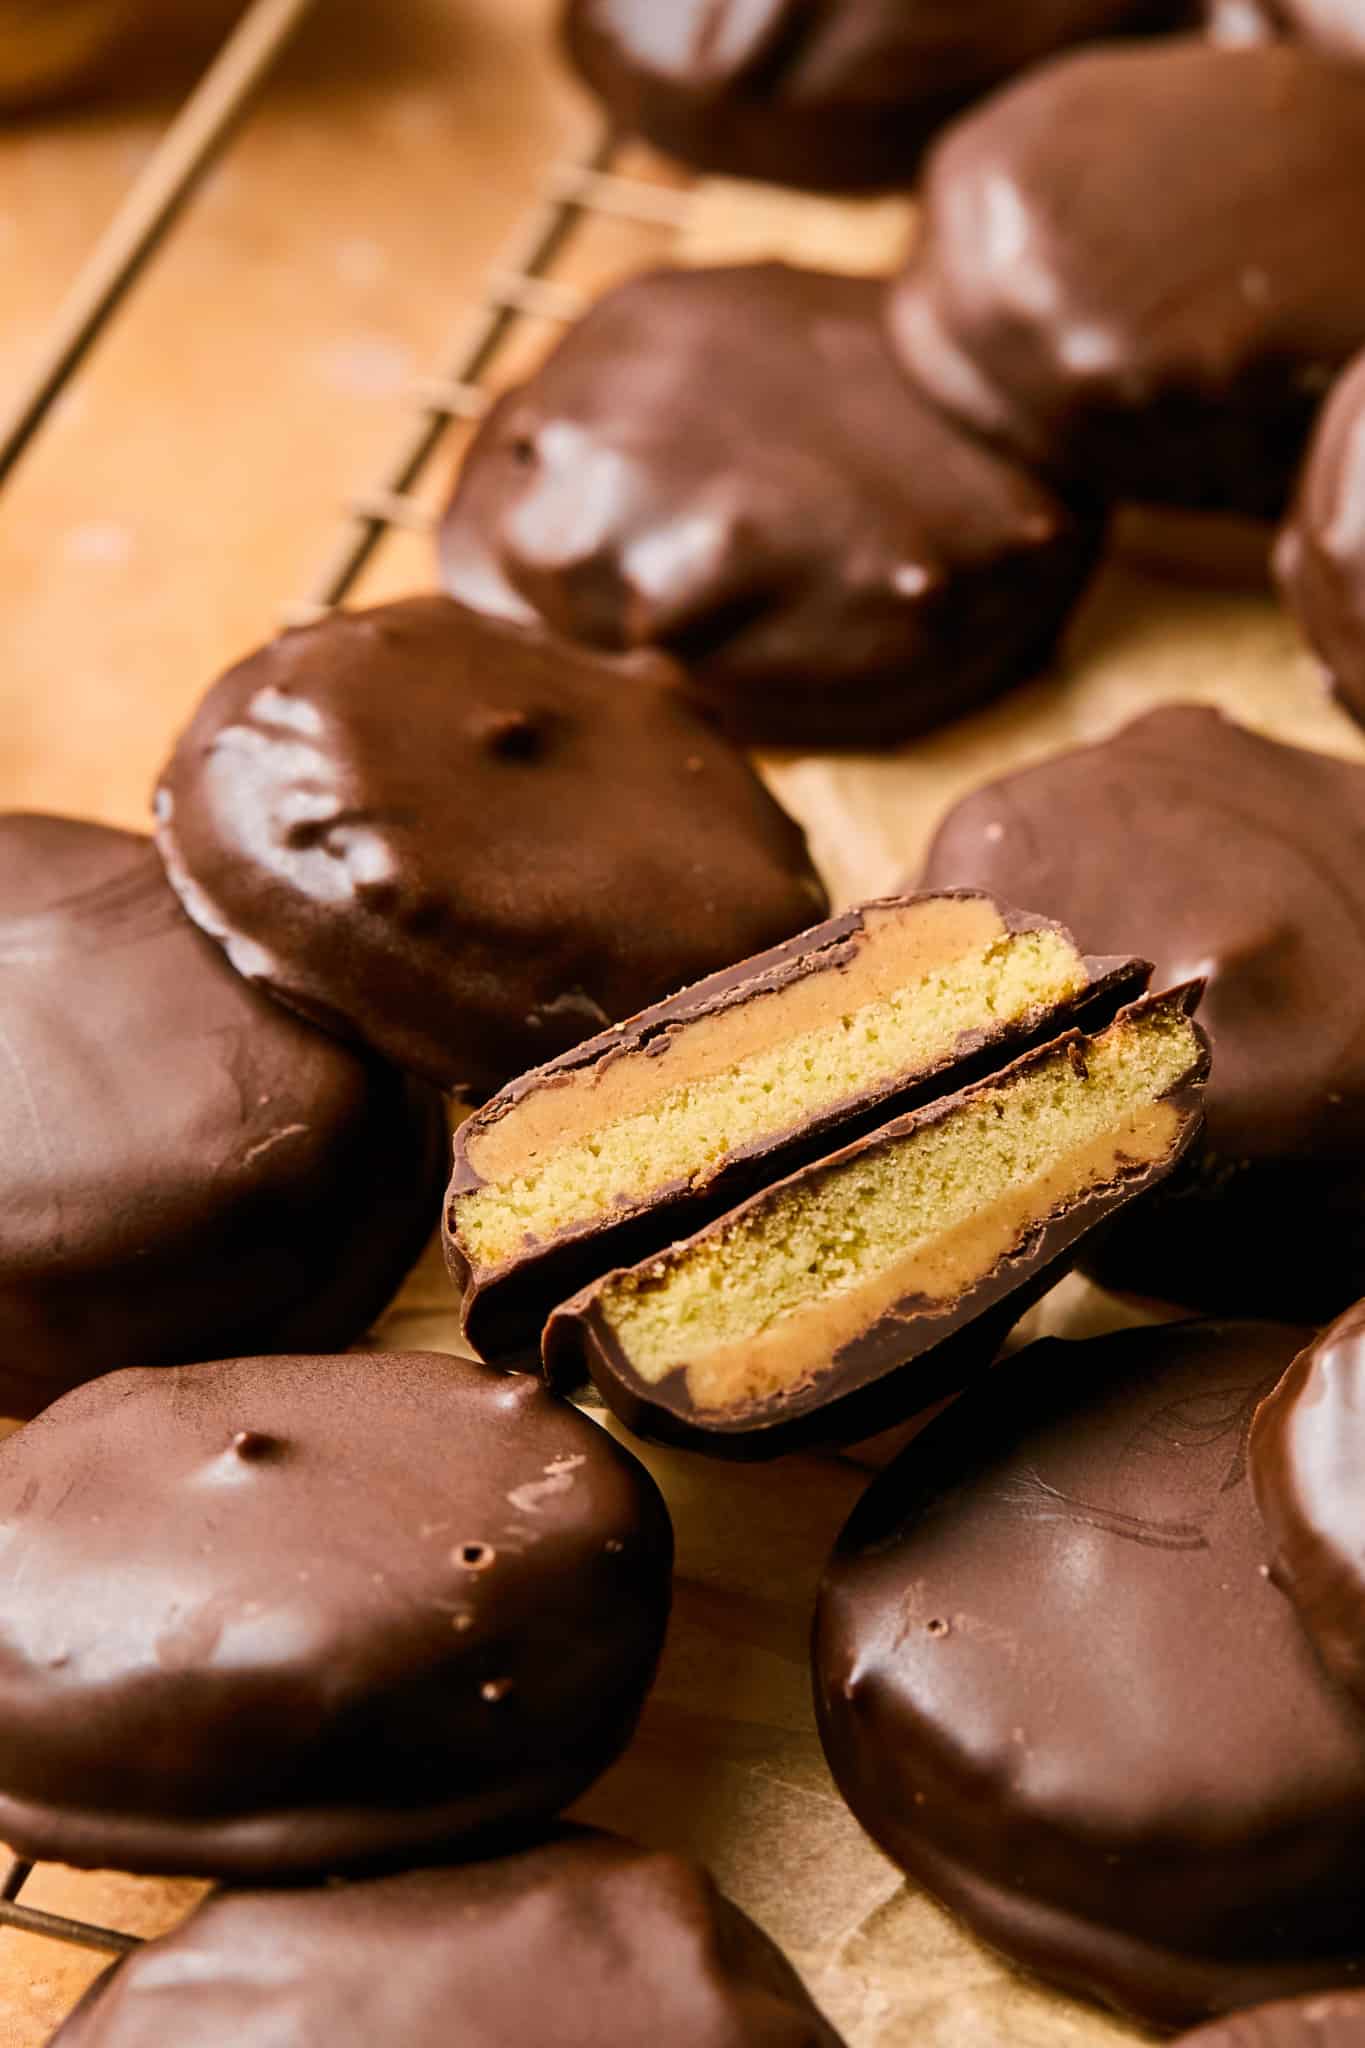
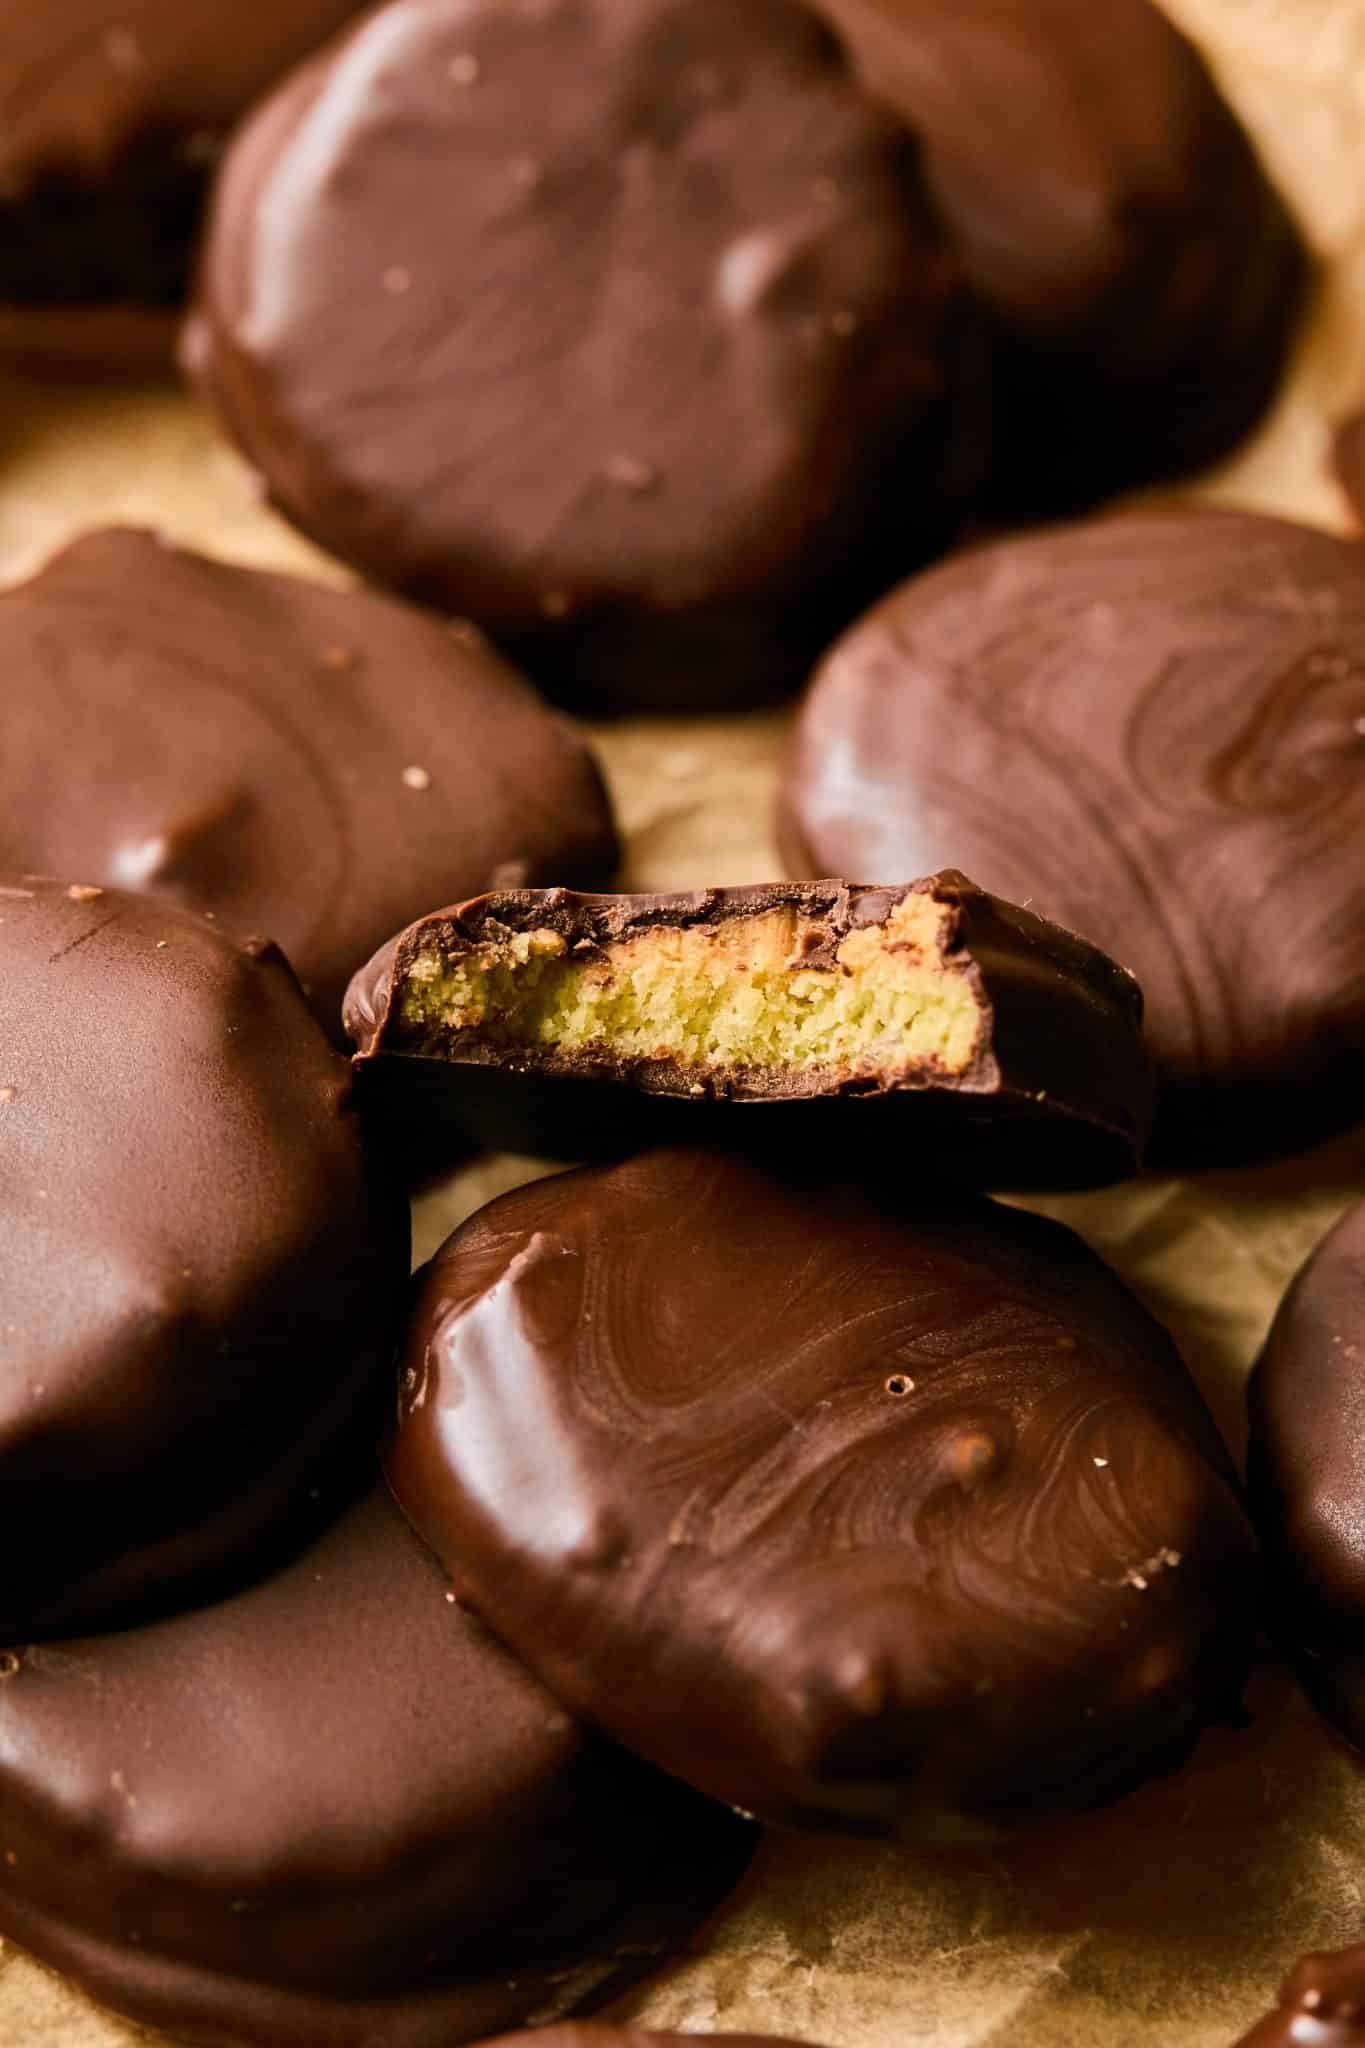
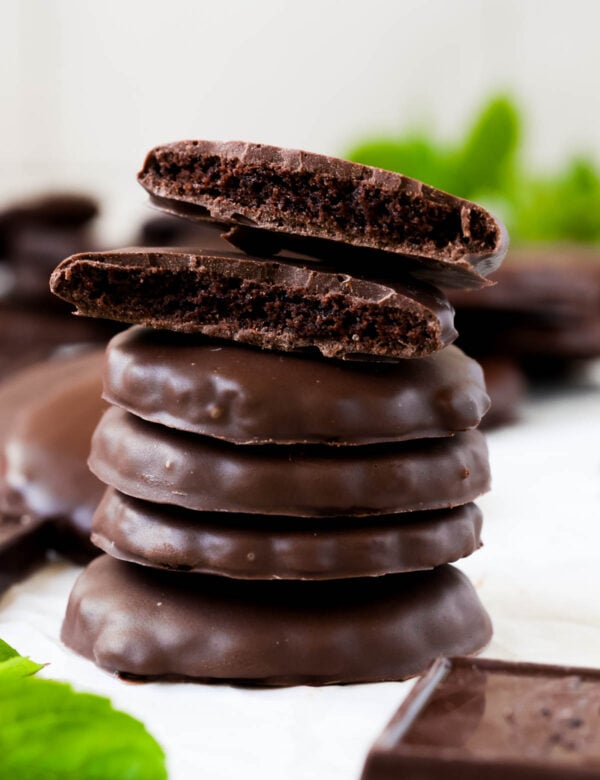
These cookies have a buttery shortbread-style cookie base (it’s actually the same cookie base recipe as these sugar cookies), a smooth 3-ingredient peanut butter filling, and luscious dark chocolate topping. AKA heaven.
They are a decadent little treat that is impressive yet easy to make. The assembly takes a little time, but the process is straightforward and simple! If you want something even easier with a similar taste, try my Ritz Cookies!
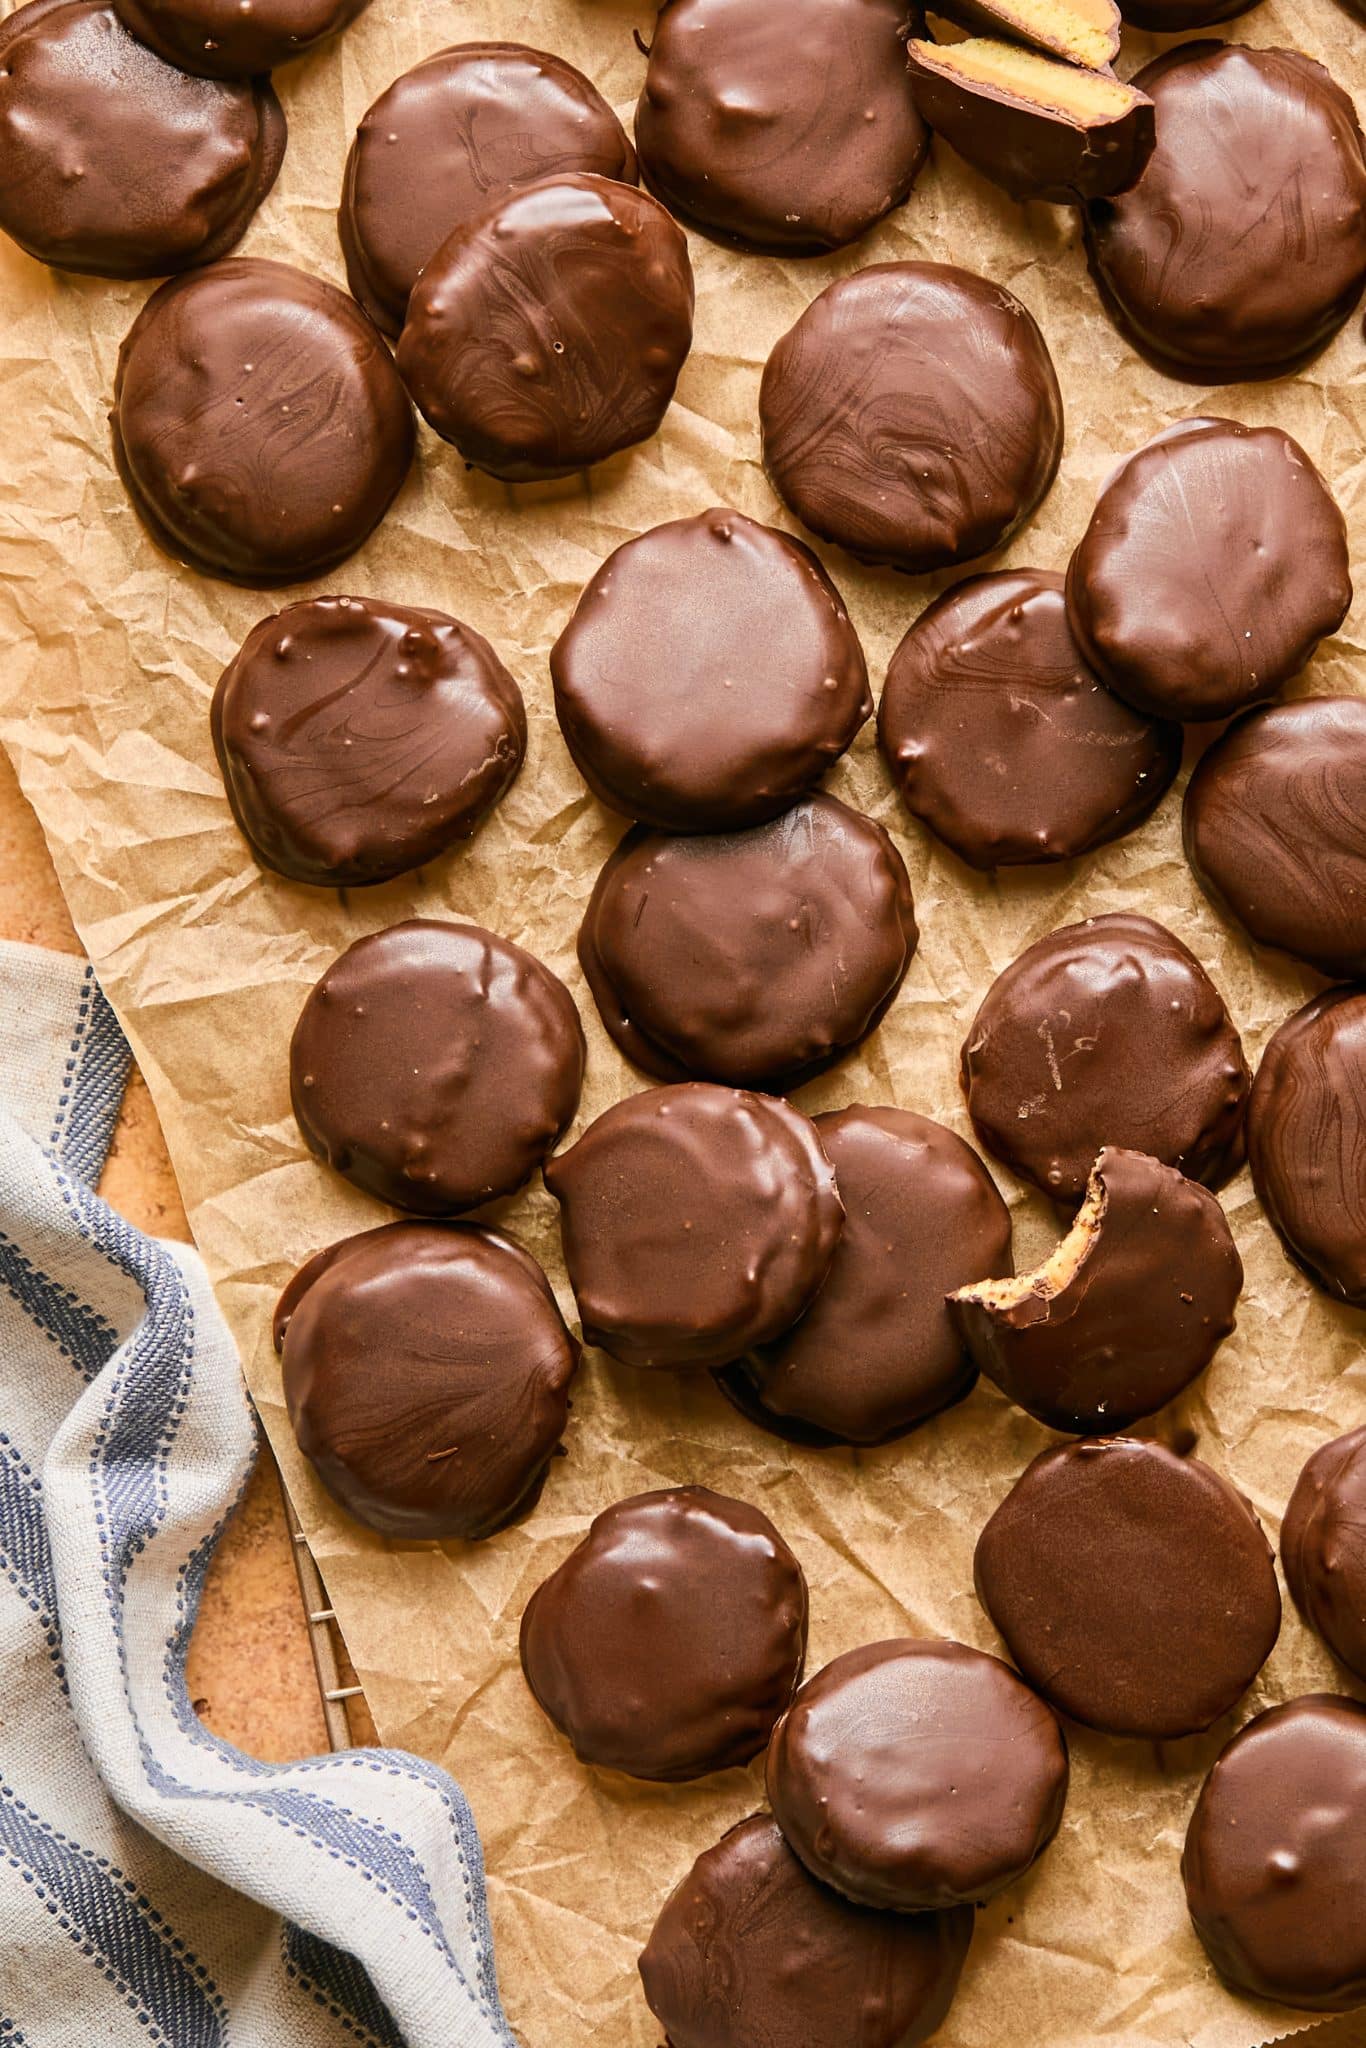

 Table Talk with Tawnie

If you’re anything like me, you stash your Girl Scout Thin Mint Cookies in the freezer for a sweet treat when the craving strikes. Well, same goes for these tagalongs! They are so good stored in the freezer and keep for up to 3 months (if they even last that long!). I love that I am conquering making copycat versions of these beloved cookies for you, mainly because homemade is quite frankly…better! Get your baking hat on and get ready for a delicious cookie that you can now enjoy year-round!
- Sugar cookie dough: the dough comes together really easily using my favorite sugar cookie dough. I use this for my cut out sugar cookies, these cookie bites, and my pumpkin pie cookies.
- Creamy peanut butter: go for something like Jif or Skippy for the best results.
- Melting wafers: I like these dark chocolate melting wafers, but feel free to use milk chocolate!
Step by Step Directions
(For the full recipe, scroll down to the recipe card below)
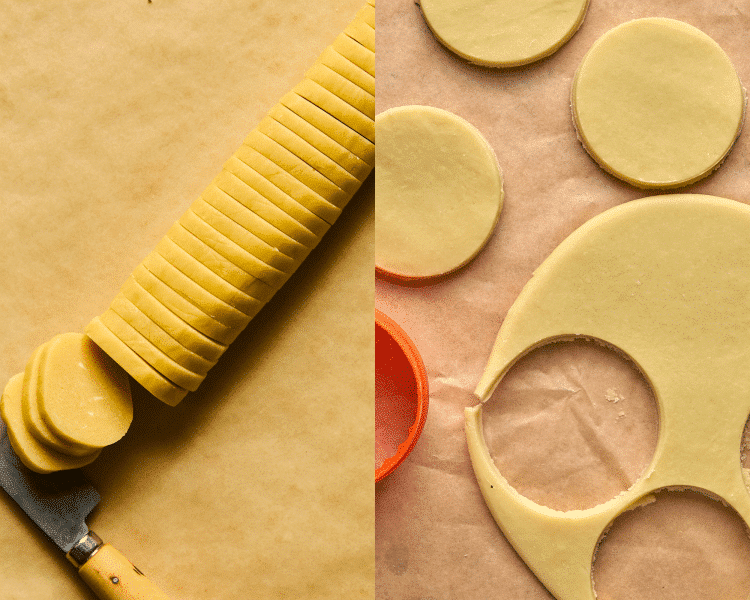
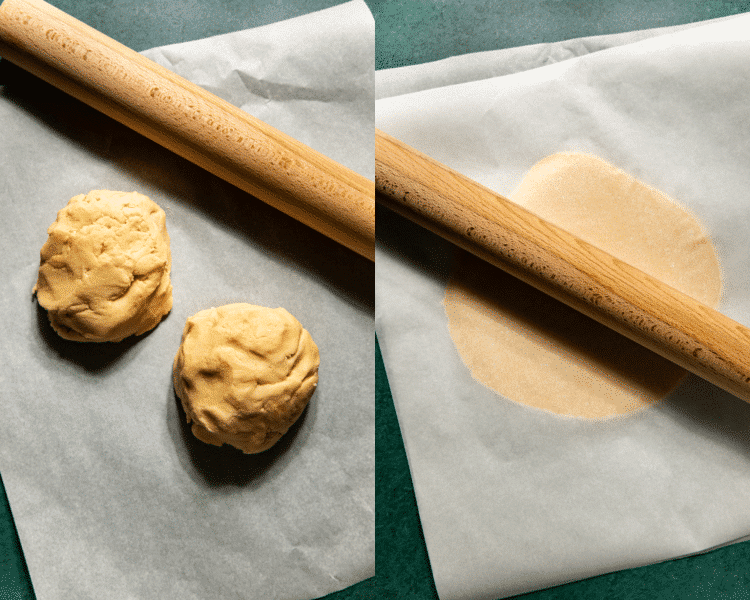
I am giving you 2 options here! You can either make the cookie dough and roll it into a log for a slice and bake option. OR roll the dough out between parchment, and use a circular cookie cutter to cut into perfect circles. Either way, they taste the same!
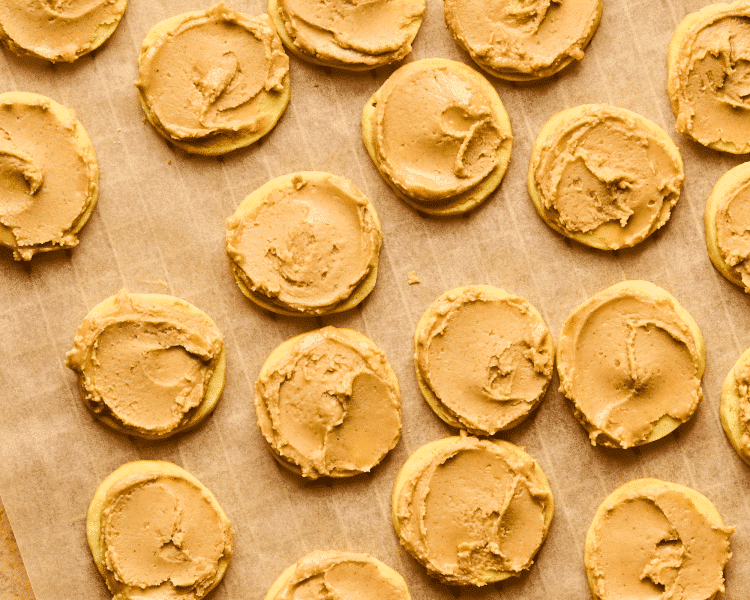
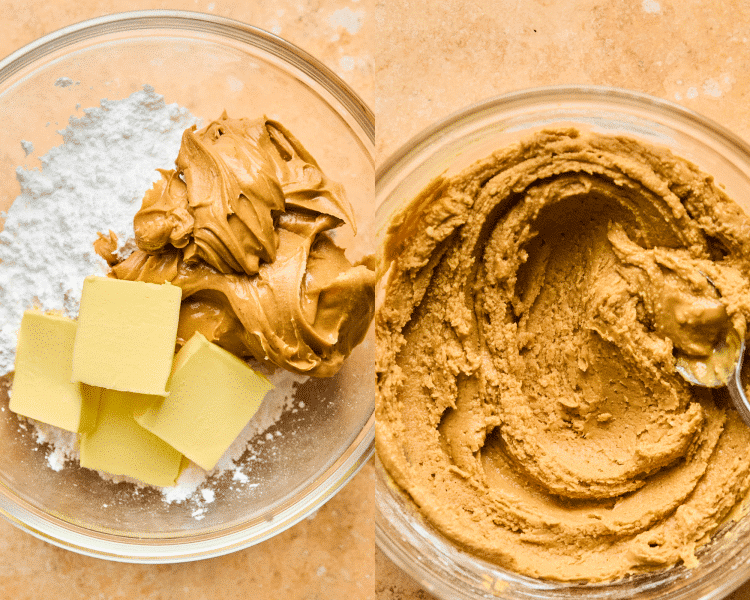
Add the peanut butter topping
Mix the peanut butter, powdered sugar, and butter and spread on top of cooled cookies.
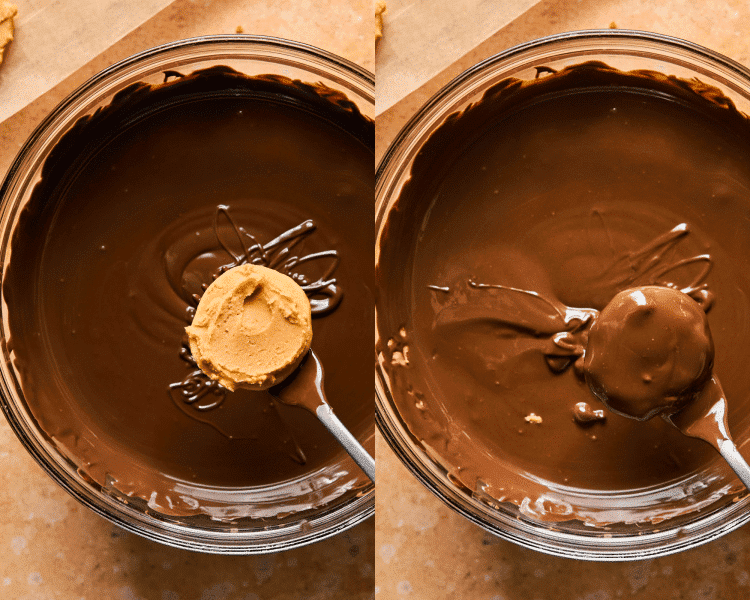
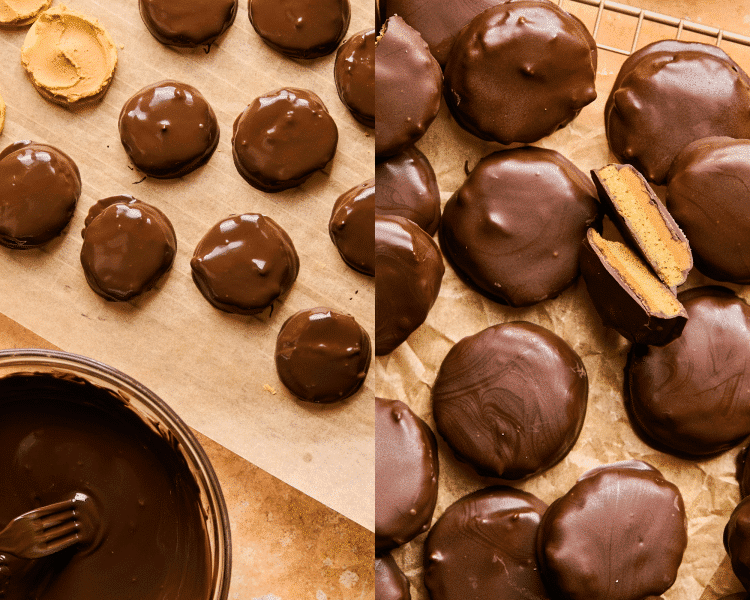
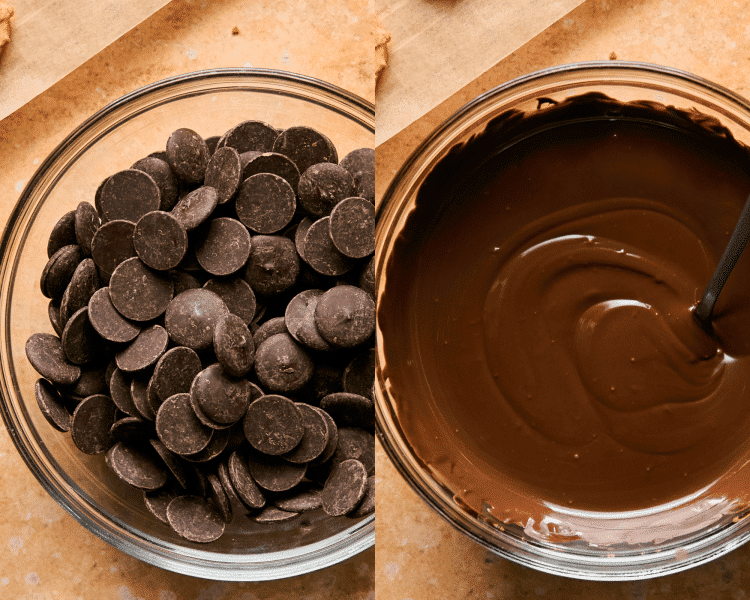
Dunk in chocolate
Dip them in the melted chocolate, tap off any excess chocolate, and place on parchment to set. Tip: use any leftover chocolate to drizzle on top of cookies.
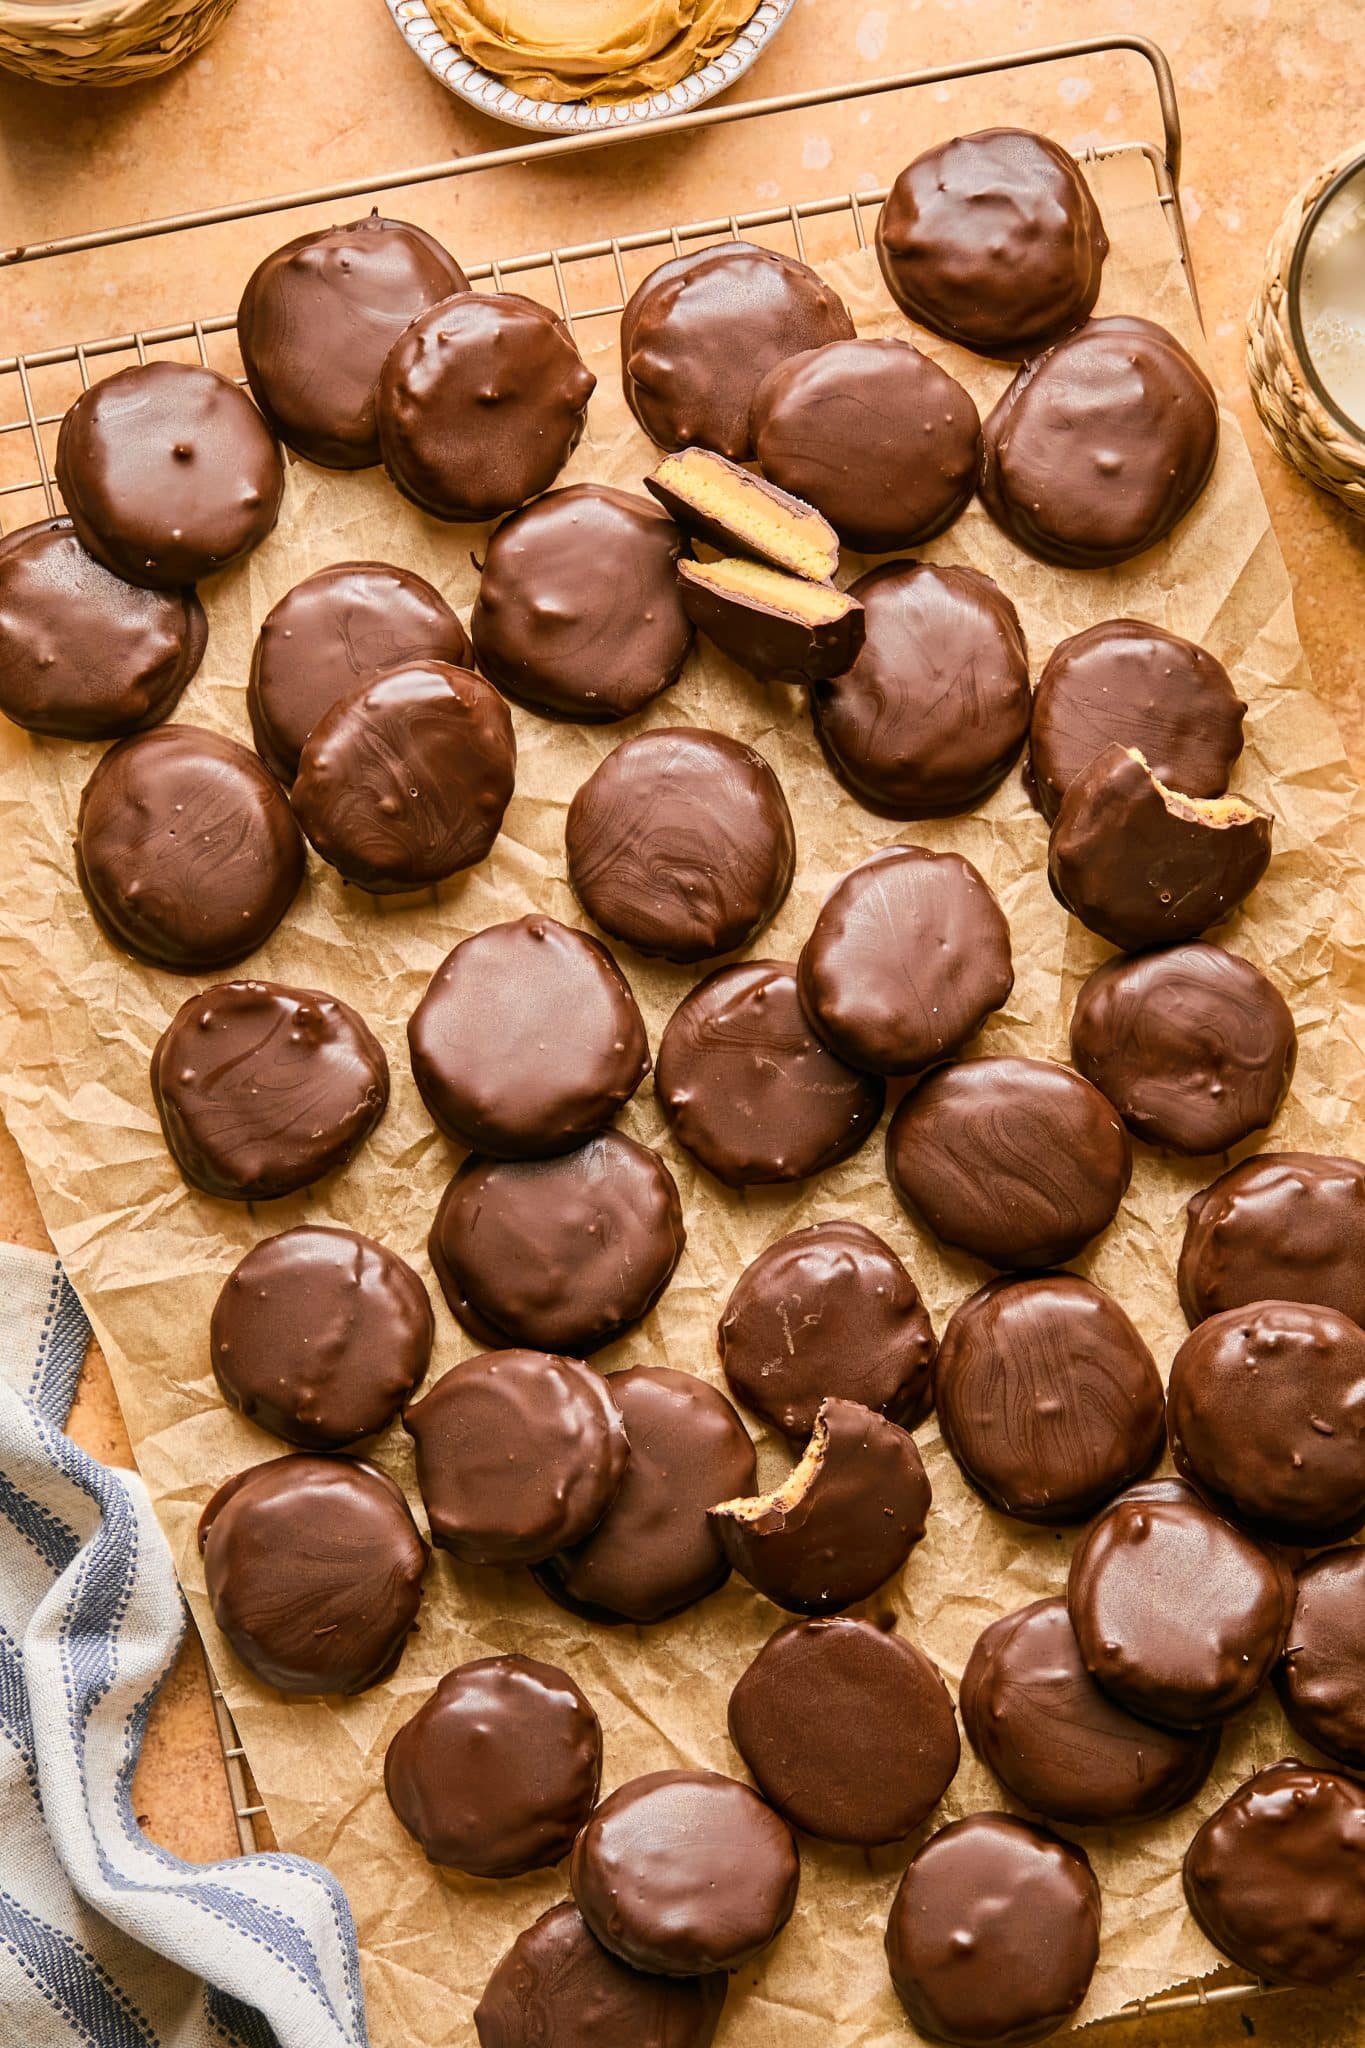
ENJOY!
Your hard work and patience has paid off…time to eat 1! Or 5!
Expert Tips
- Chill the cookie dough: don’t skip this step! This firms up the dough, making it easier to roll, cut, and also maintain a uniform shape during baking.
- Type of peanut butter matters: an all-natural peanut butter can separate and make the filling oily and kind of weird. A smooth peanut butter (like Jif or Skippy) gives a creamier, more stable filling.
- Dip with a Fork for Less Mess: Lower each cookie into the melted chocolate using a fork, then tap the fork on the bowl’s edge to shake off excess chocolate. Much easier than using a spoon!
- Fridge or freezer storage: I recommend storing these copycat tagalongs in an airtight container in the fridge or freezer. They’ll stay crisp and taste just as good, if not better, when chilled! I love them frozen!
Variations / Substitutions
- Different nut butter: Almond or Cashew Butter: Swap the peanut butter for almond or cashew butter tor use Cookie Butter or Sunflower Seed Butter: if you have nut allergies, it provides a slightly nutty flavor without using peanuts or tree nuts.
- Chocolate options: use milk chocolate, or even white chocolate, for fun flavor variations.
- Add-ins: While it’s not traditional, you can stir in crushed pretzels or crisped rice into the peanut butter layer for extra crunch or add a thin layer of caramel under the peanut butter for a decadent twist.
shop this post
 Buy Now →
  Buy Now →
 More Recipes You’ll Love
Before You Begin! If you make this, please leave a review and rating letting us know how you liked this recipe! This helps our business thrive & continue providing free recipes.
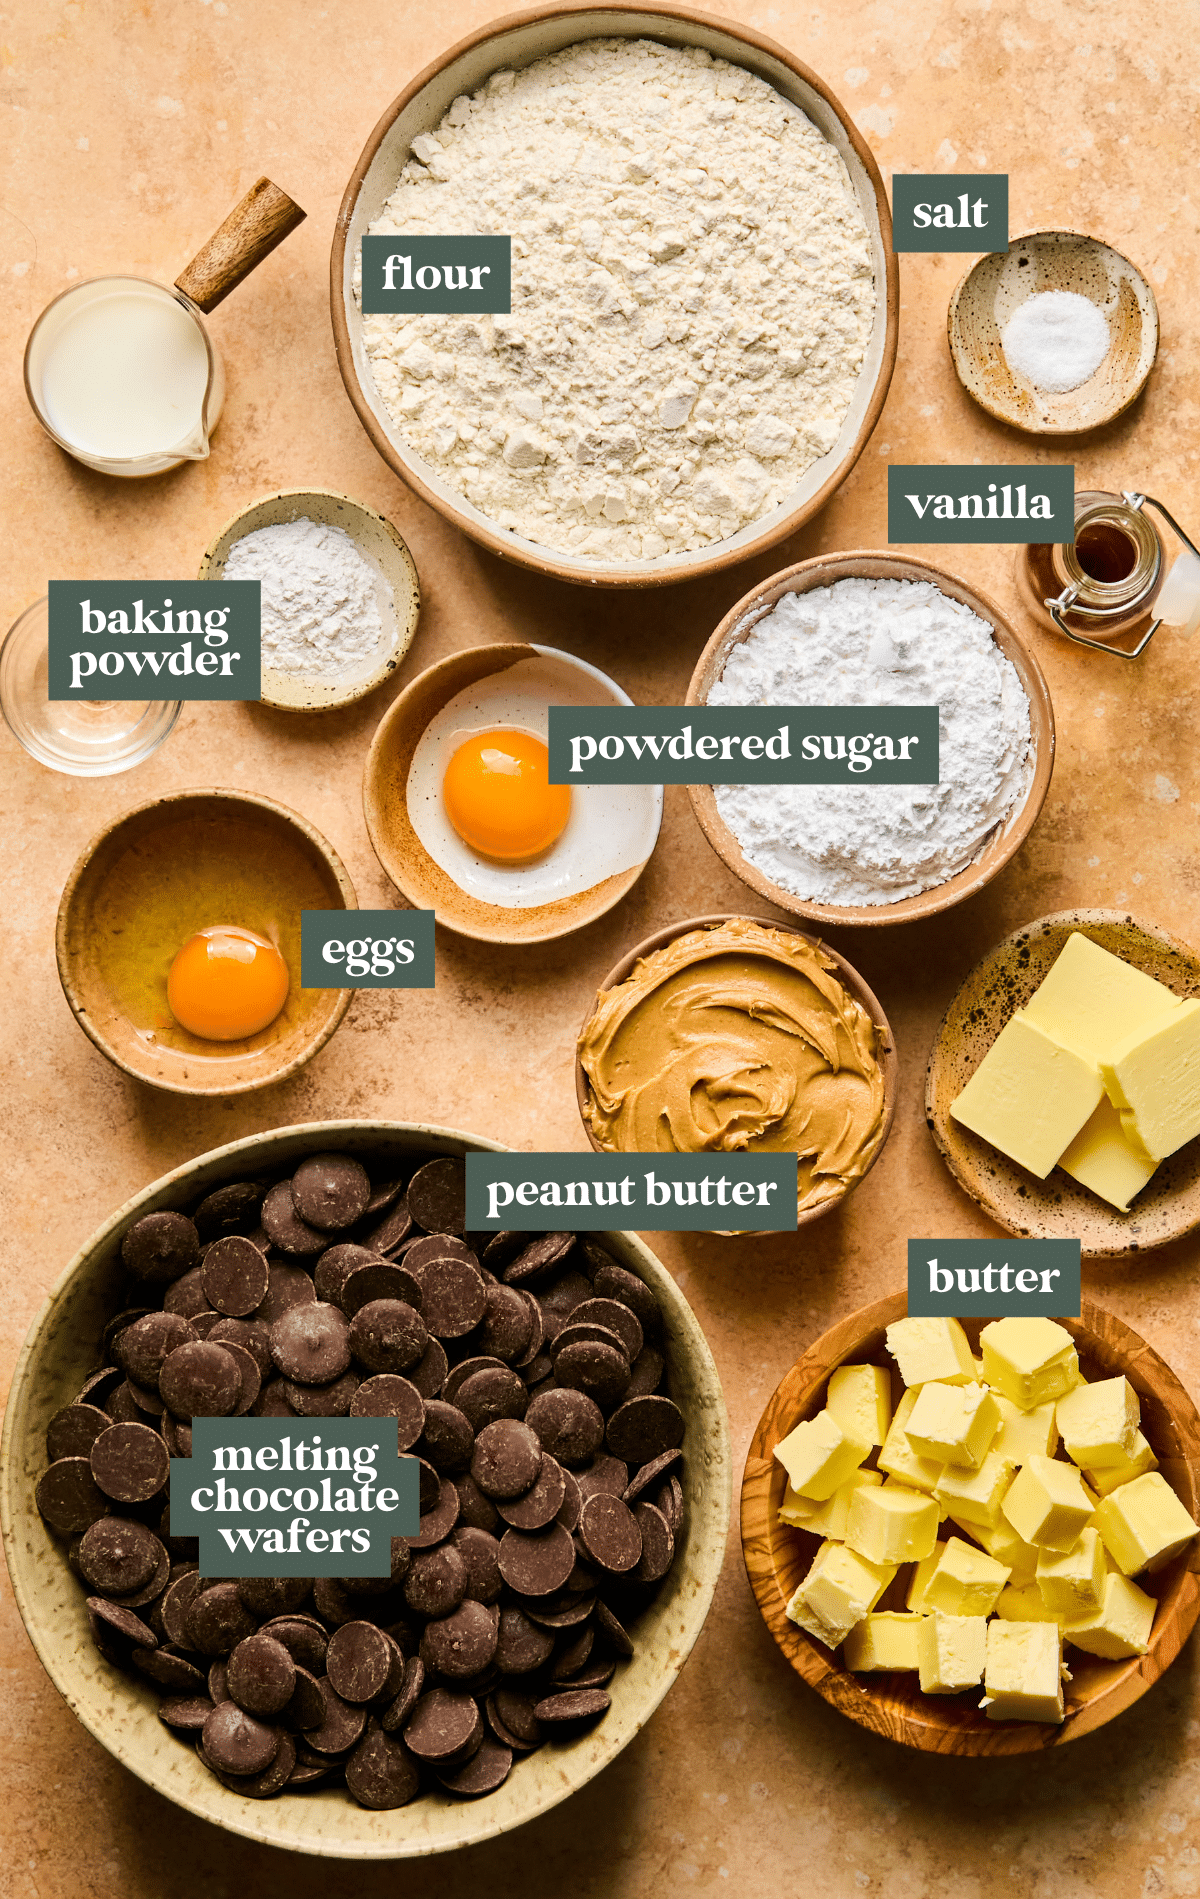
Ingredients
- 1 recipe sugar cookie dough
For the peanut butter filling
- 1 cup creamy peanut butter (like Jif or Skippy)
- 1 cup powdered sugar
- 4 Tbsp. unsalted butter
For the chocolate layer
- 3, 10 oz. bags dark or milk chocolate Ghirardelli chocolate melting wafers
Last step! If you make this, please leave a review and rating letting us know how you liked this recipe! This helps our business thrive & continue providing free recipes.
Instructions
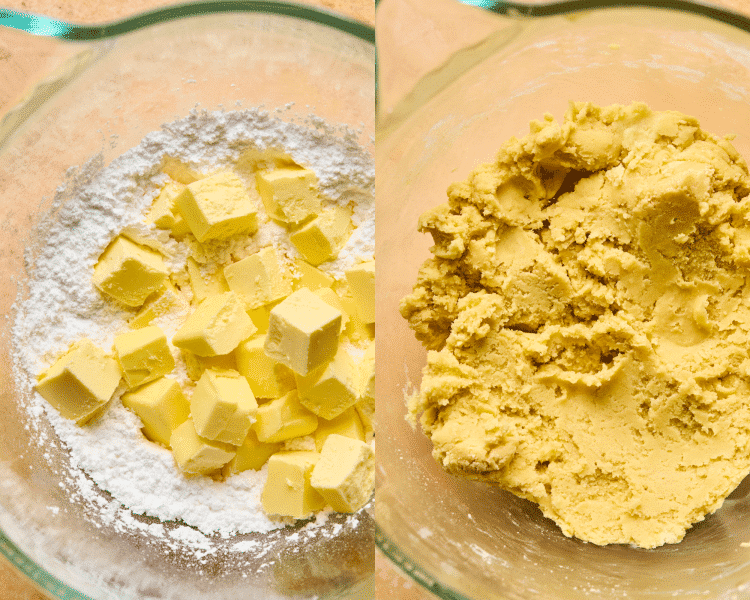
- Make cookie dough: prepare the cookie dough through step 4 using the stand mixer method. (Omit the almond extract and use a little more vanilla).1 recipe sugar cookie dough

- Divide the dough in 2: Divide the dough in half and place each half on a sheet of parchment paper. If it’s still a little shaggy just gently knead it until it comes together.
- Roll flat for the cookie cutter method OR shape into logs for slice & bake method: for the cookie cutter method, you'll place each half of dough on a sheet of parchment paper. Place a second sheet of parchment paper on top of each half of dough. Using a rolling pin, roll out each half of dough between the 2 sheets of parchment until ~1/4 inch thick.
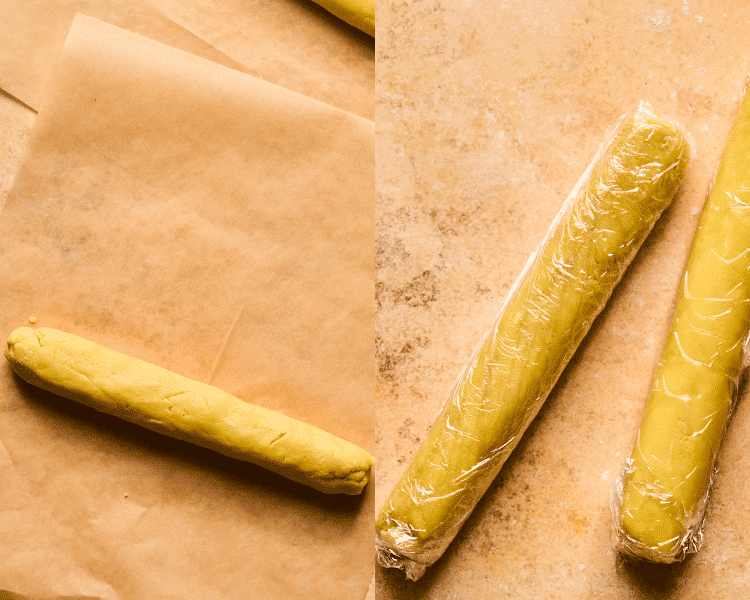
- For slice and bake: pat and form each disk of the dough into a log about 2 inches in diameter, making it as fairly even as possible. Fold the parchment paper over the dough and roll it gently to create a smooth, even log, use a light dusting of flour if needed, if the dough is sticking. Both methods: refrigerate for at least 1 hour or until chilled and has hardened a bit.
- Preheat and prep: Preheat the oven to 350°F. Line 2 baking sheets with parchment paper.
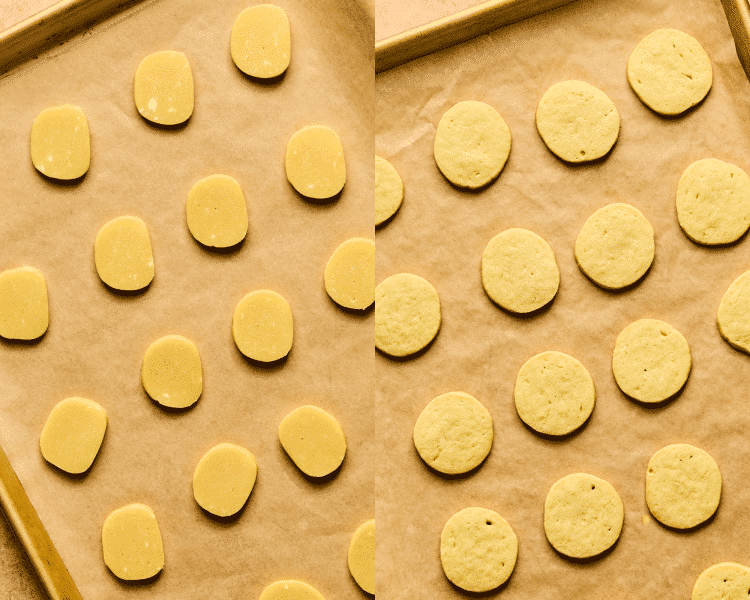
- Cut: remove one slab of cookie dough, or log, and use a 2 inch cookie cutter for cutting out the cookies, or slice in ¼ inch-thick circles and place on the prepared baking sheet, spacing the cookies about 1 inch apart from each other. Depending on how thin or thick you make the cookies, you can get 40-60 cookies. For the slice and bake option, you can form the into more of a circular shape if they look wonky.
- Bake: Bake the cookies for 9-11 minutes (do not over bake) or until the edges begin to turn golden brown. I like to underbake mine, but that's just preference. Allow to cool on the sheet pan for a few minutes, then transfer to a wire rack lined with parchment.
- Melt peanut butter: melt the peanut butter, powdered sugar, and butter in a heat-proof bowl in 20-30 second increments, stirring in between, until smooth and it will be a bit thick (not drippy). Careful not to overheat.
- Spread on peanut butter: Spread an even layer of peanut butter on each cooled cookie. Chill in the fridge for 10-15 minutes just to help the peanut butter set up a bit.
- Melt the chocolate: Add the melting wafers to a heat-proof bowl, or use a double boiler if preferred, and melt the chocolate in the microwave in 20-30 second increments, stirring in between, until melted and smooth. Be careful to not burn the chocolate!3, 10 oz. bags dark or milk chocolate Ghirardelli chocolate melting wafers
- Dunk: use a fork to dunk each cookie in the melted chocolate, coating the cookie completely, and tap the fork on the side of your bowl to tap off excess chocolate. Place the cookie on a piece of parchment and repeat with the remaining cookies.
- Enjoy: best part! Allow the chocolate to harden, then enjoy! I love these stored in the freezer!
Notes
- Storage: storage in the fridge in an air-tight container or baggie for 1 week or freeze for up to 3 months.
Nutrition Information
Nutritional information is provided as a courtesy and is automatically calculated. It should only be construed as an estimate rather than a guarantee. Ingredients can vary and Kroll’s Korner can’t make any guarantees to the accuracy of this information.
📸 Photos by Sierra Ashleigh Photography
