
Classic Buttermilk Waffles
These Classic Buttermilk Waffles are light, fluffy, and slightly crispy on the outside. Perfect with fresh berries, maple syrup, peanut butter, or your favorite waffle toppings!
Servings 12 waffles
Calories 188kcal
Ingredients
- 2 cups all-purpose flour
- 3 Tbsp. granulated sugar
- 2-3 Tbsp. cornstarch, optional to make them crispy!
- 2 1/2 tsp. baking powder
- 1 tsp. baking soda
- 1/2 tsp. salt
- 2 large eggs, separate whites and yolks
- 2 cups buttermilk*
- 6 Tbsp. unsalted butter, melted
- 1 tsp. vanilla extract
Instructions
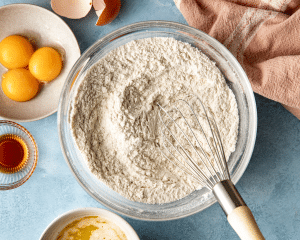
- Mix dry ingredients: In a large bowl, mix the all-purpose flour, sugar, baking powder, baking soda, and salt.2 cups all-purpose flour, 3 Tbsp. granulated sugar, 2 1/2 tsp. baking powder, 1/2 tsp. salt, 1 tsp. baking soda
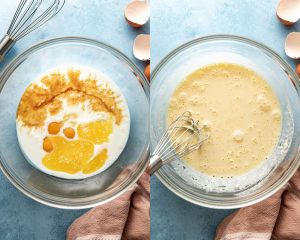
- Combine wet ingredients: In a separate medium-sized bowl, whisk together the egg yolks, buttermilk, butter, and vanilla.2 large eggs, 2 cups buttermilk* , 6 Tbsp. unsalted butter, 1 tsp. vanilla extract
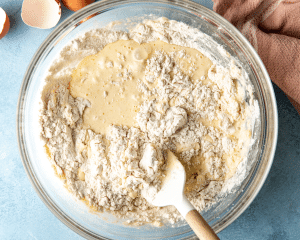
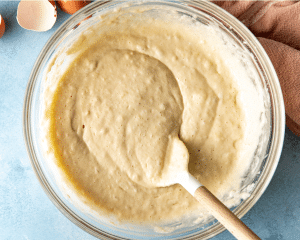
- Fold ingredients together: Fold the wet ingredients into the dry ingredients.
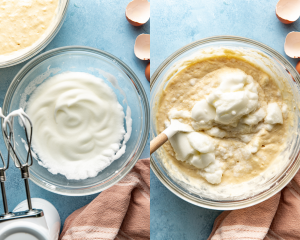
- Beat egg whites: Beat the egg whites with a hand mixer or stand mixer until soft peaks form. Then fold the egg whites into the batter.
- Let batter rest: Let the batter sit for 10 minutes before pouring into your waffle iron.
- Cook waffles: Spray your preheated waffle iron with non-stick cooking spray. Pour batter onto the hot waffle iron and cook until golden brown.
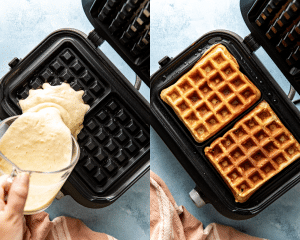
- Serve: Serve hot with your favorite waffle toppings!

Video
Notes
-
- Store: These classic buttermilk waffles will last in the fridge up to 5 days in a sealed baggie. If you’re not going to eat them all that soon, you can also freeze them!
- *Buttermilk: I dont recommend using a homemade buttermilk for this recipe, it’s truly so much better with the real deal! Also, you can slightly warm the buttermilk to prevent the melted butter from solidifying in the batter. It will help create a more evenly textured waffle!
- Freeze: To freeze waffles, let them cool to room temperature before sealing them inside a freezer bag.
- Hot waffle iron: Always make sure your waffle iron is good and hot before adding your batter. This helps to achieve a nice crispy waffle, not a soggy one!
- Don't skip the egg whites: Whipping the egg whites cannot be skipped if you’re looking for big, pillowy waffles from scratch! Use a handheld or stand mixer to get the job done.
- Serve immediately: These waffles are best served warm, immediately after cooking, as the exterior loses its slight crispness over time.
- For a crowd: If you’re making buttermilk waffles for a crowd, place them in the oven on an oven-safe dish and cover loosely with a damp tea towel. (The oven temperature should be very low.)
- Recipe update: This recipe was updated with new photos in September 2025 (same recipe, new photos).
Nutrition
Serving: 1waffle | Calories: 188kcal | Carbohydrates: 22g | Protein: 5g | Fat: 9g | Saturated Fat: 2g | Cholesterol: 51mg | Sodium: 318mg | Potassium: 97mg | Fiber: 1g | Sugar: 6g | Vitamin A: 398IU | Calcium: 119mg | Iron: 1mg